
[ad_1]
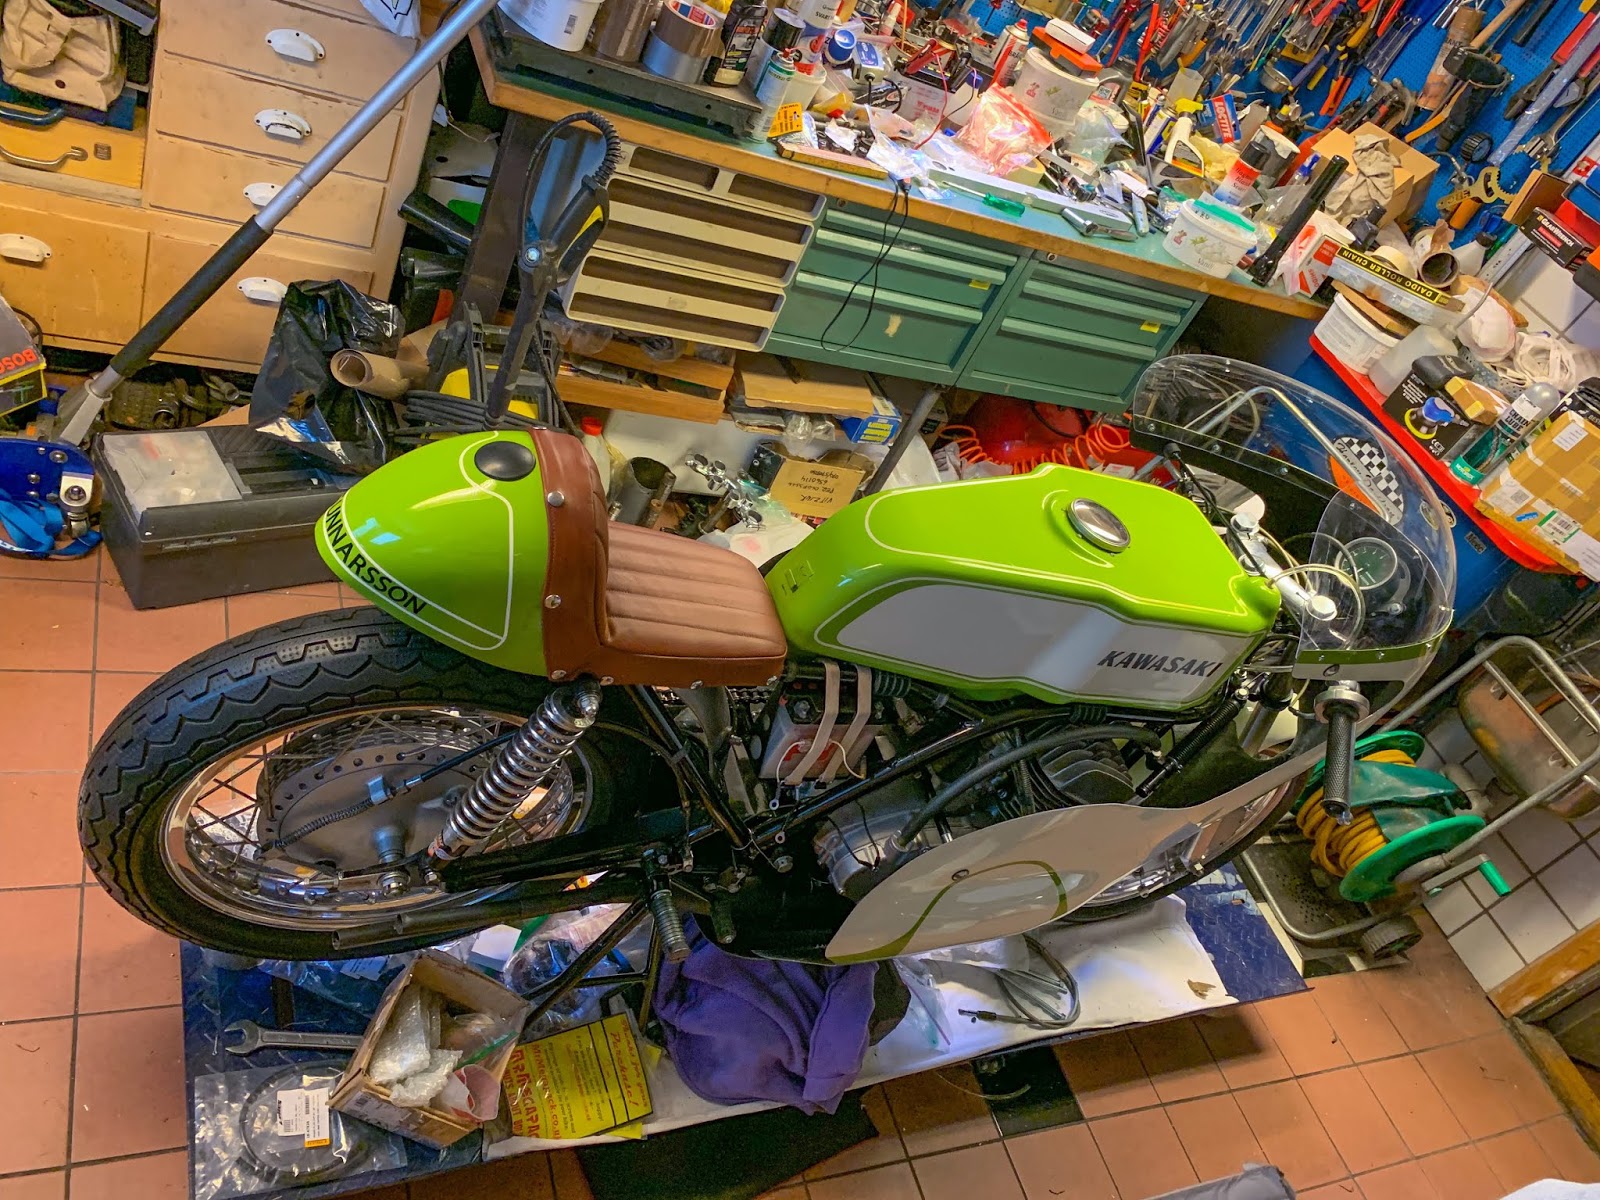
A good bit of fairing issues.
Yesterday I got here involved with a graphics enterprise right here in Stockholm that would assist me getting the proper numbers on the bike. Bear in mind I want the quantity “12” as my begin quantity. That’s what “ESSO” had on it when he received the Swedish GP. These numbers could be pretty straightforward to get completed. I despatched them a mail with good footage of the characters and they’re going to make new ones from the images with the proper font and the precise measurement. Test!
They, Södermalms snabbkopiering, will even duplicate the “BP” defend for the fairing sides and alter the measurements of the “Dunlop” and “CHAMPION” decals to suit higher. The remainder of them are completed by Johnny´s buddy in Kristinehamn.
OK, having the graphics completed, it was time to begin working severely on getting the fairing again on the bike. It is a job I´ve been pushing aside for a while. I do know it is going to be a ache getting it proper and failing getting the fasteners and brackets proper is NOT an possibility…
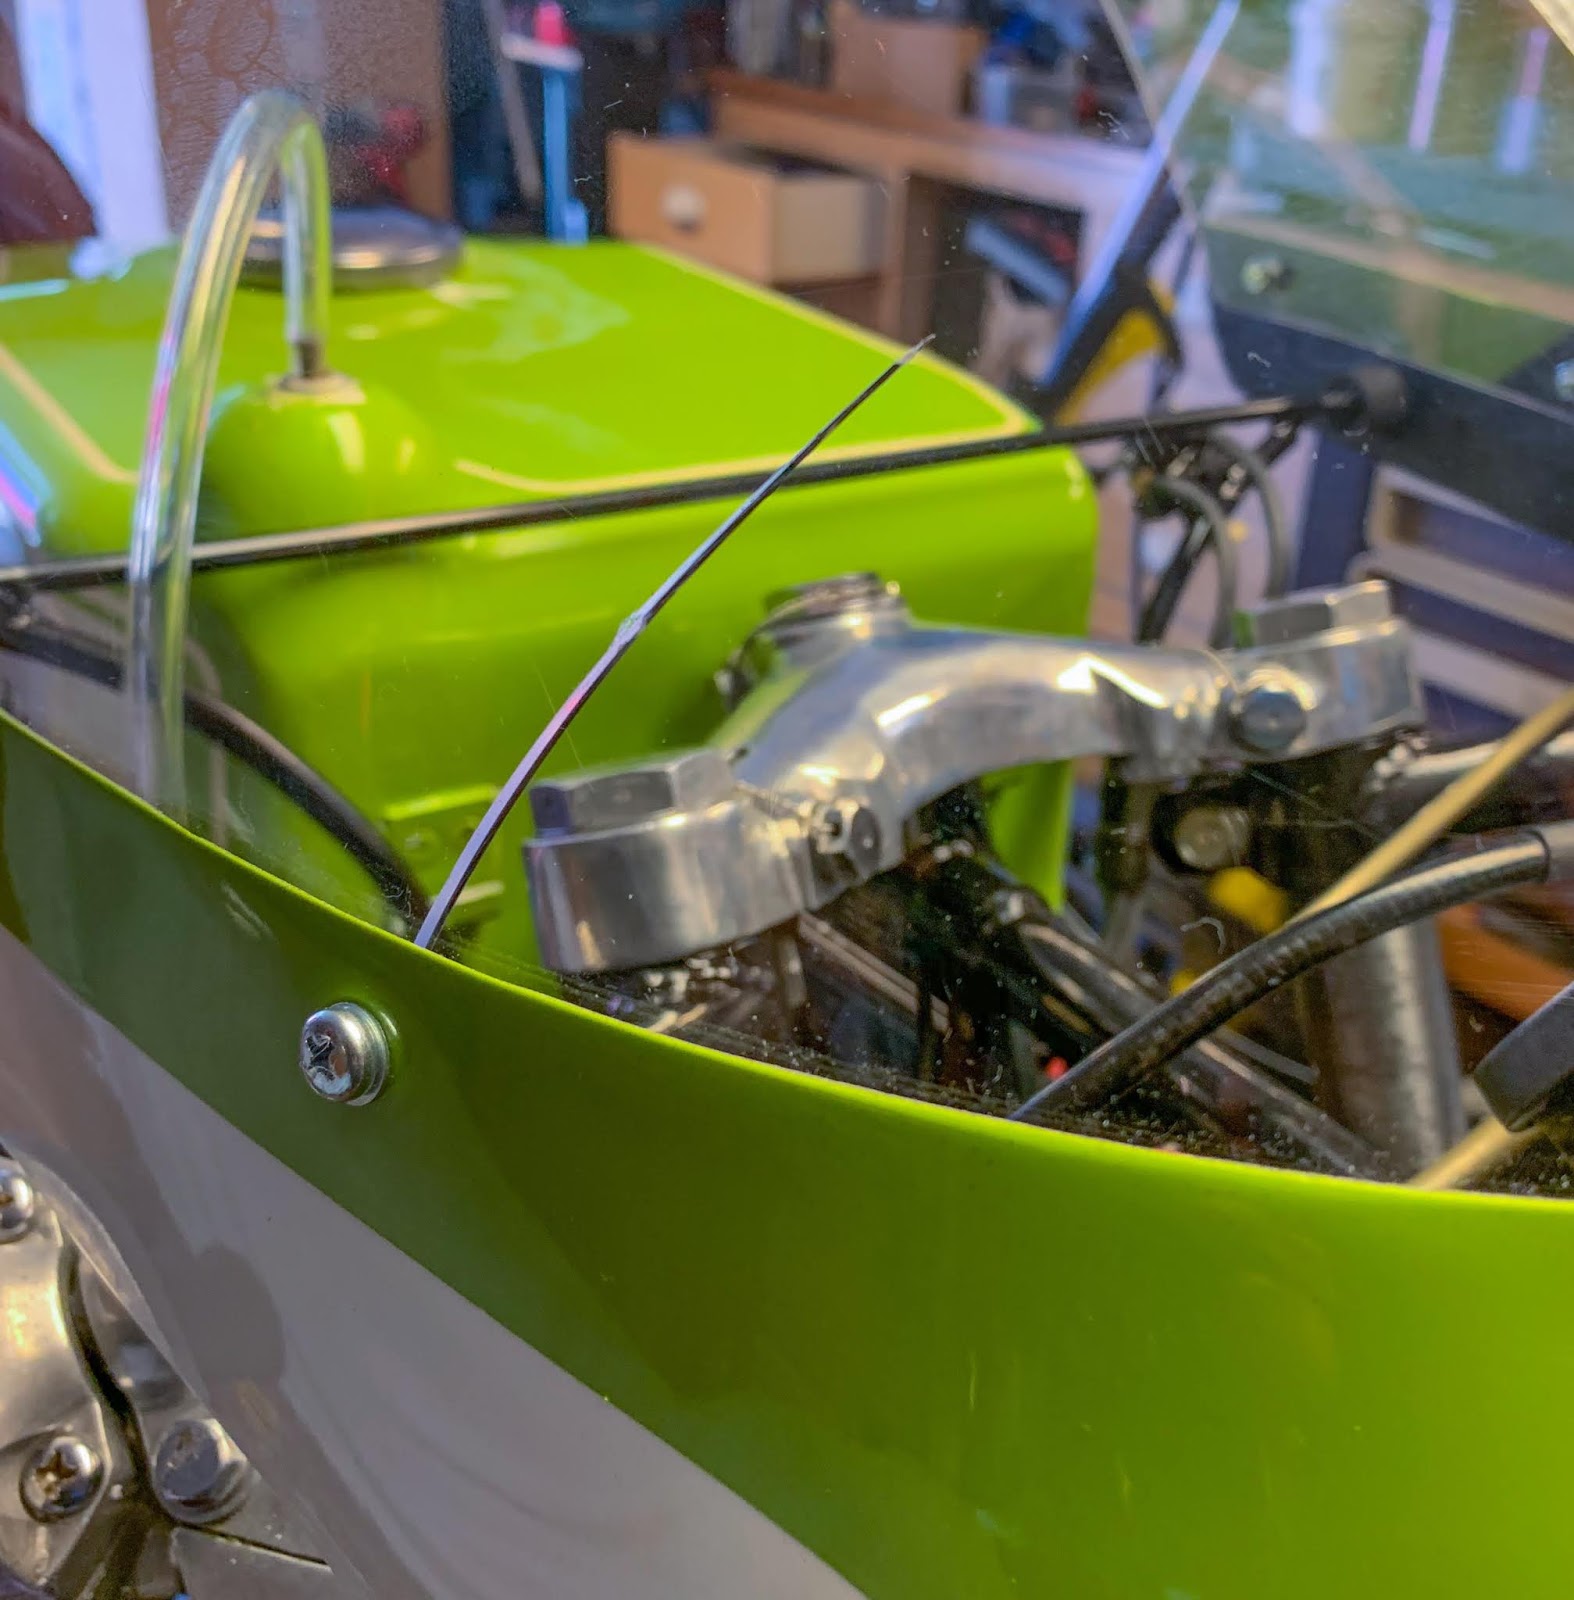
First I needed to attend to the transmission vent hose.
The unique half quantity, 92059-025 Pipe breather, hasn´t proven up in the course of the three years I´ve been trying. Now it was time to get one thing else. The issue is the tube becoming on the oil filler cap is 14 mm thick and all gas/oil hoses with that inside diameter are likely to have very thick partitions, a few of them with bolstered rubber making them even thicker. I visited a number of automotive shops, VVS shops and ended up at an hydraulic line store.
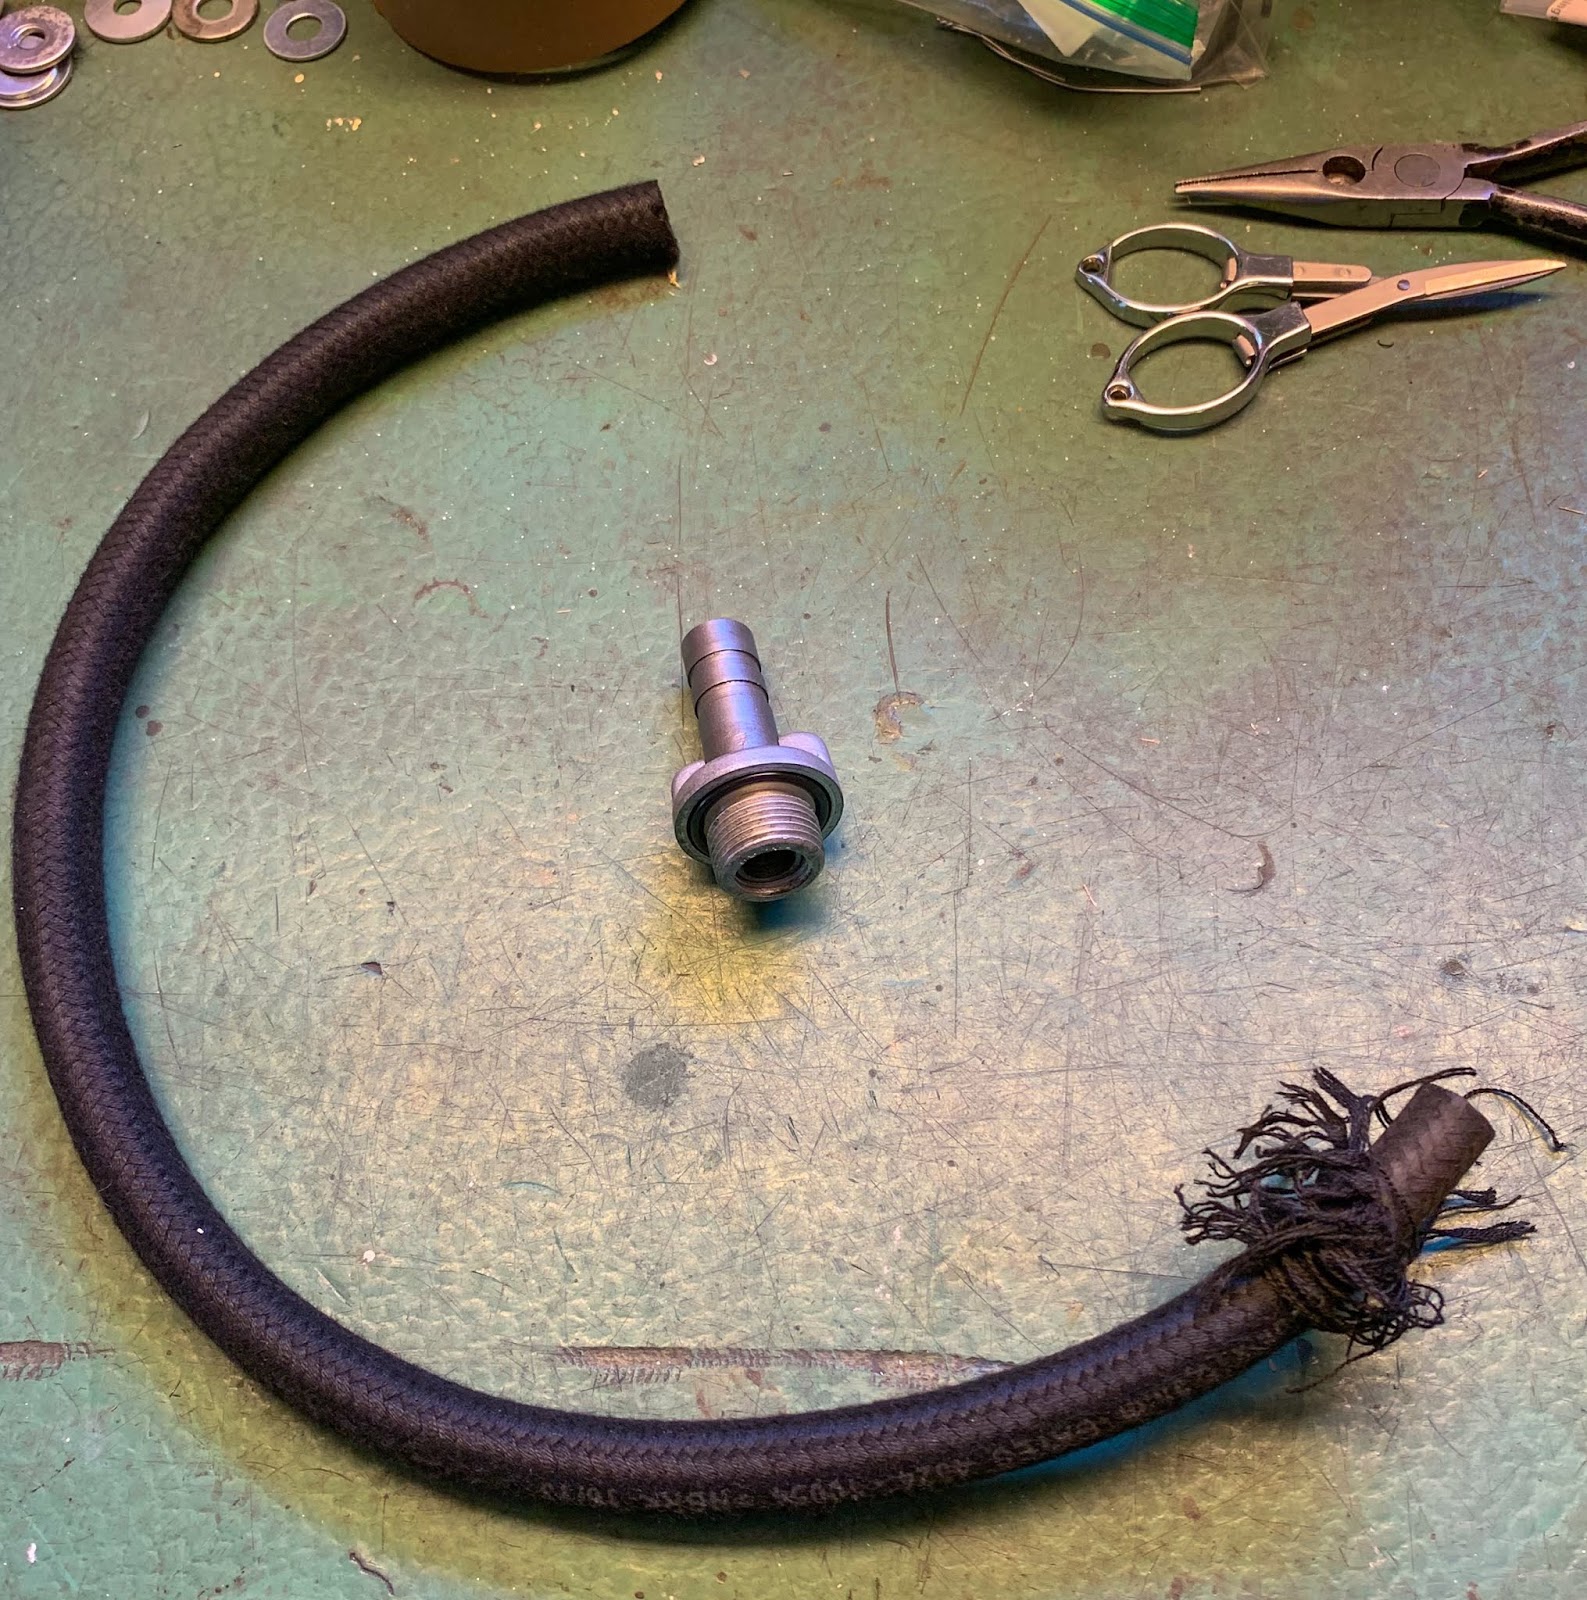
That they had a small piece of this 10 mm inside diameter textile braided tube. I sort of preferred the look of it and figured I’d have the ability to get it on to the oil filler. Not really easy…
I needed to get the braiding off and use my warmth gun and nonetheless it didn´t look proper.
On to the subsequent possibility.
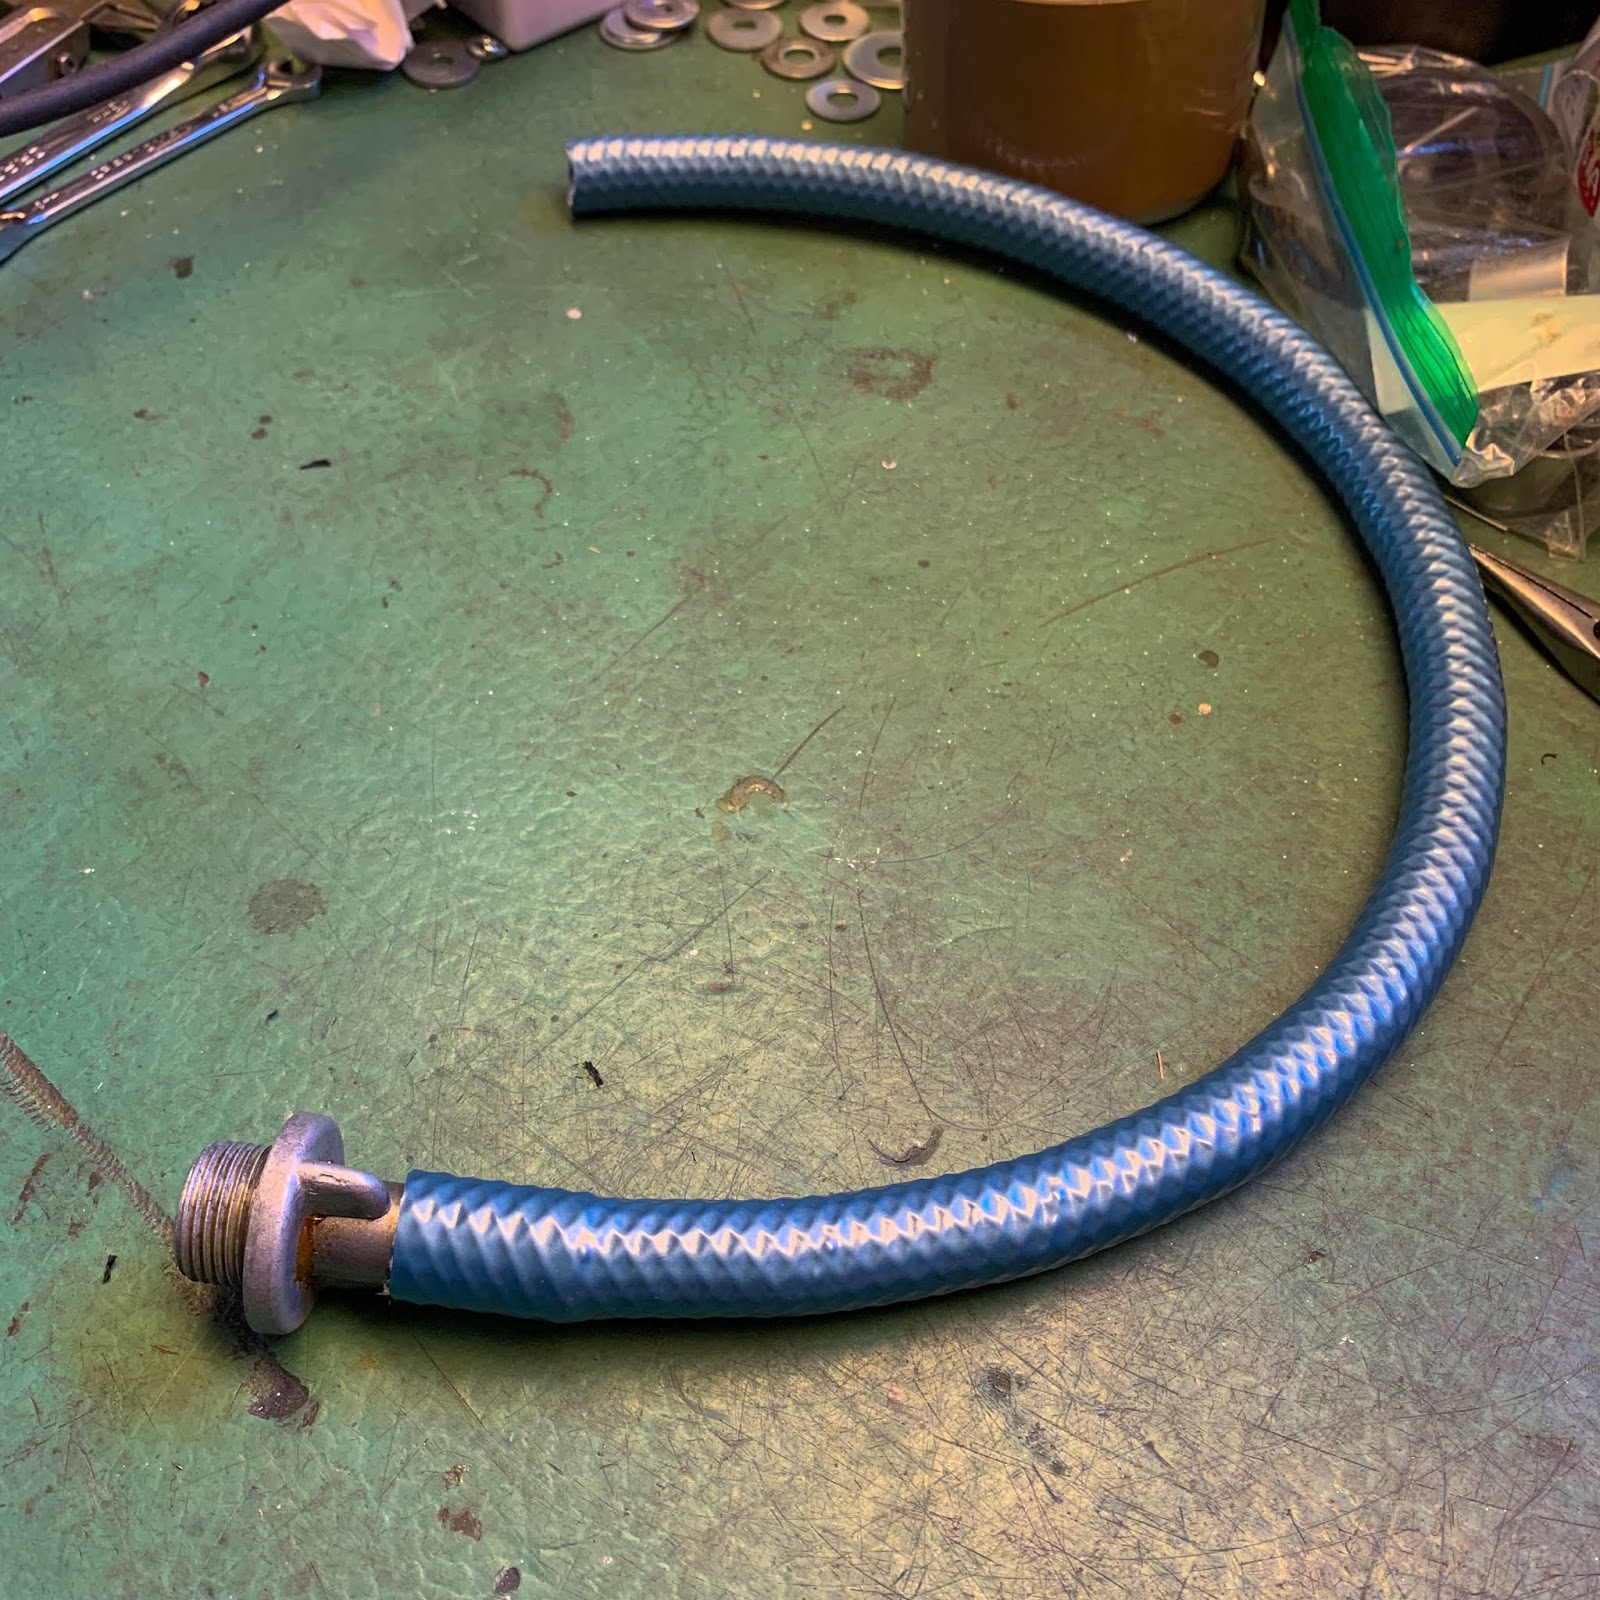
This one was a really thin-walled common objective tube that seemed OK if it wasn´t for the colour… Blue isn’t going to fly right here. I thought-about portray it with some sort of vinyl spray however realized that might by no means work…
How about some shrink tubing?
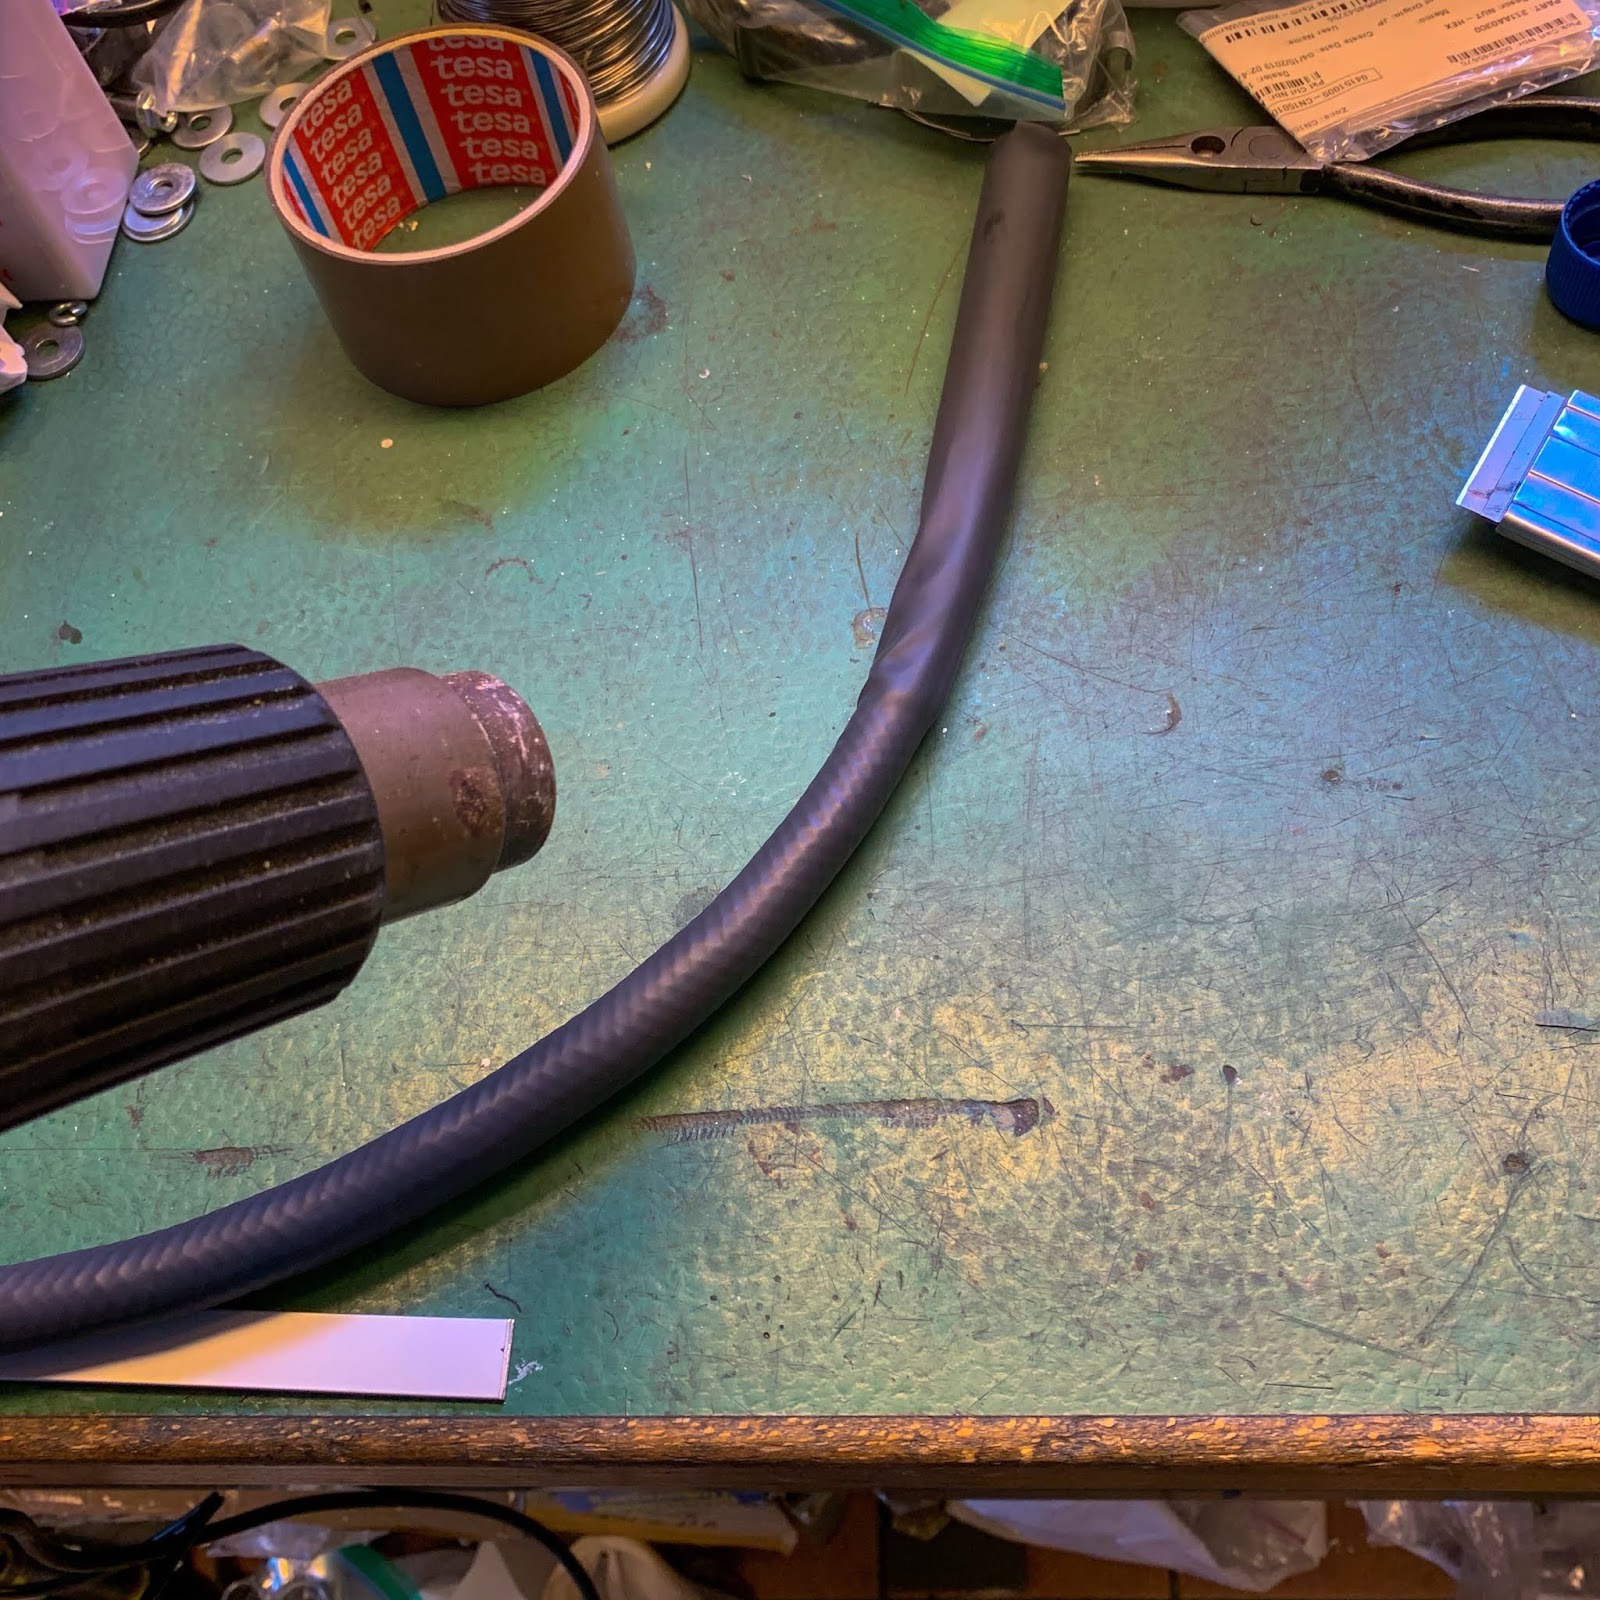
Why not? That labored fantastic. I modified the colour on the tube in a quite simple and efficient approach. It will do fantastic till the proper sort of rubber tube reveals up someplace alongside the best way.
Let´s transfer on to the fairing. It has been delay lengthy sufficient now.
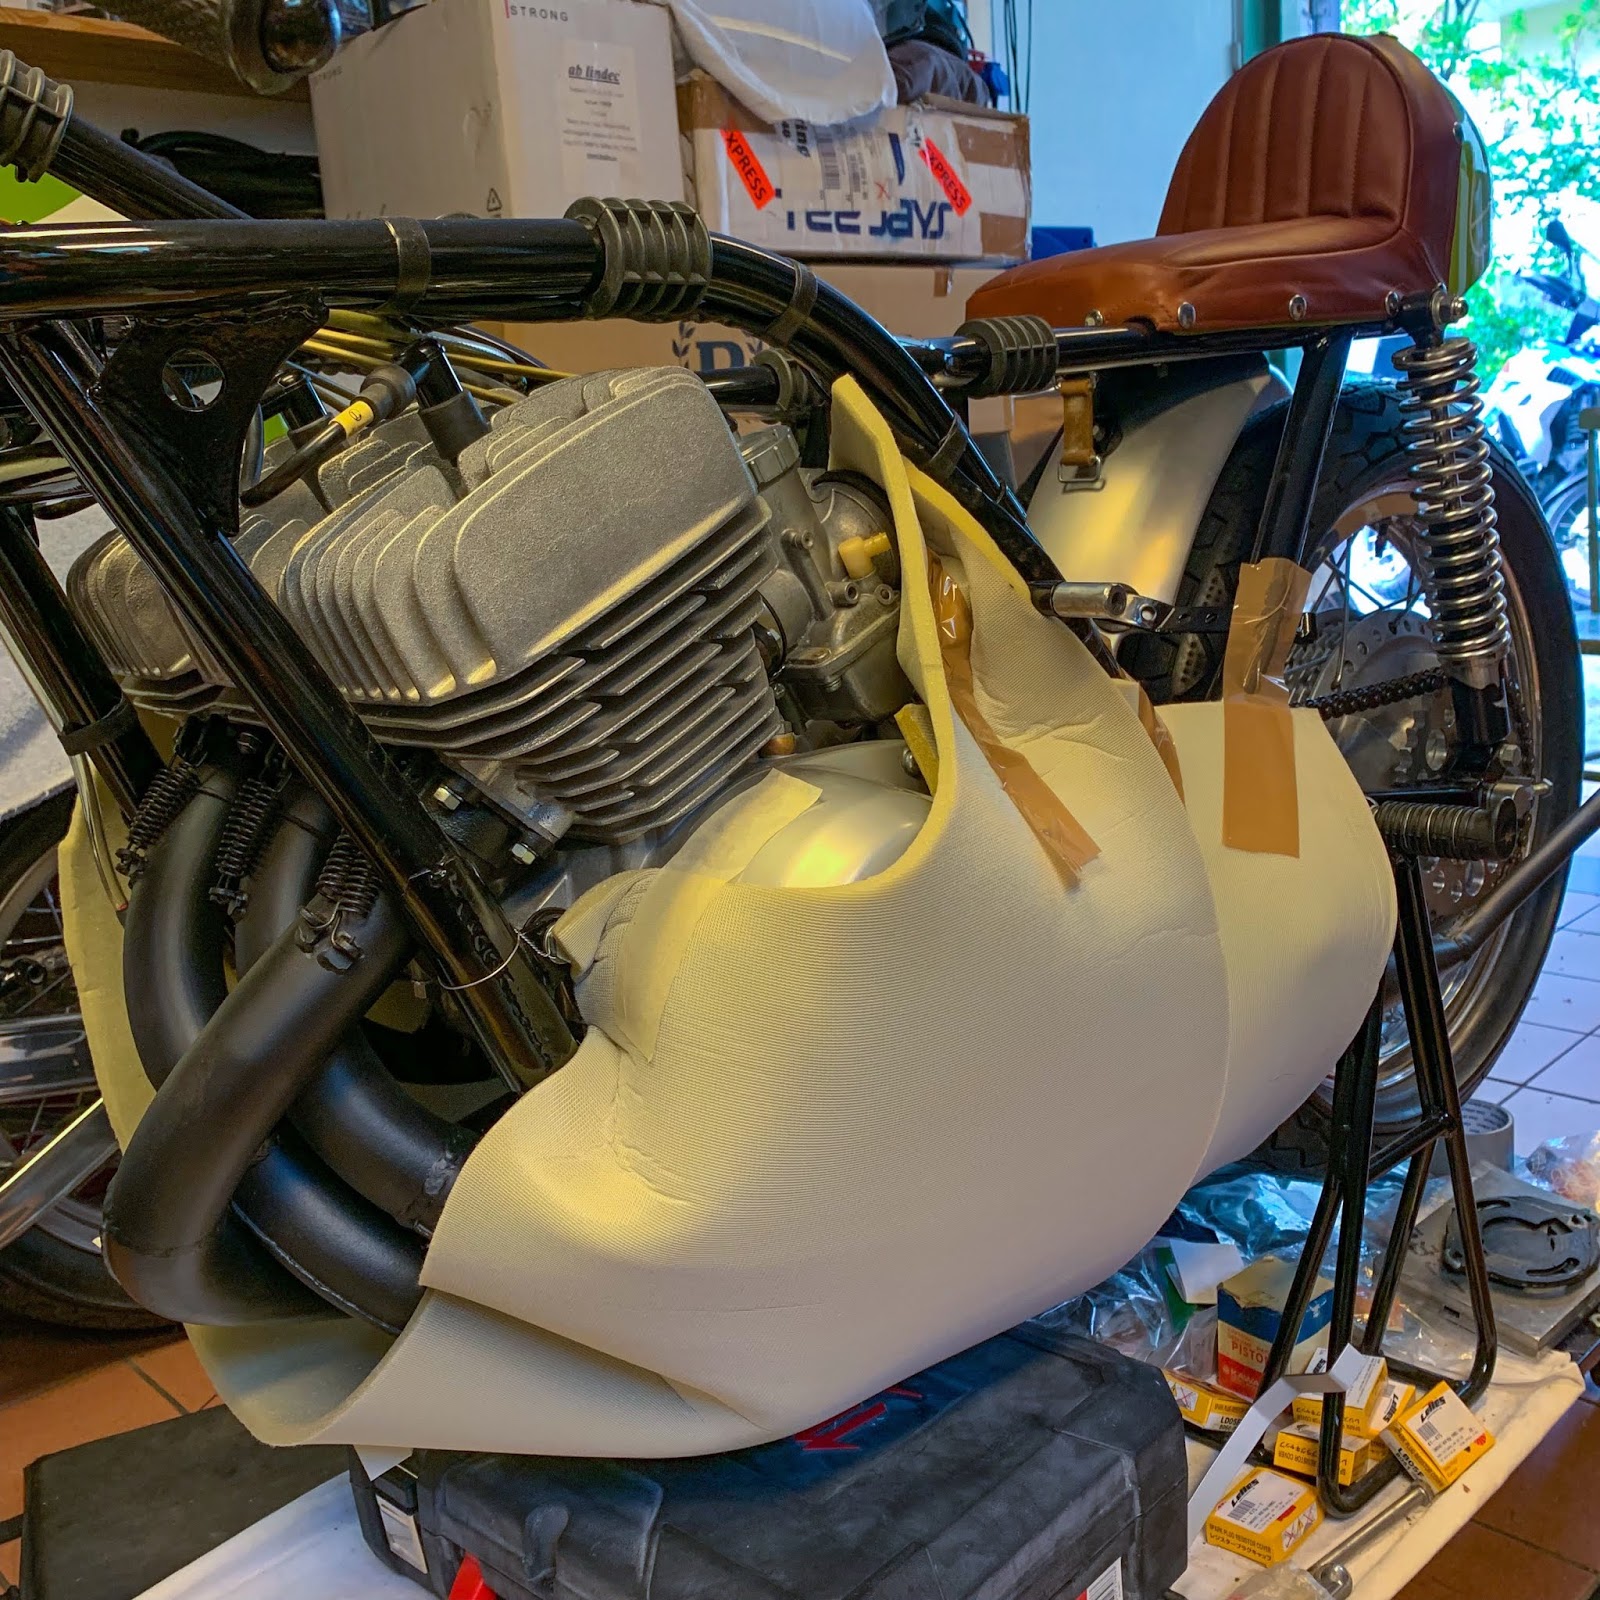
I needed to verify there could be a small clearance throughout the pipes, clutch and ignition cowl. ..
Throughout my efforts to stitch my very own seat cowl I had purchased a patch of 1 cm thick padding that got here in very useful now. (By no means, ever throw something away….!!)
This manner I may be certain the fairing will probably be positioned at an appropriate distance from the engine and pipes.
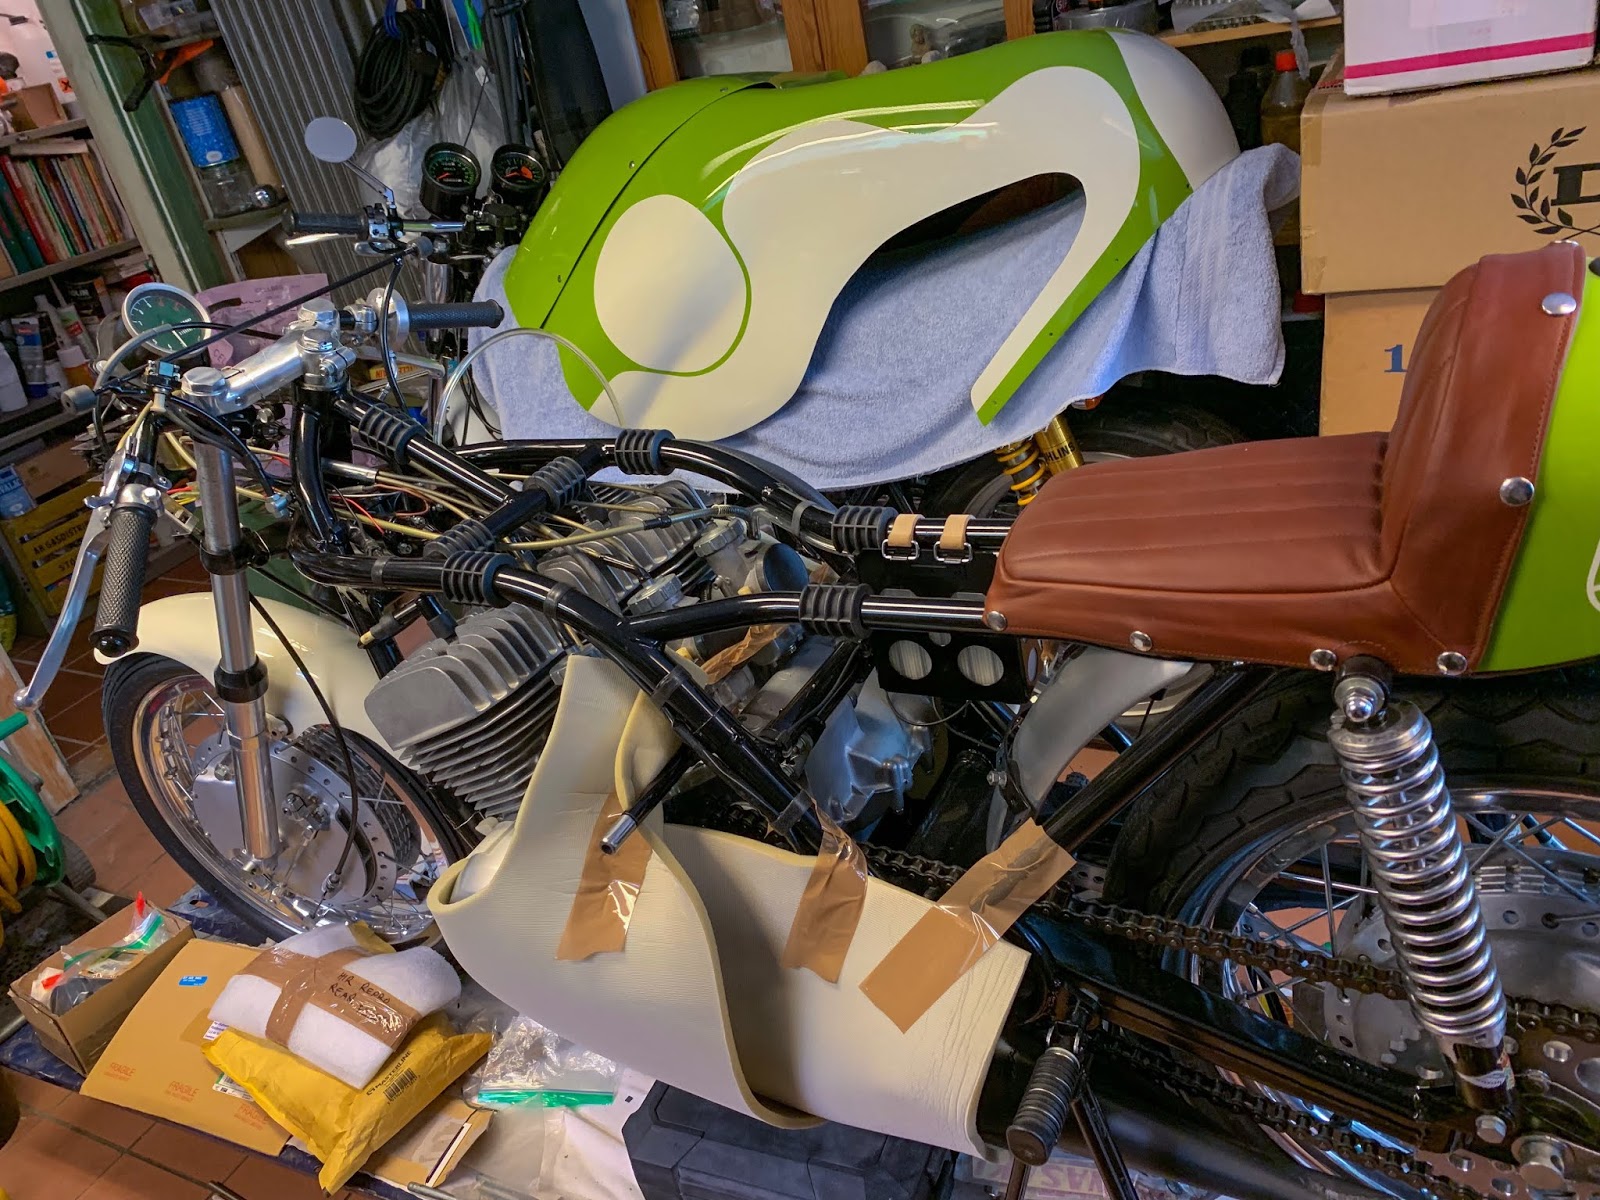
Time to get cracking with the fairing elements…
It was a bit difficult, to say the least, getting it on and getting it on straight and stage with the remainder of the bike.
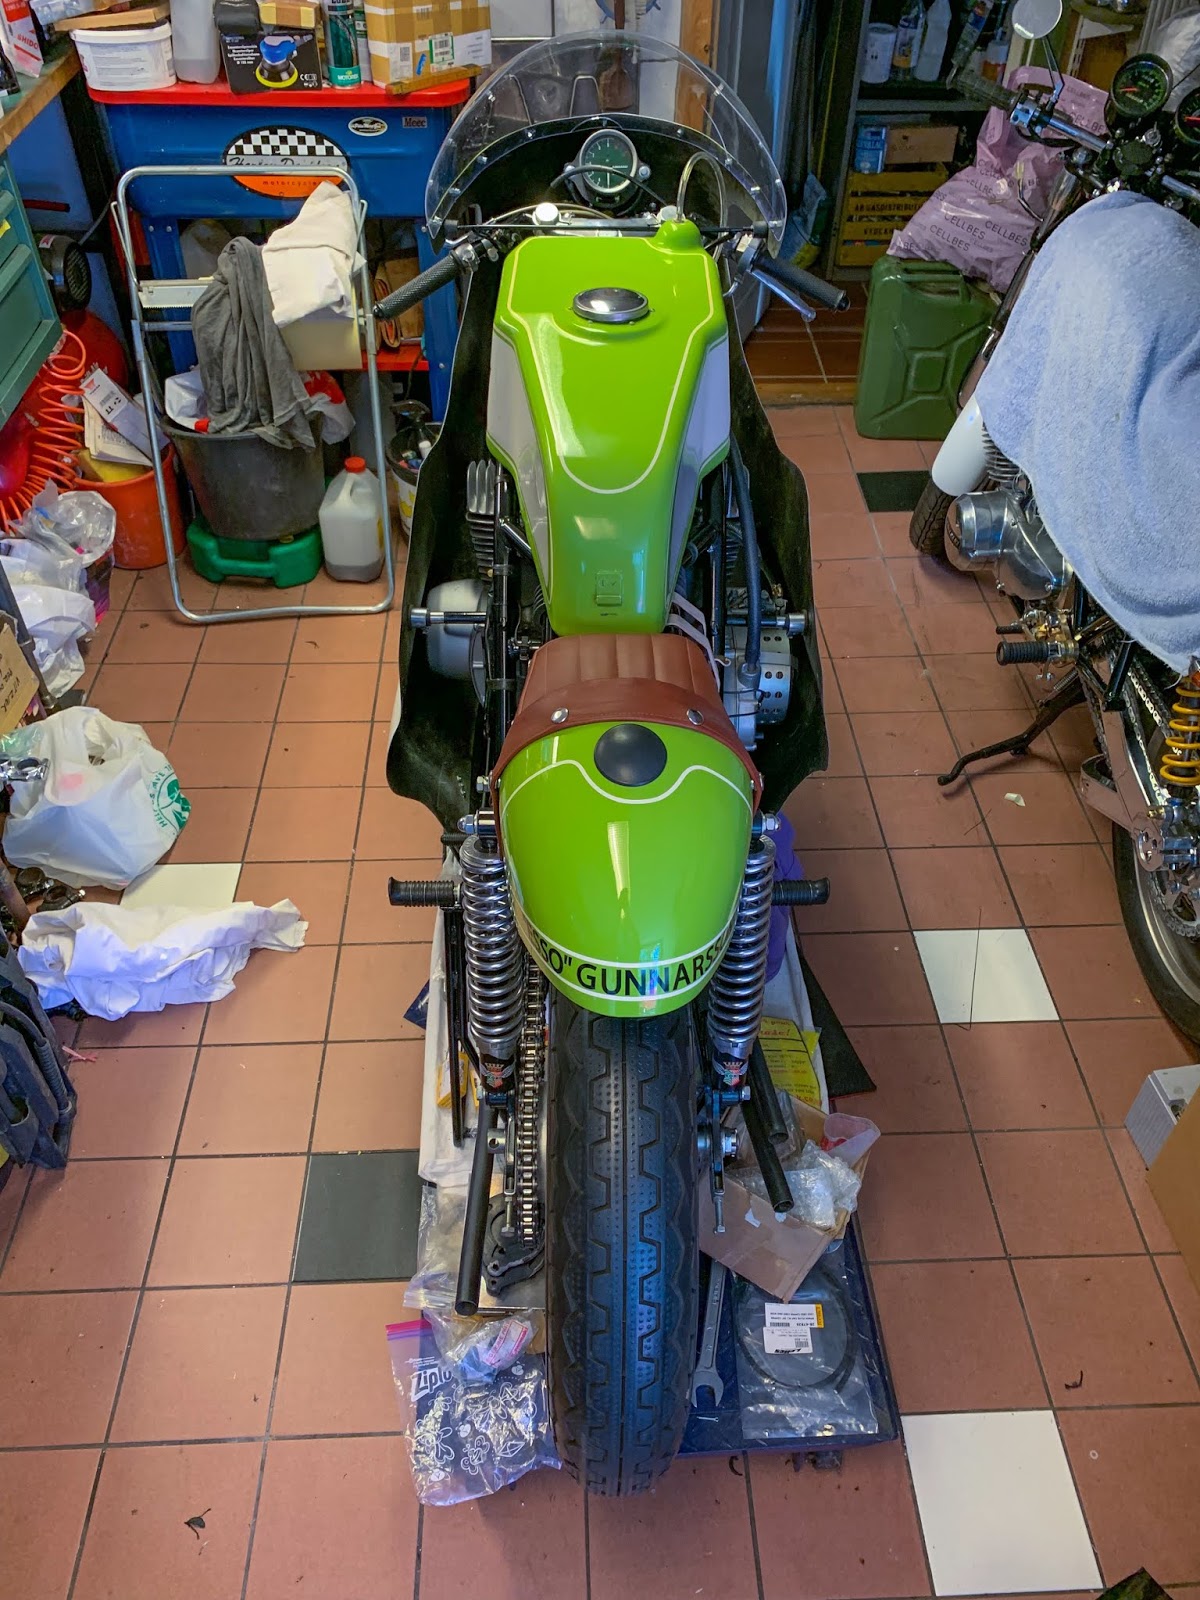
I solely had ONE safe level as reference, the highest entrance one.
That gap was nonetheless intact and presumable within the appropriate place. Getting that hooked up was straightforward. After which I seen the fairing could possibly be turned and pressed in quite a few methods throughout the bike getting very completely different references for drilling the remaining 4 fasting holes. The hours handed…
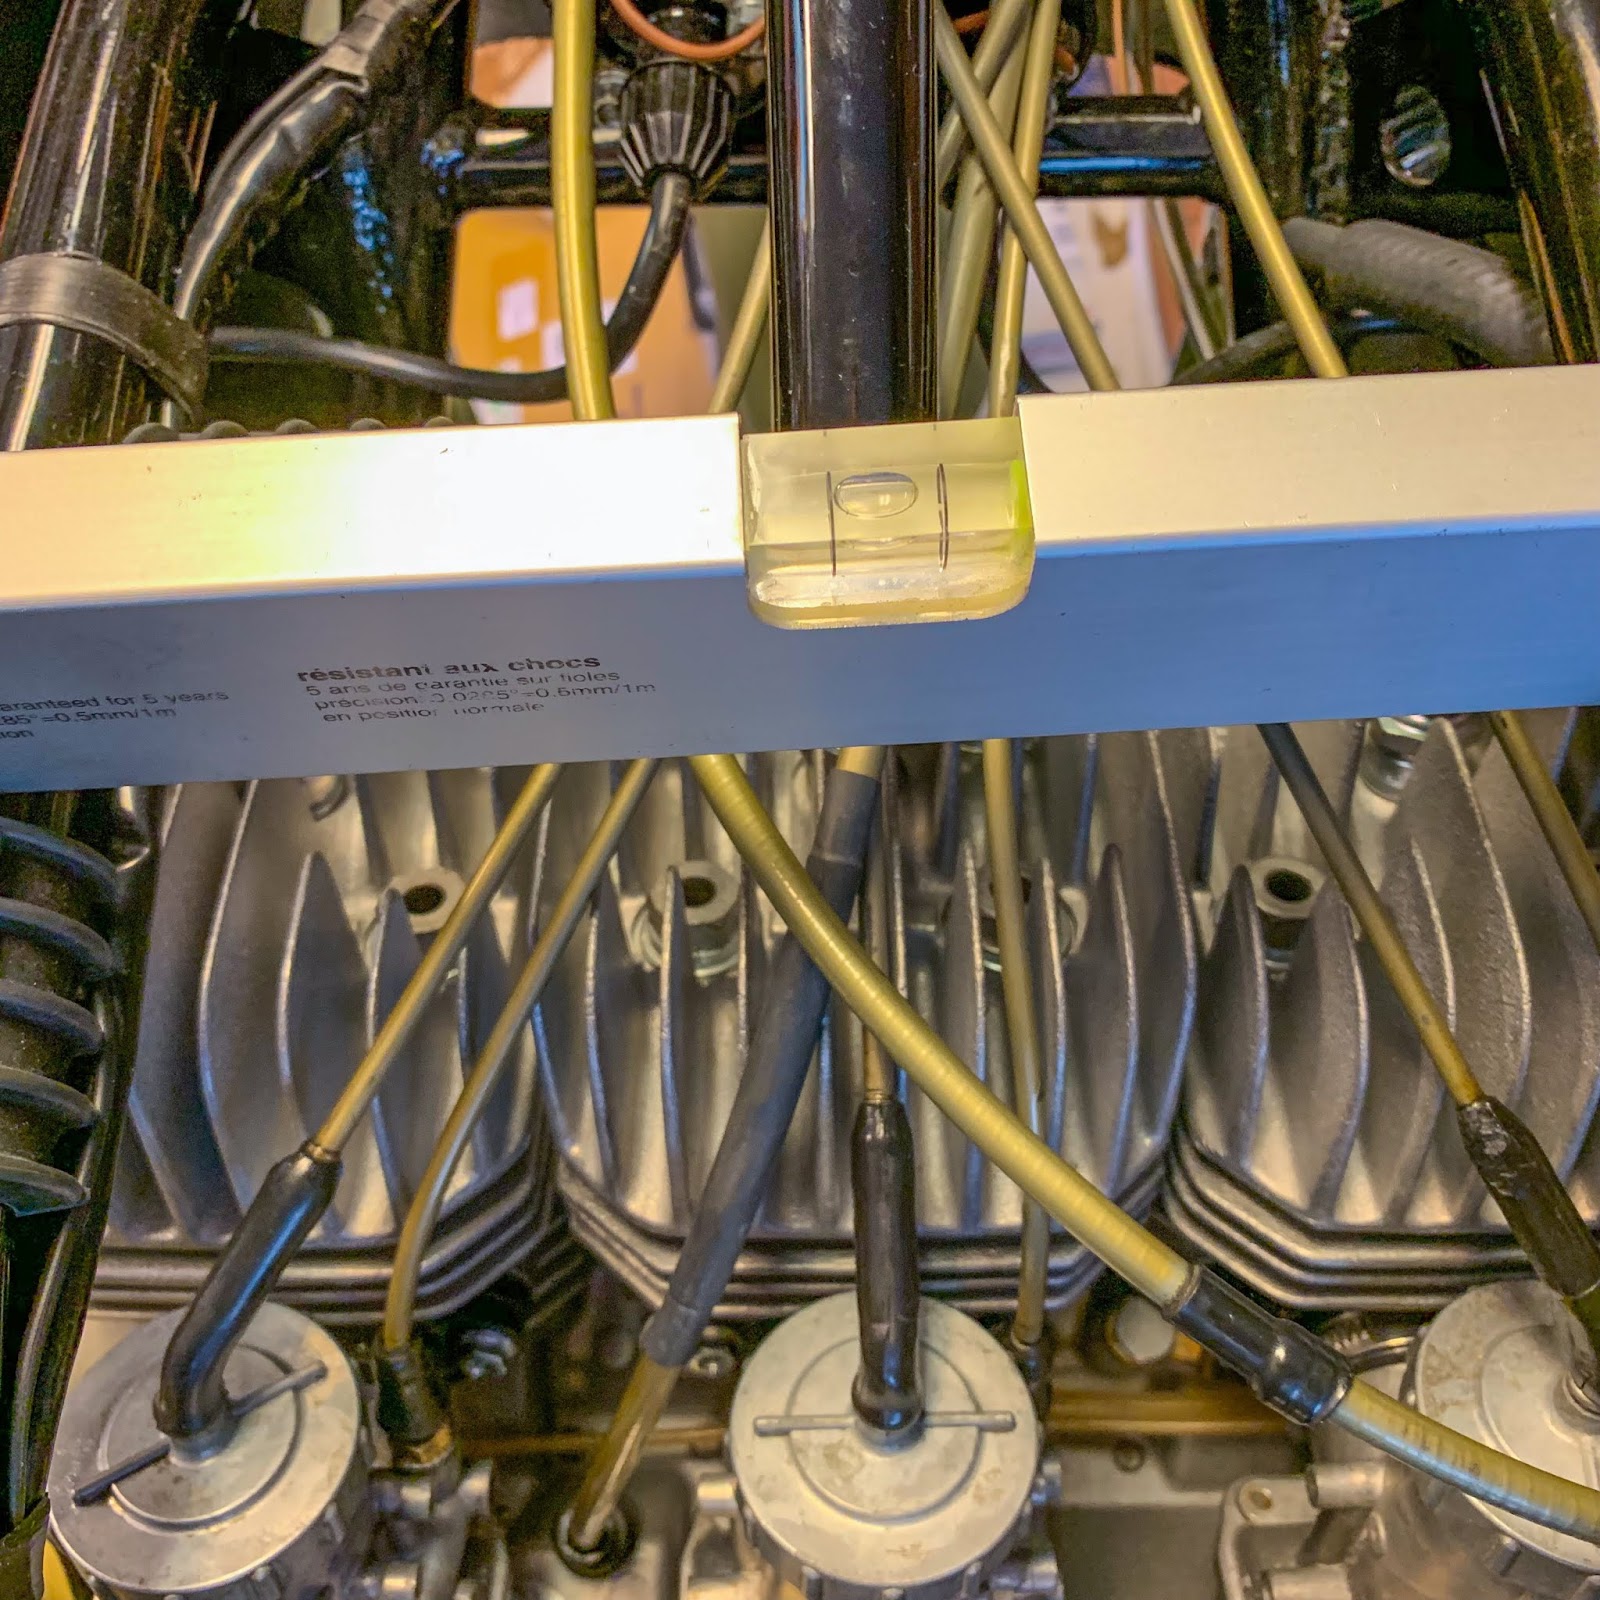
I figured I wanted some sort of fastened reference and determined it needed to be the body tubes simply above the engine. Inserting a stage there confirmed how the bike was leaning on the raise.
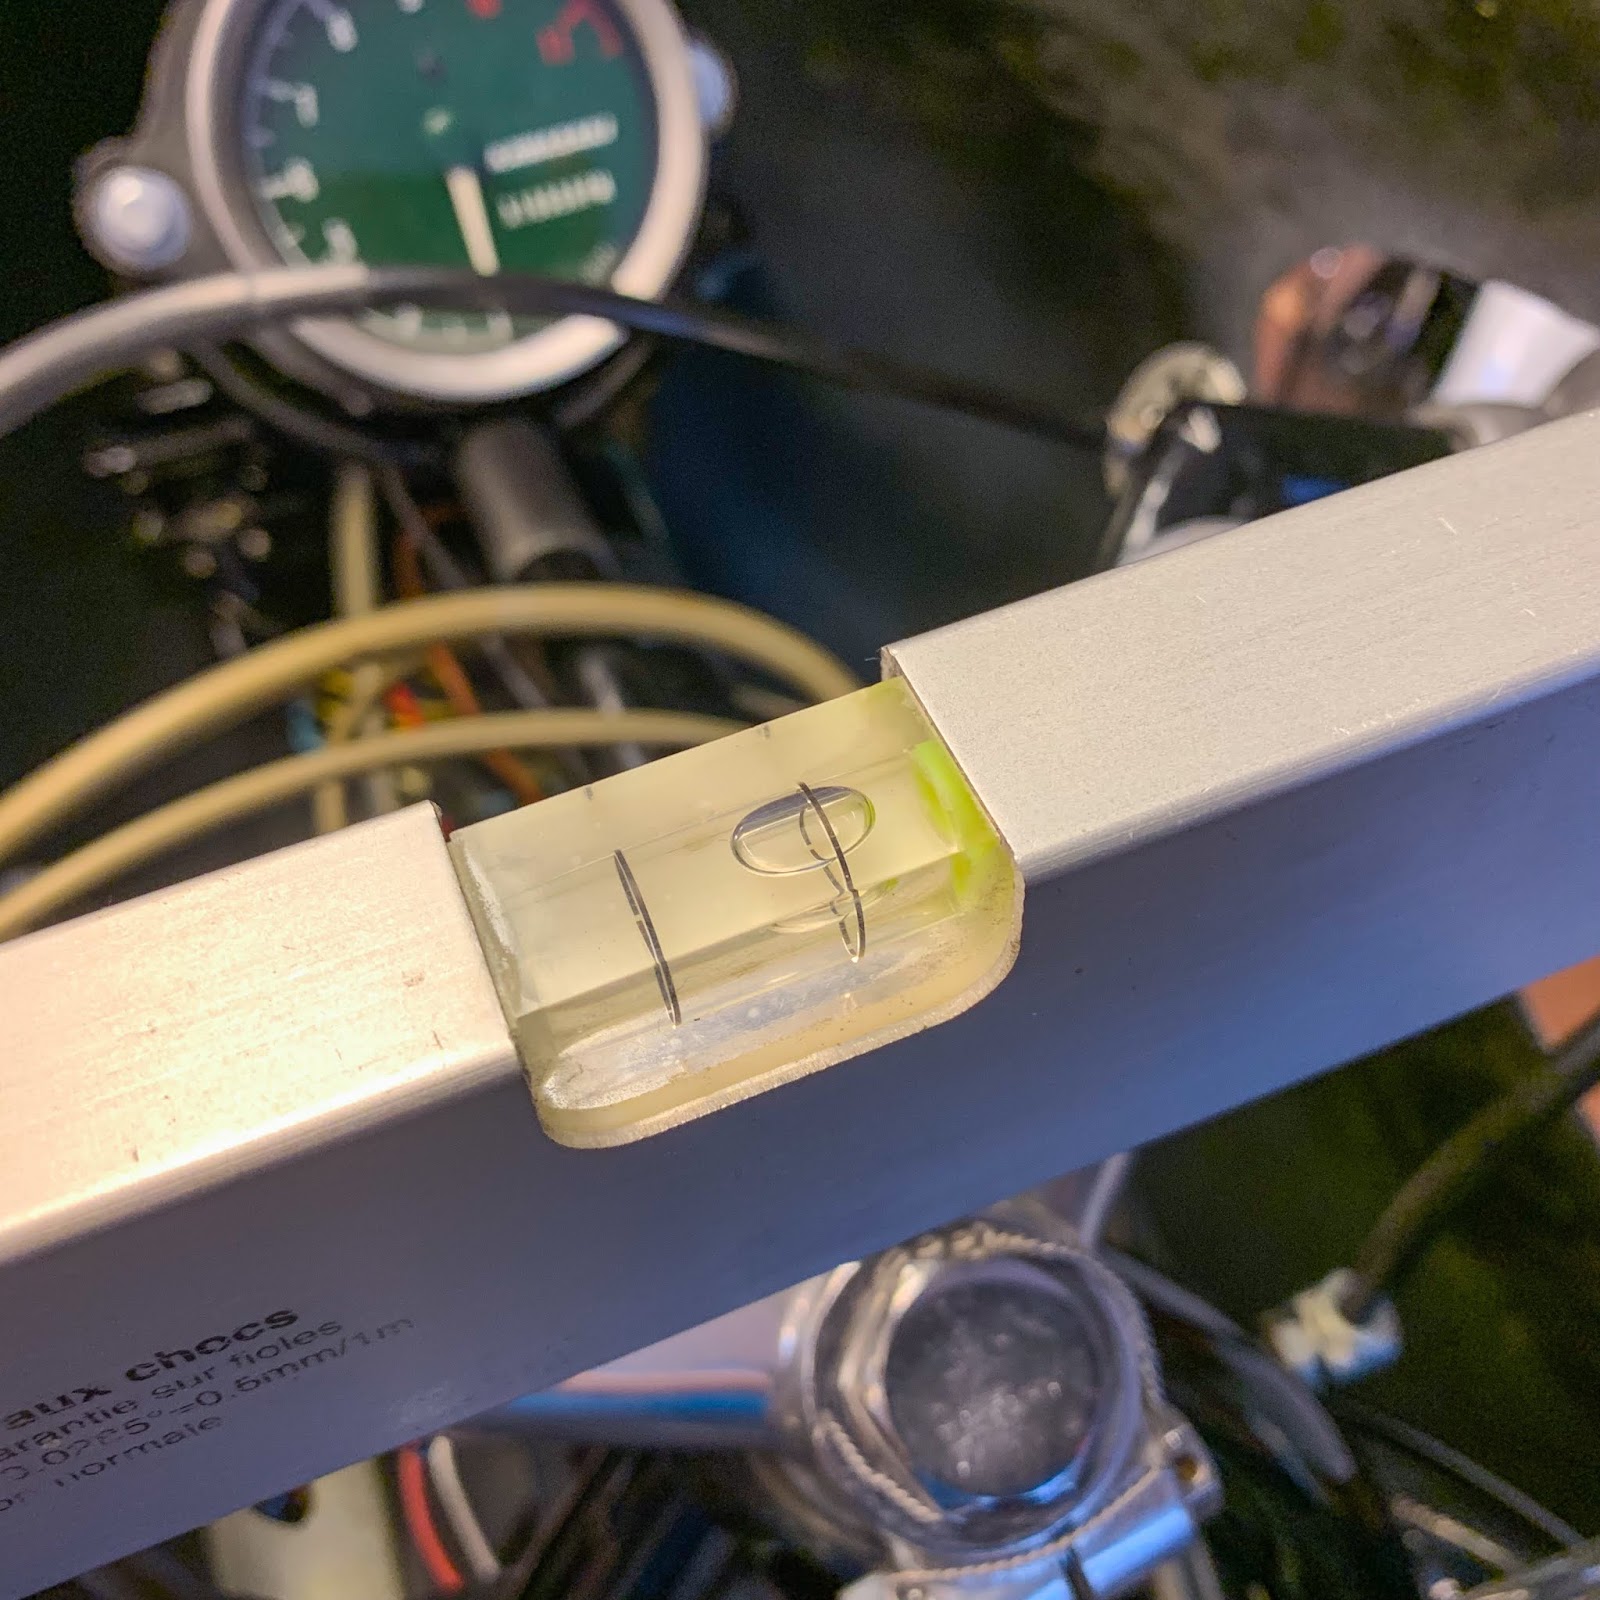
Inserting the extent on the fairing bracket up entrance made me notice I used to be off by a bit in adjusting the bracket. Down a good bit on the precise facet.
Now I knew the entrance bracket was stage with the body tubes. That ought to imply if I might get the highest a part of the fairing to suit properly up there it might be fairly near stage additionally on the rear.
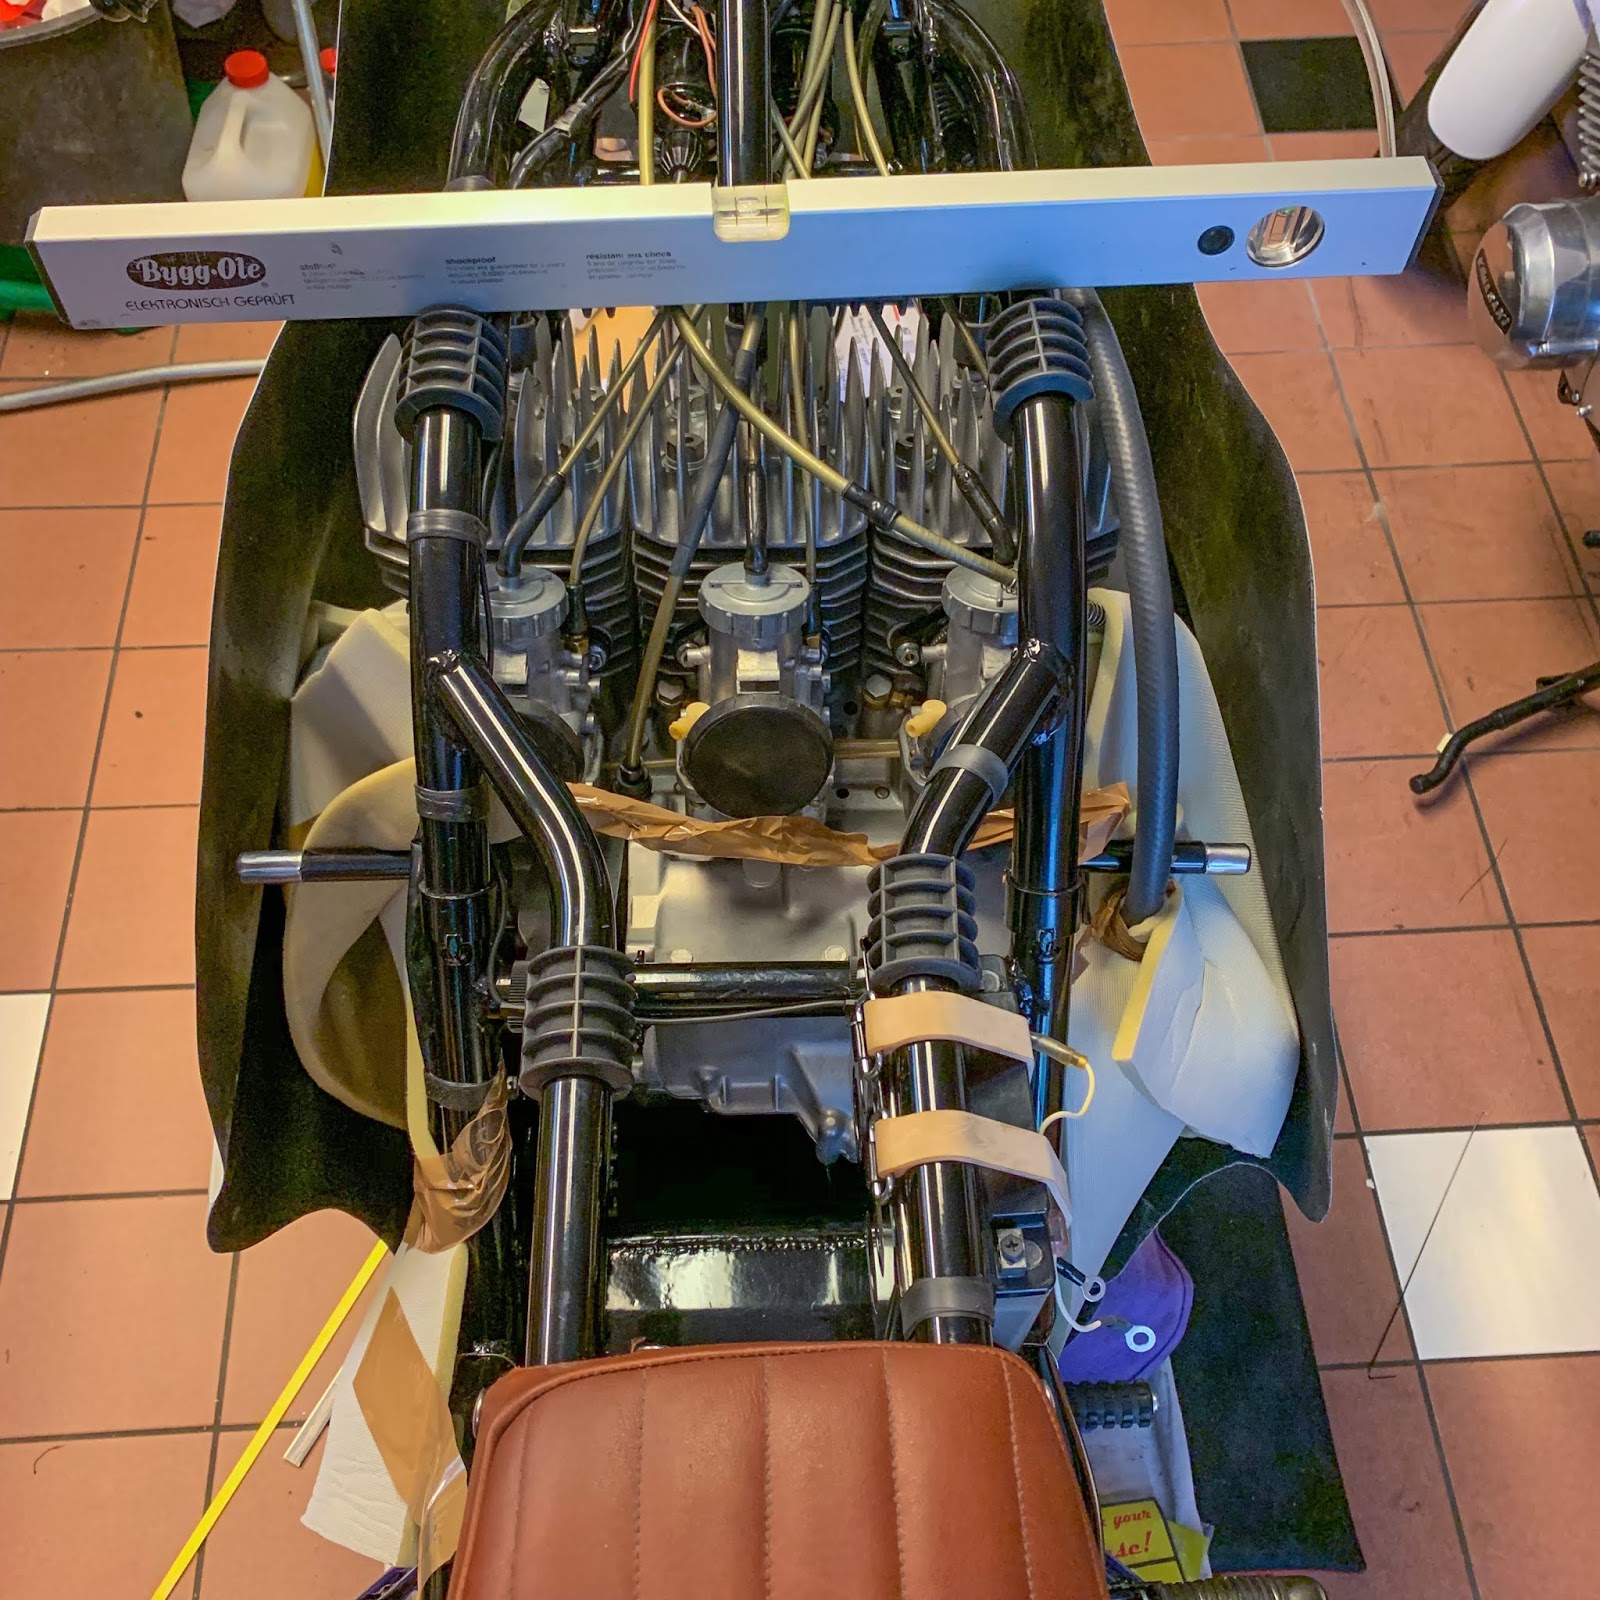
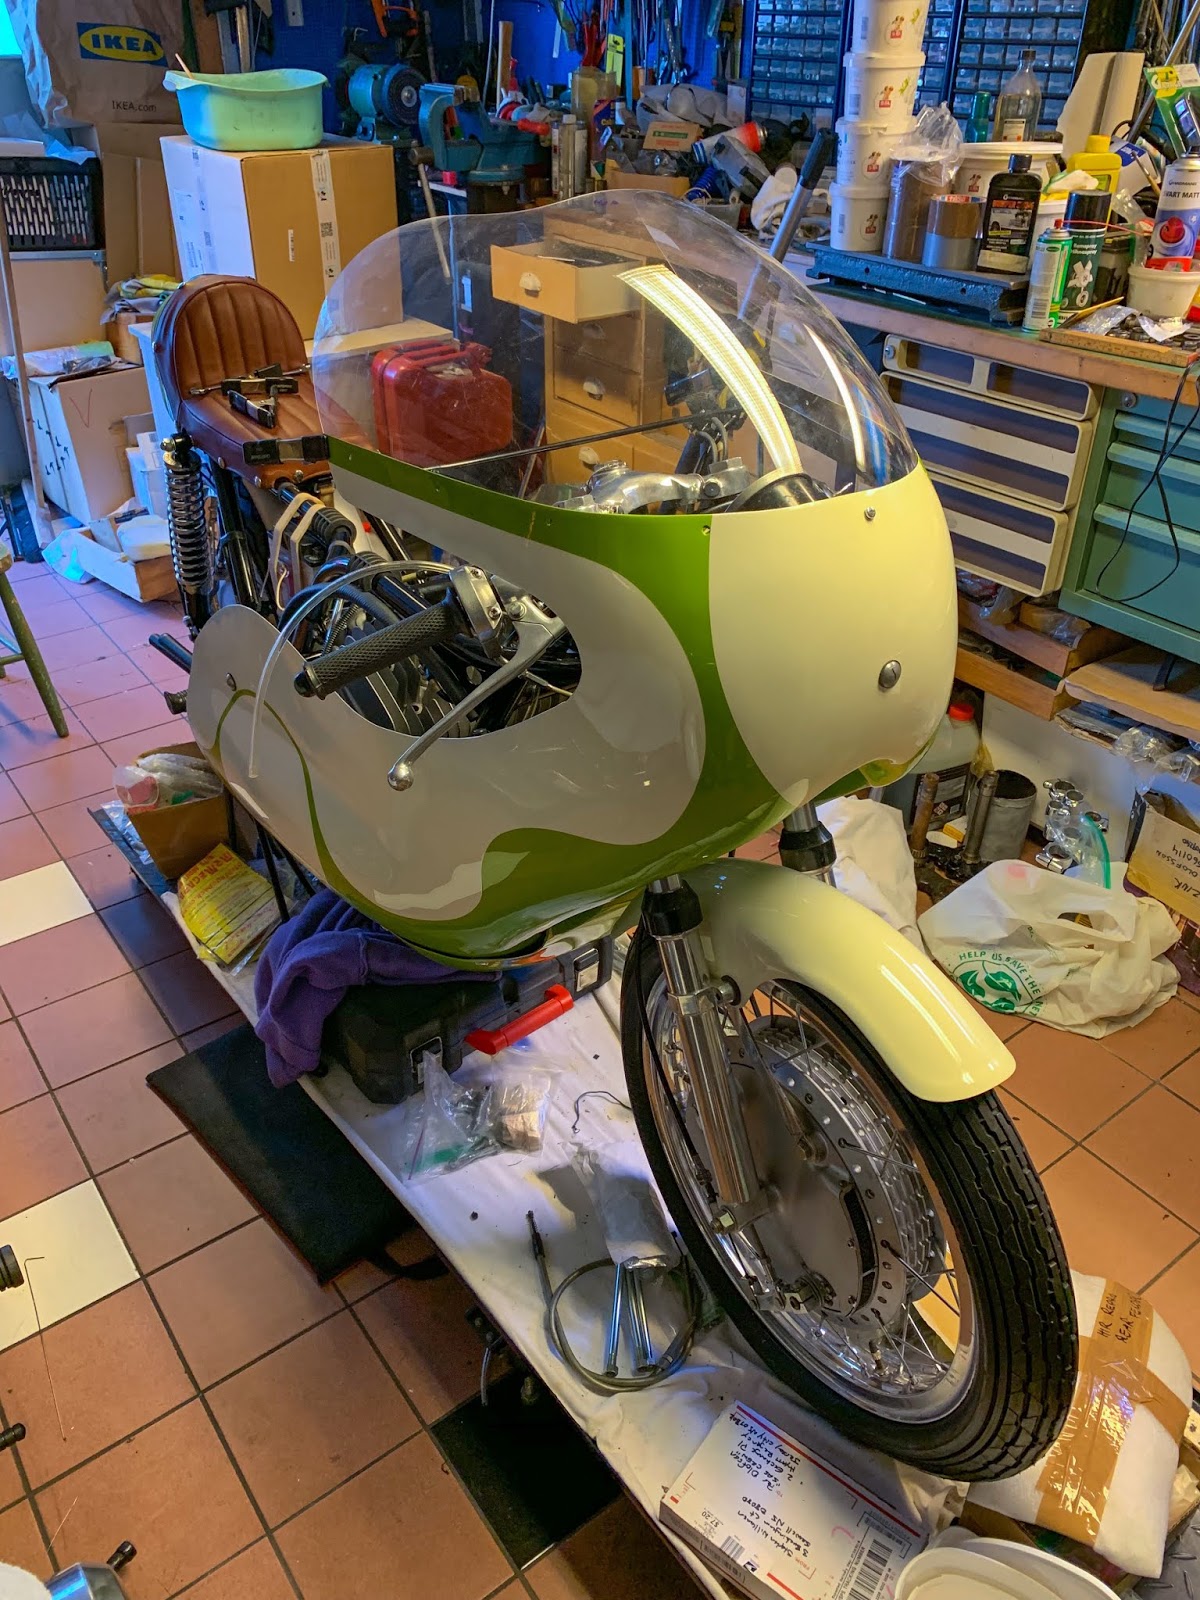
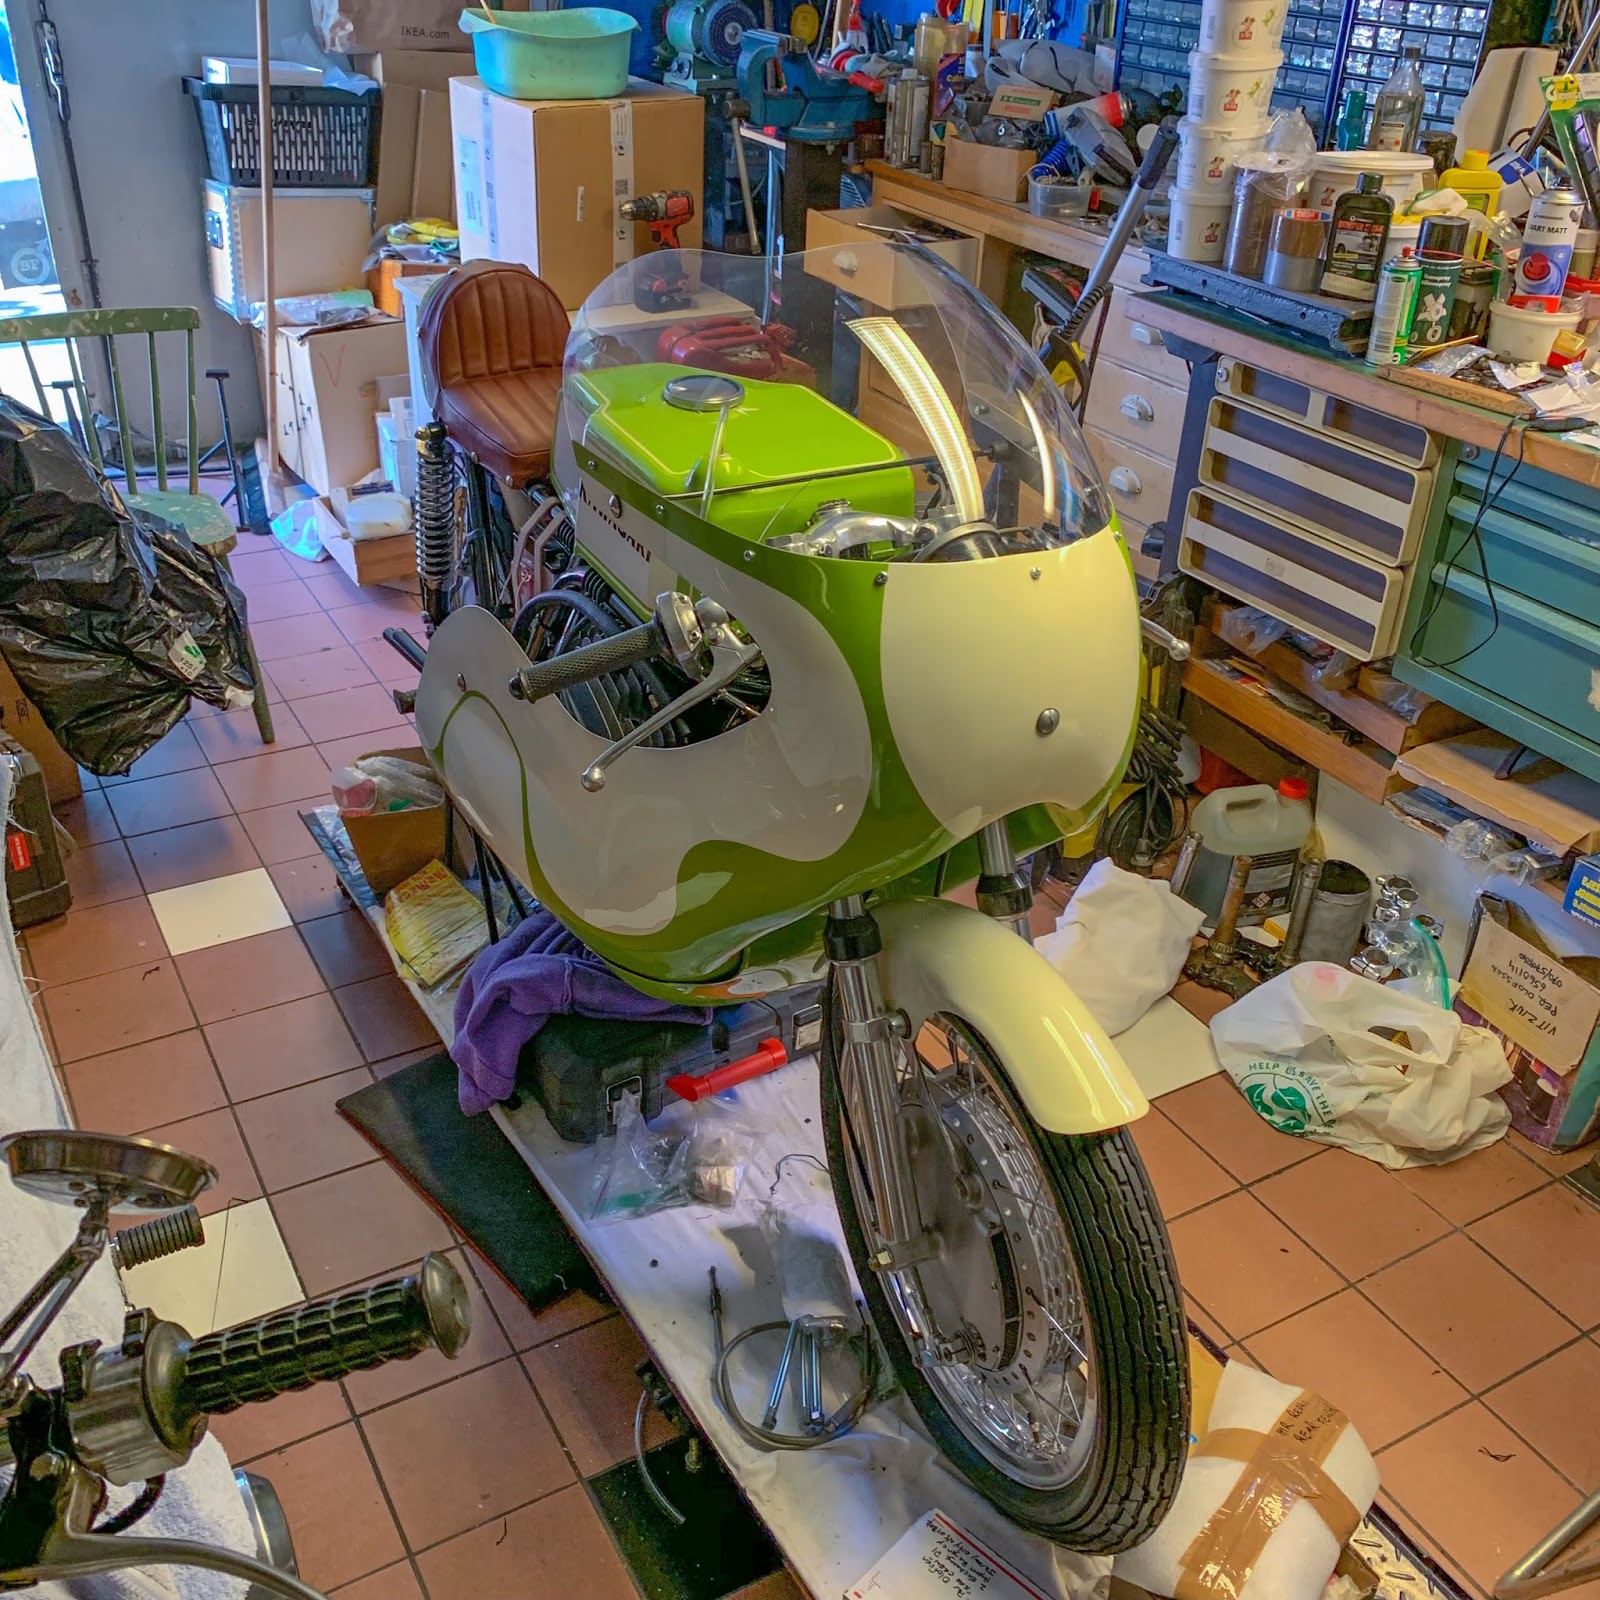
Right here we’re getting nearer… There´s ample clearance throughout the motor and pipes, even the ignition cowl is free from it. Fortunately I made my body lugs barely longer than wanted. That may be adjusted in a while for a extra good and slim match of the fairing.
Time to do the scary bit!
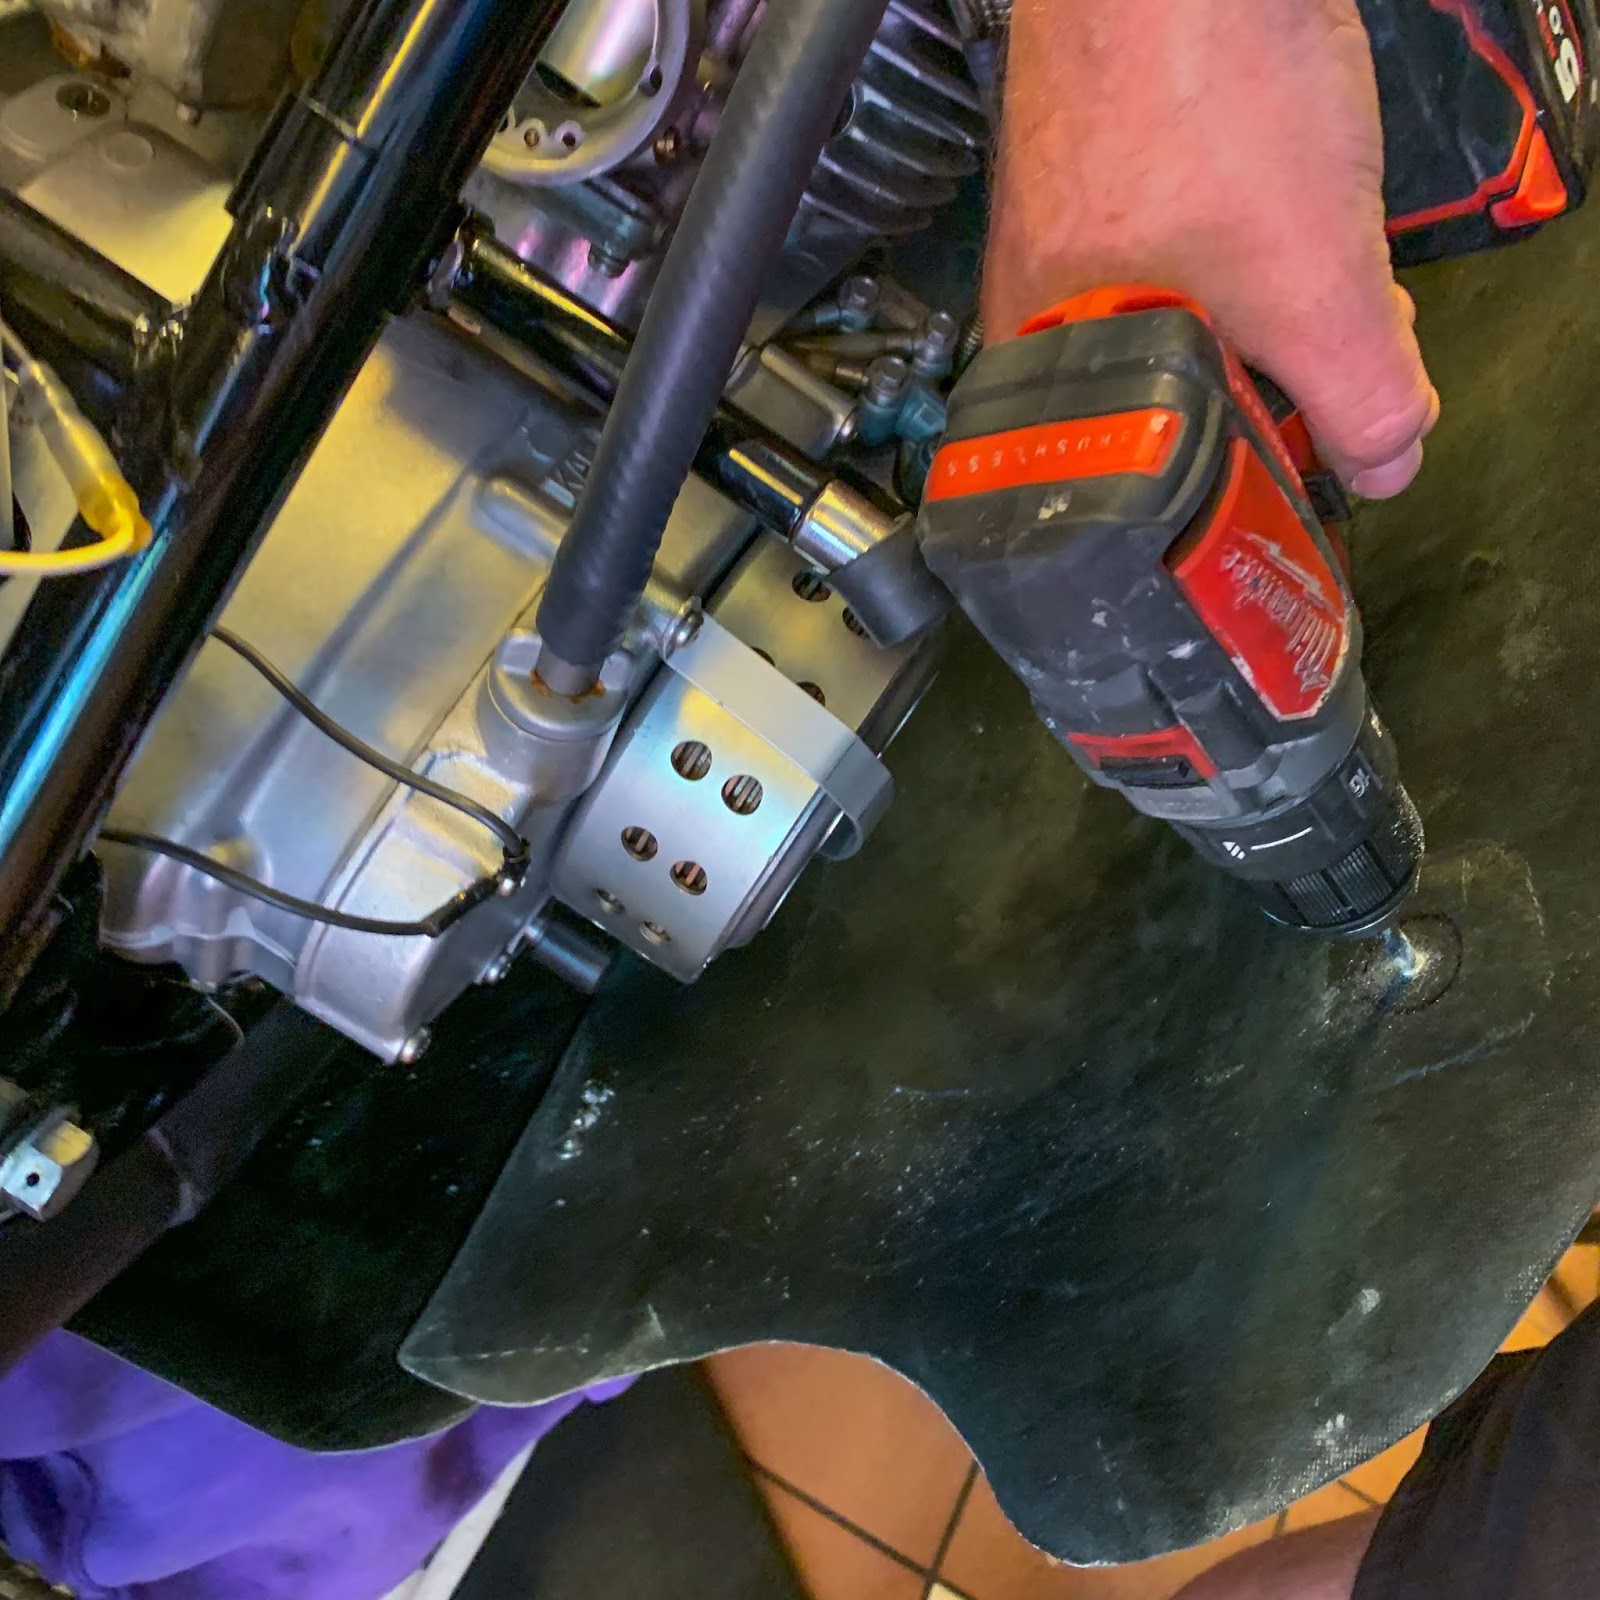
After checking, double checking and triple (!) checking I did it!
I put the drill in to my freshly repaired and repainted H1R fairing!
“No guts, No glory” as we are saying within the airline business….

I really suppose I nailed it! A couple of hours of fettling forwards and backwards received it completed in a really acceptable approach.
I considered leaving it for the day, however figured I’d simply as properly proceed with the clear wind display screen.
That was a choice I deeply regretted a number of moments later…
First I clamped the display screen to the fairing on the rear ends to line up the perimeters of the display screen with the rear ends of the fiber glass fairing. This to see if it might match as anticipated.
It did, it certain did! On the left right here is the primary gap drilled within the display screen. It’s good to begin on the heart and work your approach rearwards screw by screw. To this point so good!
And that was when catastrophe struck….
Attempting to ever so evenly press the display screen upwards to get a greater angle for the screws the rear clamp gave up and I shredded the display screen on the entrance screw….
What I assumed and stated within the storage isn´t applicable for writing in a household motor weblog.
OK, the harm already completed. I’d simply as properly try to get it on for fitment of the opposite screws. A fast name to “Tullar´n” asking if he might presumably make me one other display screen and have it prepared subsequent week?
No reply.
I left a message and determined to try to get it on as finest I might. Now I felt like an entire fool and it might escalate from that time.
It proved very troublesome to drill holes within the display screen. I used a 5 mm drill bit, new and sharp, however I might really feel the way it nearly cracked the display screen each time I attempted to drill a gap.
Being barely offended at myself,, pushing a bit to onerous made me crack it a number of instances extra drilling the retched holes… D*MN!
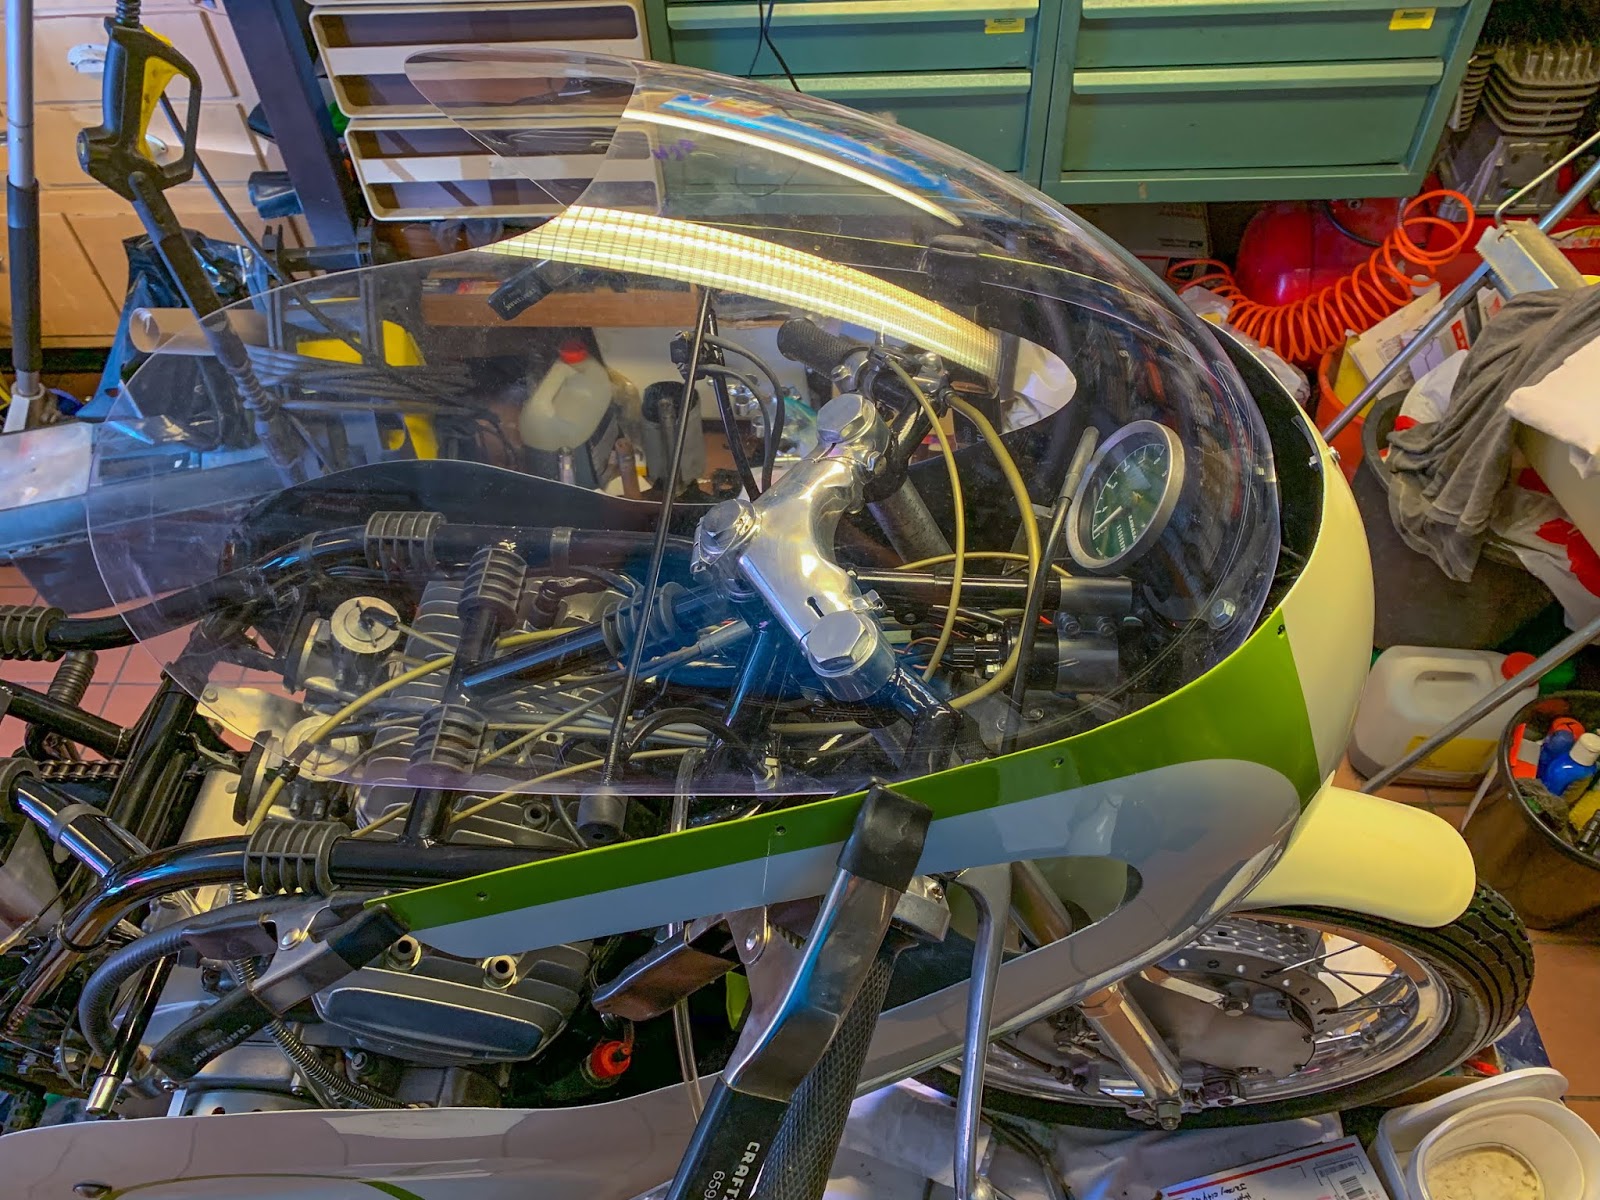
Nicely, I lastly received it on there and, Thank God, it was straight and stage and really seemed fairly all proper other than the cracks and lacking items…
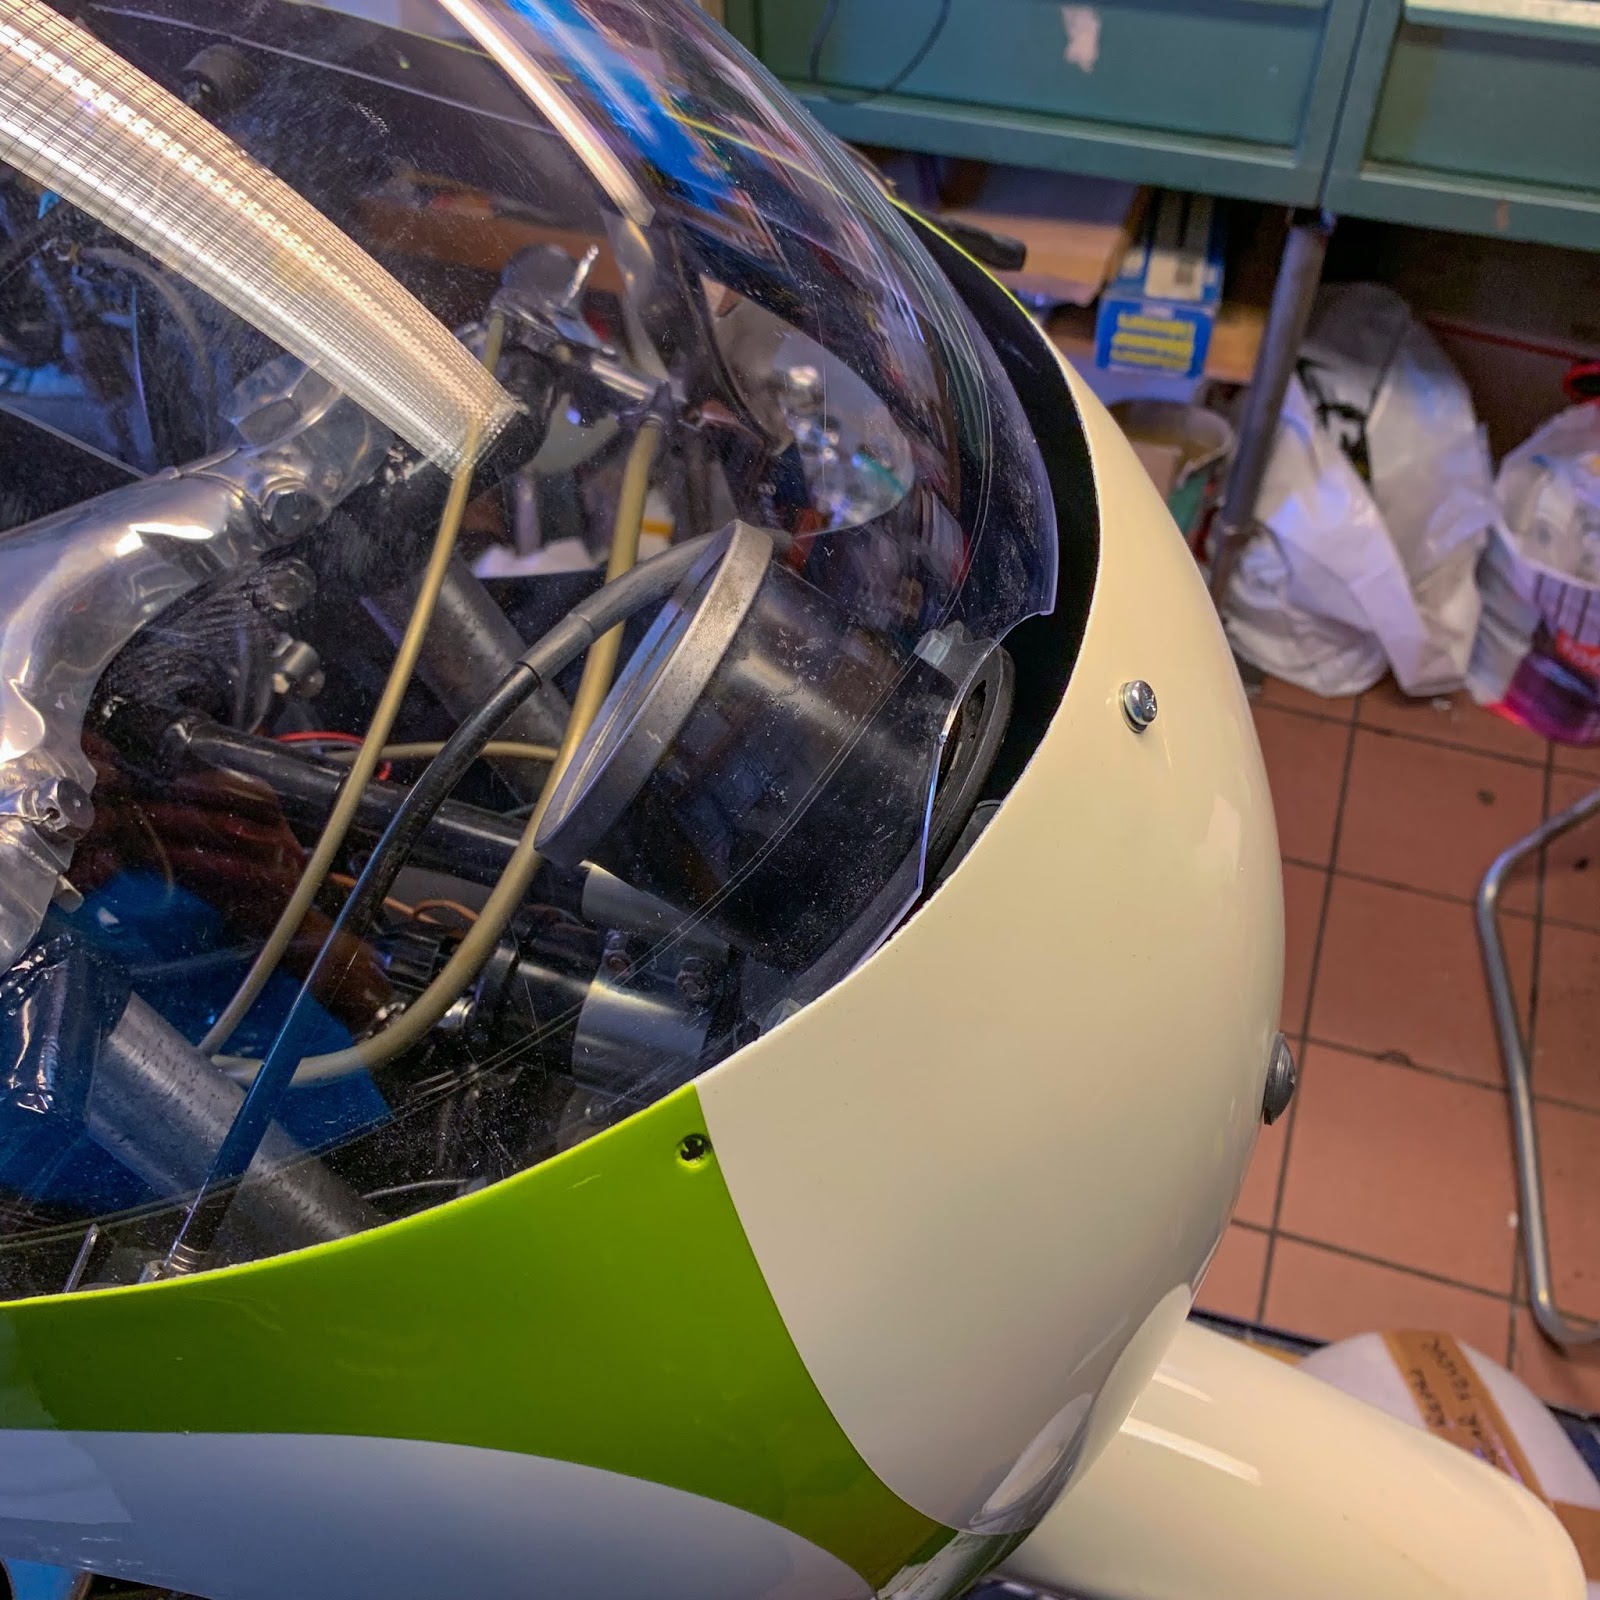
And right here´s the proof of my whole ignorance relating to mounting wind screens…
A big, very seen crack from one of many screws angling upwards over the display screen.
Nonetheless no reply from “Tullar´n” so I began to determine I needed to do with this display screen for subsequent weekend and the present.
No massive deal, I’ve no drawback confessing my very own shortcomings as a mechanic or as a human being. That’s a part of life. Be taught from it and transfer on!
From a distance it seems fantastic. That´ll do for now. Getting the final two fastening screws in place on the prime rear of the fairing was straightforward sufficient. No mishaps there. Straight and stage and a pleasant, cosy match throughout the bike.
A small pleased dance anyway…
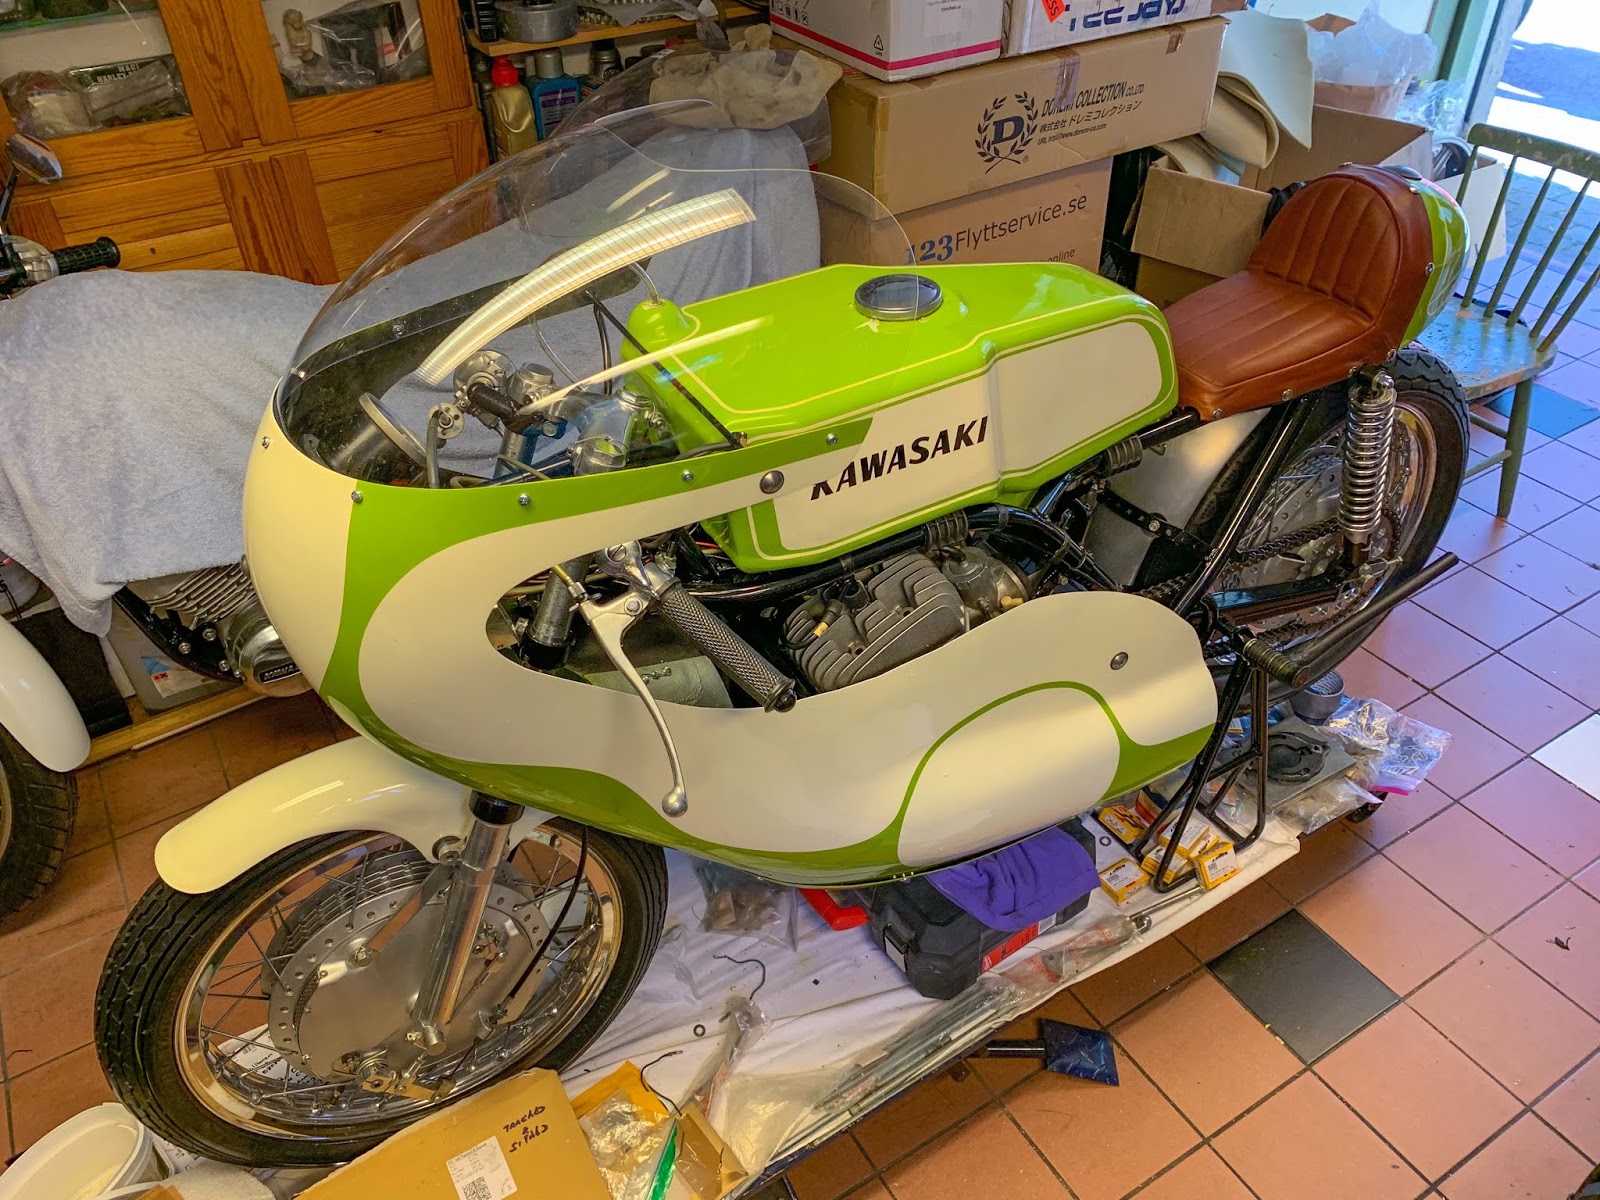
A view from the left hand facet. The seat cowl will probably be modified for the present, however other than that it’s getting completed for its premiere present… First check with the unique show tank. Appears fab!
The correct facet of the bike. The engine vent hose may be seen contained in the fairing.
Now all it wants is a little bit patina right here and there. Let´s hope I can get that on the monitor. I hope I´ll have the ability to, no less than, begin it up within the pit. Driving is unsure resulting from sound restrictions on the monitor. I’ll NOT put silencers on my authentic, utterly restored authentic enlargement chambers…
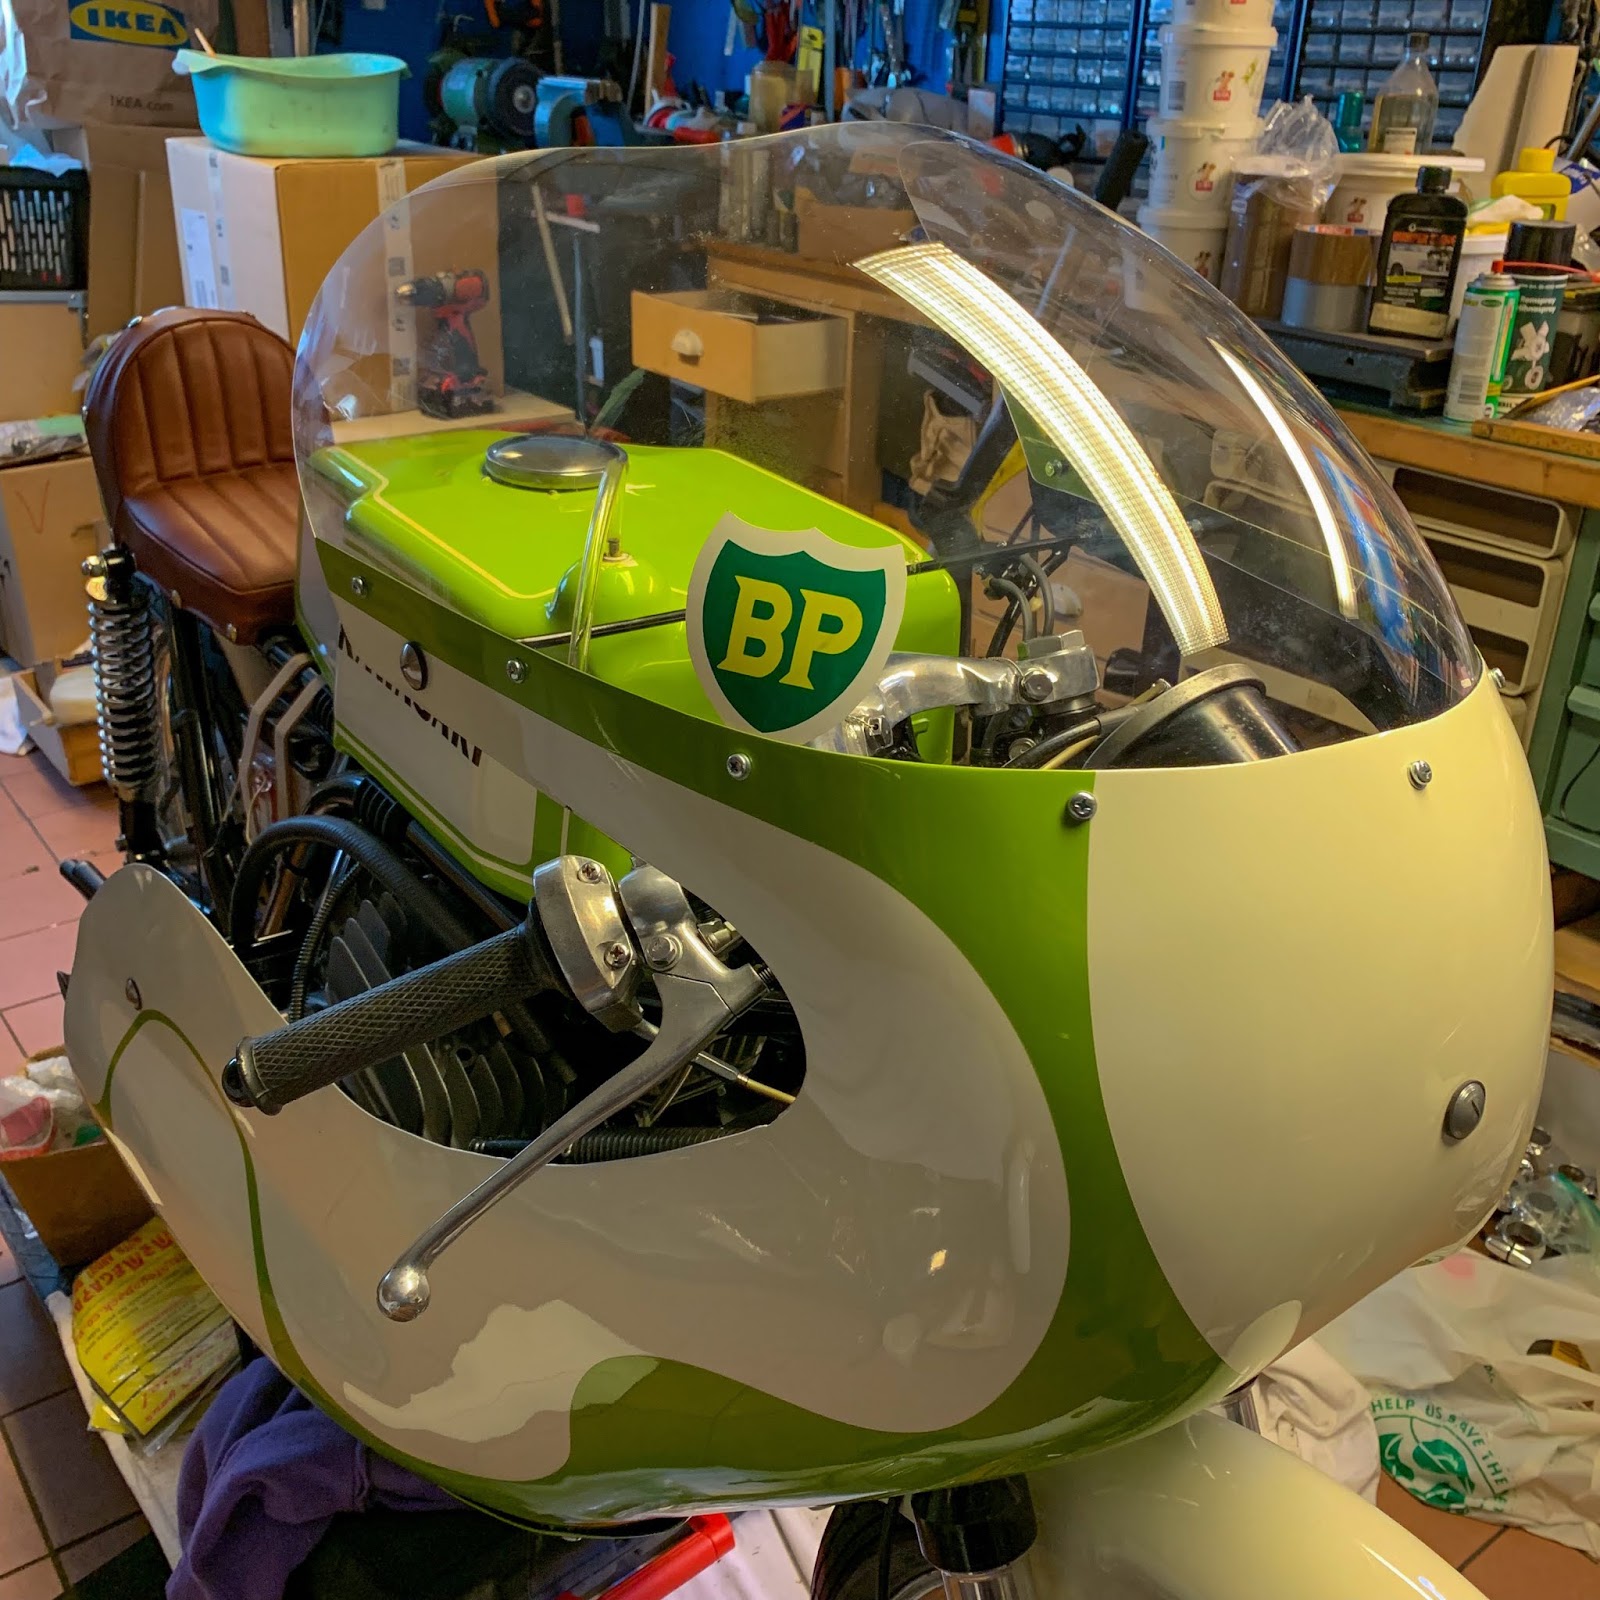
I solved the difficulty with the cracked wind display screen in a quite simple approach. “ESSO” labored with BP for quite a lot of years even promoting gas on the races to different drivers and even at automotive races. I discovered an authentic sticker from “ESSO´S” widow and put it over the crack.
Yeah, it really works. For now.
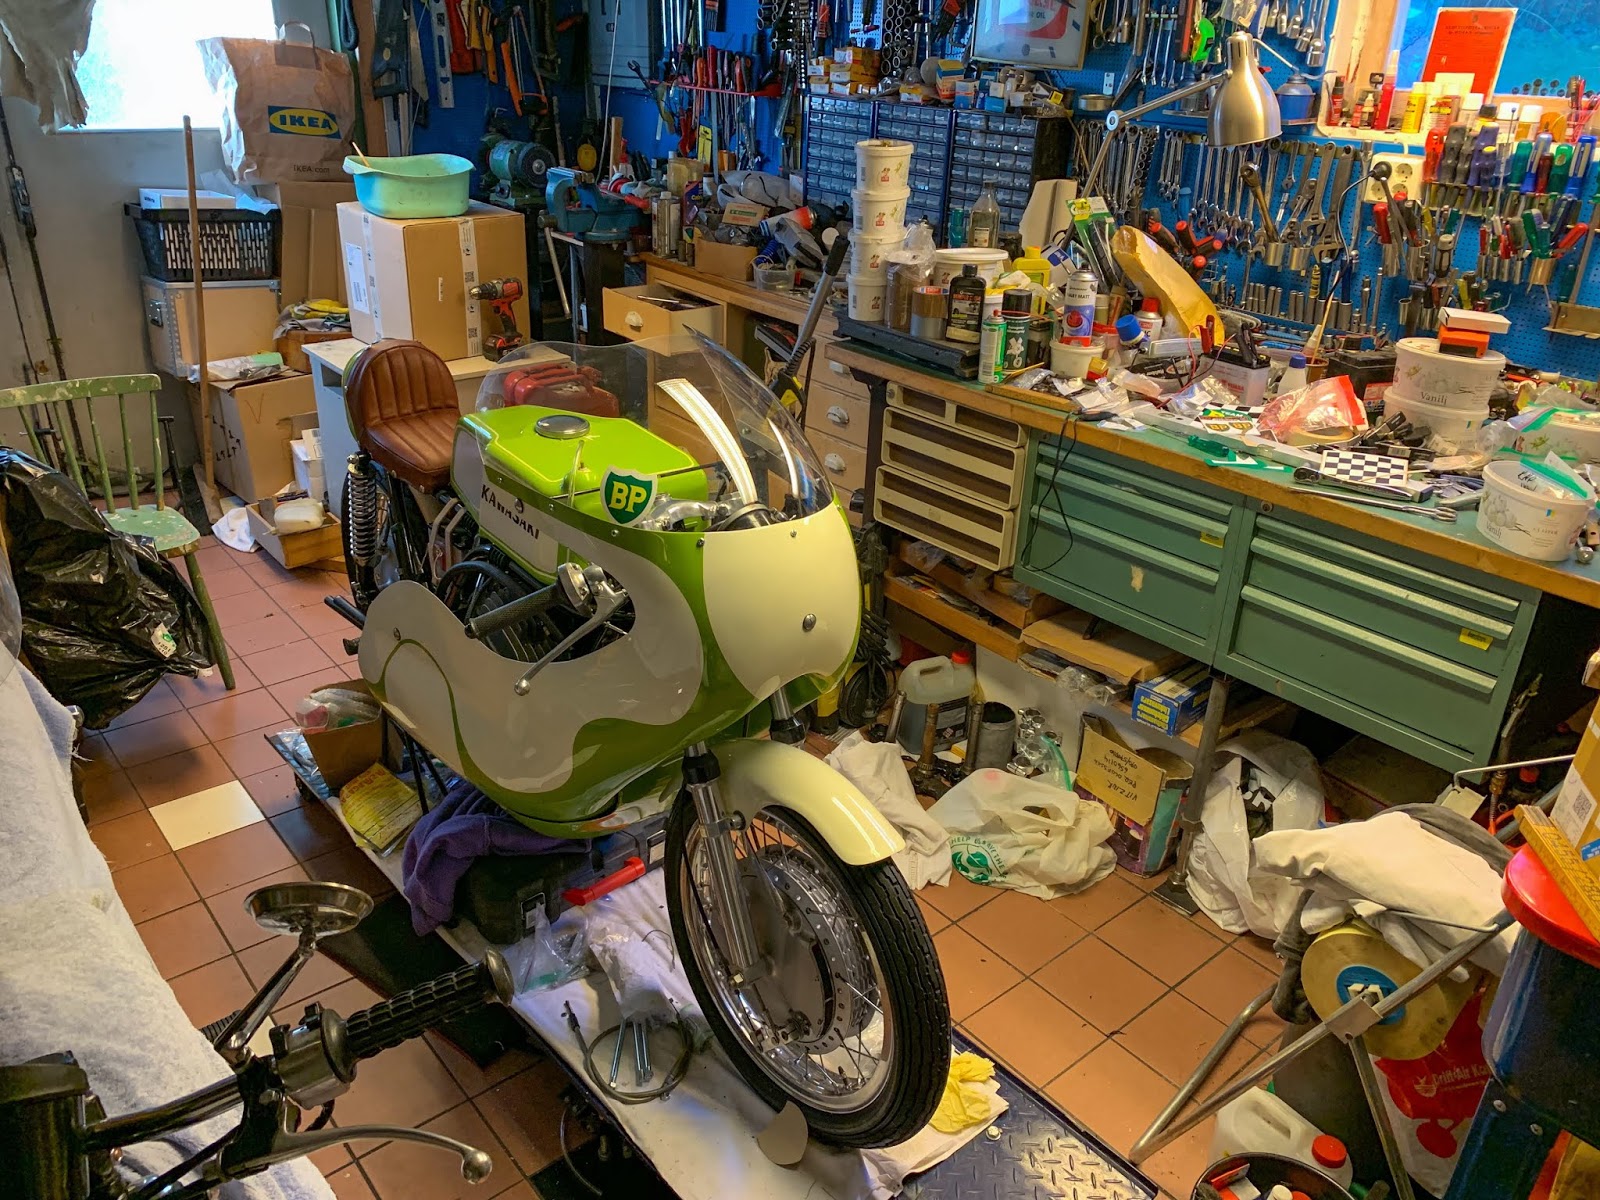
Because it sits at the moment. Roughly accomplished and prepared for its first start-up in over 40 years.
Nervous? Yeah, you wager!
Three years of loving labor and tinkering within the storage and on the pc, assembly numerous great folks everywhere in the world sharing the identical ardour for these outdated race bikes.
It’s a great story coming to an finish very quickly.
Later final night time I received a name from “Tullar´n”.
He’ll make me a few new wind screens! Yeah, I ordered two… Simply to make sure.
And the subsequent time I’ll use a ceramic tile drill bit! By no means use an unusual drill bit on plexi glass!
I´m fairly certain he talked about this to me once I received the display screen final winter, however I’ve forgotten all about it! You study as you go alongside. All the time.
Now, the weekend is off for some household time. I really do want a break from the storage proper now.
Hopefully I´ll have the ability to try to begin it up subsequent week once I can borrow Janne´s pit starter. I´m NOT going to take a position 1000£ to get my very own.
There´s a restrict to what’s economically viable .
Have a pleasant weekend and keep cool within the warmth!!
/Per
[ad_2]