
[ad_1]

For some motive, the earlier proprietor of my springer determined to color the whole factor with tan spray paint. Springs, fork legs, rockers, alemite fittings and even the within bearings surfaces all bought a great coat of paint. I needed to return the entrance finish to a extra appropriate look, which meant that the springs wanted to be parkerized and the remainder of the elements wanted a coating of black enamel. I am not a lot of a painter, so I made a decision to ship out the black elements for powder coating whereas I tackled the springs.
The wonderful thing about spray paint is that with just a little lacquer thinner and a scotch-pad you possibly can take away it pretty simply. I crammed a glass container with lacquer thinner and simply let the elements soak for ten to fifteen minutes earlier than scrubbing them with the scotch-brite pad. You will need to be sure to the place gloves throughout the whole course of.

This is how the elements taken care of scrubbing. There was nonetheless some primer and a few older black paint in spots, so the whole lot went within the blasting cupboard for a ultimate cleansing.

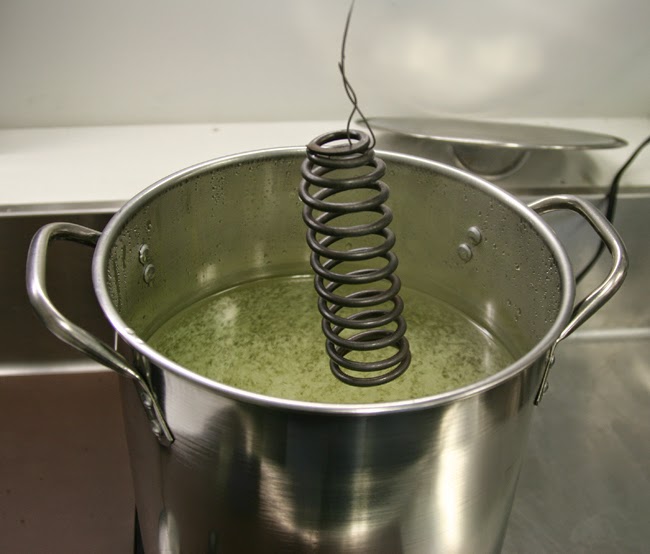
Then it was on to parkerizing. I already put collectively a separate article on the whole course of which you’ll learn right here: Learn how to Parkerize Bike Components
Within the meantime, my different elements got here again from being powder coated. Earlier than I began reassembling the entrance finish, I changed my spring rods utilizing new rods from Colony Machine. Set up was very simple, you merely insert the rods by the tapered holes on the spring fork after which tighten them into place utilizing the equipped hex nuts. My unique hex nuts had been welded to maintain them from loosening, so figured it might be a good suggestion to Loctite the brand new hex nuts to ensure they did not loosen up on the highway.

As soon as the spring rods had been in place, I slid the buffer springs down onto the spring rods. They’re held in place with flat verify springs which match right into a flat part milled into the spring rod.

Subsequent got here the most important springs, often called cushion springs. These slide down the spring rods and over the buffer springs. Now the whole spring fork will be put in on the the inflexible fork. I lined the inflexible fork legs with a towel to make it possible for I did not harm the end throughout meeting.

After slipping the spring rod bushings onto the spring rods it was time for the laborious half, compressing the springs. This step will be probably harmful for the reason that cushion springs are very sturdy and must be compressed a great deal to complete the set up. Typically a big clamp is used to compress the springs, but when one thing goes incorrect, elements can find yourself flying round your store. I got here up with a barely totally different set up methodology which was fairly a bit safer and did not require any heavy obligation clamps.
As a substitute of compressing the bigger cushion springs, I compressed the higher fork springs. First I inserted zip-ties into the spring on either side in order that they could possibly be tightened on the center coils of the spring. Then I compressed the spring utilizing a Fast-Grip hand clamp. Whereas the spring was compressed, I tightened each zip-ties, ensuring they had been spaced equally on either side of the spring. As soon as the zip-ties had been tightened, the clamp was launched and the springs slid onto the spring rods.

I additionally used one other Fast-Grip hand clamp to maintain the cushion springs lined up appropriately whereas I used to be placing on the spring rod higher finish nuts.

As soon as the higher spring rod nuts had been threaded onto the spring rods, I eliminated the zip-ties from the higher fork springs and launched the Fast-Grip. The ultimate step to finish the spring set up was so as to add the higher spring rod lock nuts.

Subsequent I put in the rockers on the decrease finish. Beforehand I had changed all of the rocker plate bushings utilizing a customized software which I detailed right here: Do It Your self Instruments for Rebuilding Harley-Davidson Springer Entrance Ends
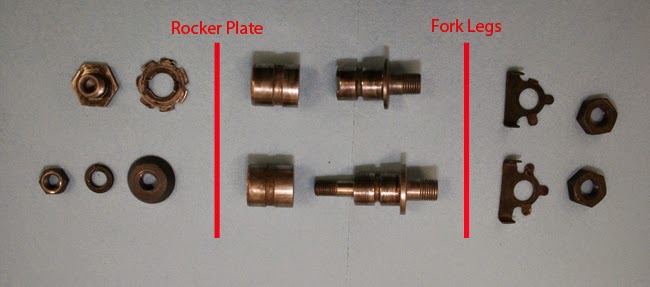
Utilizing the software, I pressed out the previous worn bearings and pressed in new alternative bearings from Colony Machine. I then reassembled the rocker plates utilizing the next structure. Be aware that the rocker plate with the offset goes on the best hand facet of the motorbike.
This is what the rocker plates appear like on the surface of the fork.

This is what they appear like on the within of the fork.

Final step was to put in new alemite fittings and to bend within the tabs on the nut locks. That accomplished the entrance finish rebuild and it was able to be put in on the body.

Purchasing Listing
Colony Machine
7606-26 Full Rocker Rebuilding Package
9862-8 Springer Spring Rod Package
9417-4 Springer Spring Retainer and Prime Nut Set
7706-2 Springer Spring Rod Bushings
Sponsored By

[ad_2]