
[ad_1]
One of many first upgrades I made to my 1964 Harley-Davidson Duo-Glide was to alter my main drive from a sequence to a belt. This improve offers two main benefits over the inventory chain drive, much less vibration at increased speeds and fewer upkeep. My principal motivation was much less vibration to make freeway using a bit extra pleasing. The much less upkeep can also be a giant plus as a result of adjusting the chain drive is a protracted course of. If you happen to haven’t adjusted a sequence drive on a classic bike, it’s laborious to think about it’s a large deal, however on these older bikes there may be not a main chain adjuster like on late mannequin bikes. As an alternative, it’s a must to alter the place of the transmission to regulate the first chain. After you end adjusting your main chain, then it’s a must to readjust your clutch and rear chain.
On a inventory bike, the first chain is lubricated by engine oil that’s sprayed into the first by an engine breather. To maintain extra oil from build up within the main, there’s a drain on the backside of the first which permits the oil to empty out and down a tube onto the rear chain, thus lubricating it as effectively. This is without doubt one of the causes previous bikes appear to be consistently leaking oil, nevertheless it’s really not a leak it’s a self oiling chain system.
Since you can not simply block off the engine breather, I made a decision to reroute it across the new belt drive, utilizing quite a lot of copper plumbing fittings that I picked up on the native ironmongery store. If you understand how to solder copper pipe, this can be a very straightforward strategy to make a breather bypass. If you happen to’ve by no means soldered copper pipe, then I might recommend trying out a number of the “Do It Your self” kind web sites earlier than beginning this undertaking.
To get began, you’ll wish to decide up the next:
1′ size of 1/2″ ID copper pipe
two 1/2″ ID copper 90 diploma elbows
two 1/2″ to 1/4″ ID copper reducers
6″size of 1/4″ ID copper pipe
2′ size of 1/4″ OD copper tubing
6″ size 1/2″ ID rubber hose
two hose clamps
Plus customary instruments and supplies for soldering copper pipe.
Now comes the enjoyable half, getting all of this to suit inside your main cowl. It took quite a lot of trial and error till I bought every little thing to suit excellent. Earlier than you begin slicing pipe, you’ll wish to take away the small elbow on the top of the engine breather, so that you’re left with only a straight piece of pipe operating into the first.
Step one is to chop about 1/4″ off the massive finish of every reducer. With out this step, the reducer plus the 90 diploma elbow will likely be too lengthy to suit inside the first cowl.
 |
| Trim reducers by at the very least 1/4″ |
Subsequent I lower two items of the 1/2″ ID pipe to slot in between the reducer and the 90 diploma elbow. You’ll need the reducer and elbow to suit collectively flush to elminate as a lot further size as attainable. As soon as prepared, you may solder the 2 joints collectively and set them apart to chill.
At this level it can save you somewhat time becoming the principle size of pipe, if you may get somebody to provide you a hand. Mainly simply maintain the 2 completed reducer/elbows on the appropriate areas and have your helper measure the gap between them. After you have a tough measurement, you can begin becoming the pipe, trimming as essential, till the highest reducer strains up with the engine breather and the decrease reducer strains up with the drain gap. Be sure you don’t solder the principle pipe to the reducer/elbows till you end the subsequent step.
The final piece to suit is a brief part of 1/4″ ID pipe. This may fill the hole between the decrease reducer and the drain gap. It’s important that this piece suits precisely. Whether it is too lengthy, the decrease elbow won’t clear the first cowl. Whether it is too brief, the within of the decrease elbow can contact the belt.
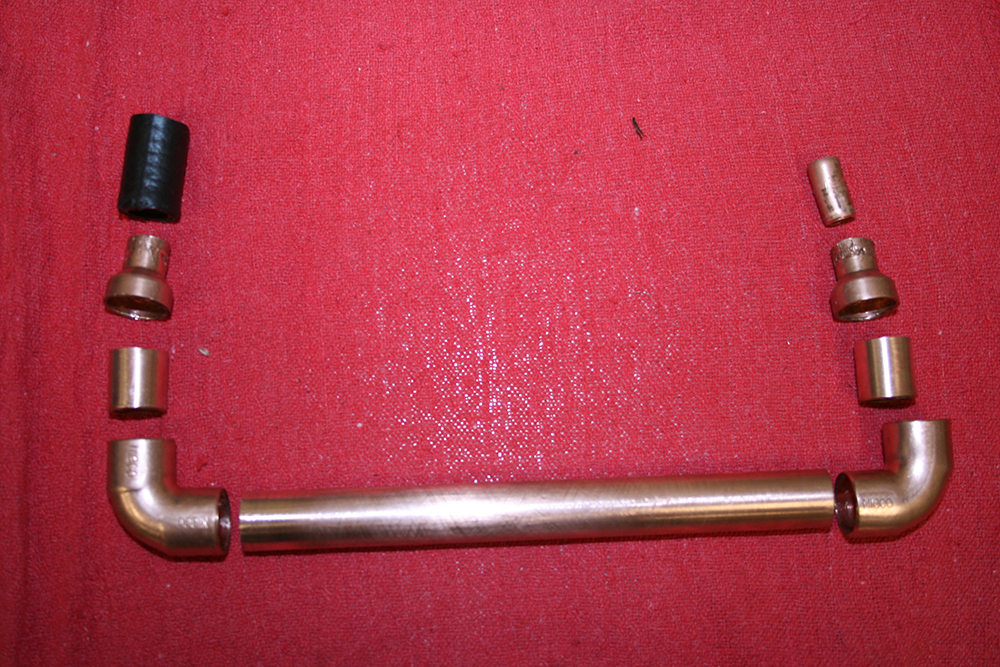 |
| Listed here are all of the items, lower and able to assemble |
With the final two items of pipe lower, dry match every little thing collectively and mark the rotation of the elbows on the principle pipe. Match the first cowl again on the bike and be sure that nothing is coming involved with the belt and you could screw the duvet down. I used a pair of channel lock pliers to barely crush the decrease elbow to achieve extra clearance between it and the belt. If you find yourself glad that every little thing goes to suit, solder all of it collectively.
 |
| Soldered and able to set up |
Bending the size of copper tubing which is able to go from the first drain to your rear chain is the subsequent step. It took three makes an attempt for me to bend one which I may cleanly path to the rear chain.
 |
| Copper tubing used to route oil from the first drain to the rear chain |
Understand that the copper tubing should be soldered to the decrease reducer after it has been put in on the bike. I selected to maximise the gap to the primary bend, in order that I may have the copper tubing stick just a few inches outdoors of the first for meeting. Be sure you use one thing to guard your belt whereas soldering this final joint. I lined mine with a welding glove and made positive to work as shortly as attainable with the torch.
 |
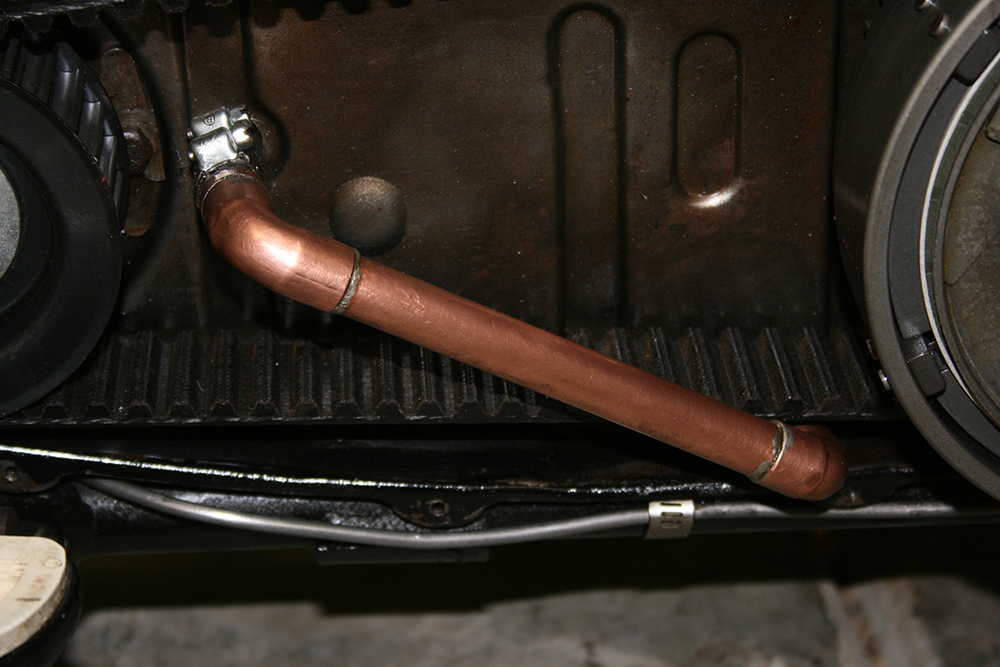
| Copper tubing positioned to grease the rear chain |
The final step is to chop a brief piece of rubber hose that you’ll use to connect the higher reducer to the engine breather. The gap right here is essential, so be sure that the reducer butts up in opposition to the engine breather when becoming the rubber hose. A few clamps will maintain all of it collectively after which your breather bypass is full.
 |
| Engine breather bypass put in and prepared for main cowl to be mounted |
[ad_2]