
[ad_1]
Share This
0
Thanks upfront for spreading the phrase!
On this Make Your Personal Bikepacking Gear (MYOBG) tutorial, Greg Maino shares a easy 10-step information to creating light-weight pogies which can be designed to be good for cold mornings and moist rides alike. Discover it right here, full with a supplies checklist, detailed images, and step-by-step directions…
Phrases and images by Greg Maino (@igmaino)
I received into making my very own gear about two years in the past. Initially, I needed to stitch my very own body luggage. However, since catching the MYOG bug, I’ve began in search of any excuse to interrupt out the stitching machine. A latest undertaking was a set of ultralight water resistant pogies. Final summer season, I headed to Iceland for a two-week bikepacking journey, and I needed one thing small and lightweight that I may get away on windy, wet stretches to maintain my fingers heat and dry. I noticed the Pogie Lites from BikeIowa, and thought I may make these. So, I grabbed my winter pogies, made a template primarily based on their dimensions, and received to it.
Regardless of having made a full set of luggage for 2 of my bikes, I’m not likely that nice at stitching. This undertaking will not be troublesome and is ideal for each novices and skilled sewers seeking to create a comparatively distinctive however high-utility merchandise. I’ve used these pogies largely for fall and early winter commuting. They’re nice for cool mornings or moist rides. Additionally, whereas they’re supposed primarily to be used on flat bars, I’ve discovered they do work on drop bars which have internally routed cables. Be aware that in case your use could be primarily with drop bars, I might suggest flaring the wrist opening barely.
Stuff You’ll Want
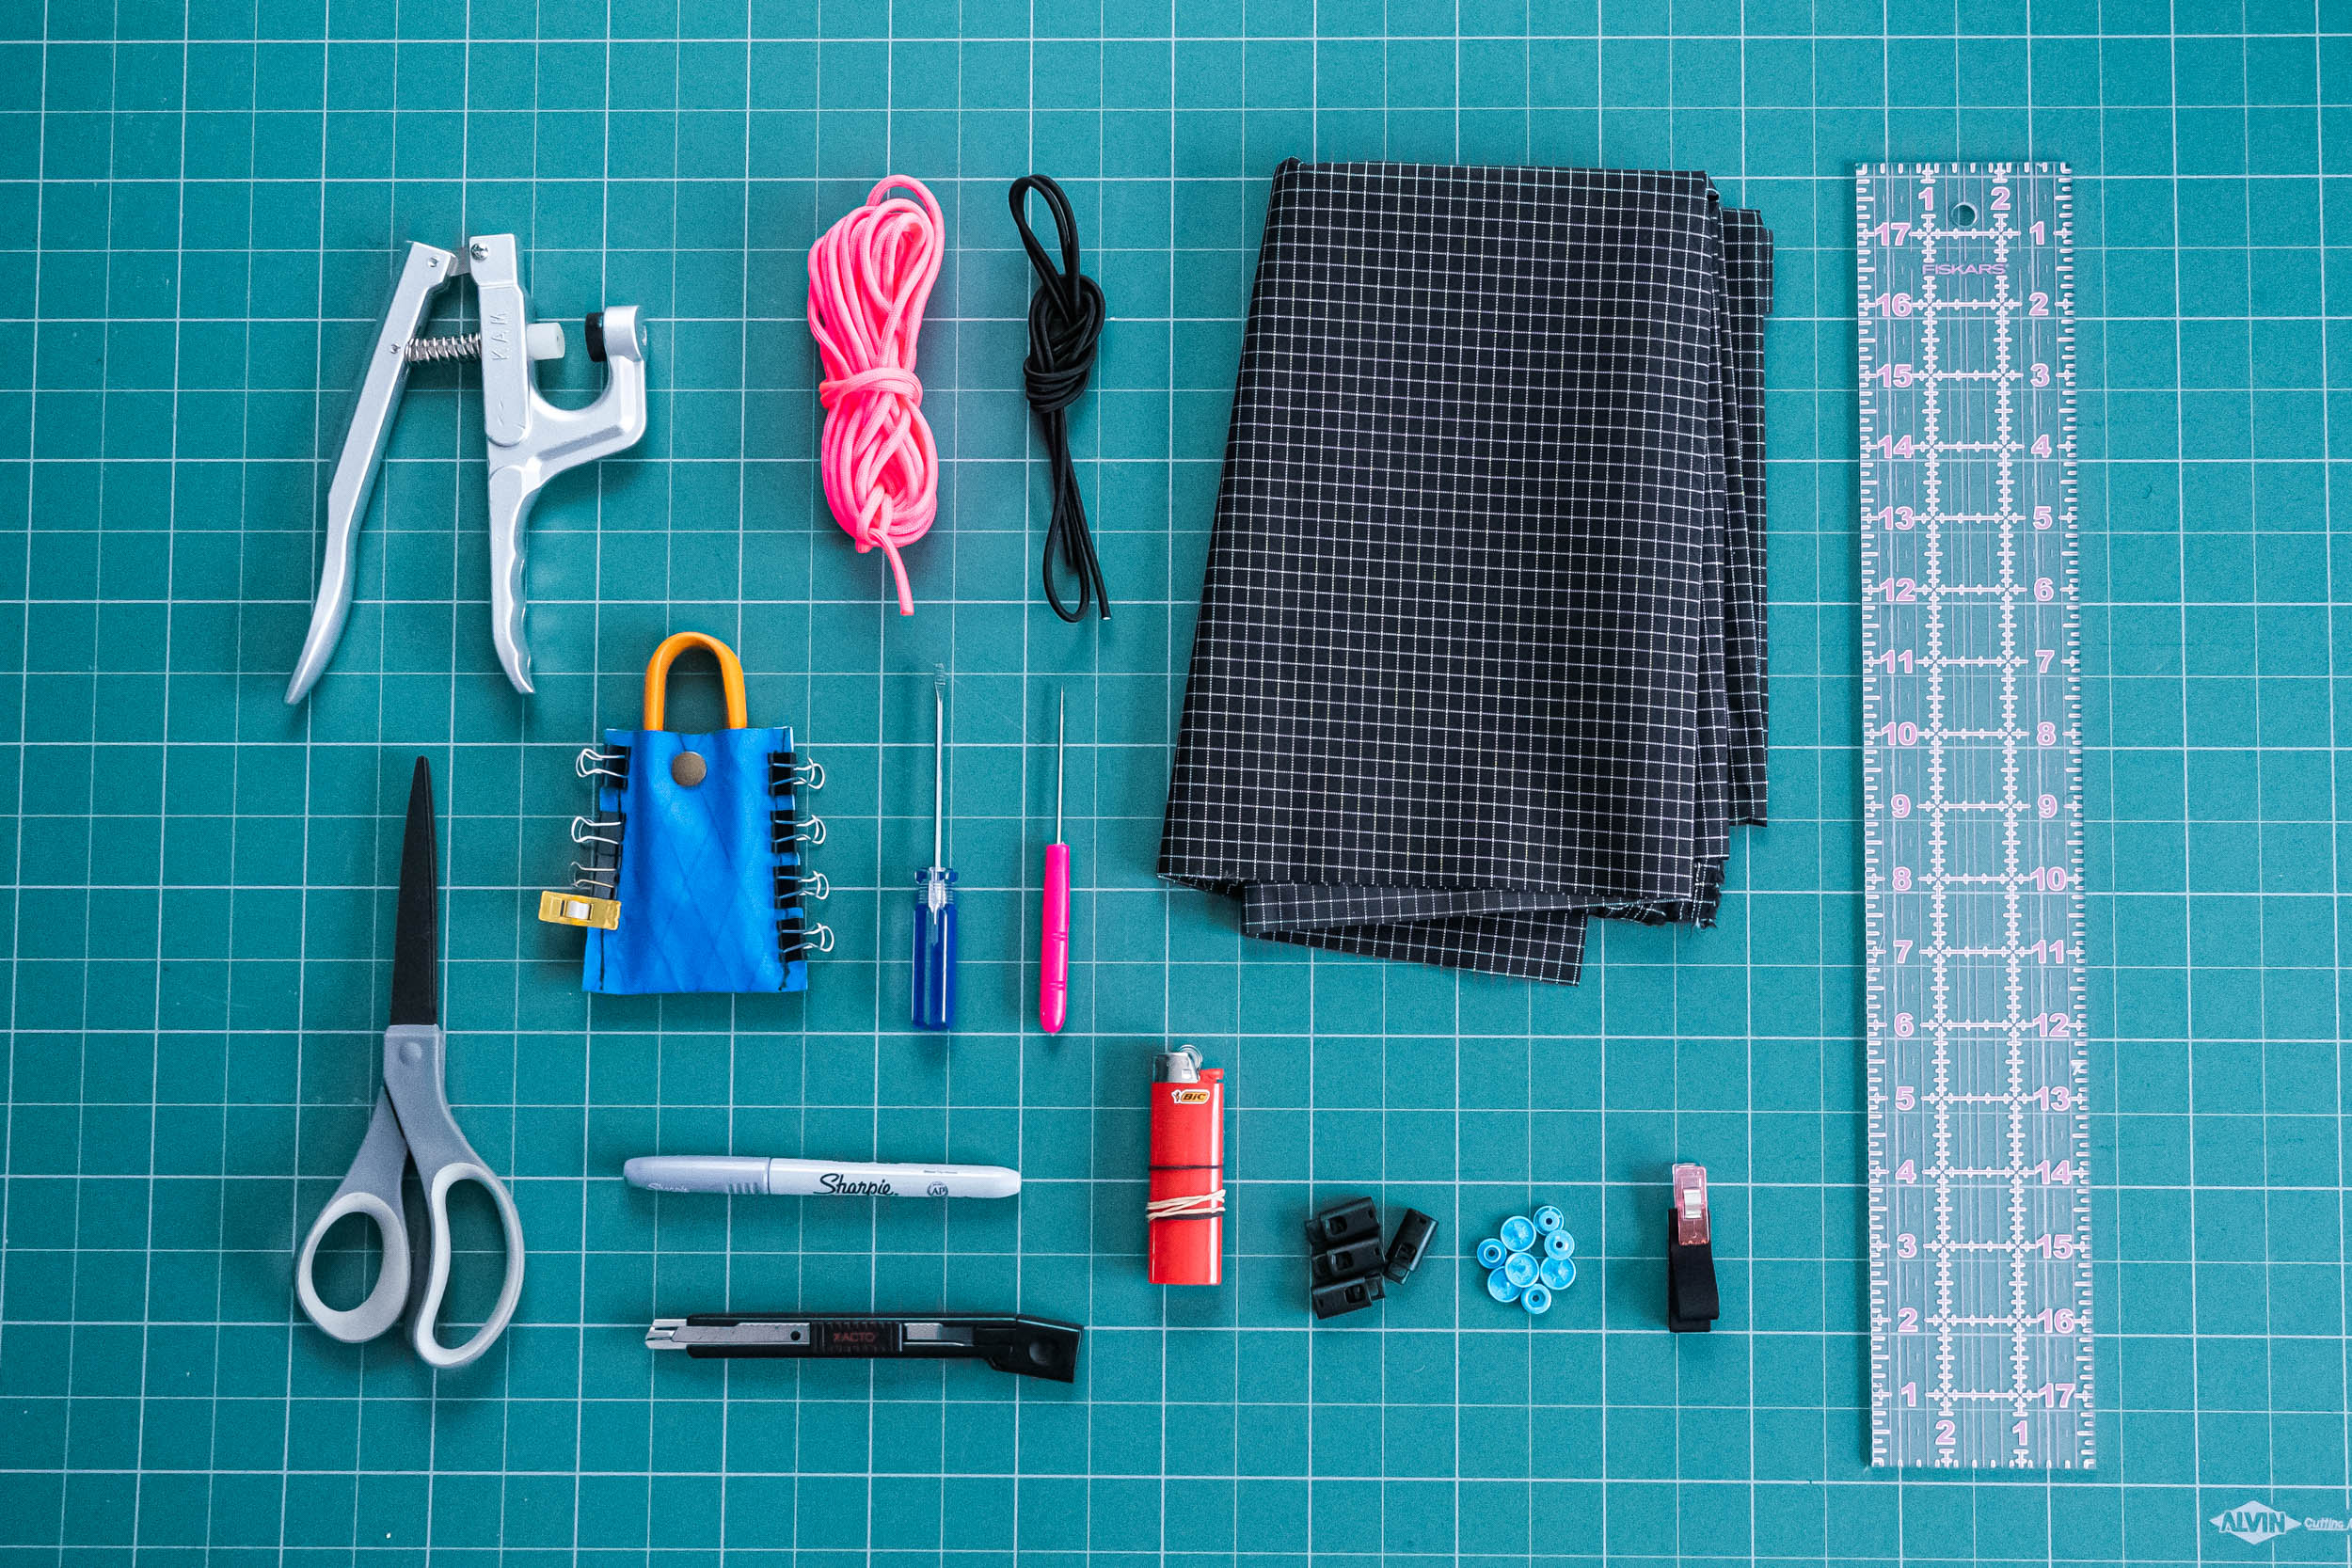
- Light-weight Coated Material: I just like the HyperD 300 from Ripstop By The Roll. It has a PU coating on the again and, whereas gentle, nonetheless has sufficient construction so the completed pogie holds its form, making it simpler to get out and in of. For this tutorial, I’m utilizing a PU coated Dyneema Gridstop Material.
- Twine Locks (4).
- 550 Paracord: You might use thinner wire or shock wire as nicely. I just like the 550 measurement because it offers a pleasant construction for the wrist opening permitting simpler entry/exit.
- Shock Twine (bungee wire): I used ⅛” shock wire, however you may use one thing smaller.
- Webbing or Grosgrain.
- Snaps: right here I’m utilizing KAM Snaps Plastic Snaps.
Step 1 – Create & Minimize Out Your Sample
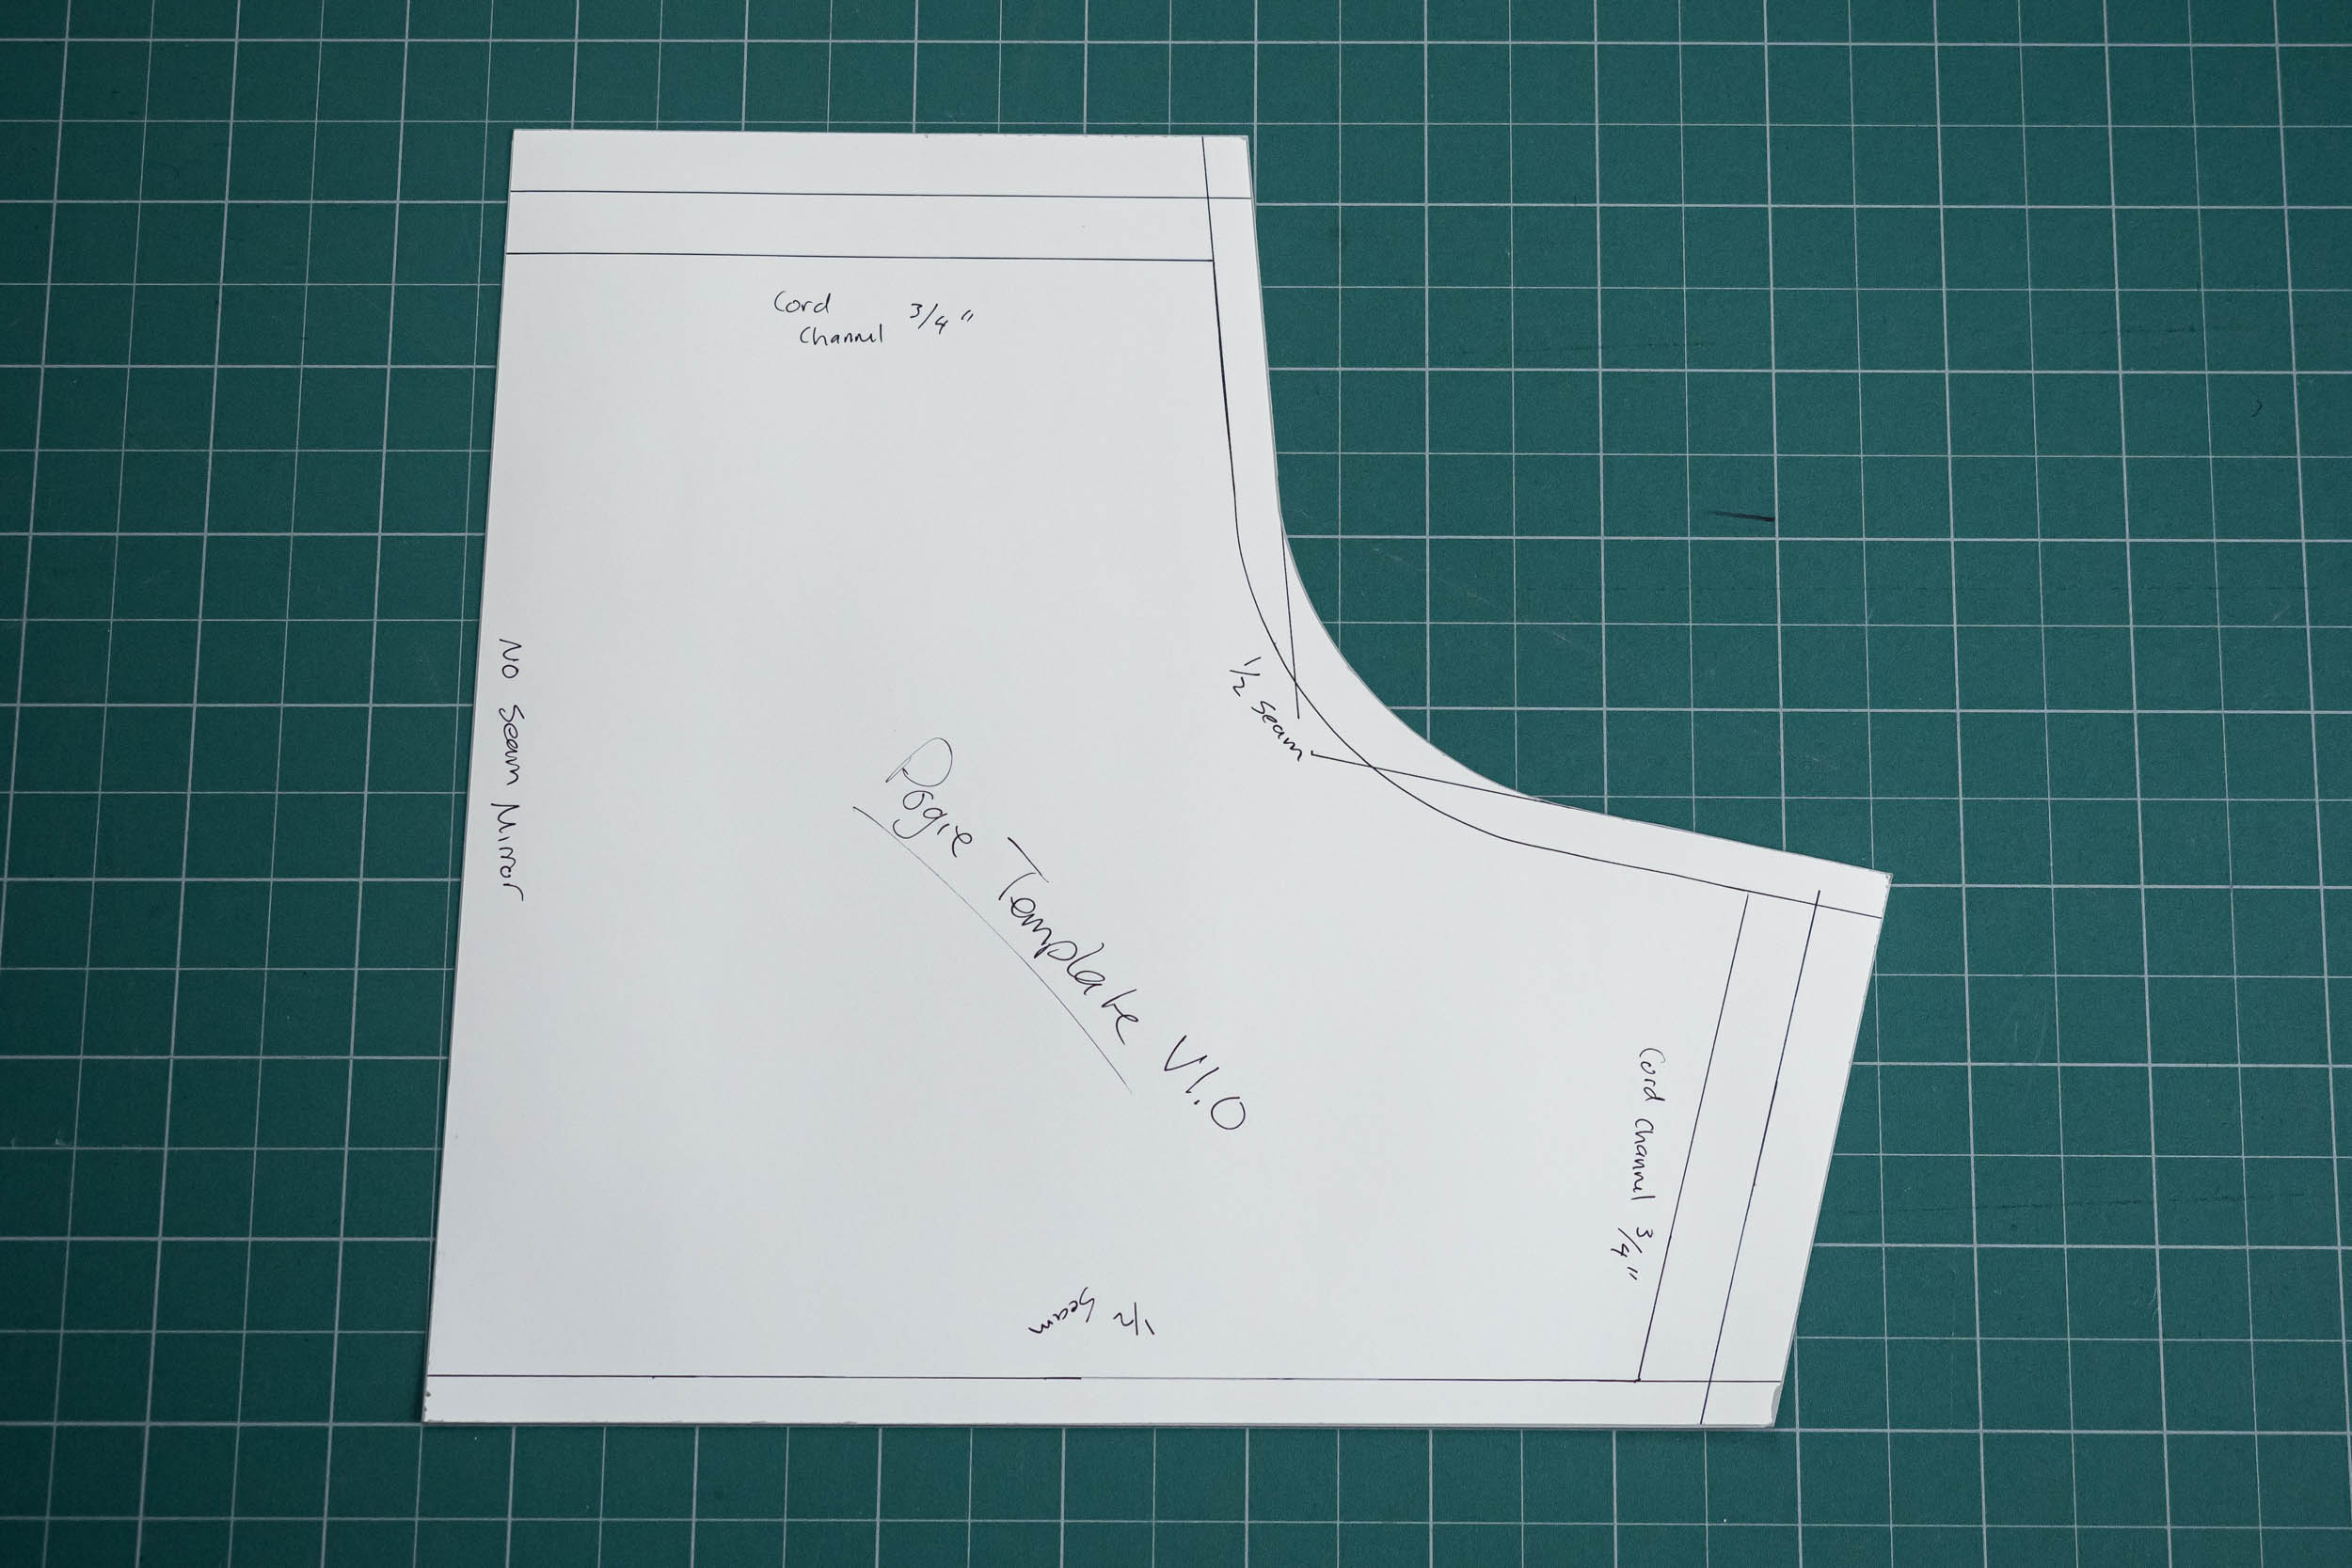
Obtain the sample right here. Print each halves of the sample on 11×17 paper at 100%. Minimize out the 2 components and tape them collectively. The scale are primarily based off of a preferred winter pogie that I already owned.
You may also use the picture of my template to create your individual (grid is 1×1 inch), and don’t be afraid to experiment and take a look at out your individual designs. Newspaper and tape are nice for prototyping. If you’ll flare the wrist opening to work higher with drop bars, now could be the time to make the modification.
Step 2 – Switch Sample To Material

The sample offered is barely one-half of what’s obligatory. When transferring the design to your material, you will have to hint the primary half, then flip alongside the “mirrored” edge, and hint the opposite half.
If you’re utilizing smaller sections of material, you possibly can all the time hint these halves individually and stitch them collectively alongside the “mirrored” seam. Simply bear in mind so as to add in your seam allowance earlier than slicing to make sure the completed dimensions are correct. A “seam allowance” is a small quantity of extra material between the seam and the sting that will probably be hidden inside. This design makes use of a ½” seam allowance on the sewn edges.
Step 3 – Minimize Out Material
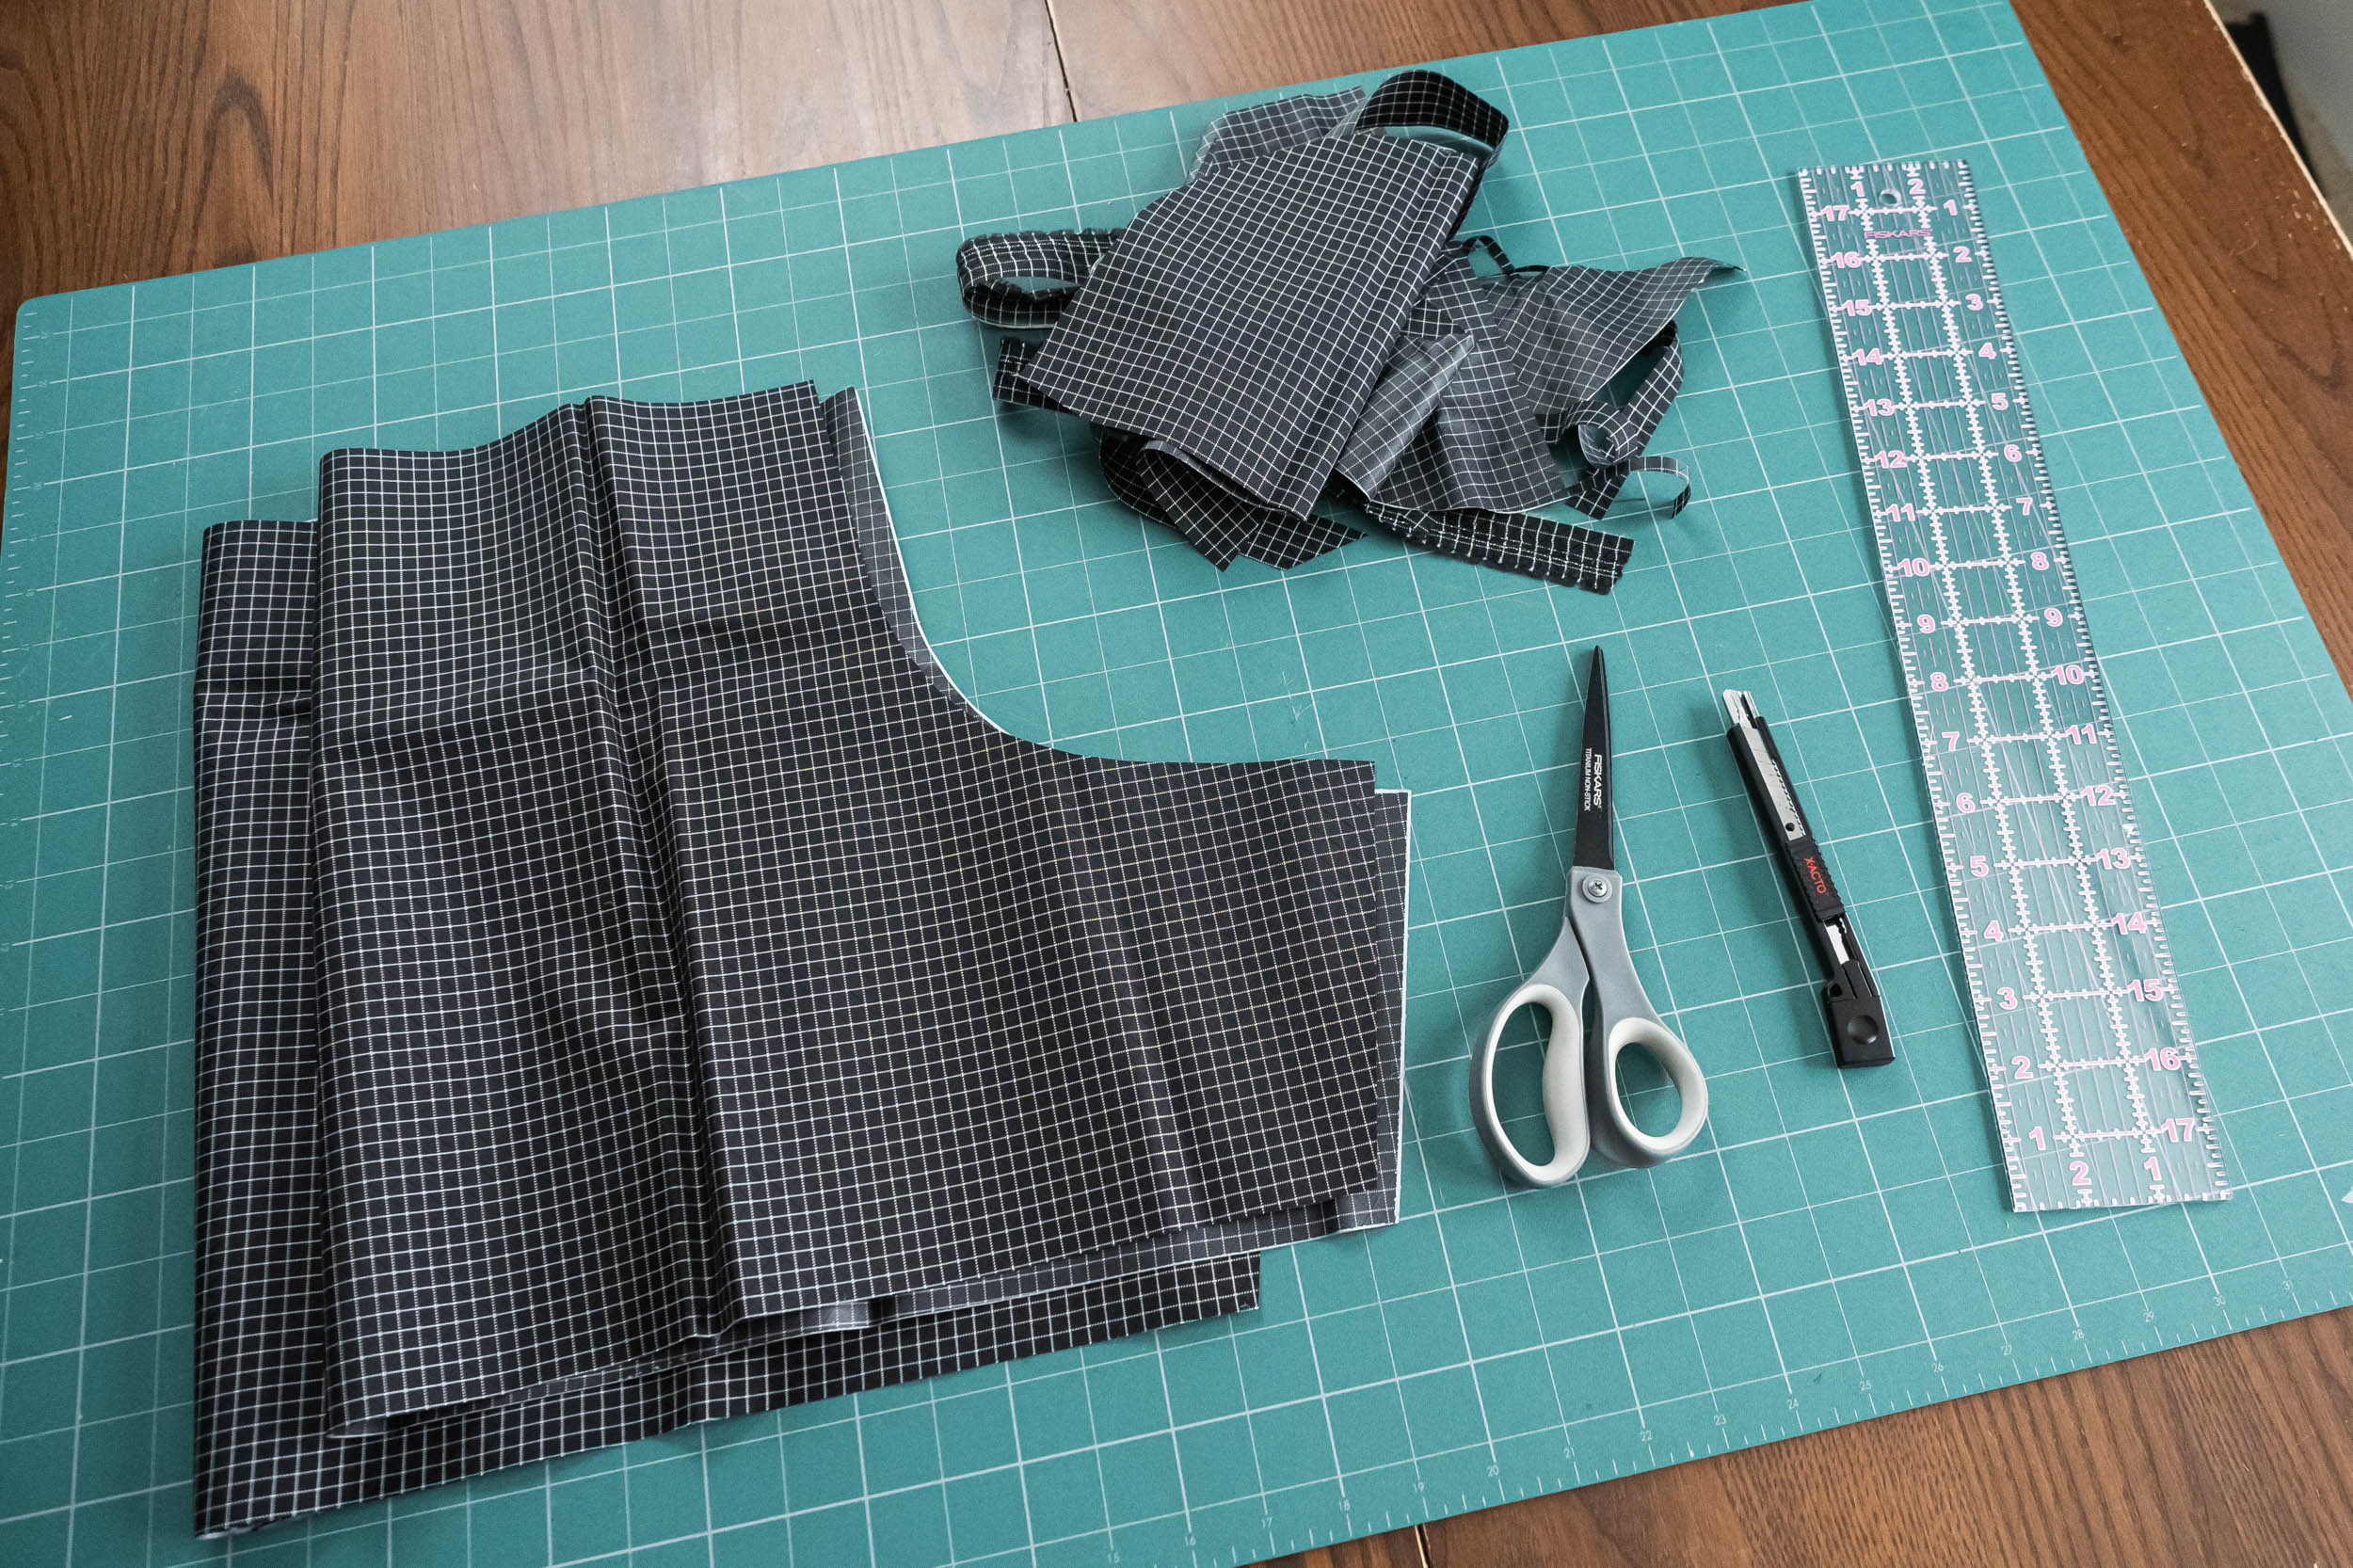
This step is fairly easy. The template offered consists of seam allowances and is able to reduce after being traced. If making modifications, or utilizing your individual design, bear in mind to incorporate your seam allowances and extra material in your wire channels earlier than slicing out the material. At all times double-check your work earlier than slicing.
Step 4 – Mark Your Seam Allowances and Twine Channel Guides

I like to make use of a contrasting marker or pen to mark my seam allowances (½ inch) and create guides for my wire channels, three strains ¾ inches aside measured ranging from the material edge.
Step 5 – Fold and Sew Twine Channel Corners
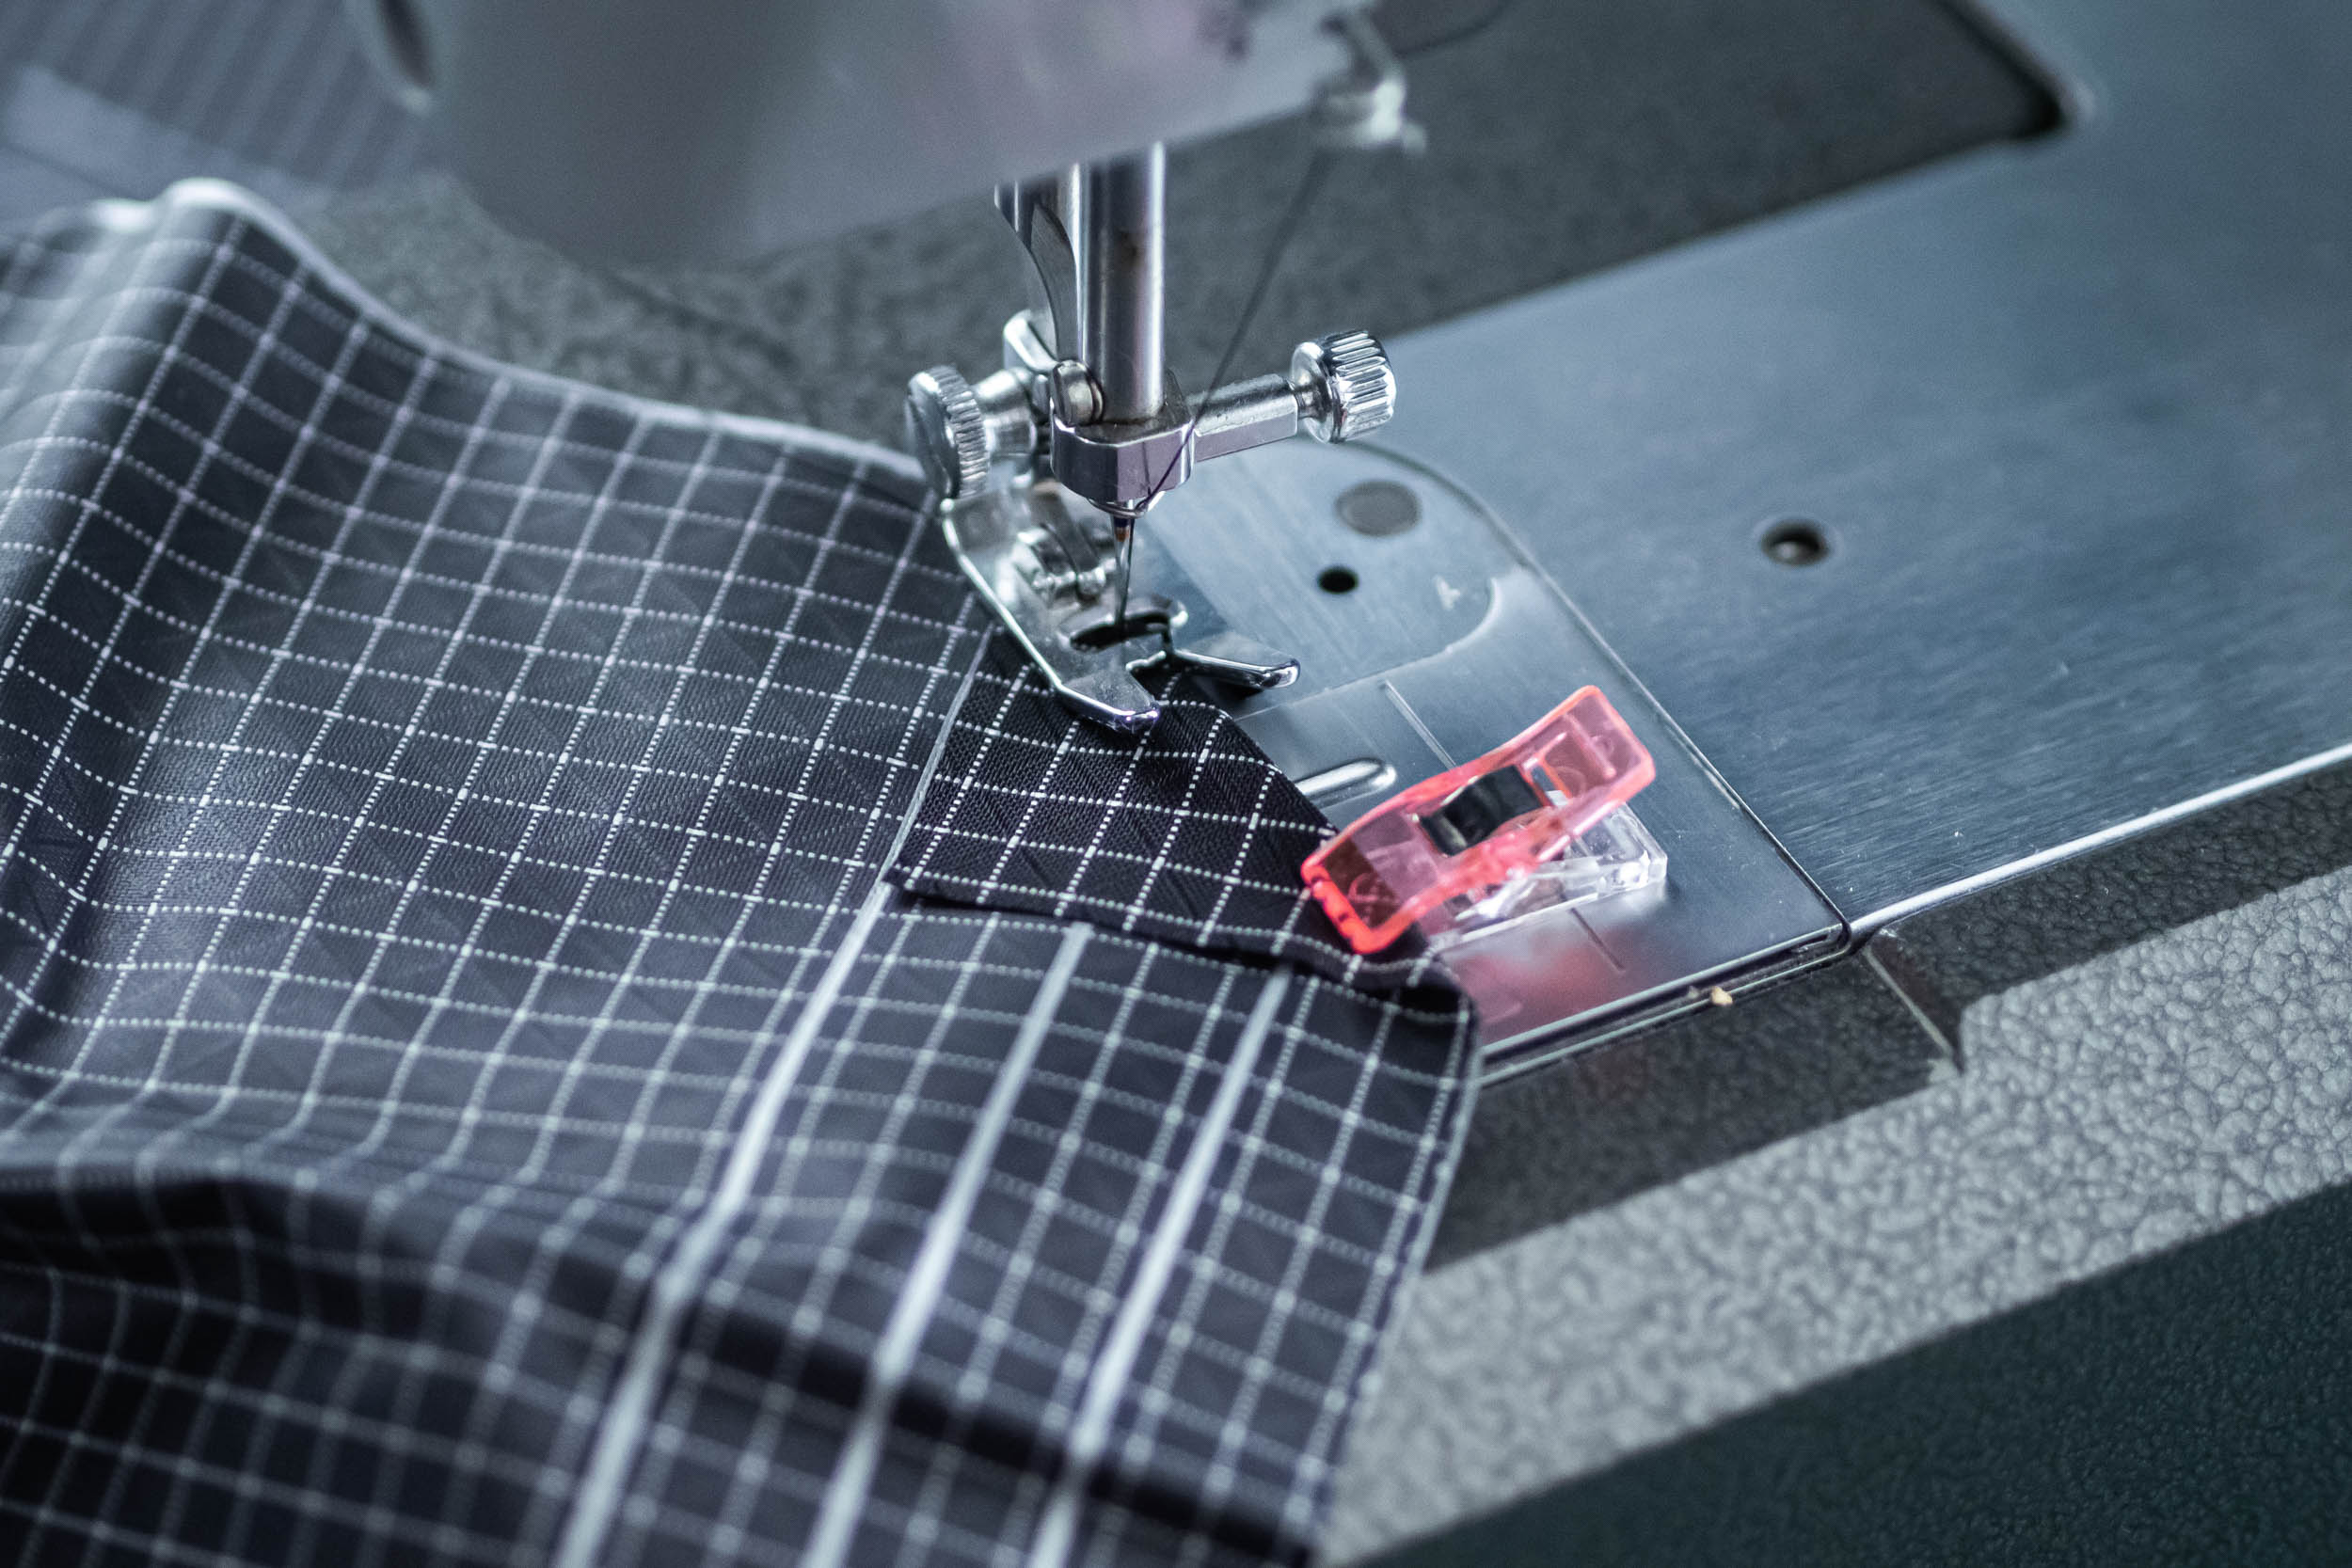

On this step, we’ll fold within the corners on the edges that may have wire channels. The underside of the fold ought to line up with the underside (third) guideline. I like to stitch these down because it makes the following step simpler. Do that for all six sides (three on every pogie) which have wire channels.
Step 6 – Fold and Sew Twine Channels
On this step, we will probably be stitching the channels by way of which the paracord will move. This may help you cinch down the openings if desired, however the major motive is to create some construction across the opening to permit the person to extra simply get their fingers out and in of the pogie.

Fold the highest edge down twice, ¾” at a time, utilizing the rules to make sure all the things is straight. Clip all the things in place after which sew alongside the underside edge as near the fold as you possibly can. Do that for all six sides.
Step 7 – Fold and Sew The Two Halves Collectively
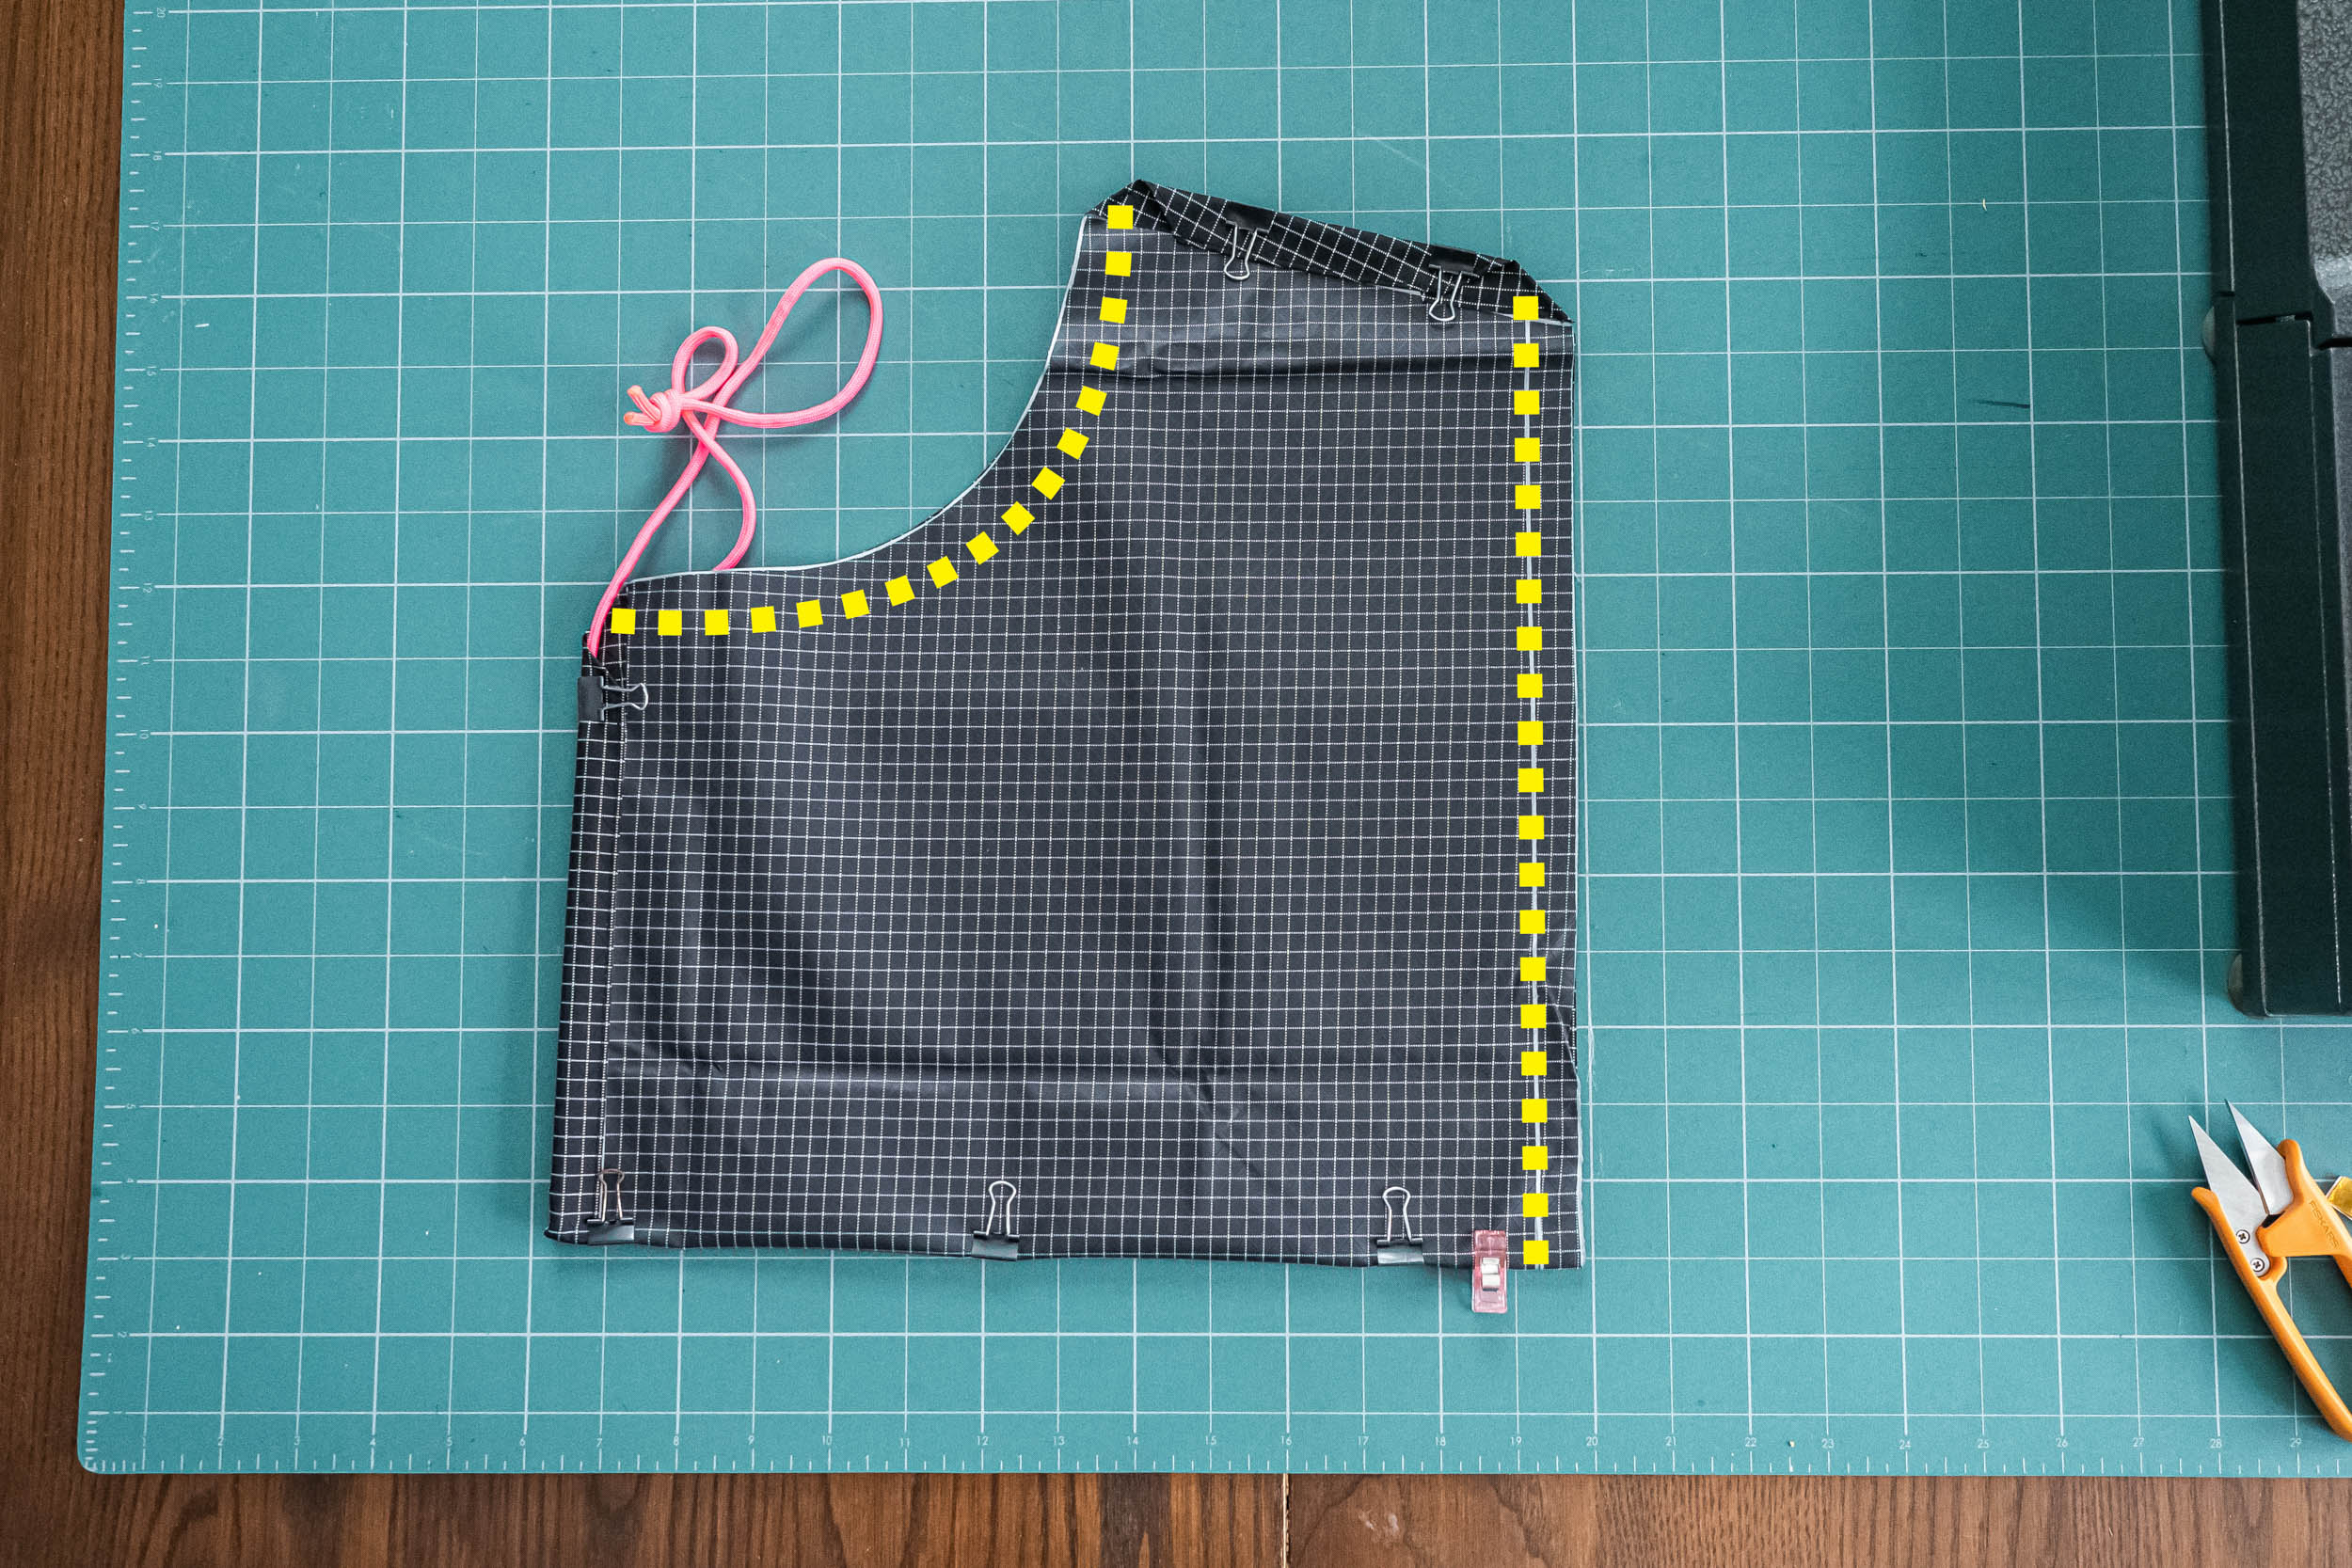
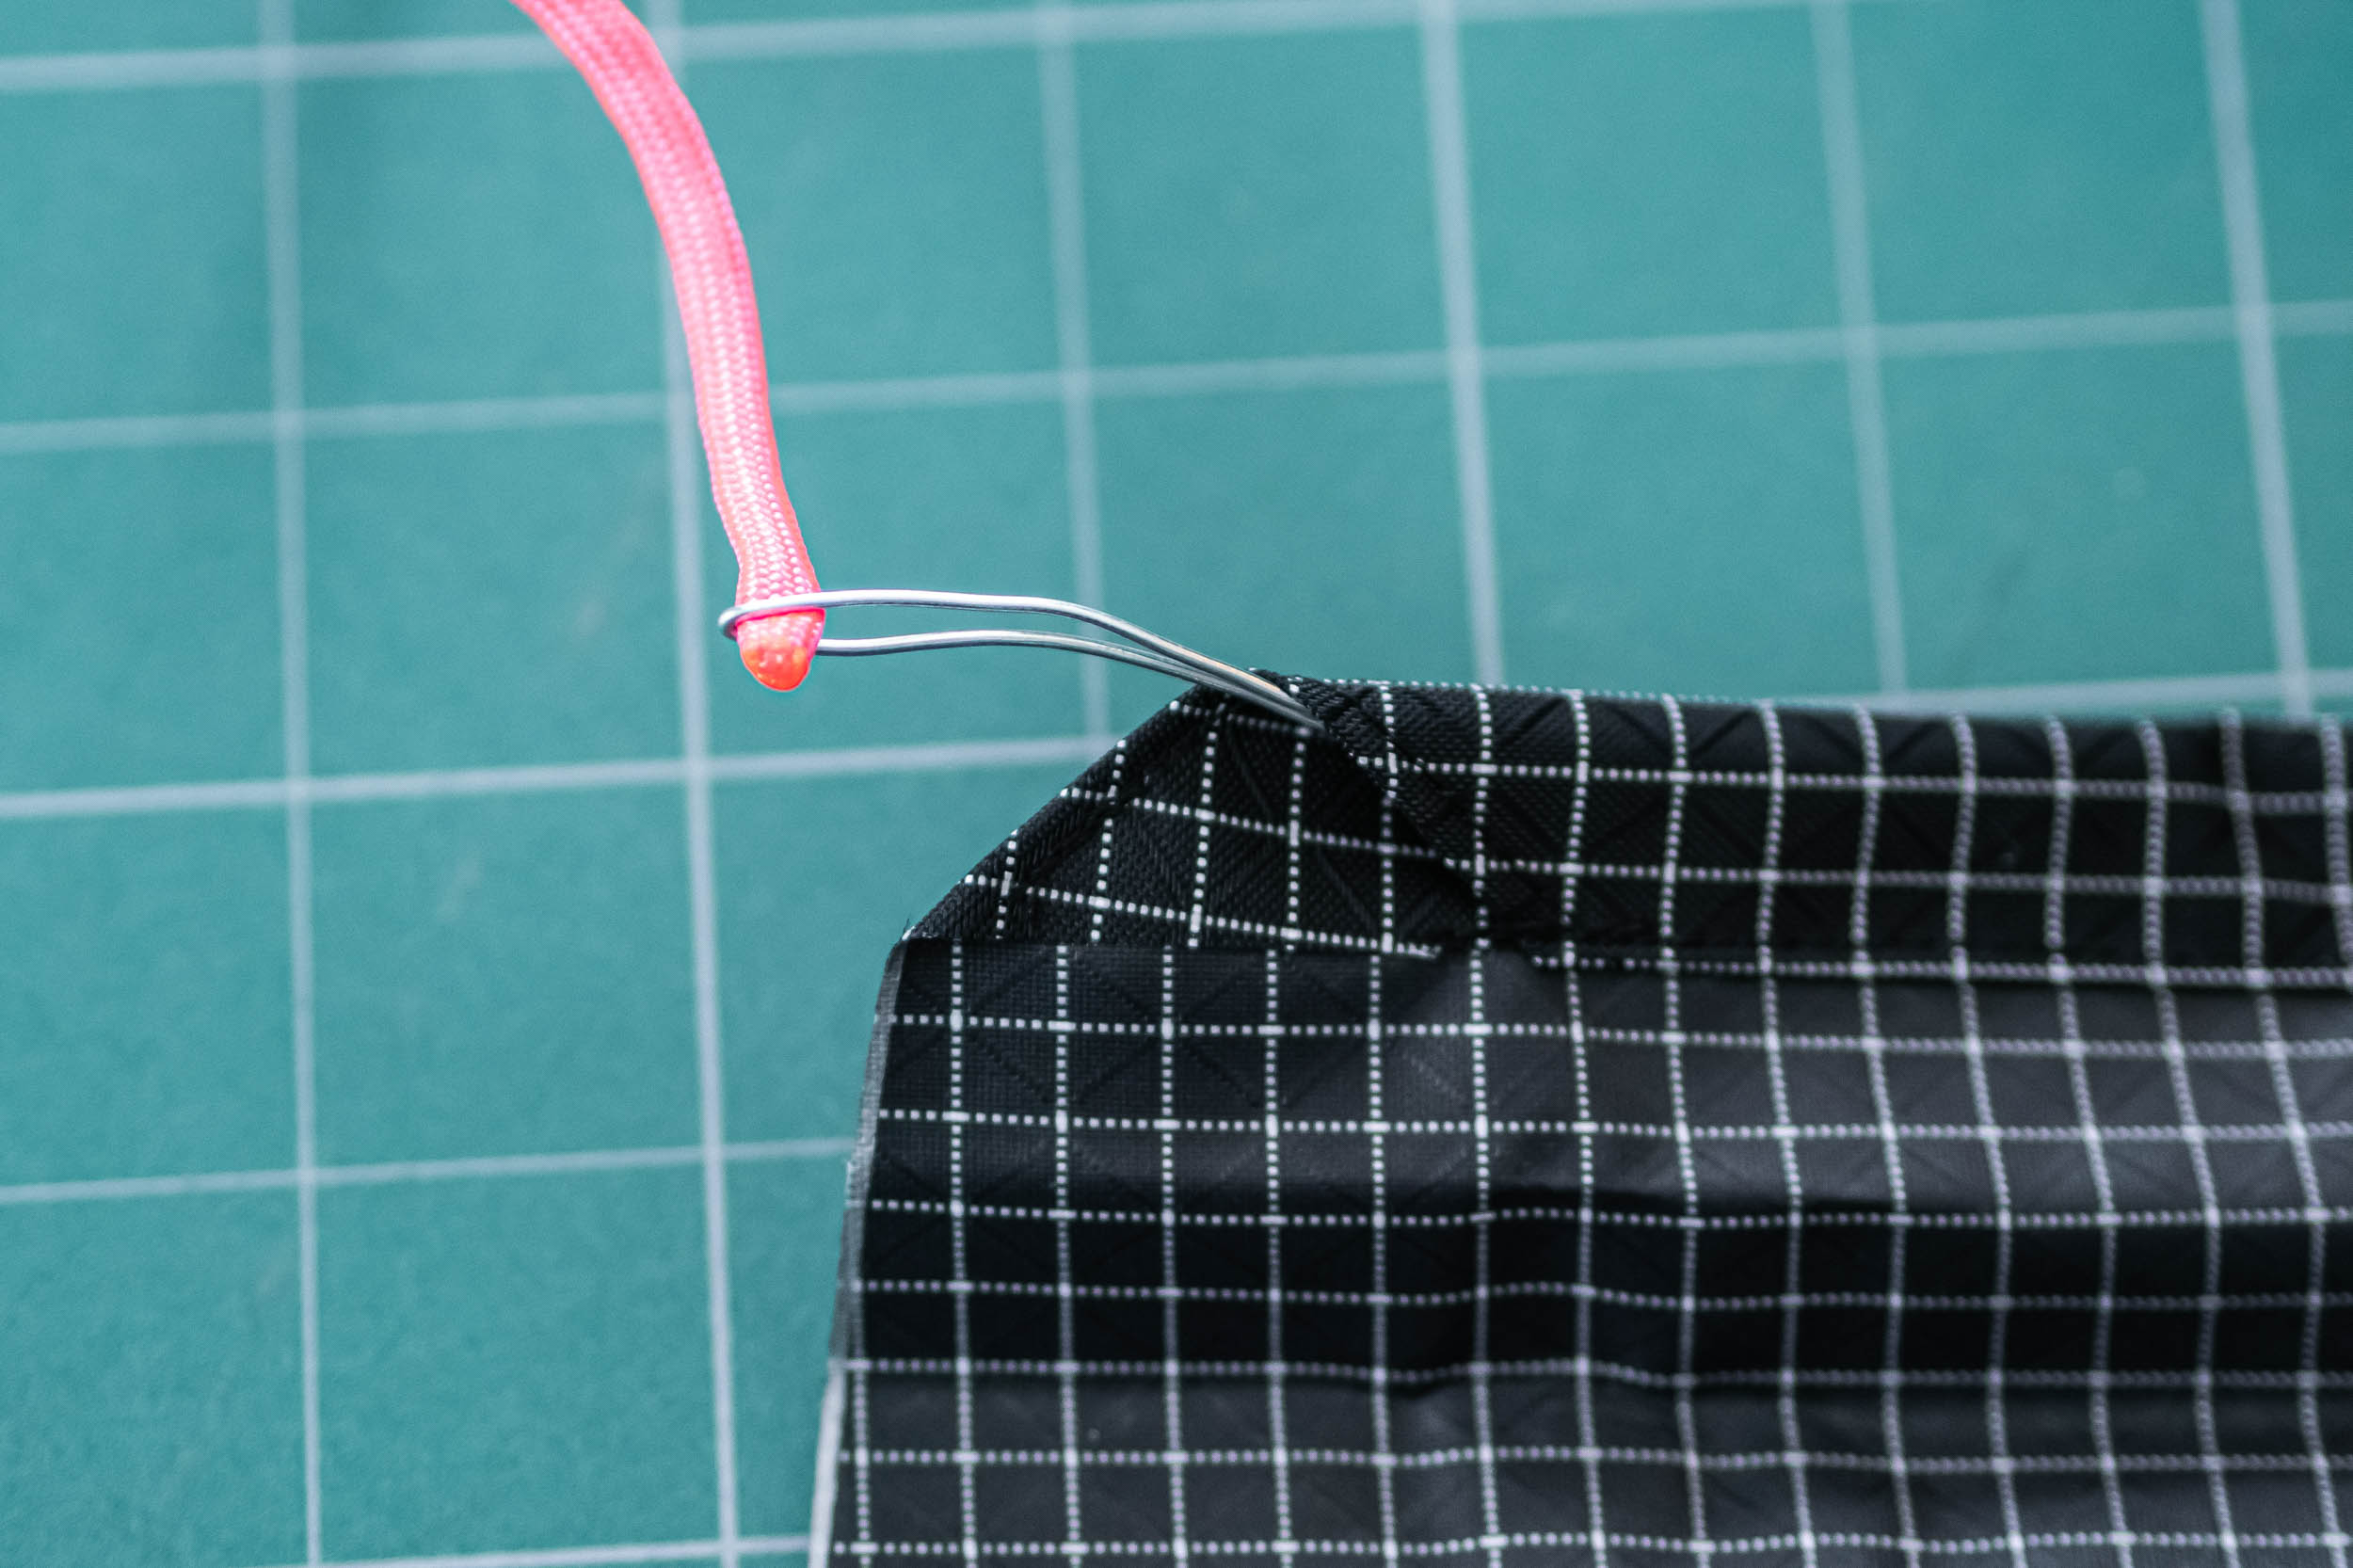
Right here, we will probably be stitching the lengthy edge that may face away from the rider whereas in use, in addition to the curved edge. I like to string my paracord by way of the lengthy edge earlier than stitching, as it’s simpler to do whereas the wire channel is straight. I used some skinny gauge image framing wire to drag the wire by way of. Tie the ends collectively to maintain it from popping out.
Fold in half. Align the perimeters. Pin or clip all the things in place. Then sew the lengthy straight edge first with ½ inch seam allowance. The straight edge is less complicated to stitch than the curved edge, and securing it first will make stitching the curved edge simpler. Subsequent, sew the curved edge once more utilizing ½ inch seam allowance.
Step 8 – Add The Inside Safety Loop
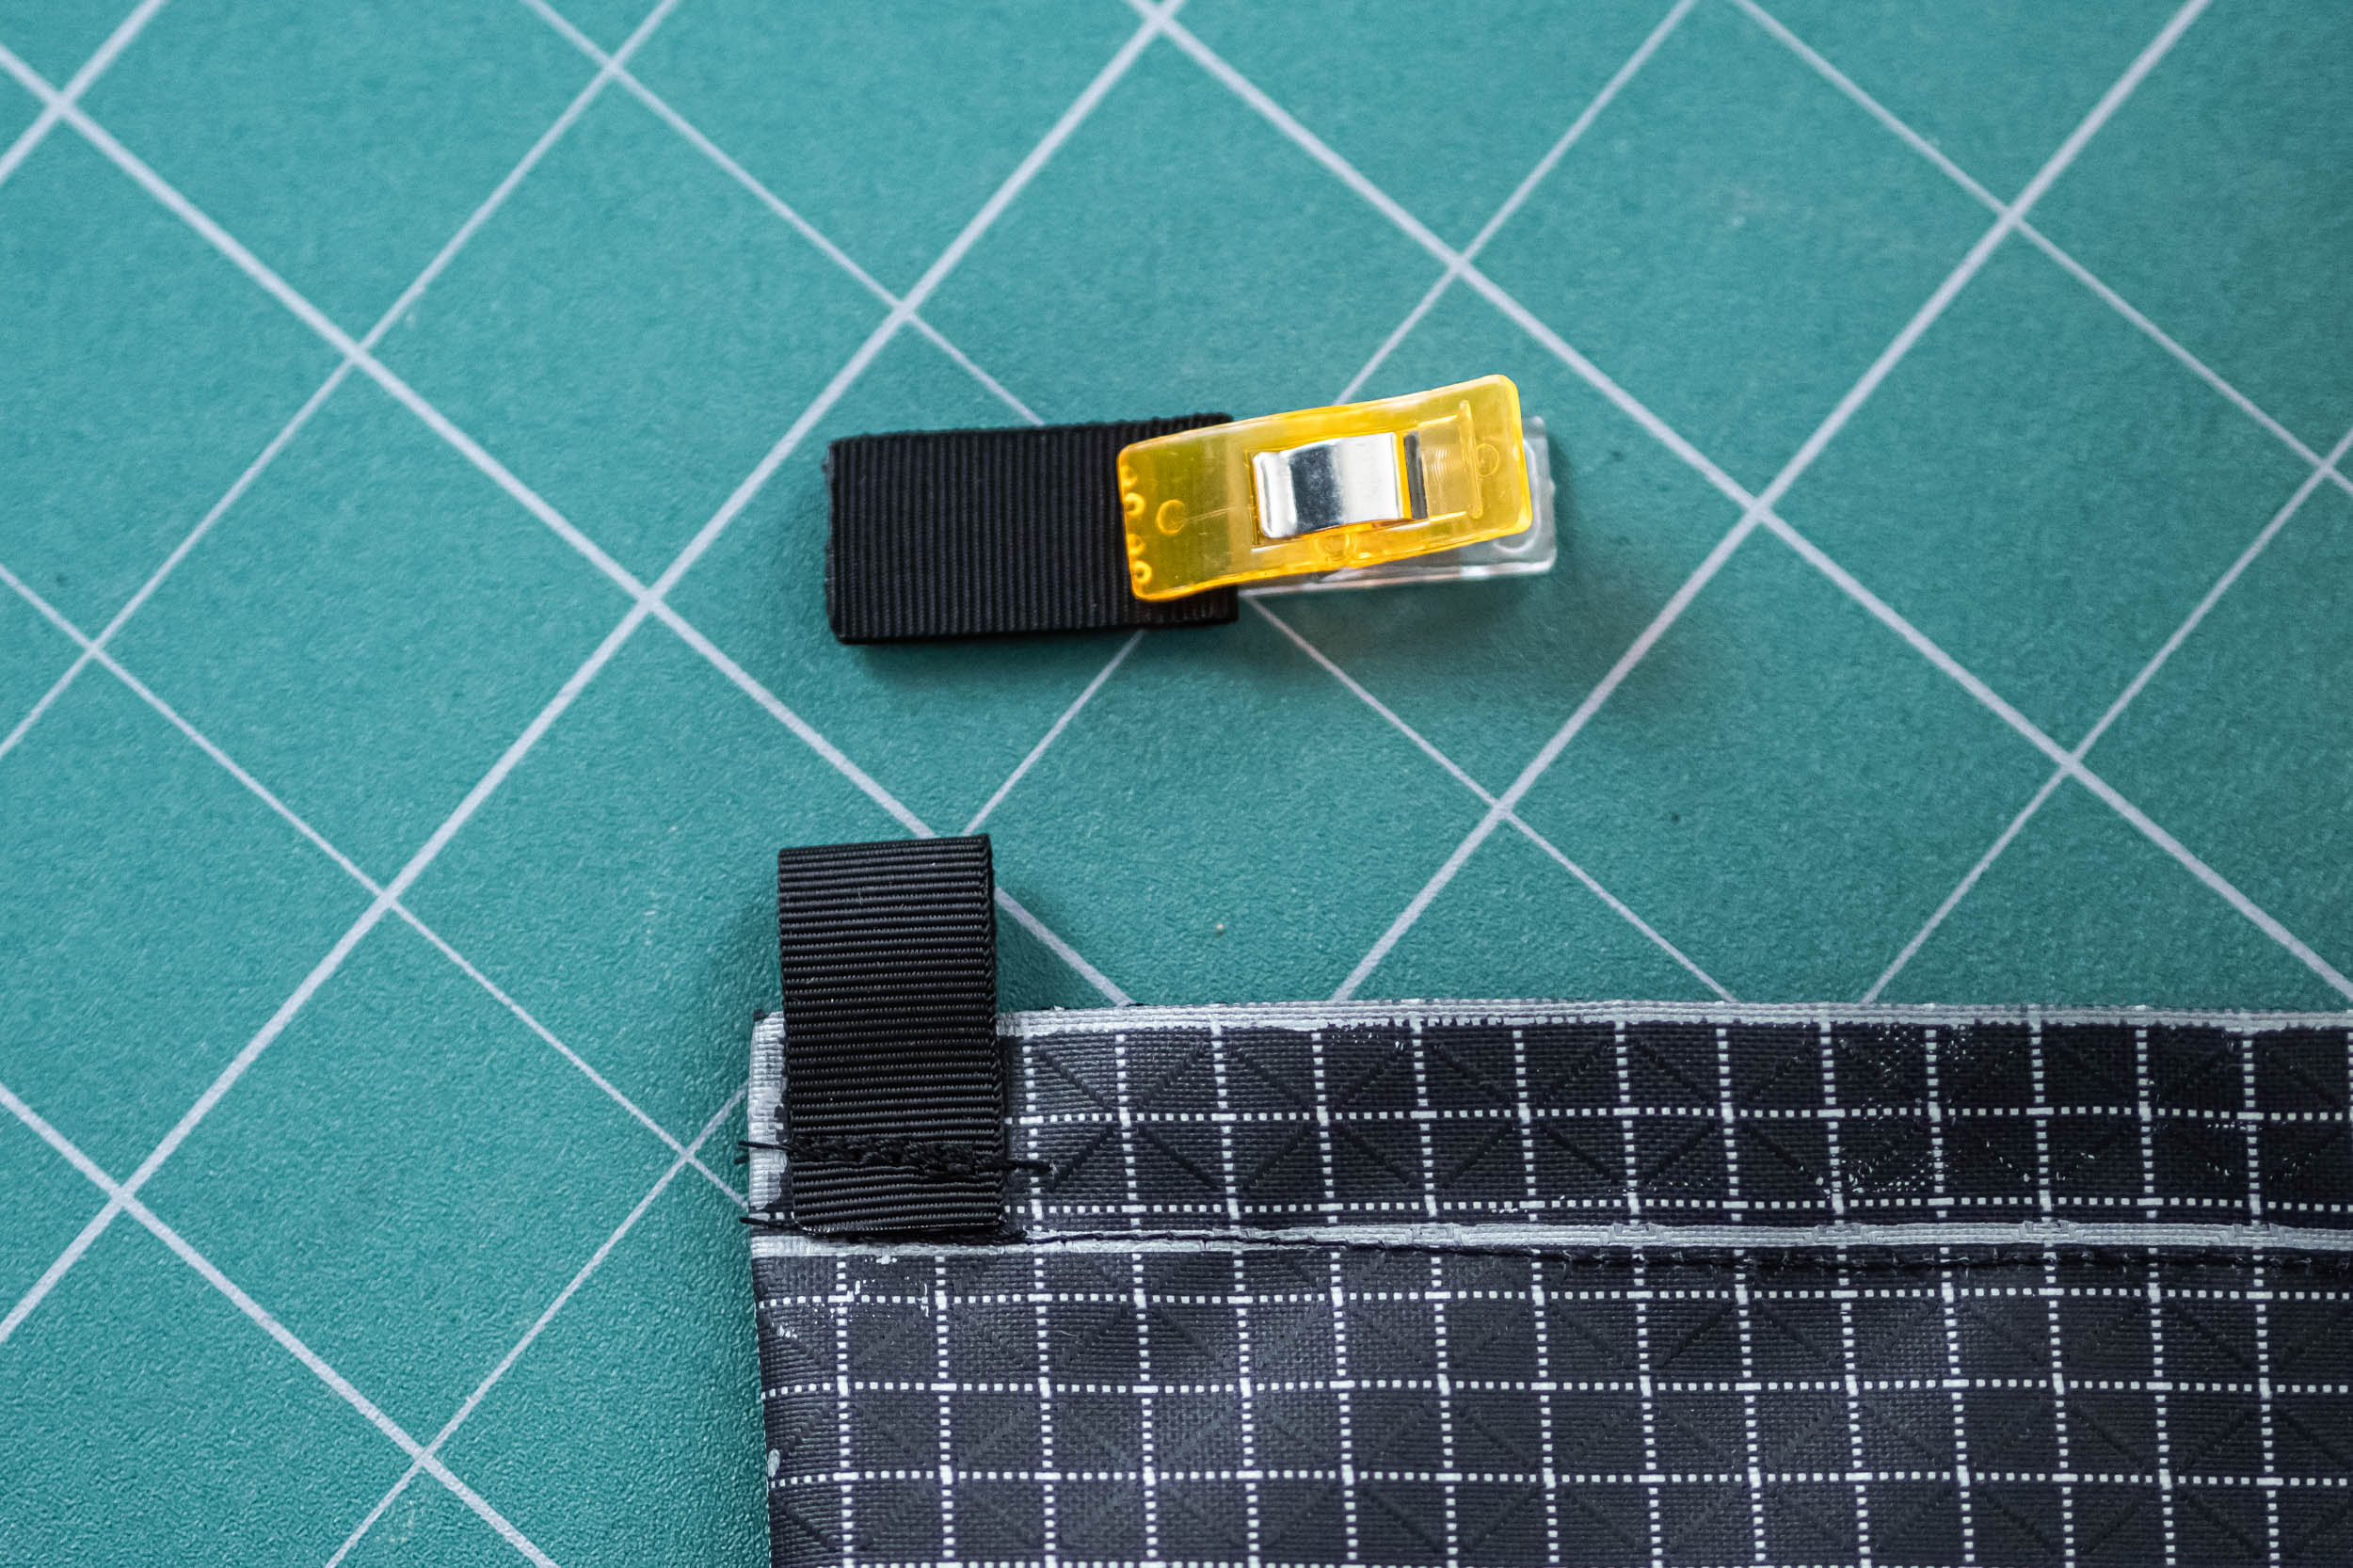
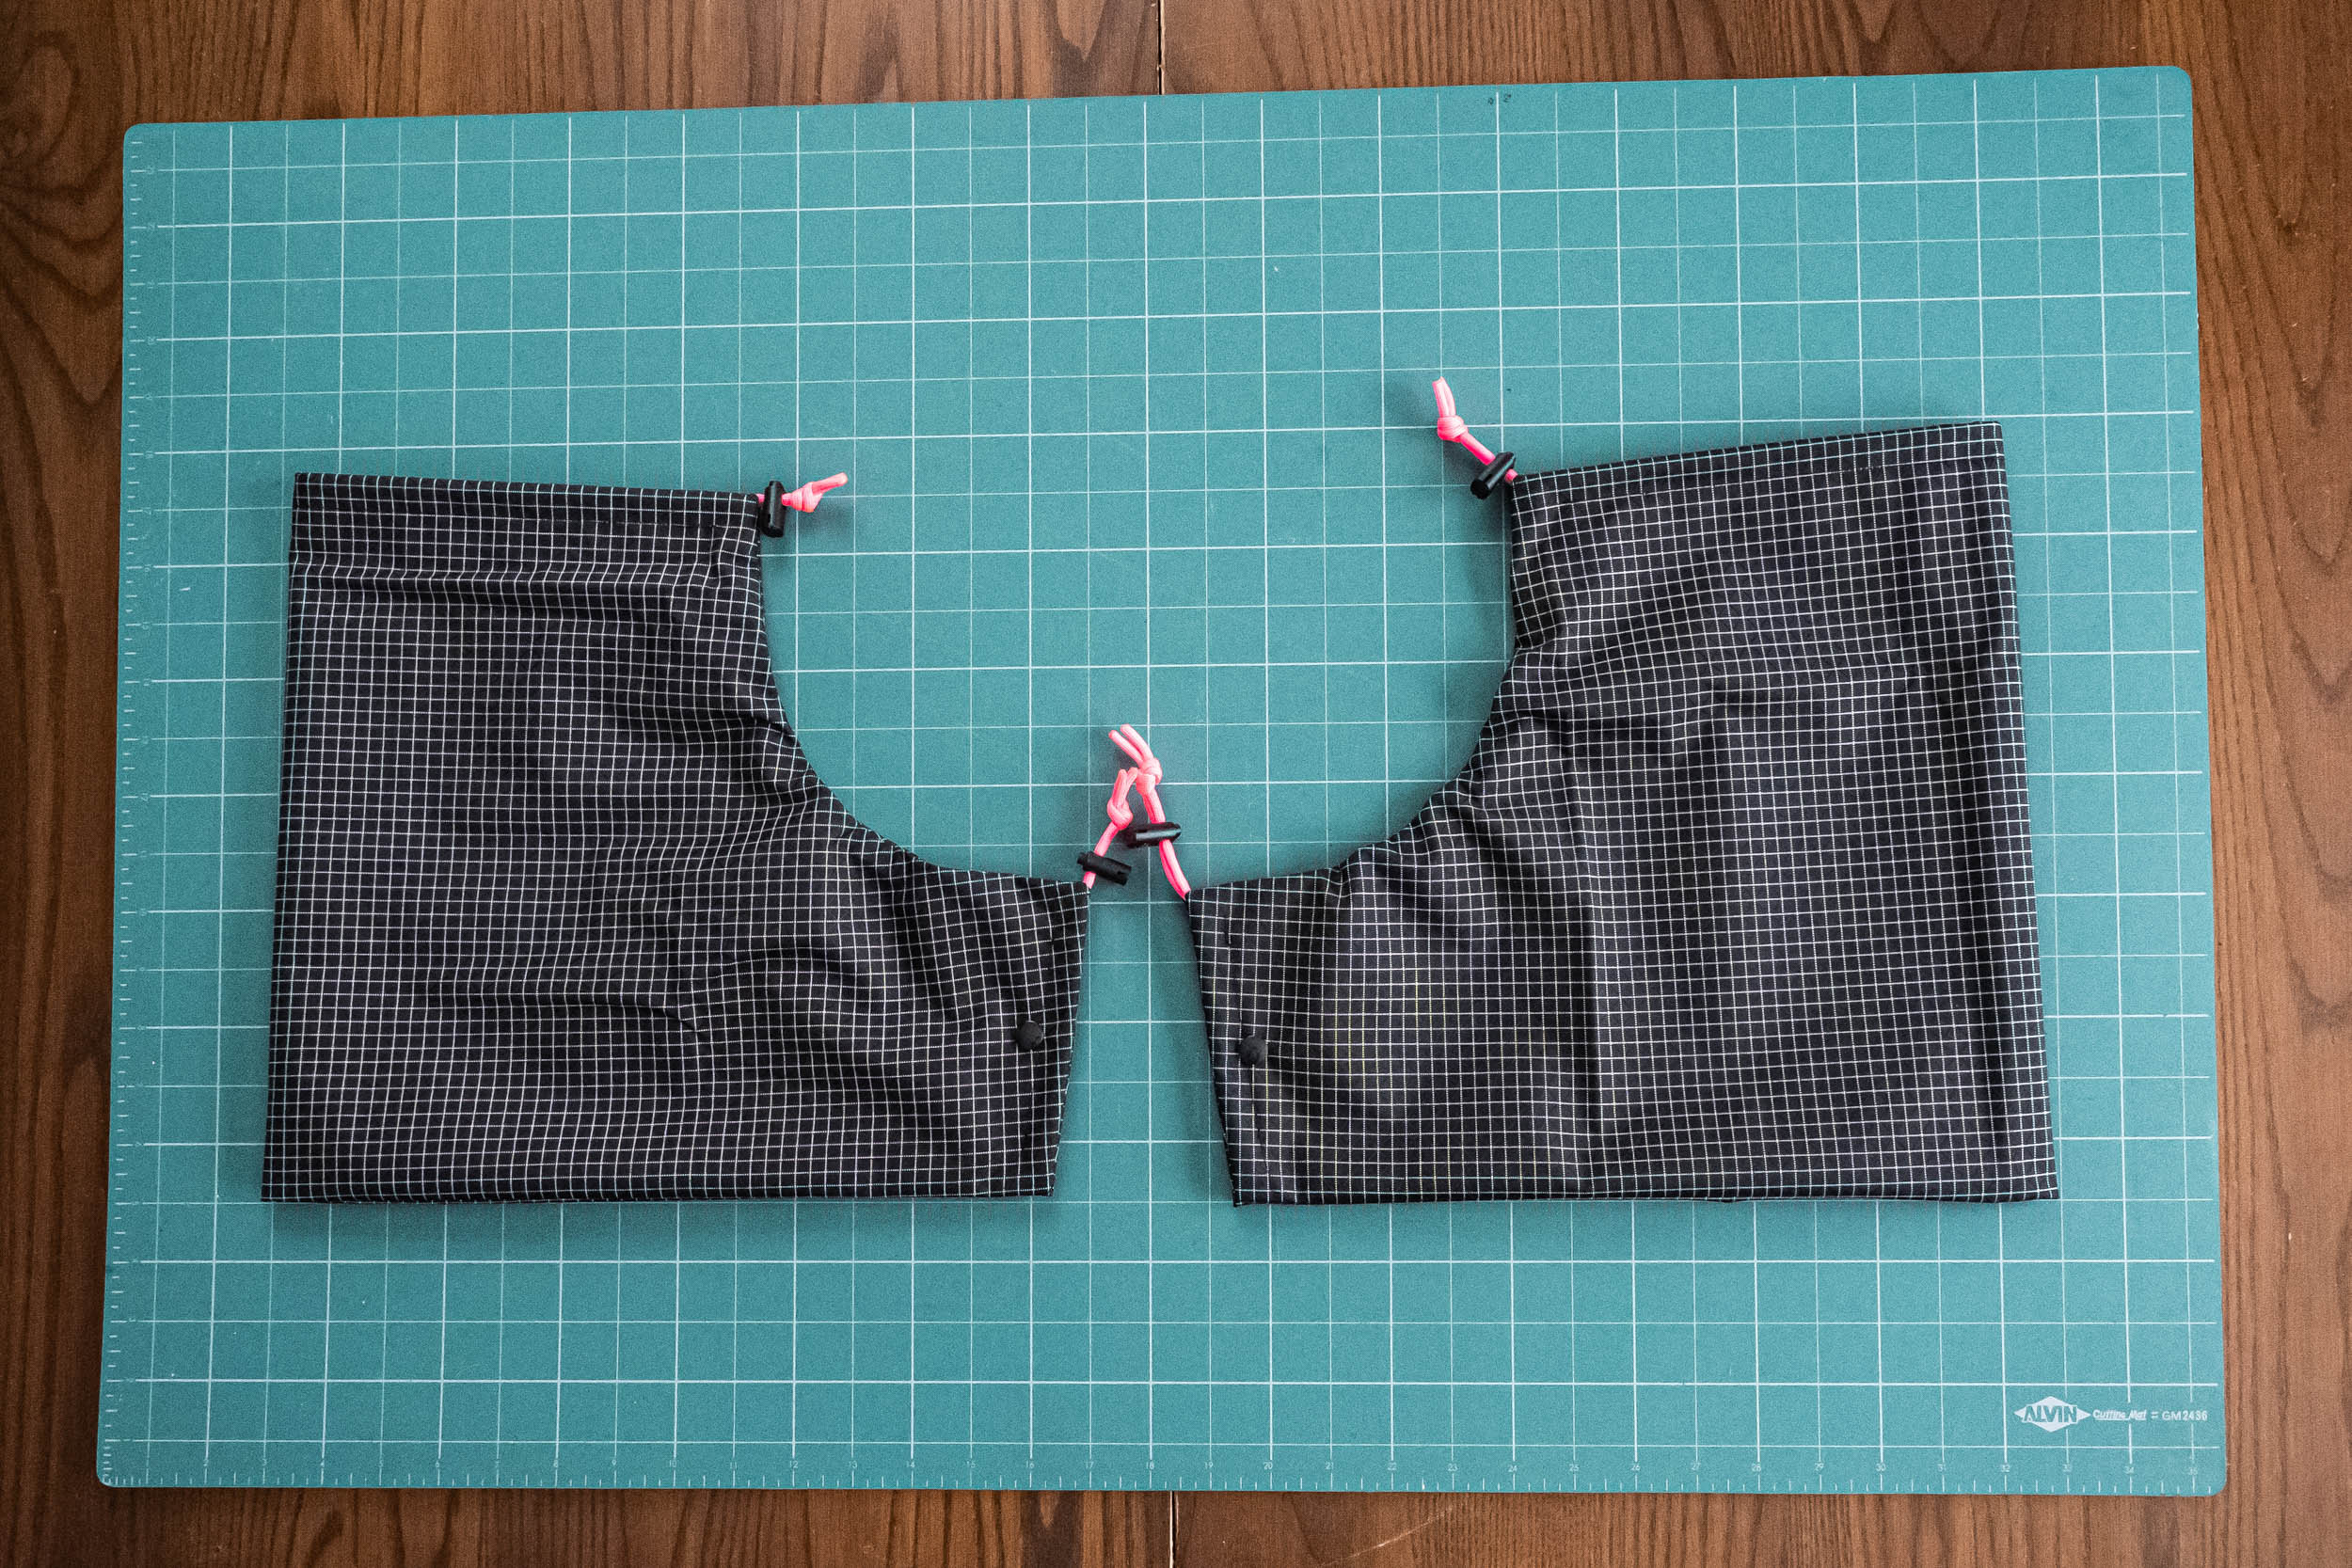
Whereas the pogie remains to be inside out, sew a small fold of webbing or grosgrain ribbon to the seam allowance within the nook reverse the curve. Then add a small loop of shock wire. This loop is meant to safe the pogie to the handlebar. In use, I moved my grips in barely, leaving a small hole between them and the bar finish plug. The shock wire loop suits properly inside this hole and is out of the best way. In case your bike setup differs, you might have to get artistic.
Step 9 – Flip Pogies Proper Aspect Out, Add Twine Locks, and Add Snaps To Handlebar Opening
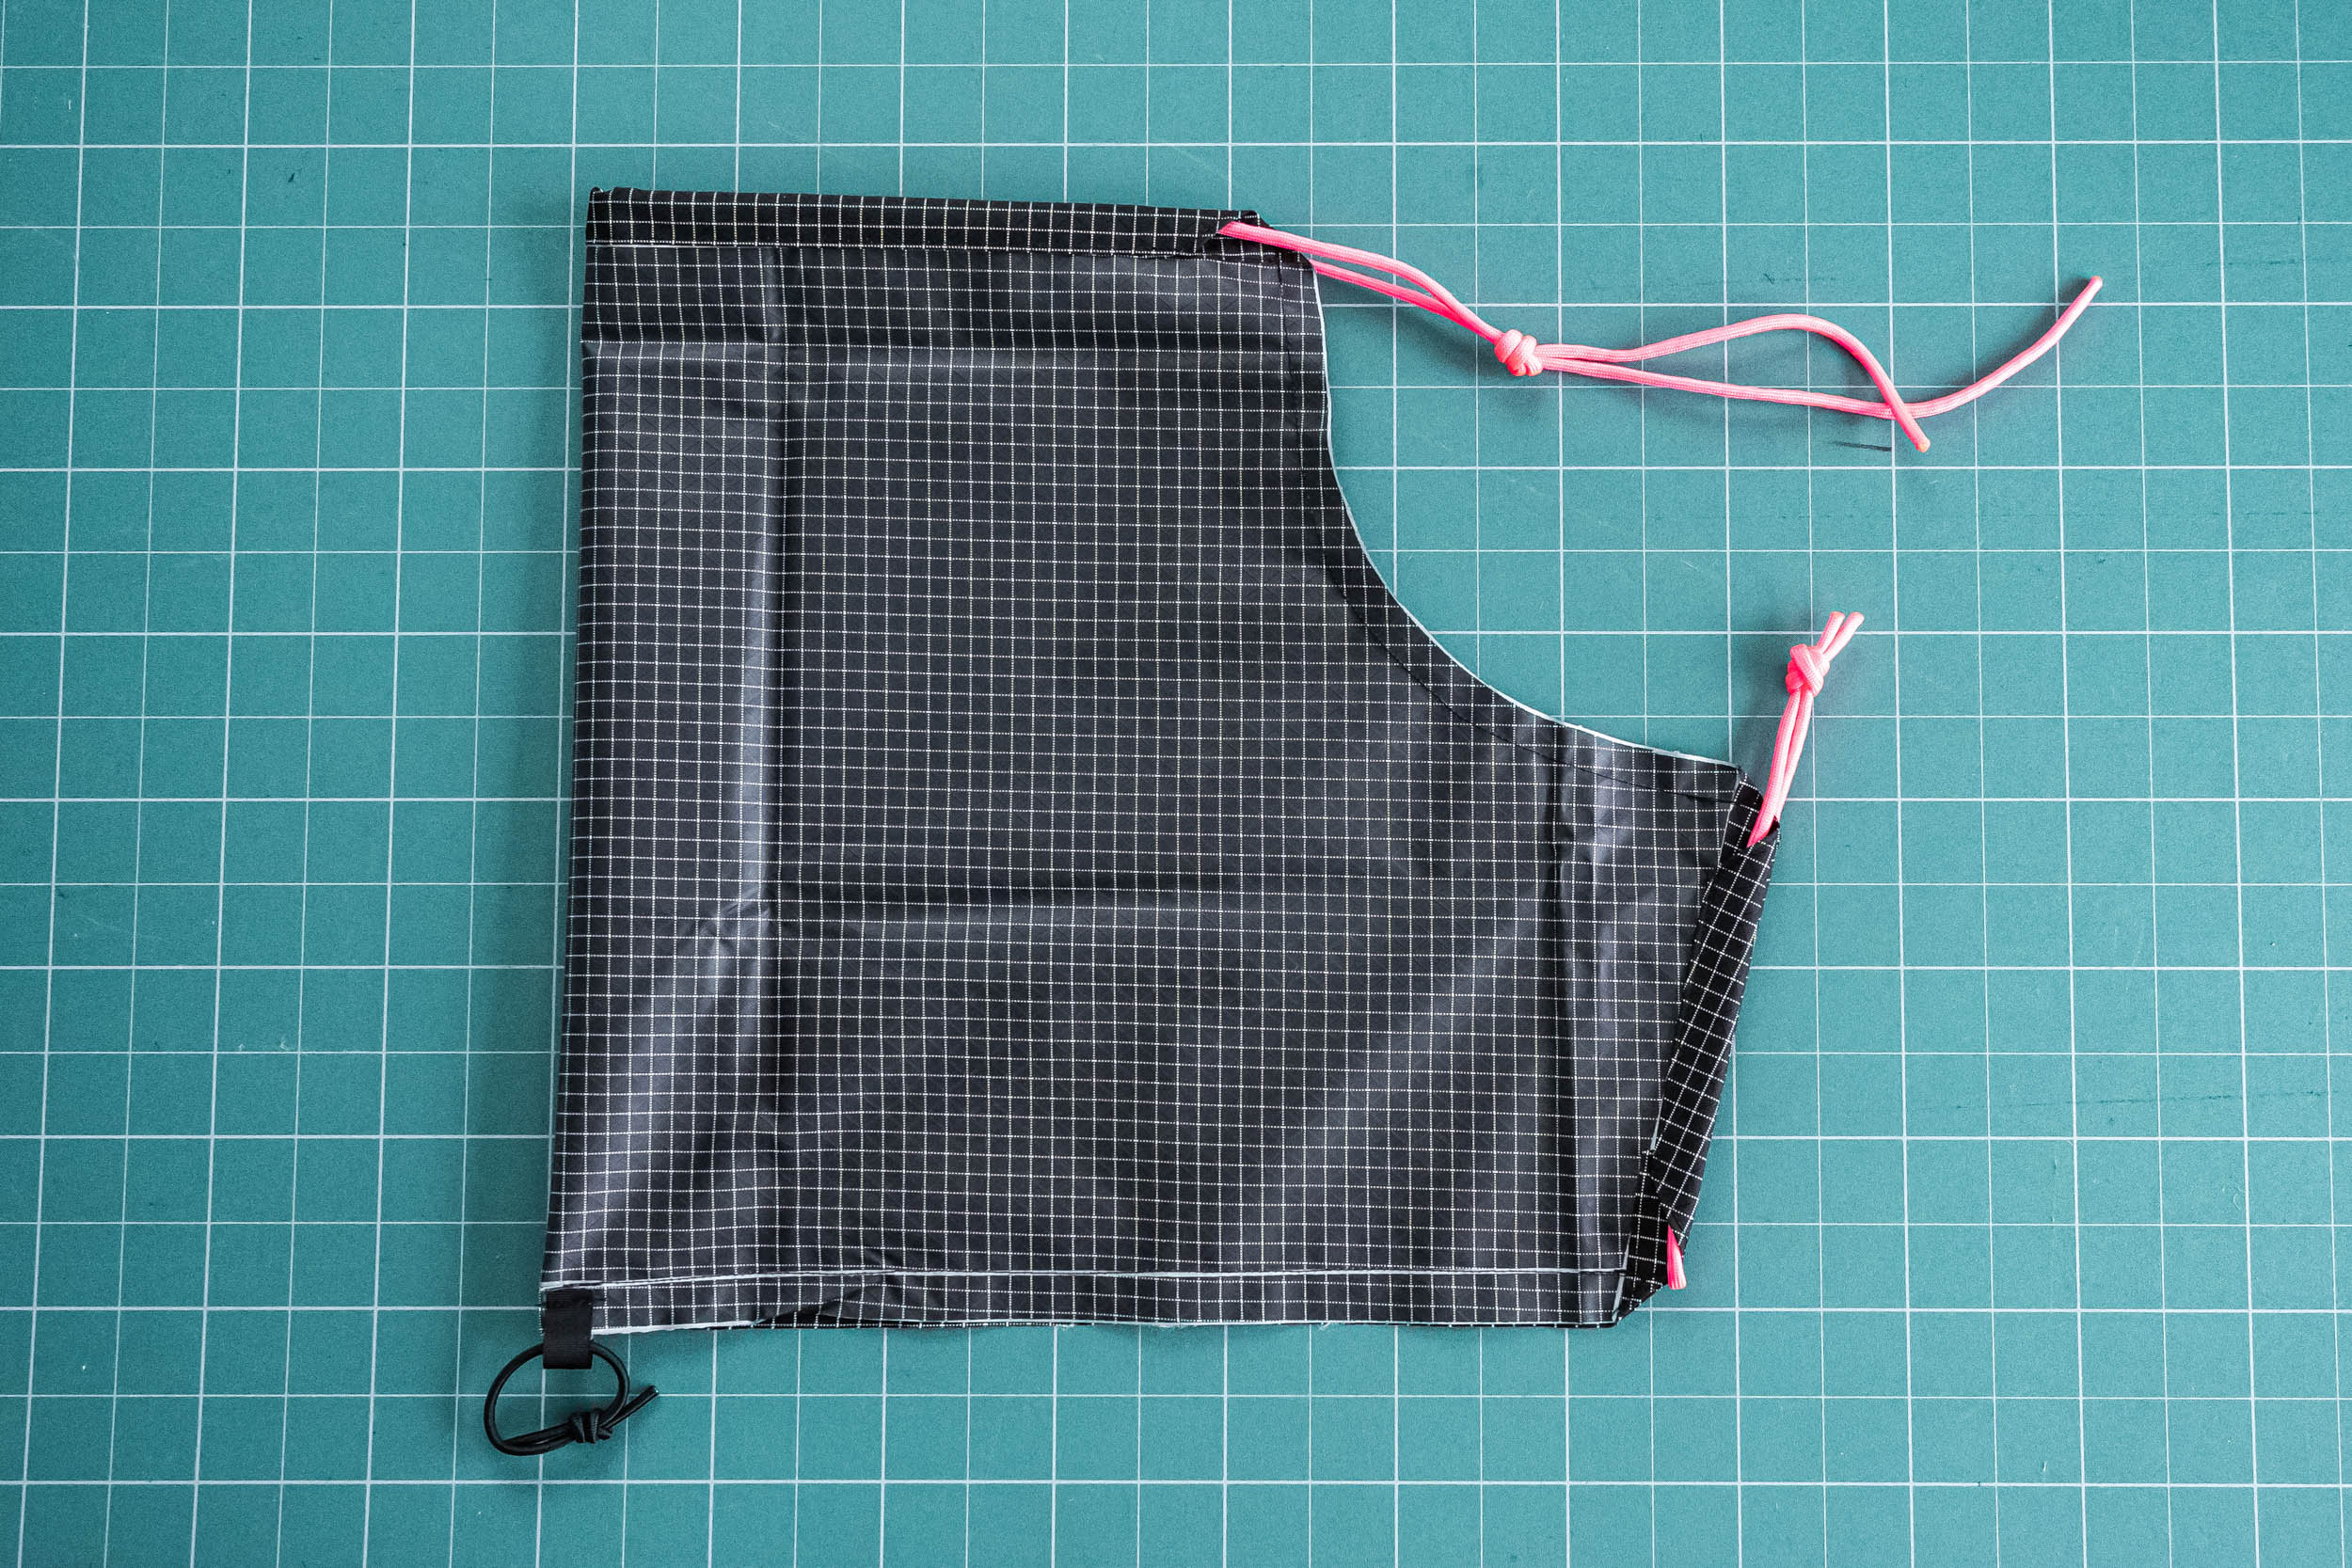
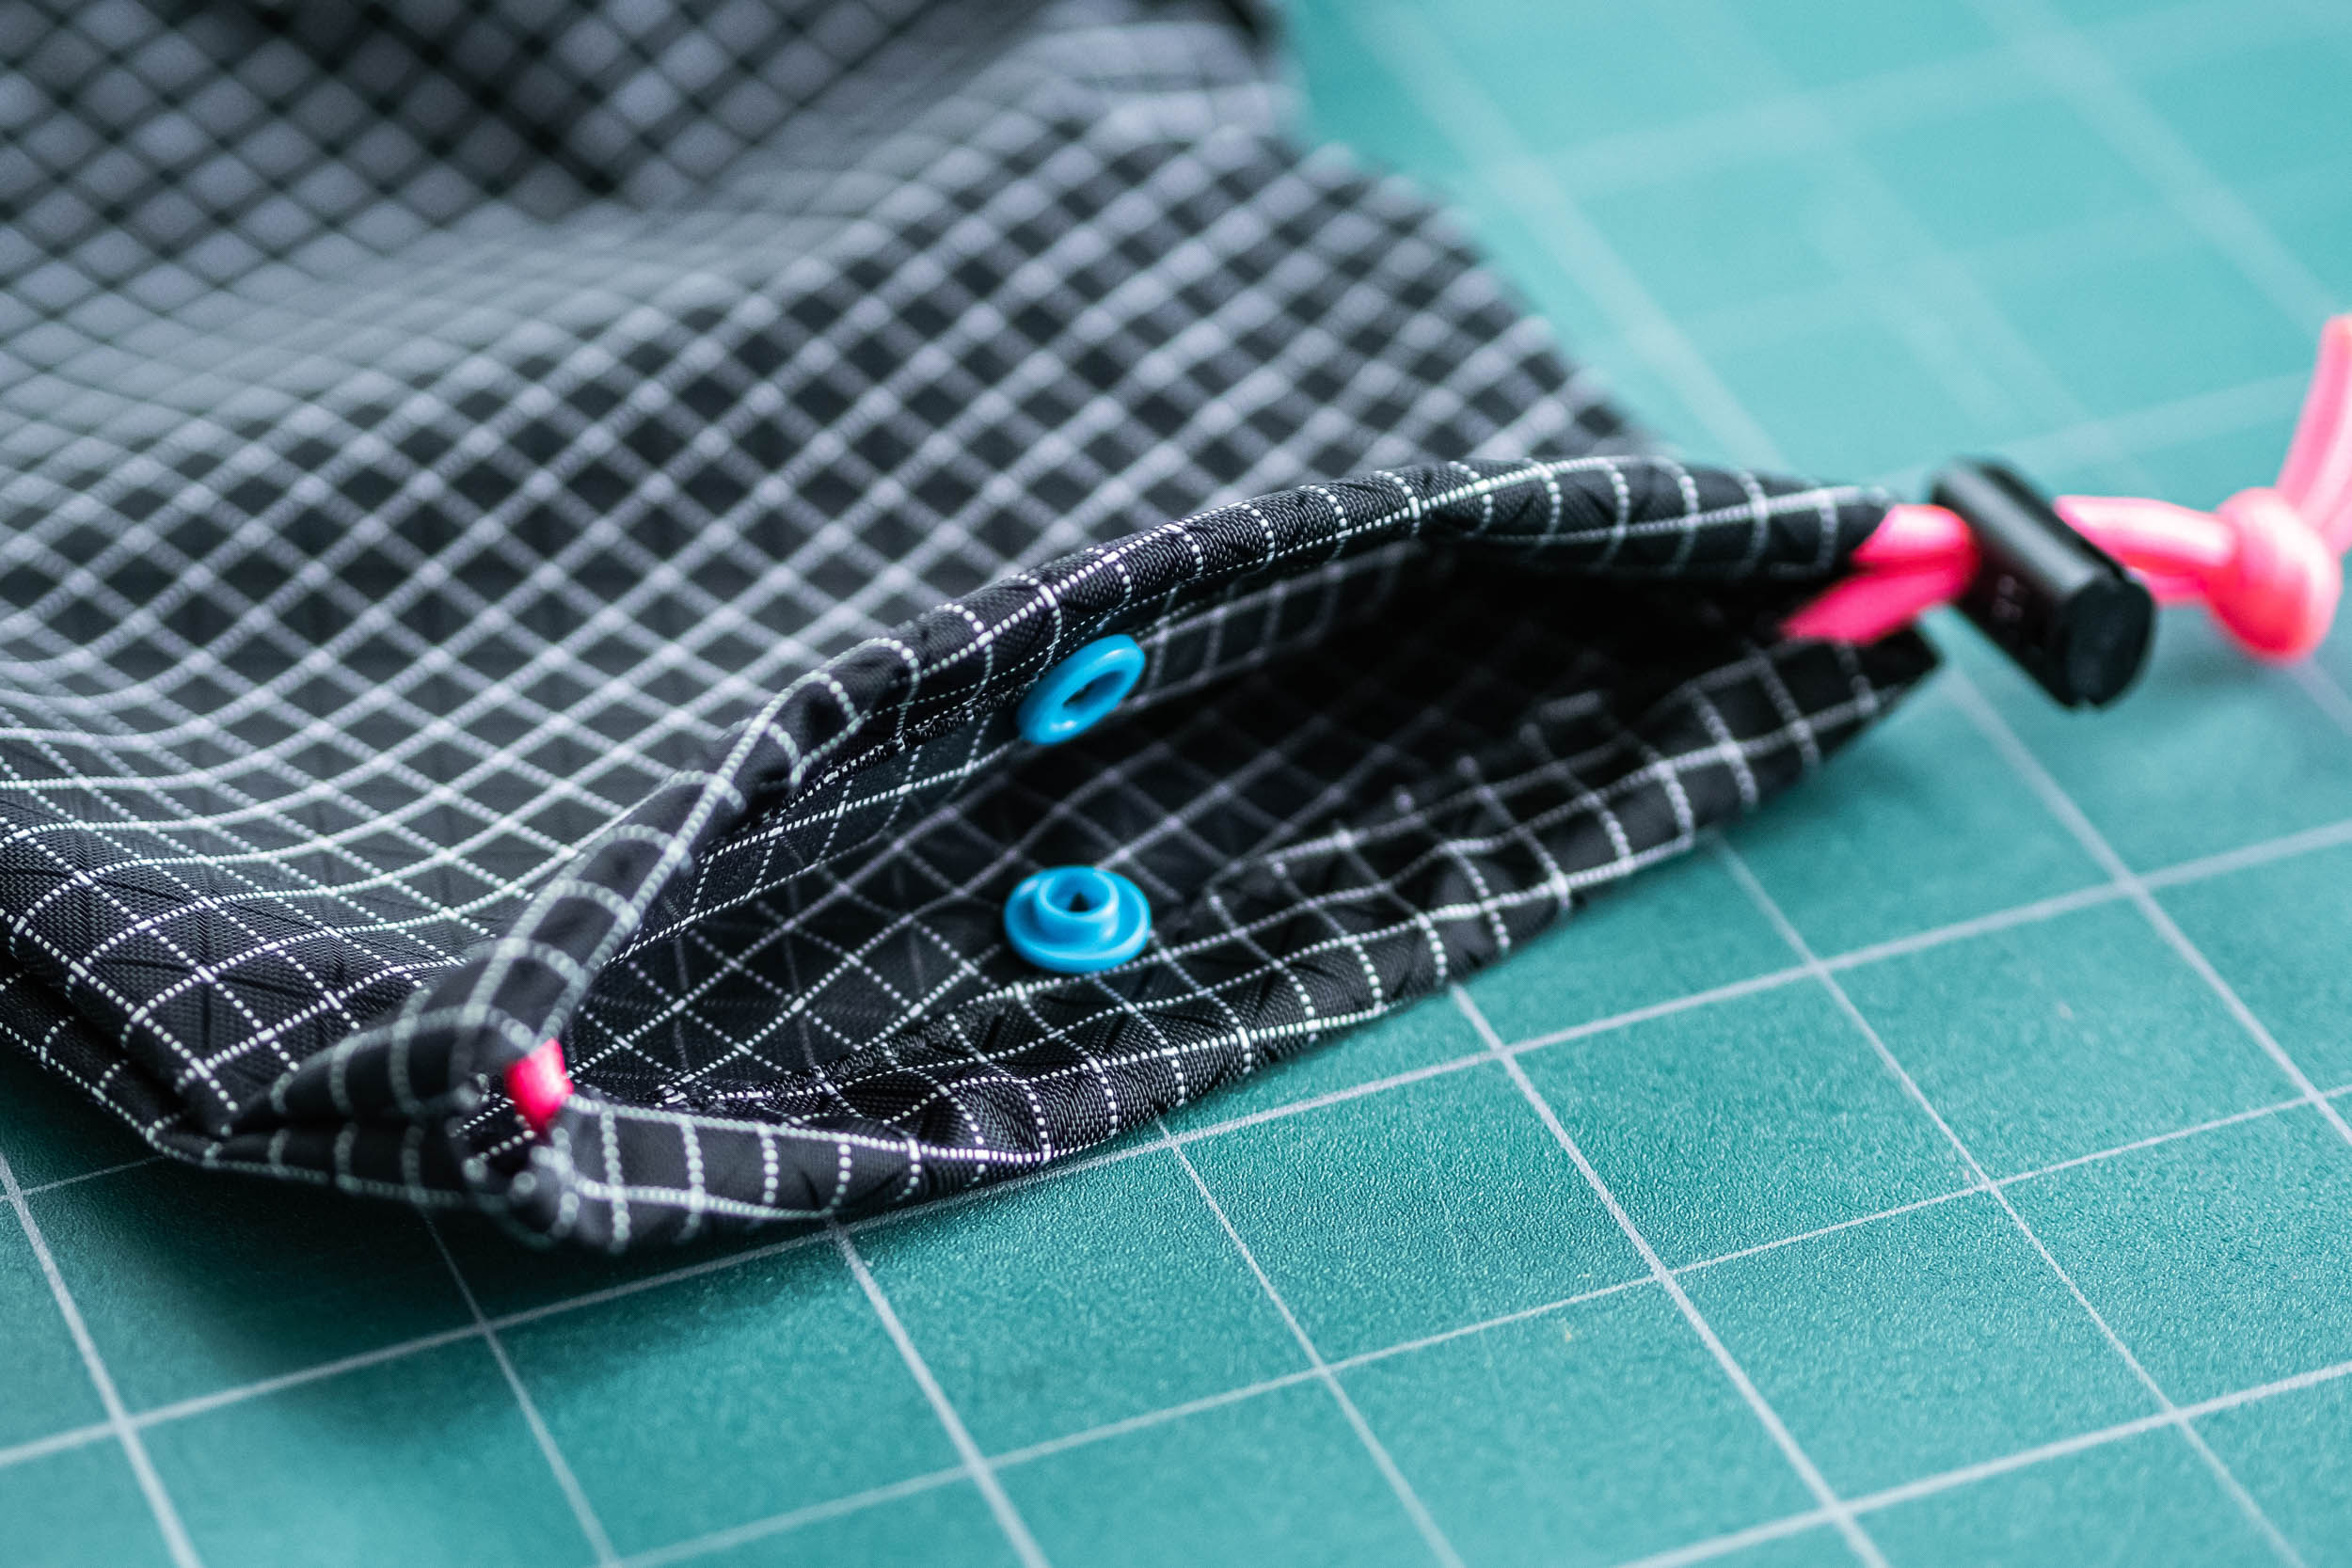
The snaps should not vital, however they do assist maintain the pogies in place and maintain the wind out. Right here, I’m utilizing plastic KAM snaps with the usual size stud. Place the snap near the opening, however not so shut that it interferes with the wire channel.
Step 10 – You’re Finished… Get pleasure from!
That’s it! Congratulations on making your individual ultralight pogies. Have a photograph of the completed product? Please share it within the dialog beneath. I’d like to see what you got here up with!


About Greg Maino
Greg Maino is a Michigander residing in Vermont who enjoys getting outdoors together with his spouse and two sons. He additionally loves serving to others get open air and works with the Vermont Bikepackers to host introductory bikepacking journeys and a free bikepacking gear library. Yow will discover him on Instagram @igmaino.
As a lot as we get pleasure from maintaining with new and progressive bikepacking and tenting gear from massive and small manufacturers, we’re equally excited in regards to the endlessly fascinating (and extra reasonably priced) world of constructing your individual gear, whether or not that’s a bikepacking bag, a biking cap, a surfboard-hauling rig, a hop-can range, and even only a hand-carved spoon. If you happen to’re inquisitive about placing collectively a DIY information to creating your individual gear, please share it with us by filling out the submission kind right here!
Extra MYOBG
Be certain that to dig into our library of MYOBG tutorials at #MYOBG with just a few linked beneath. Additionally,you possibly can be taught extra about pogies in our roundup right here.
Please maintain the dialog civil, constructive, and inclusive, or your remark will probably be eliminated.
[ad_2]