
[ad_1]
Share This
0
Thanks prematurely for spreading the phrase!
In our newest Make Your Personal Bikepacking Gear (MYOBG) tutorial, Rémi Quinquin shares a easy information to repurposing a worn-out tire to create a intelligent upcycled seat harness. Discover his step-by-step information to creating a novel and useful seat harness that may cut back waste and get monetary savings right here…
Phrases and photographs by Rémi Quinquin (@remiquinquin)
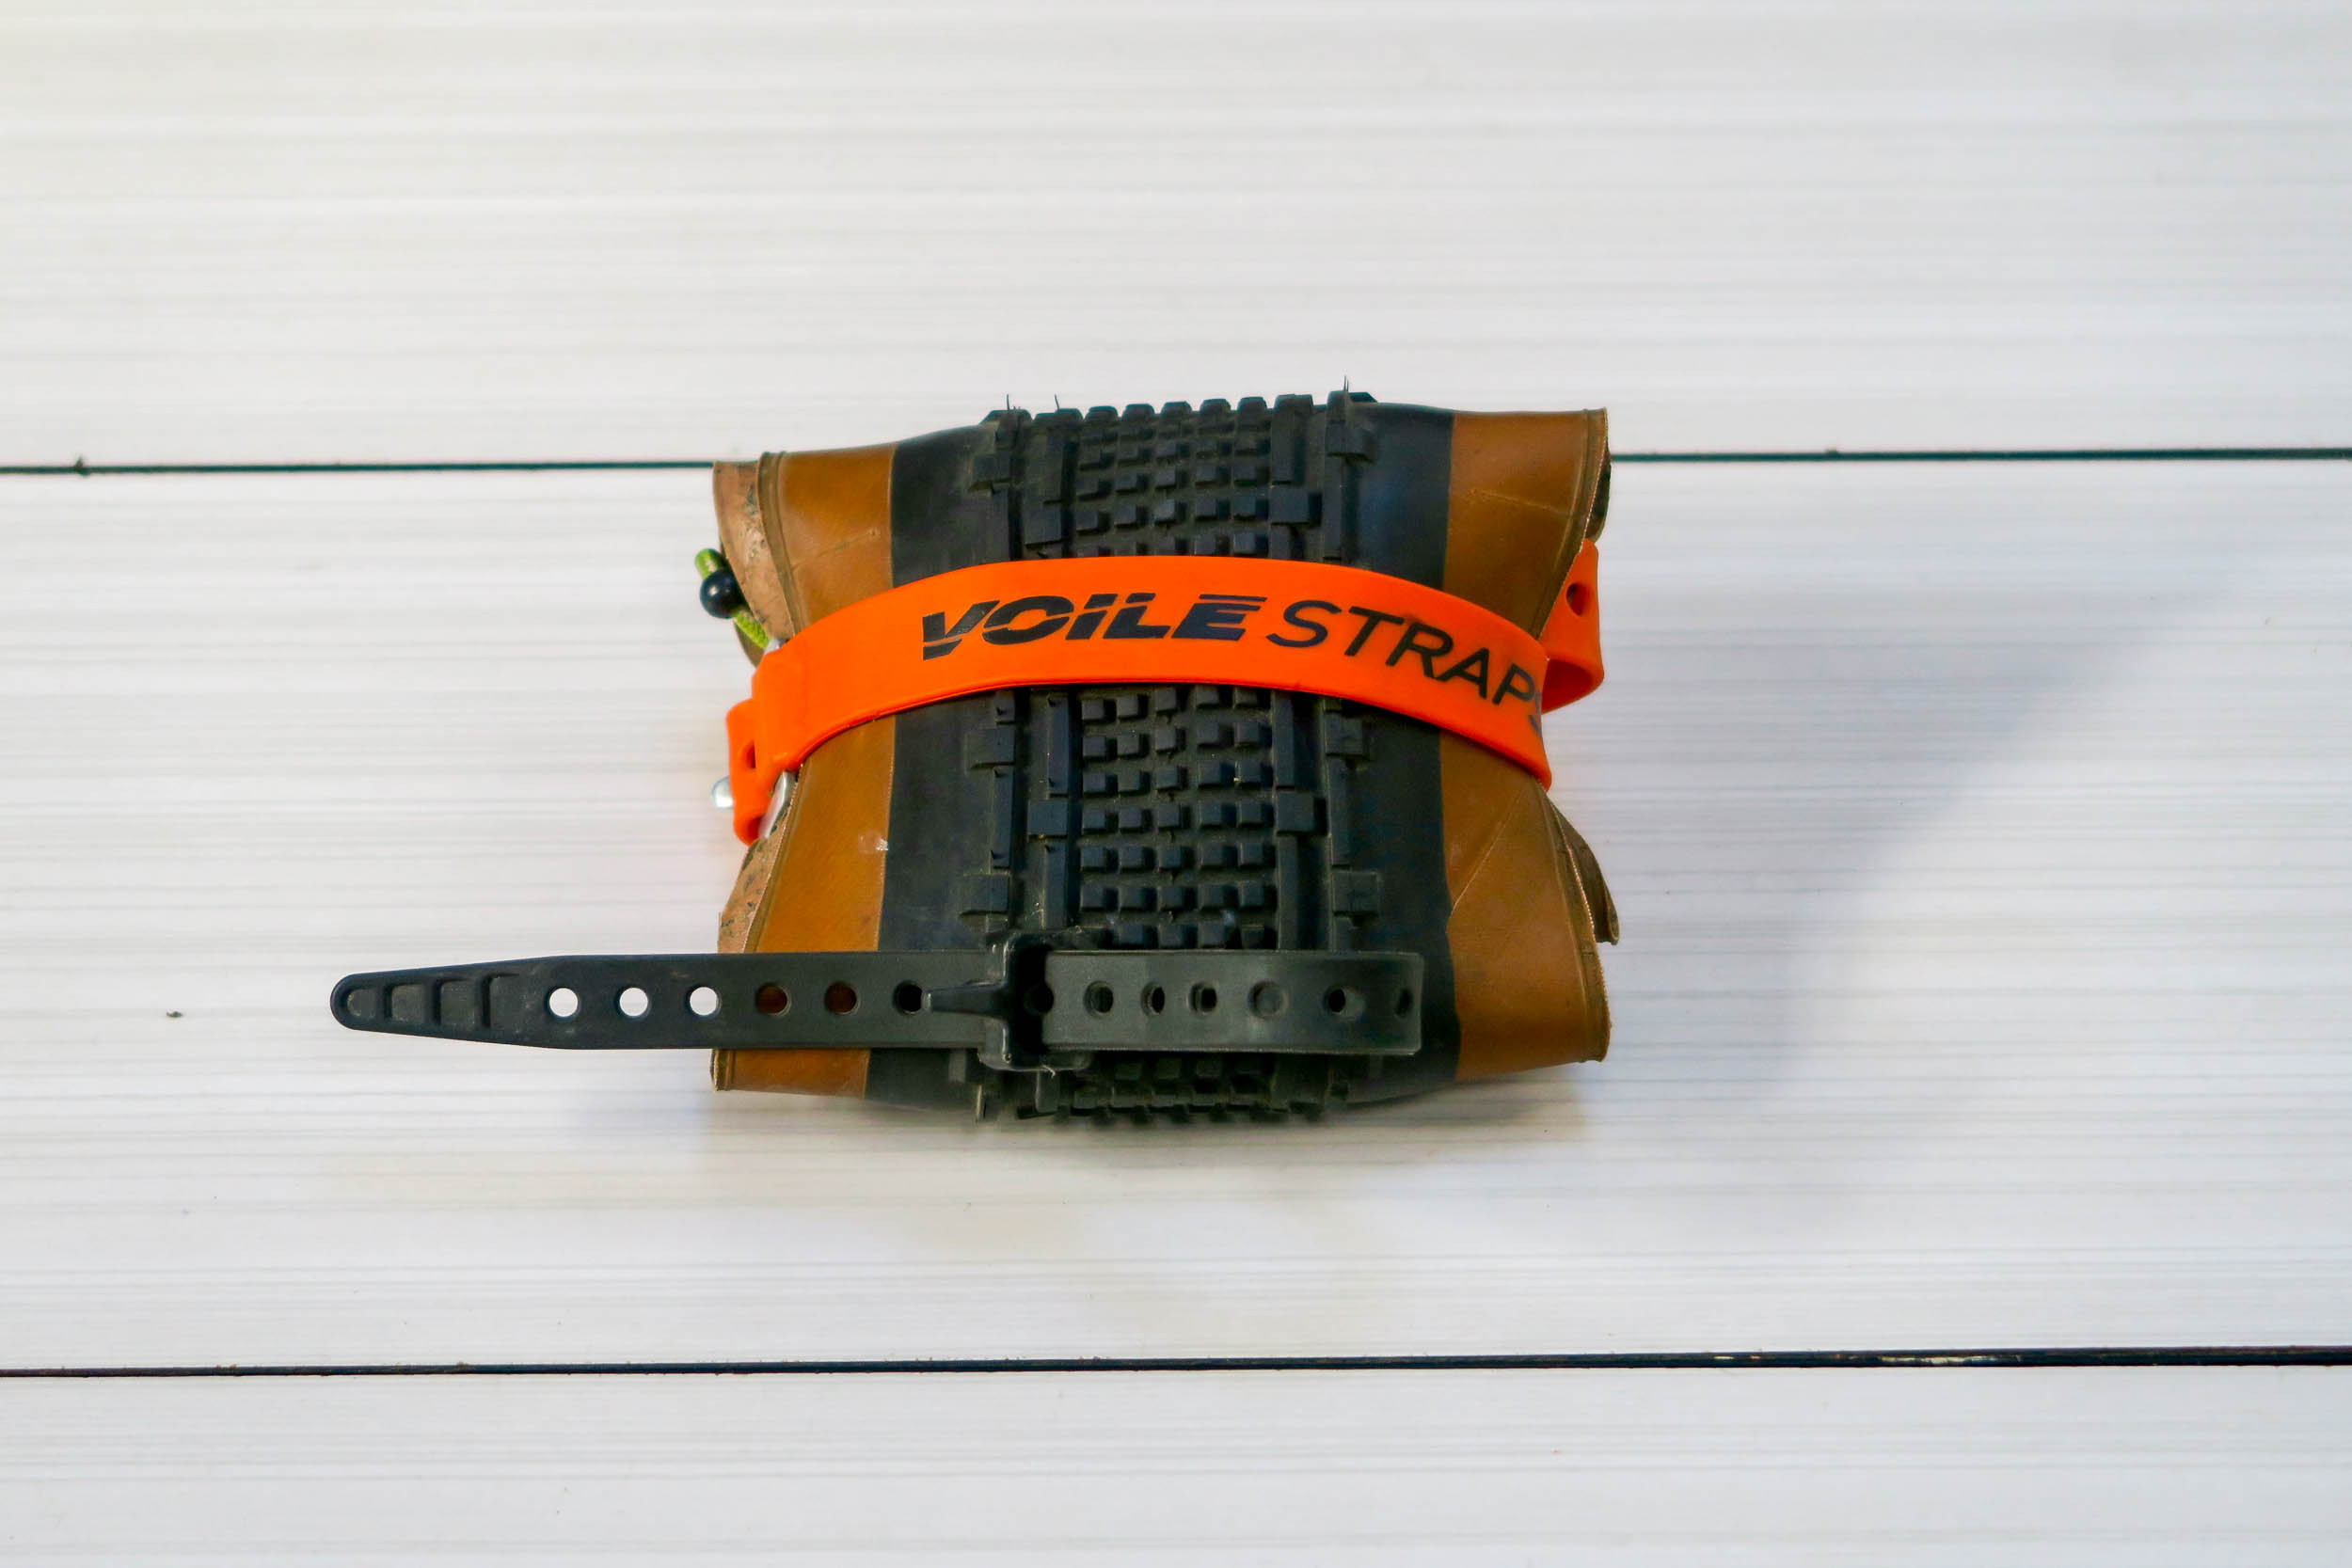
Regardless of having tried a number of commercially obtainable saddle luggage, I couldn’t fairly discover what I used to be in search of. Just a few had been tremendous however by no means best. I needed to discover a easy harness, nothing greater than a smooth however strong piece that holds a drybag. Searching for a cloth that was strong, available, and straightforward to work with, my thoughts turned to the stack of previous tires I’ve been protecting round “simply in case.” This appeared to be the proper event to place them to make use of.
After a handful of prototypes and exams over a interval of round two years, I lastly arrived on the accomplished model that I’m sharing with you right here at this time. It’s labored properly for me, and I hope it might probably assist different bikepackers too. You could find the complete tutorial, supplies checklist, and a template to observe under.
What You’ll Want

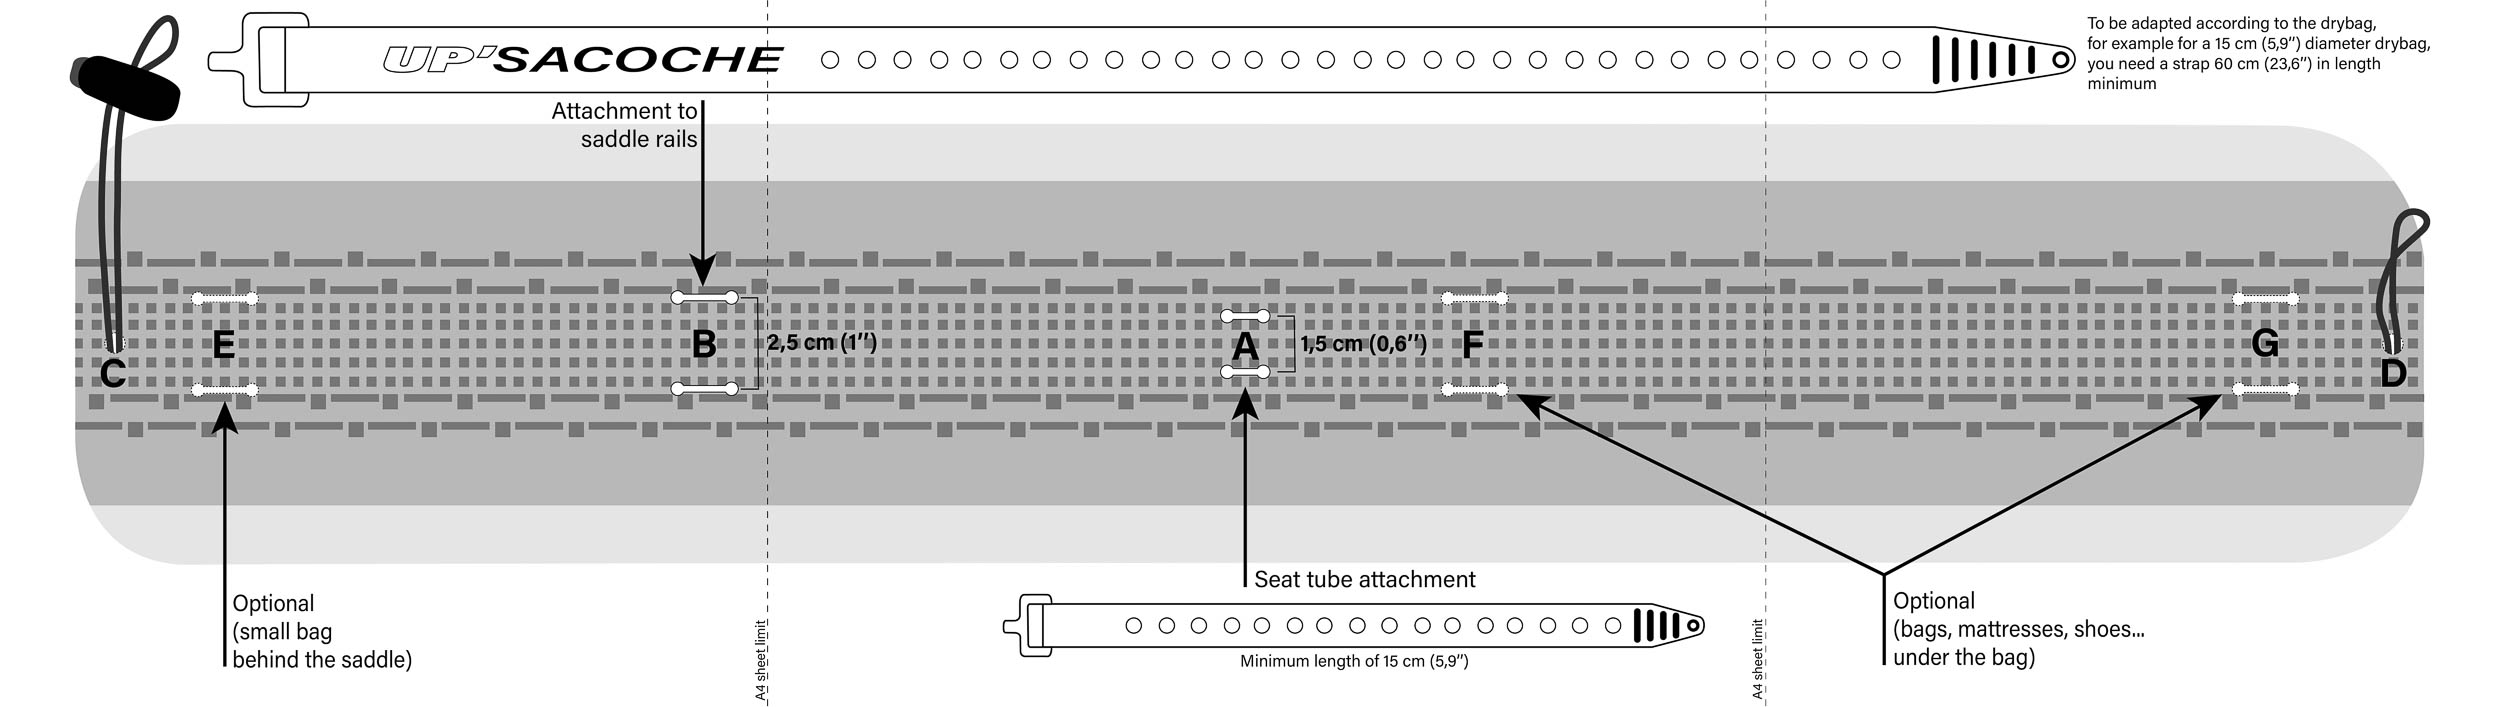
- The PDF reference diagram offered right here and displayed under.
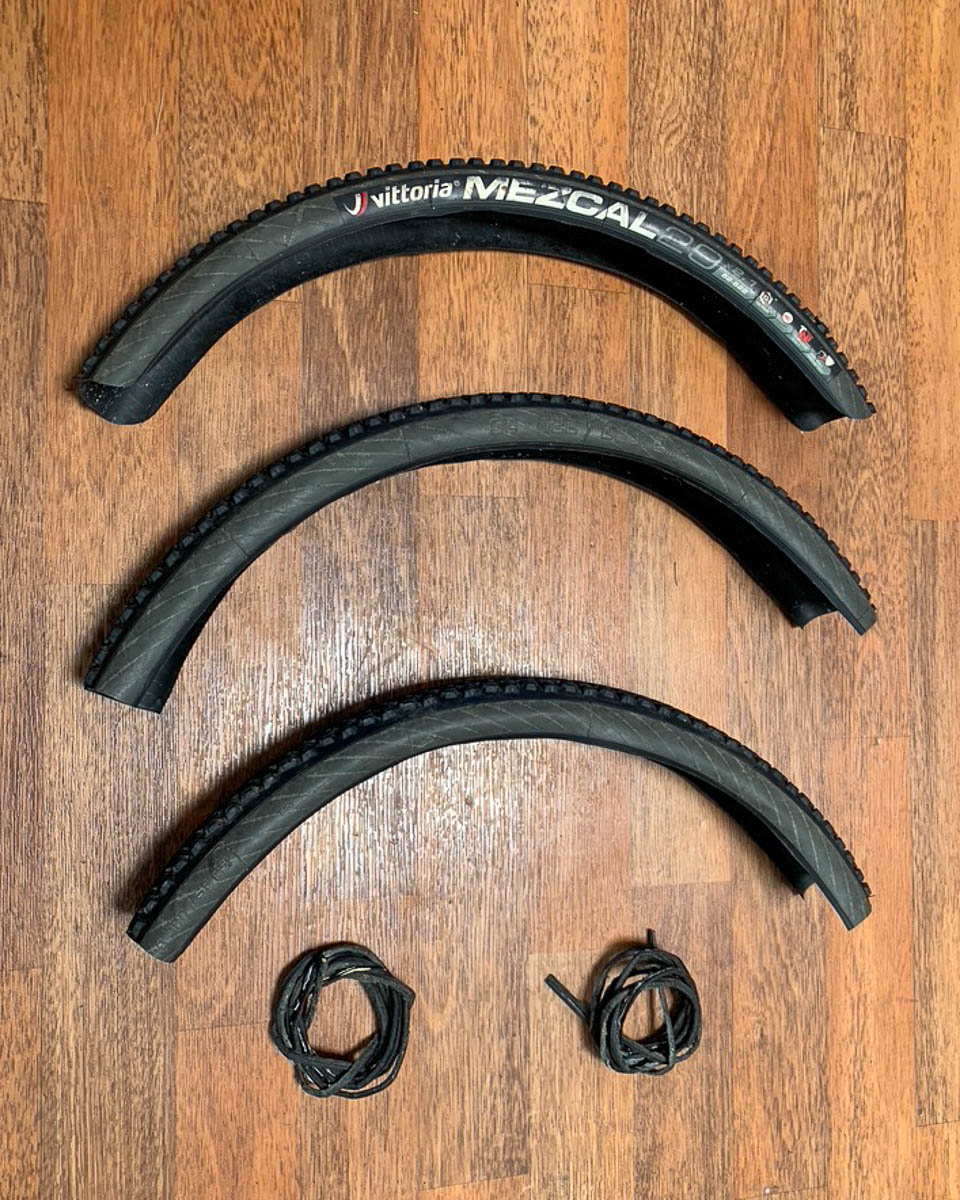
- An previous tire that’s round 50mm (2.0″) extensive. A bit of bigger is okay. You can also make three harnesses from a 29er tire.
- A dry bag. The sample is designed to work with a drybag as much as 50cm (20″) lengthy.
- Two straps. The strap on the seat tube is 15 cm (5.9″) minimal, which can work for many seat tubes. The strap that attaches to the rails will depend on the diameter of the loaded drybag. To seek out the minimal strap size, you may apply the system strap size = drybag diameter x 4.
- Two items of twine and a twine lock.
- Two eyelets (elective).
- One thing to make holes and one thing that cuts.
Step 1: Minimize the tire
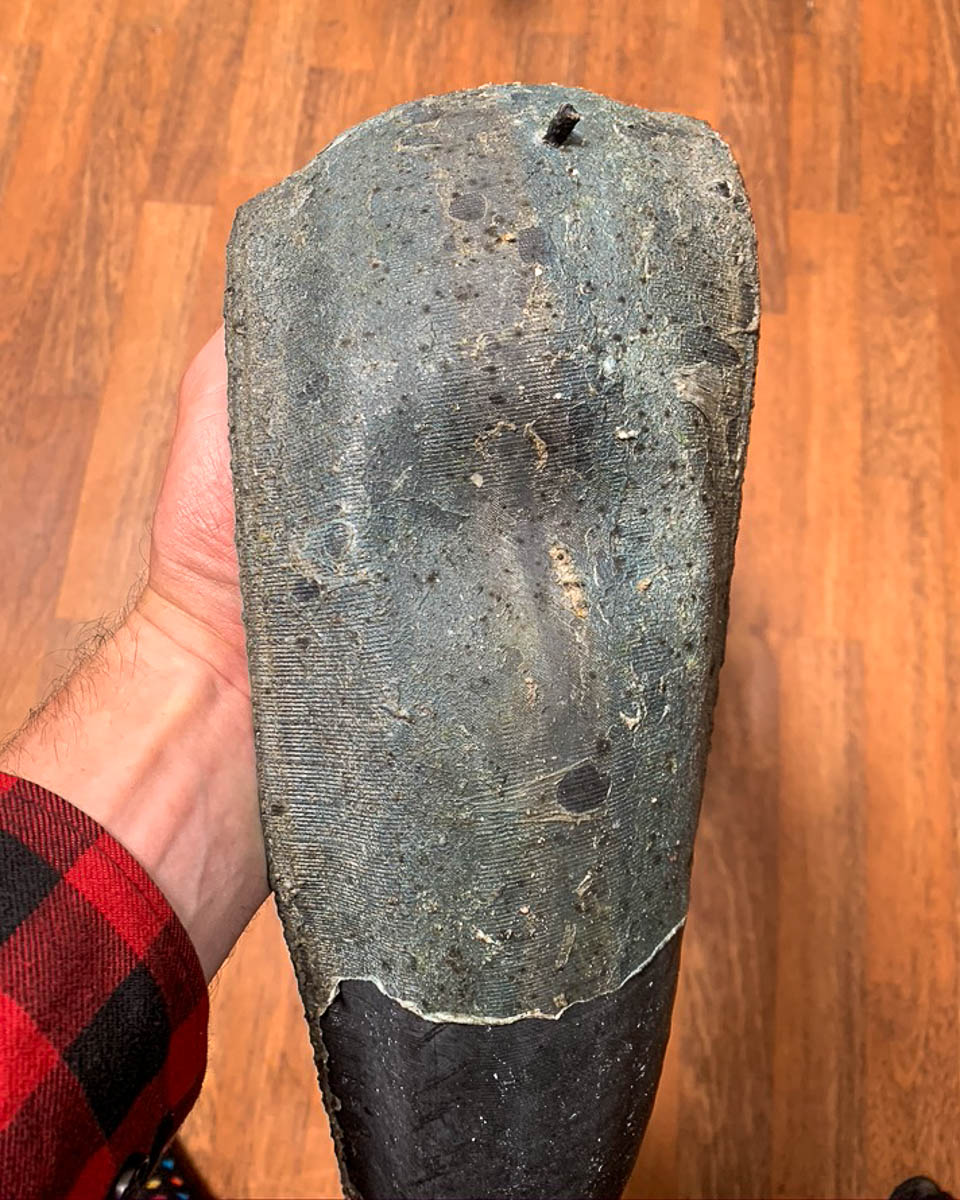
First, take your tire, clear it, take away all of the tubeless sealant that’s coating the within (if relevant), trim off the beads, and reduce it to a size of 70cm (27.6″).
Step 2: Create the openings
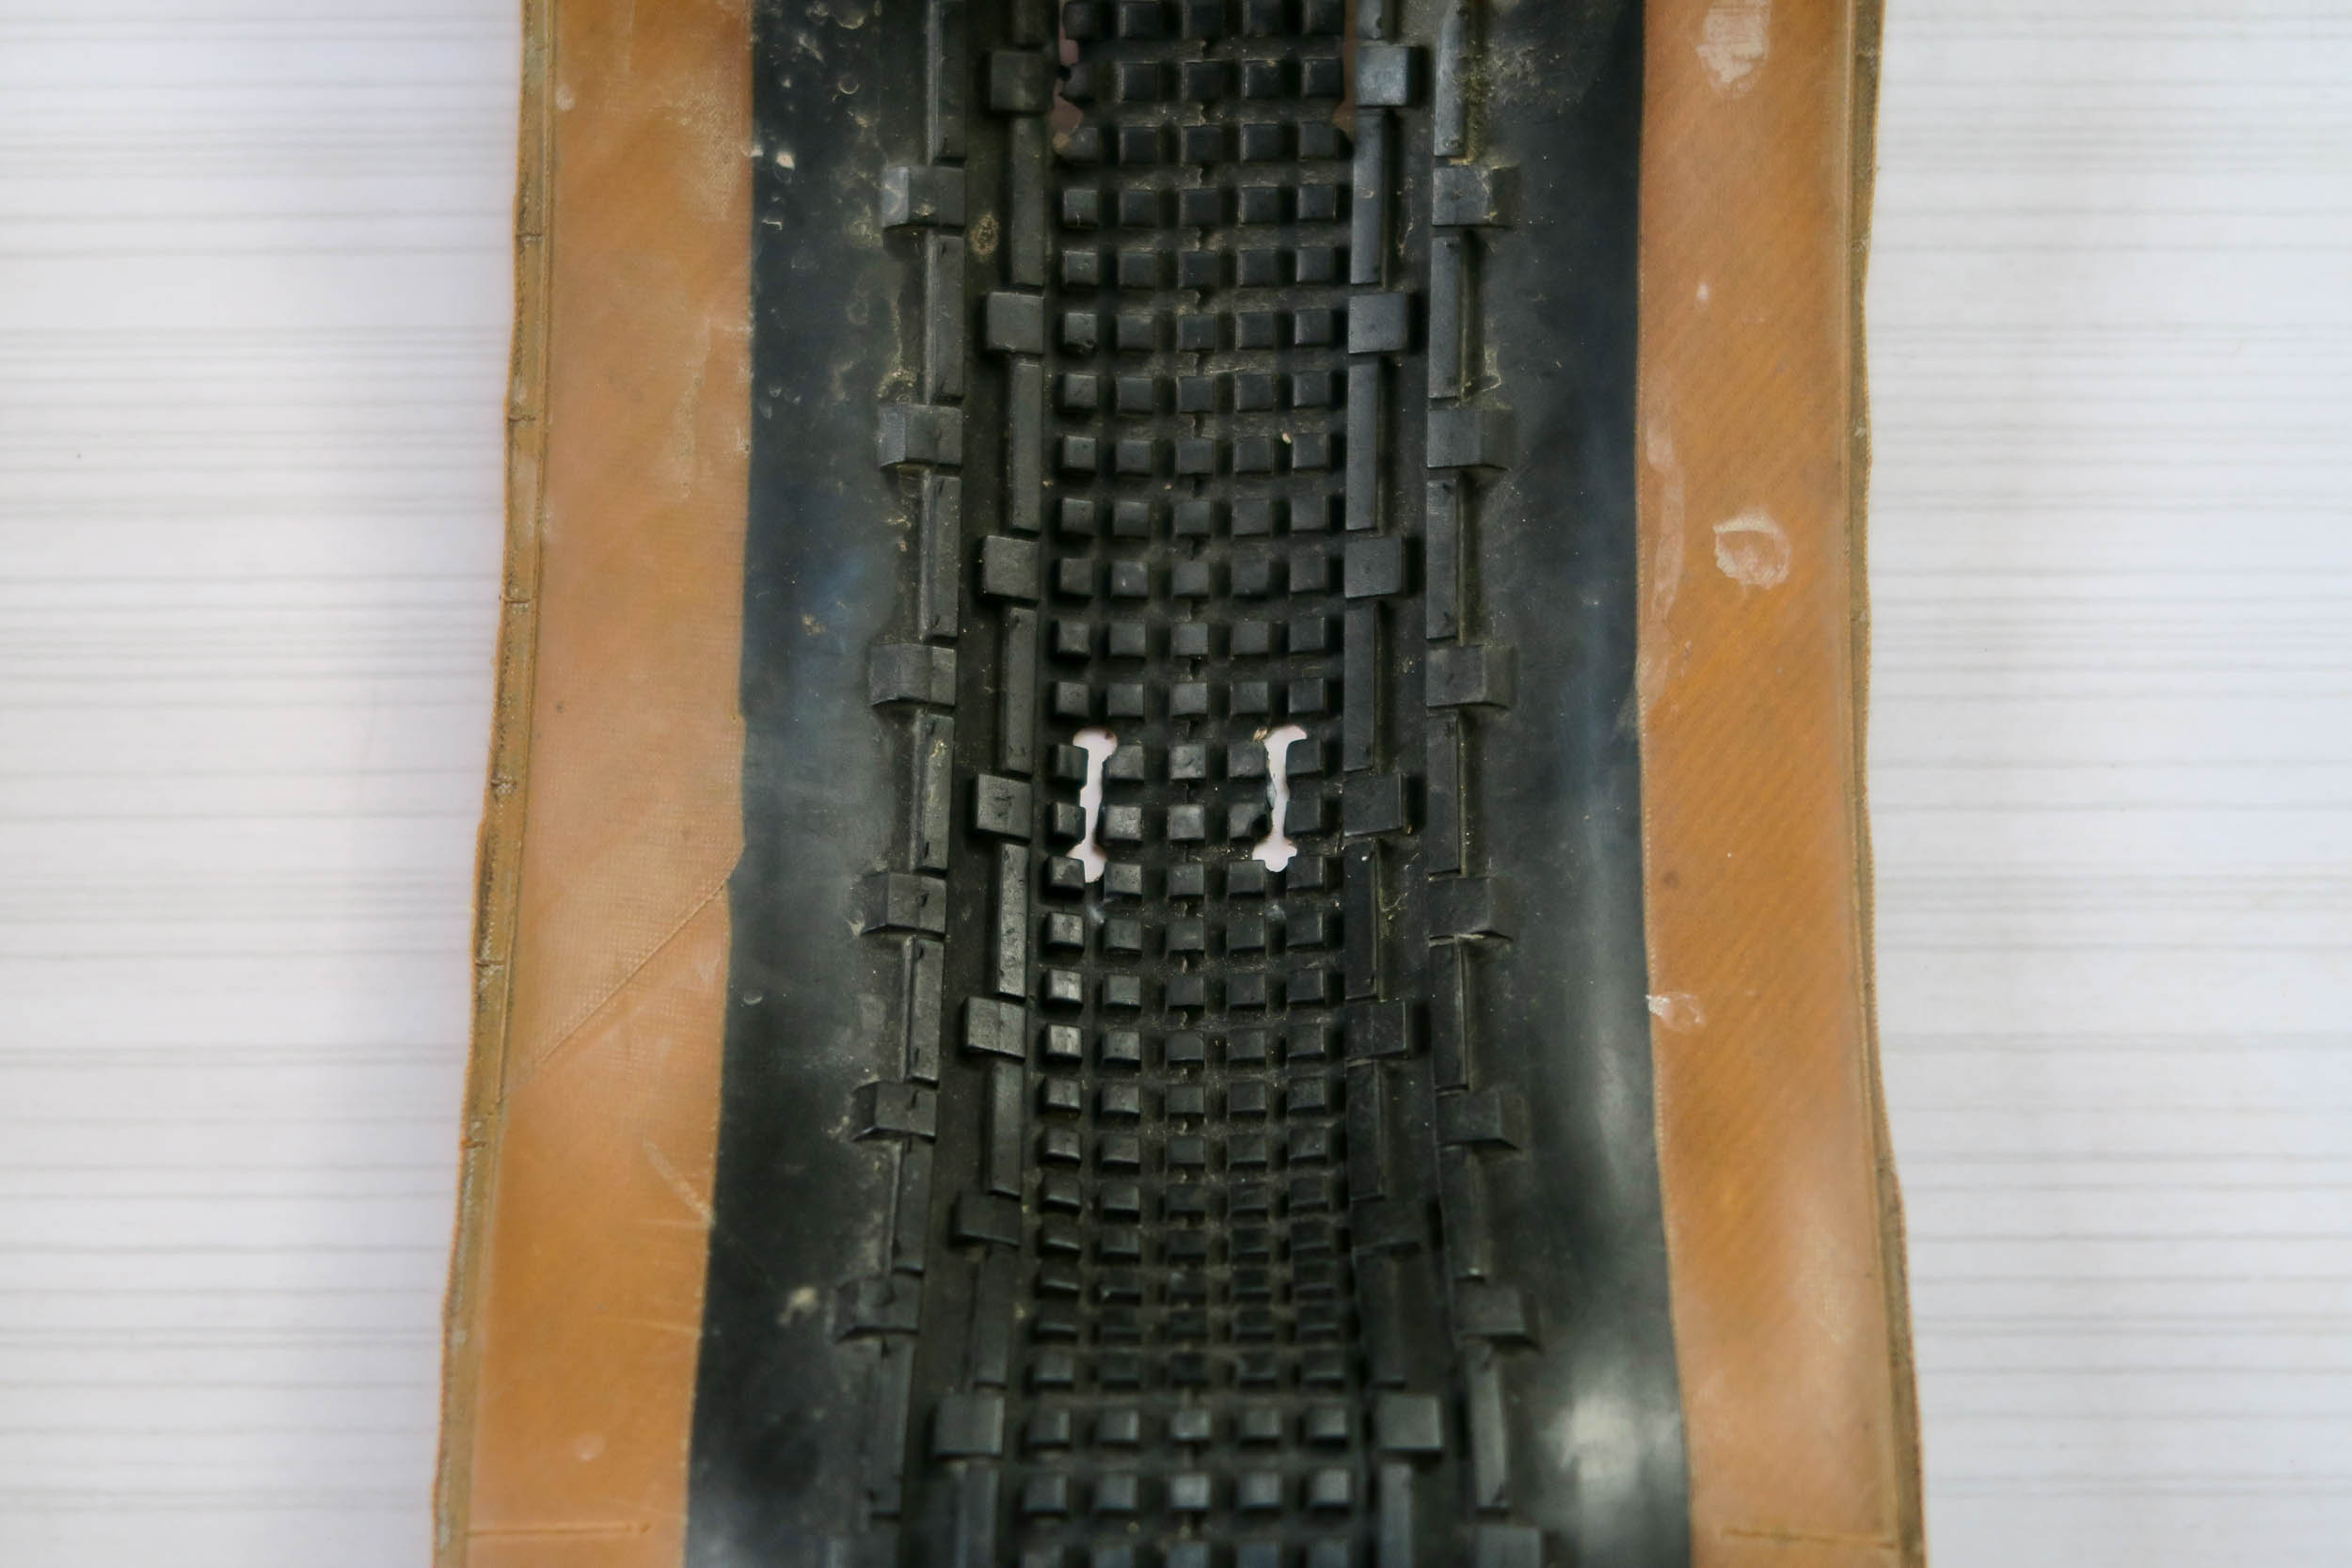
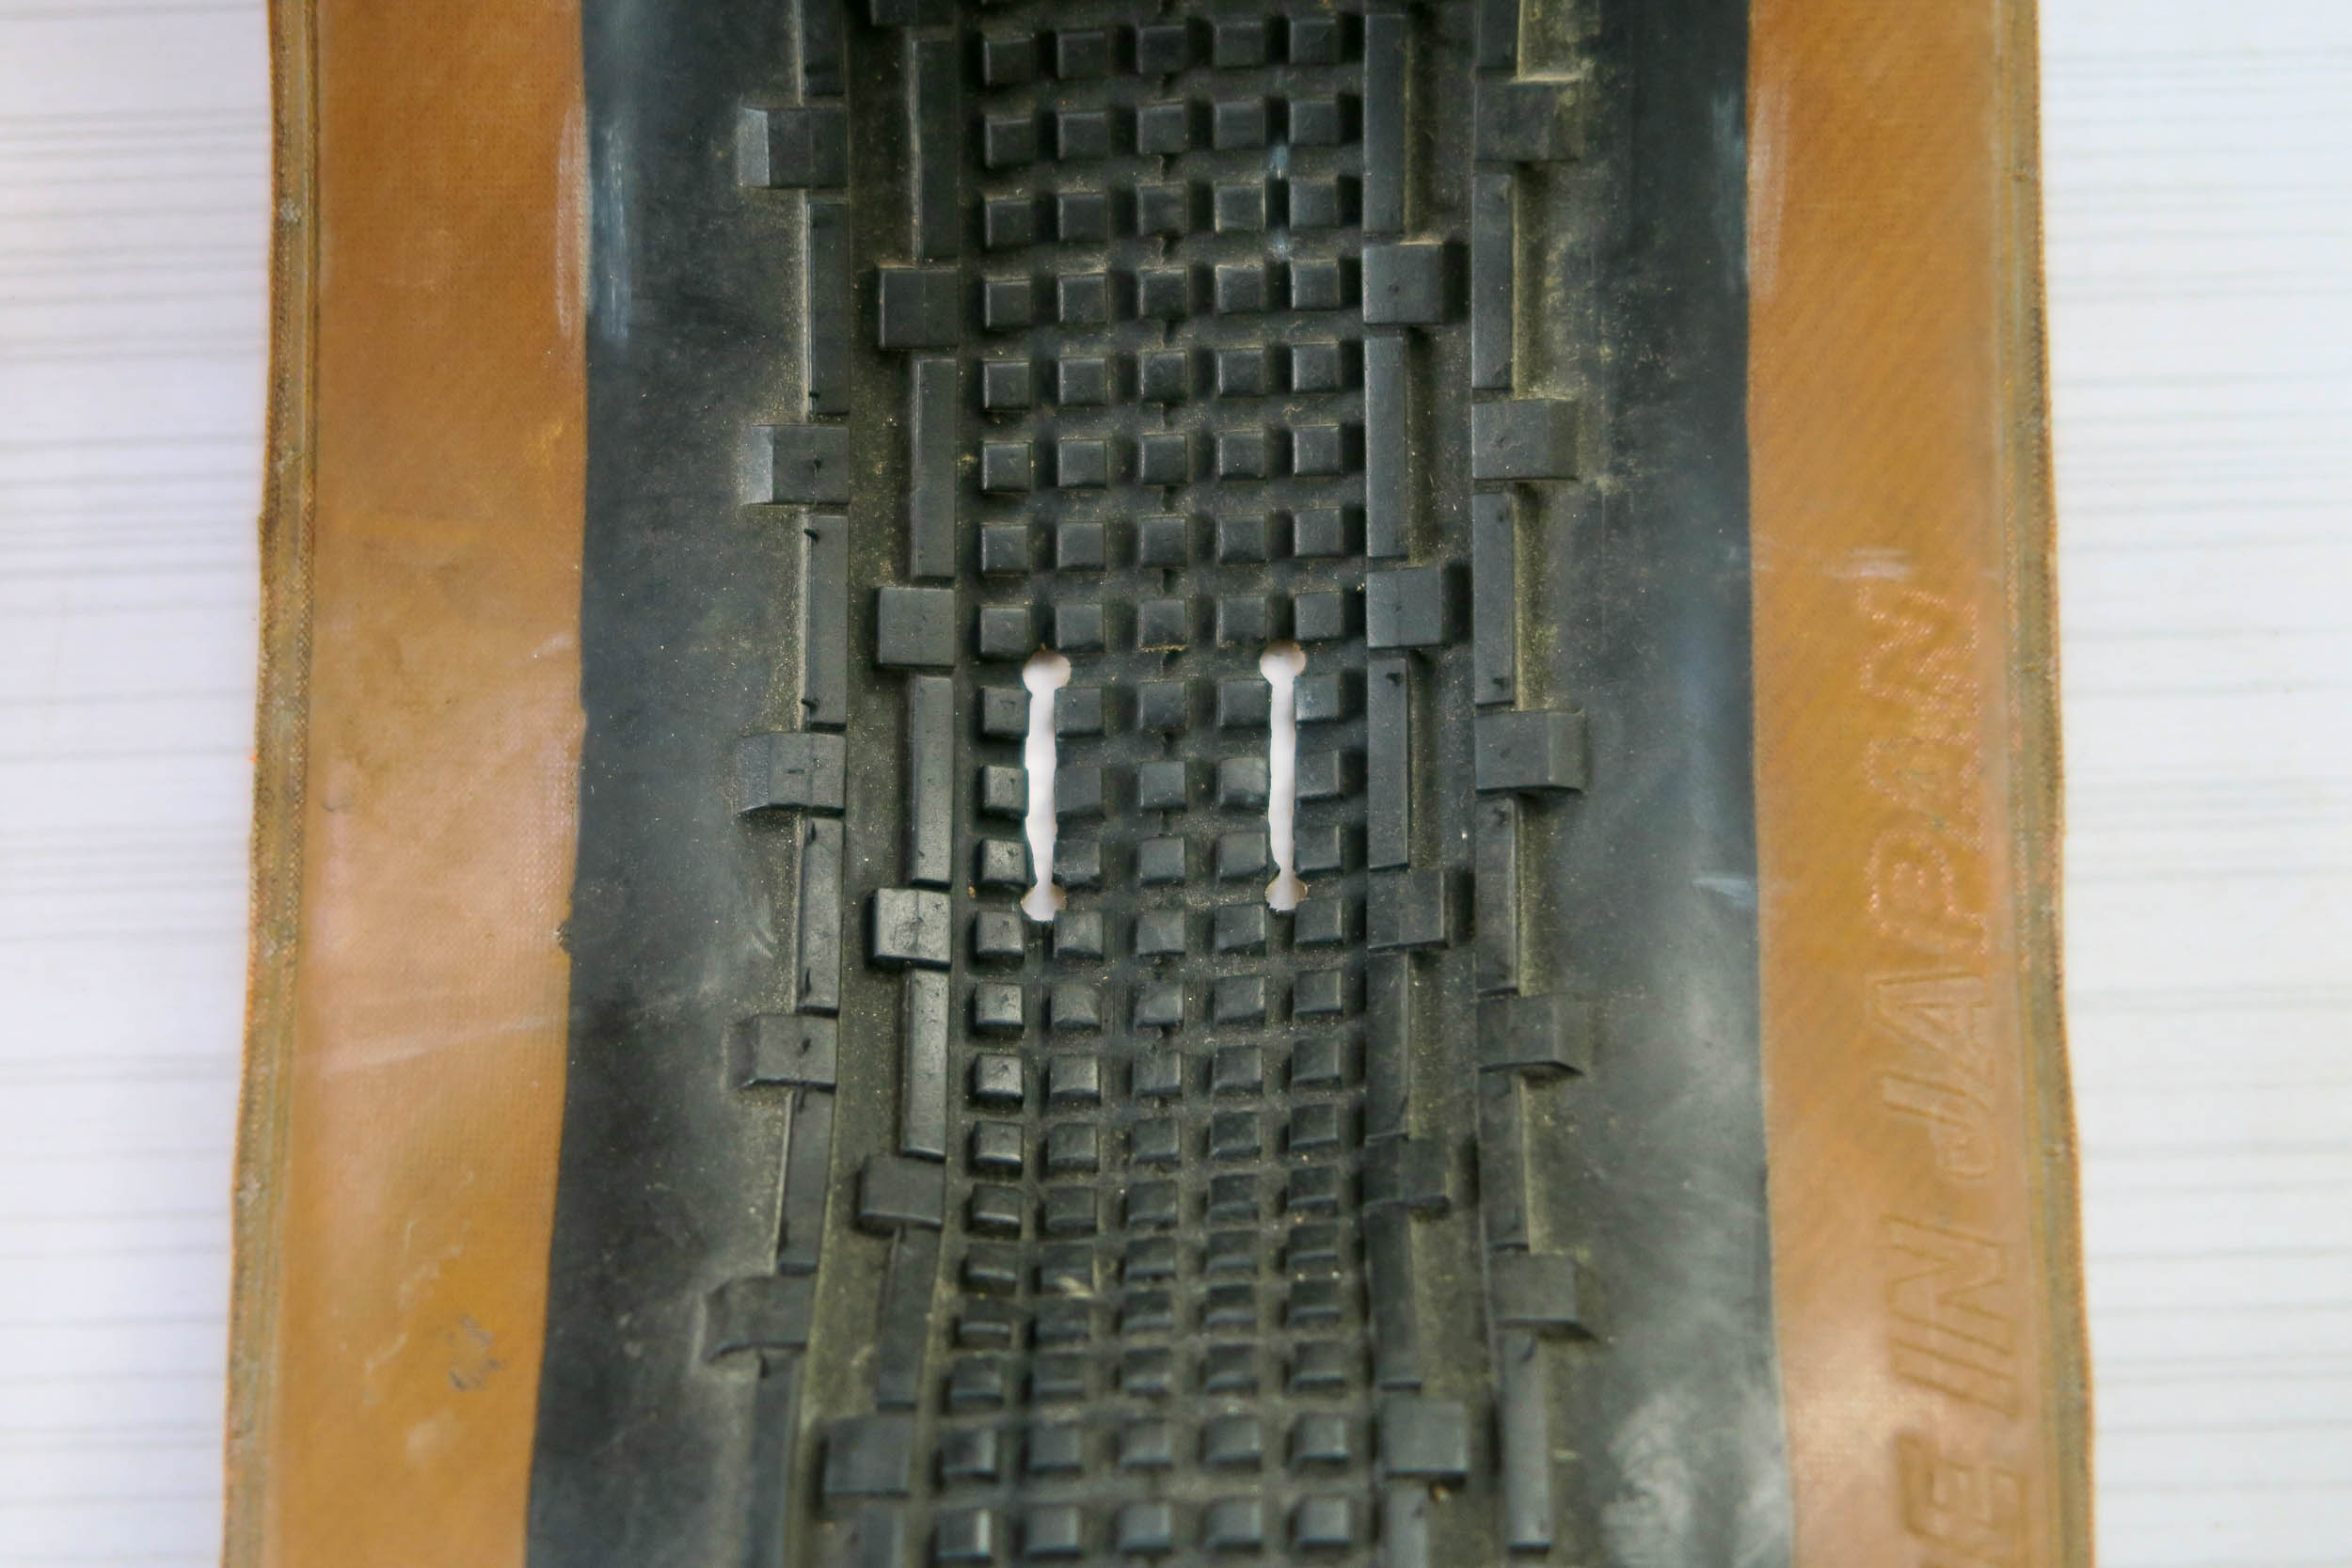
Subsequent, you’ll create a pair of small cuts within the middle of the tire to connect it to the seat tube. They should be within the middle of the tire, lengthwise (A). Ideally, you’d drill two little holes and reduce between them to create the opening. It’s also possible to use an axe and reduce in between the holes with a knife. The 2 openings for the seat tube are spaced 1.5cm (0.6″) aside, and every opening ought to be somewhat wider than the strap.
As soon as that’s executed, do the identical for the attachment to the saddle rails (B) by spacing them 2.5cm (1″) aside. Likewise right here, the 2 openings should be somewhat wider than the strap. I spaced the openings between the seat tube strap and the rail simply sufficient that the bag is much less horizontal and extra secure. In case your drybag is shorter, or if you wish to elevate the bag somewhat (quick seat submit, and many others.), you may make the (A) openings nearer to the (B) openings.
Step 3: Tie the closing twine
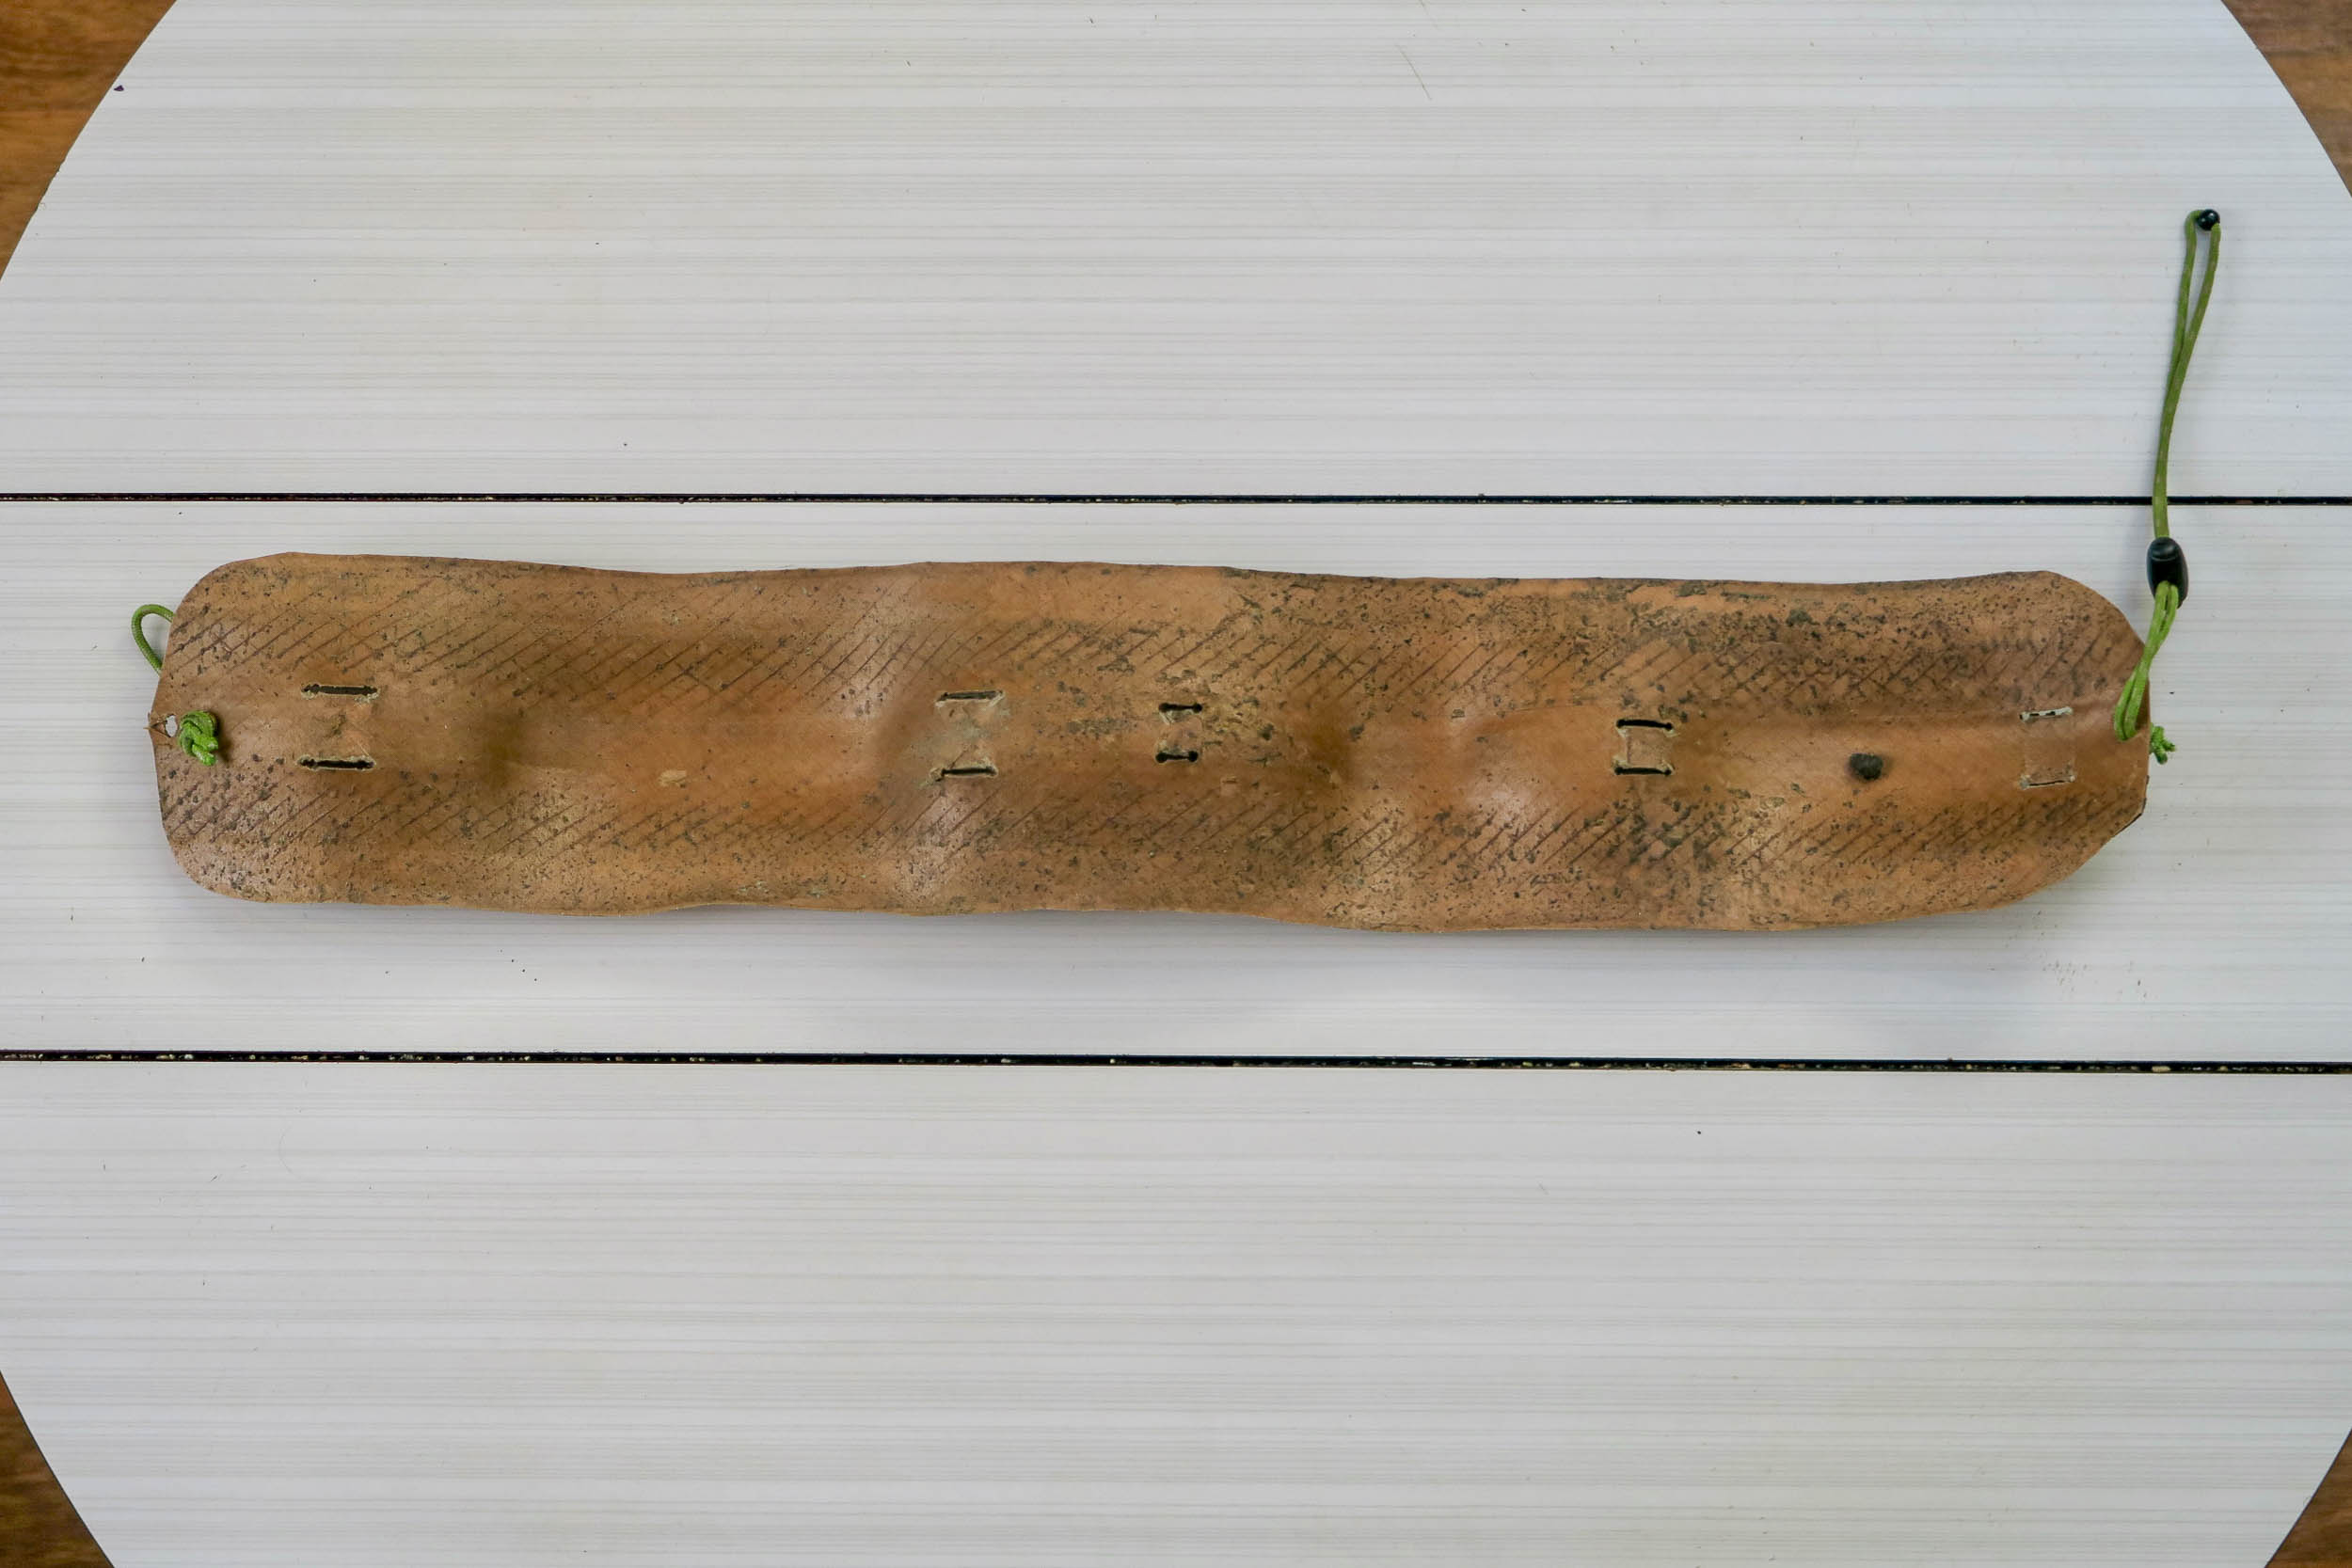
After that, drill a gap in the course of the tire at every finish (C) and (D). I’d advise placing an eyelet on every gap to stop the tire from splitting with friction. I put them 1cm (0.4″) from the sting.


Cross a loop of twine via holes (C) and (D) and tie a knot on the underside. Put a twine lock to carry the bag on one among them. The size of the twine will depend on the size of the drybag. You possibly can simply discover a twine clamp on an previous bag, pair of shorts, jacket, and many others. There could also be different options, however this one work properly. This twine additionally makes lashing light-weight objects onto the harness doable.
When your drybag is within the harness, the 2 sides of the tire would possibly contact. If so, you may reduce the tire somewhat, however be certain to trim an equal quantity off of either side so it’s symmetrical.
Step 4: Connect different luggage (Non-compulsory)
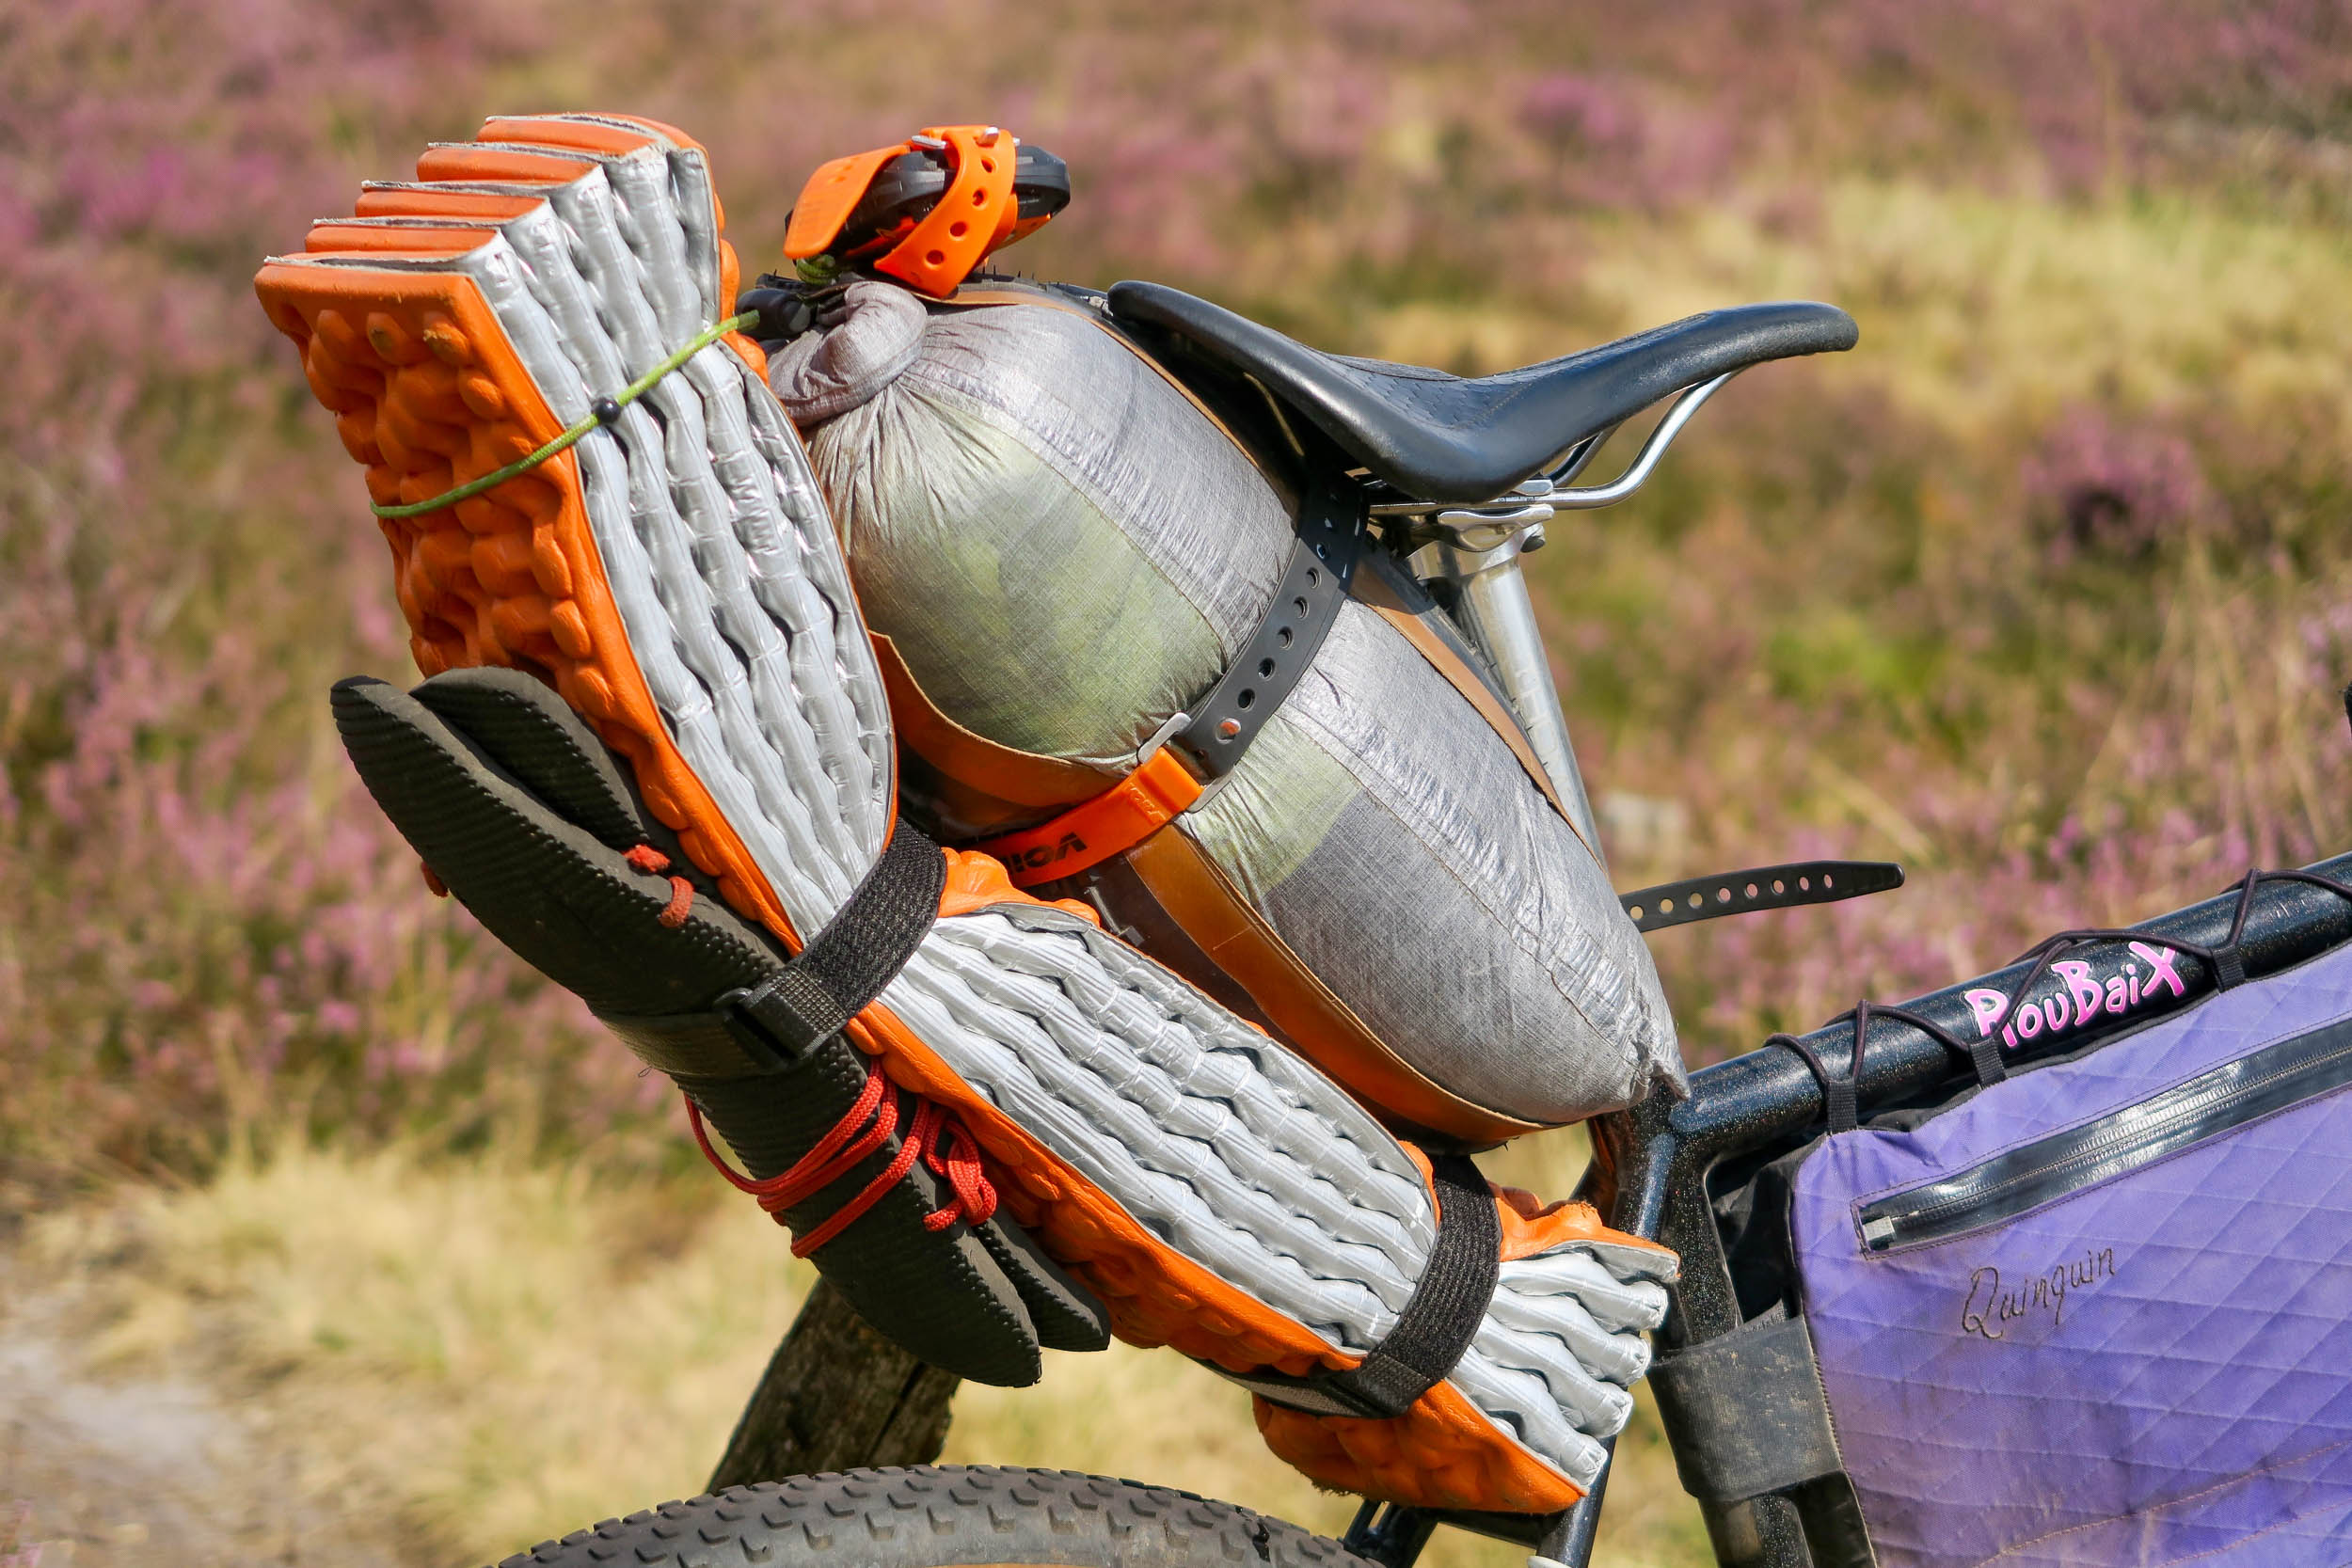
You possibly can add attachments for straps under and above at factors (E), (F), and (G). For somewhat further capability, I positioned my foam mattress and sandals under, and I’ve area for my tracker or a small bag above. Don’t hesitate to drill into the tire; it’s robust, and if the holes are clear, it received’t tear.
If you happen to tousled, you may at all times re-drill different holes in the identical tire. In any other case, the entire thing is fairly low threat, and you may at all times begin over with one other piece of the previous tire, as it is best to have one or two extras from the one you chop out.
Step 5: Connect Your Harness
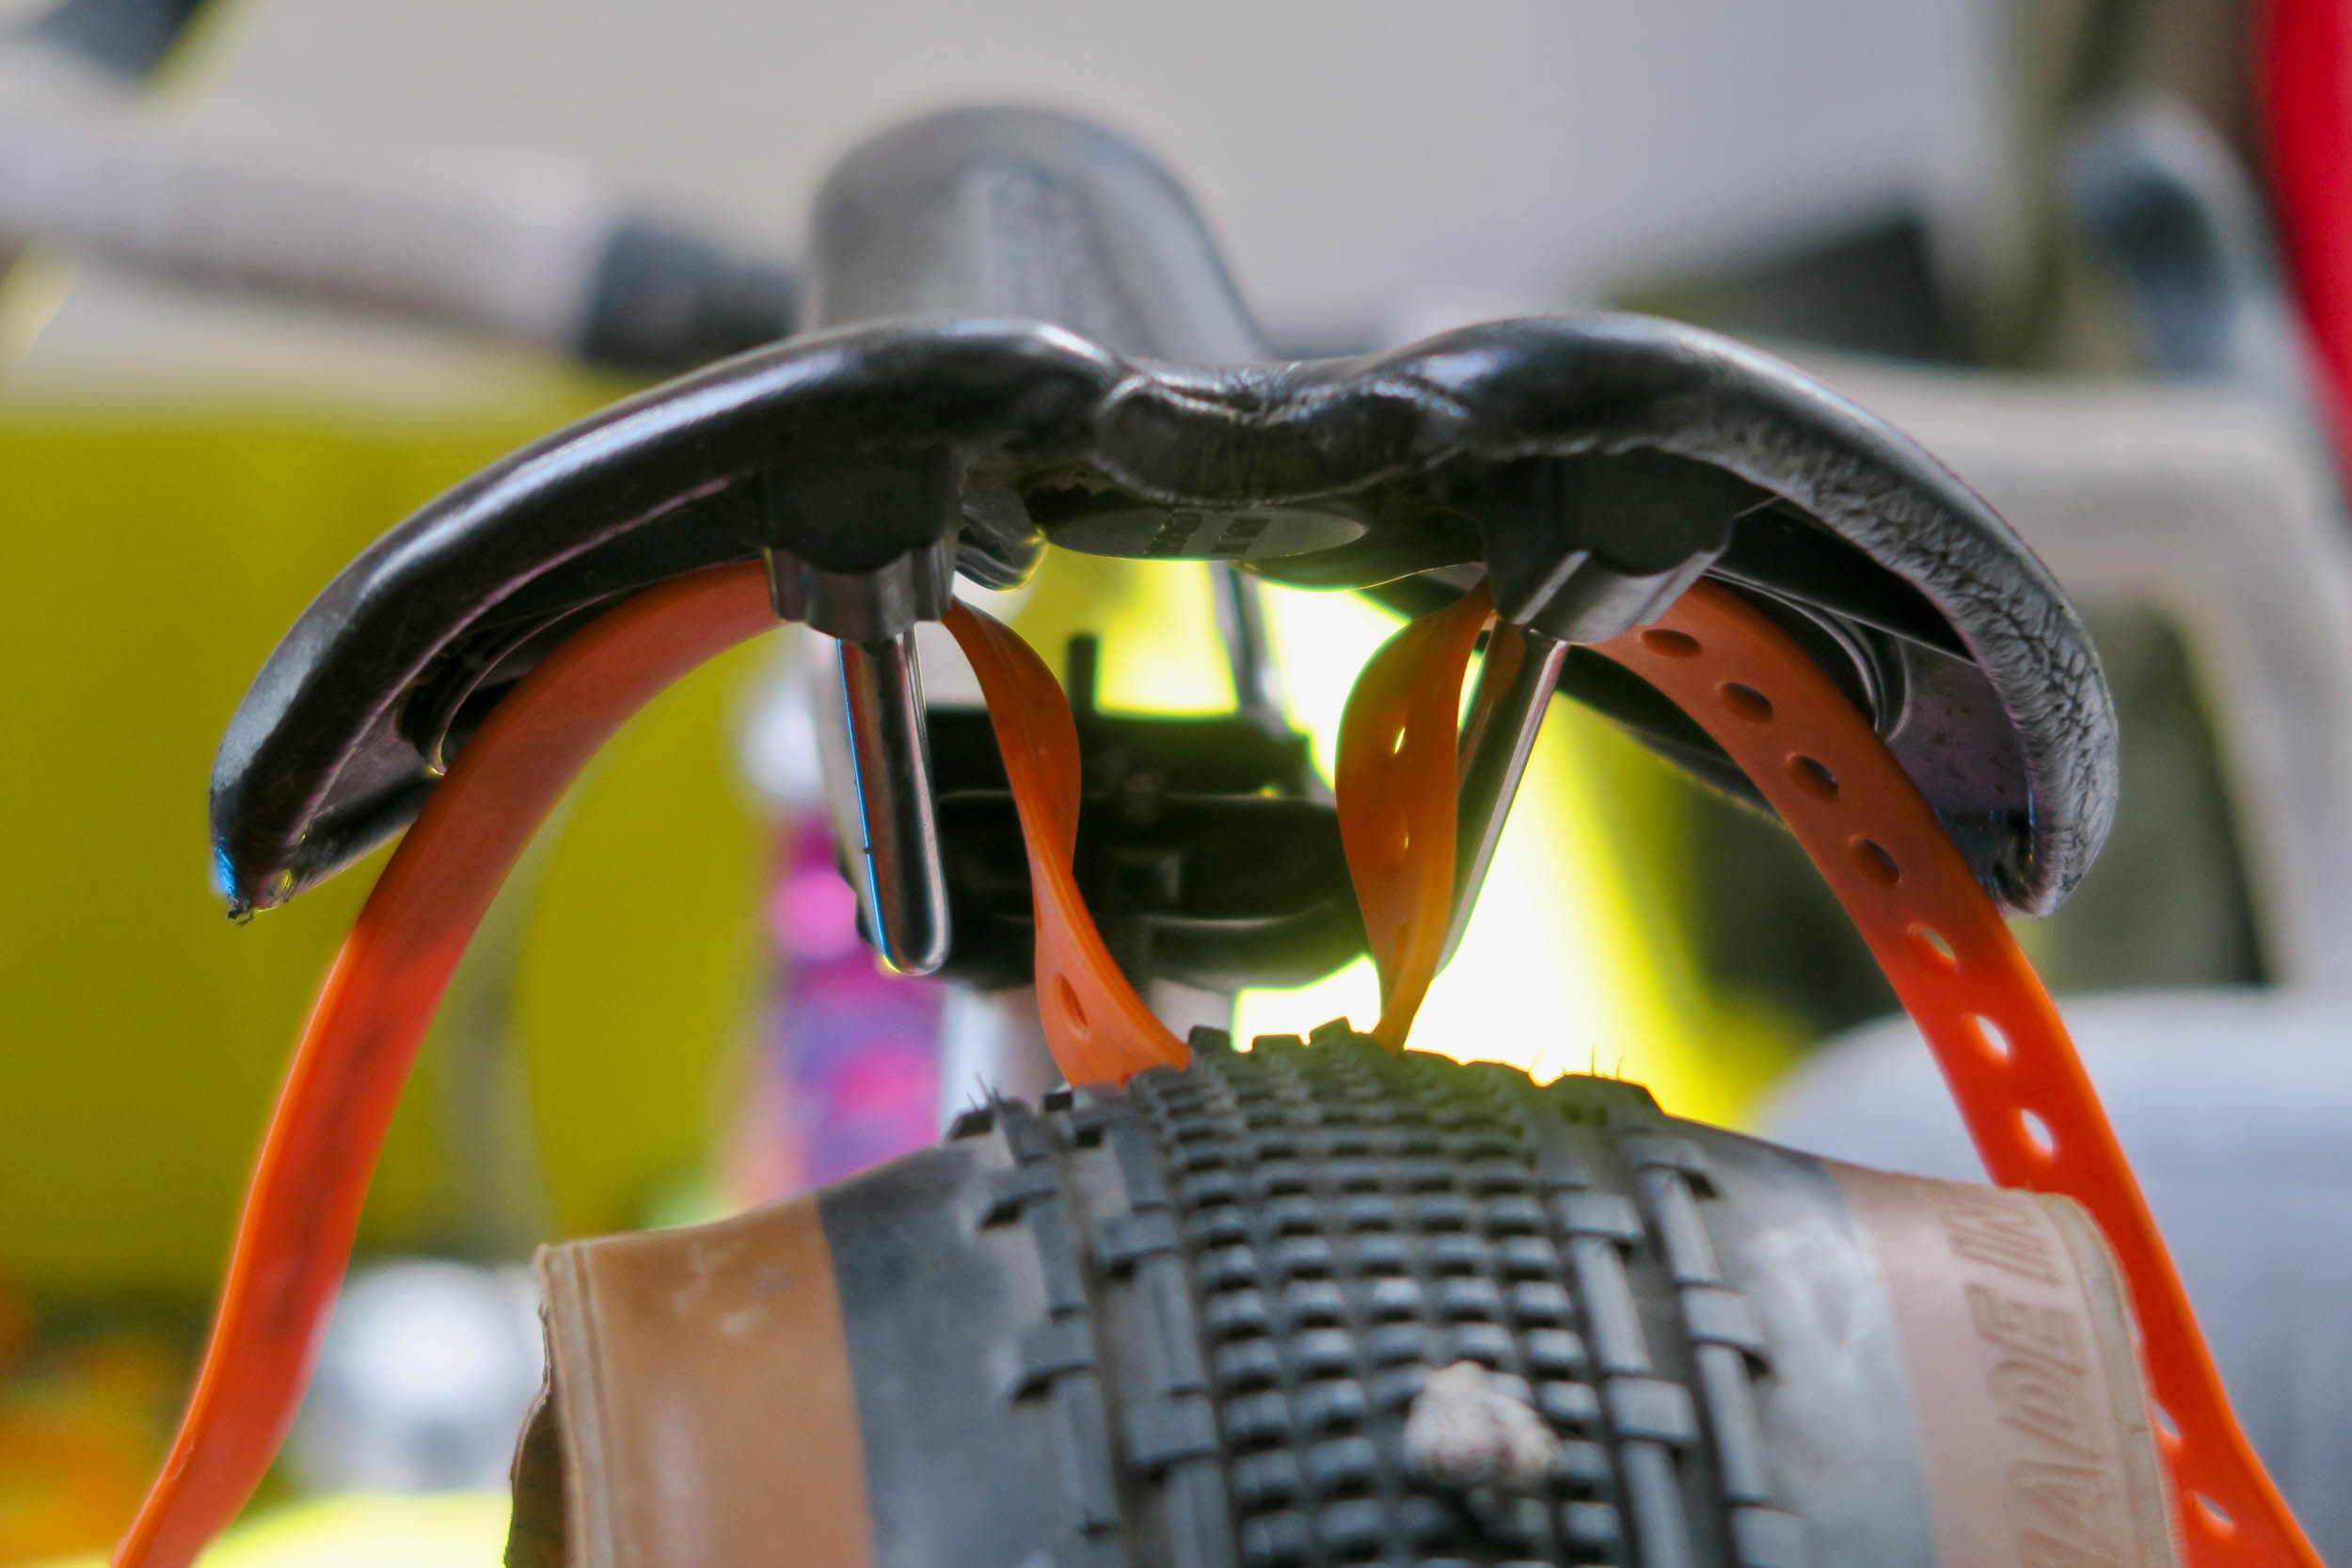
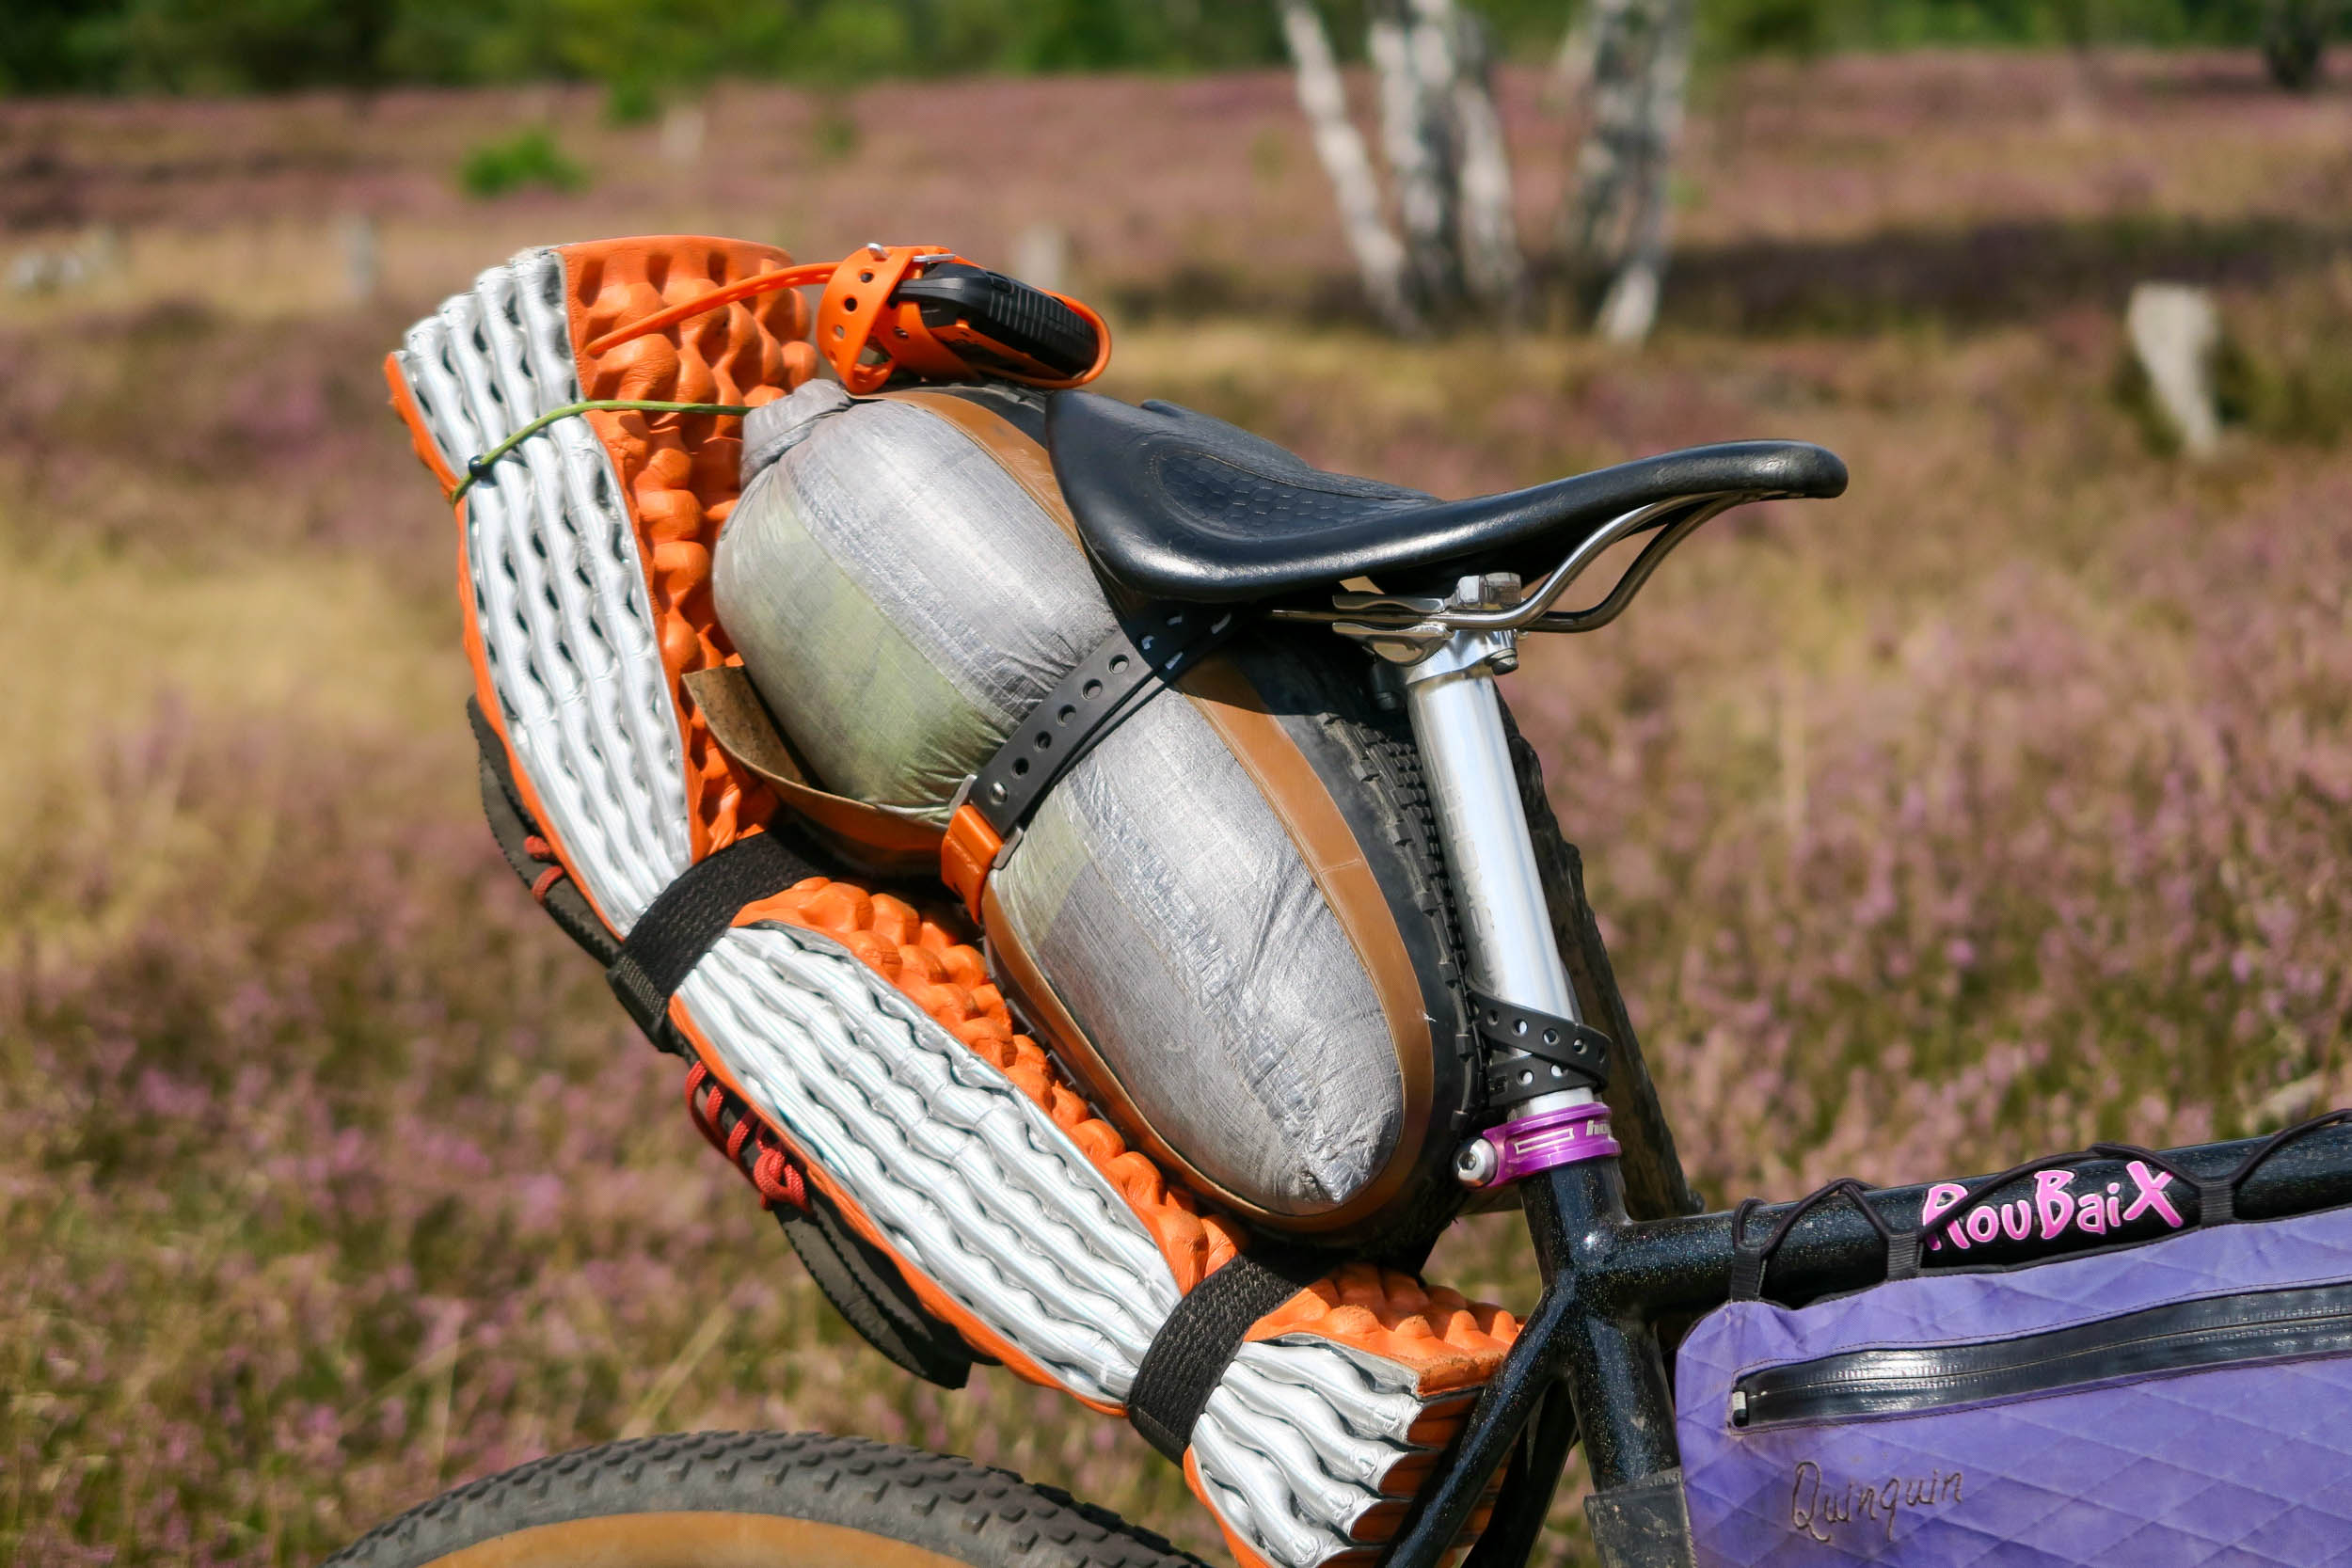
Lastly, it’s time to mount every thing on the bike. To do that, you’ll first connect the harness to your seat tube (A) with the smaller strap after which to your saddle rails (B) by passing either side of the bigger strap over every rail. Insert the loaded drybag and tighten the strap to comfortable every thing into place.
In case your drybag is simply too massive—and particularly if it’s too lengthy—it will likely be tougher to tighten into place, and it dangers swinging. Plus, your thighs will most likely contact it whereas driving. If so, you’ll have to scale back the quantity till you’re capable of synch it tightly.
Step 6: Go Trip Your Bike
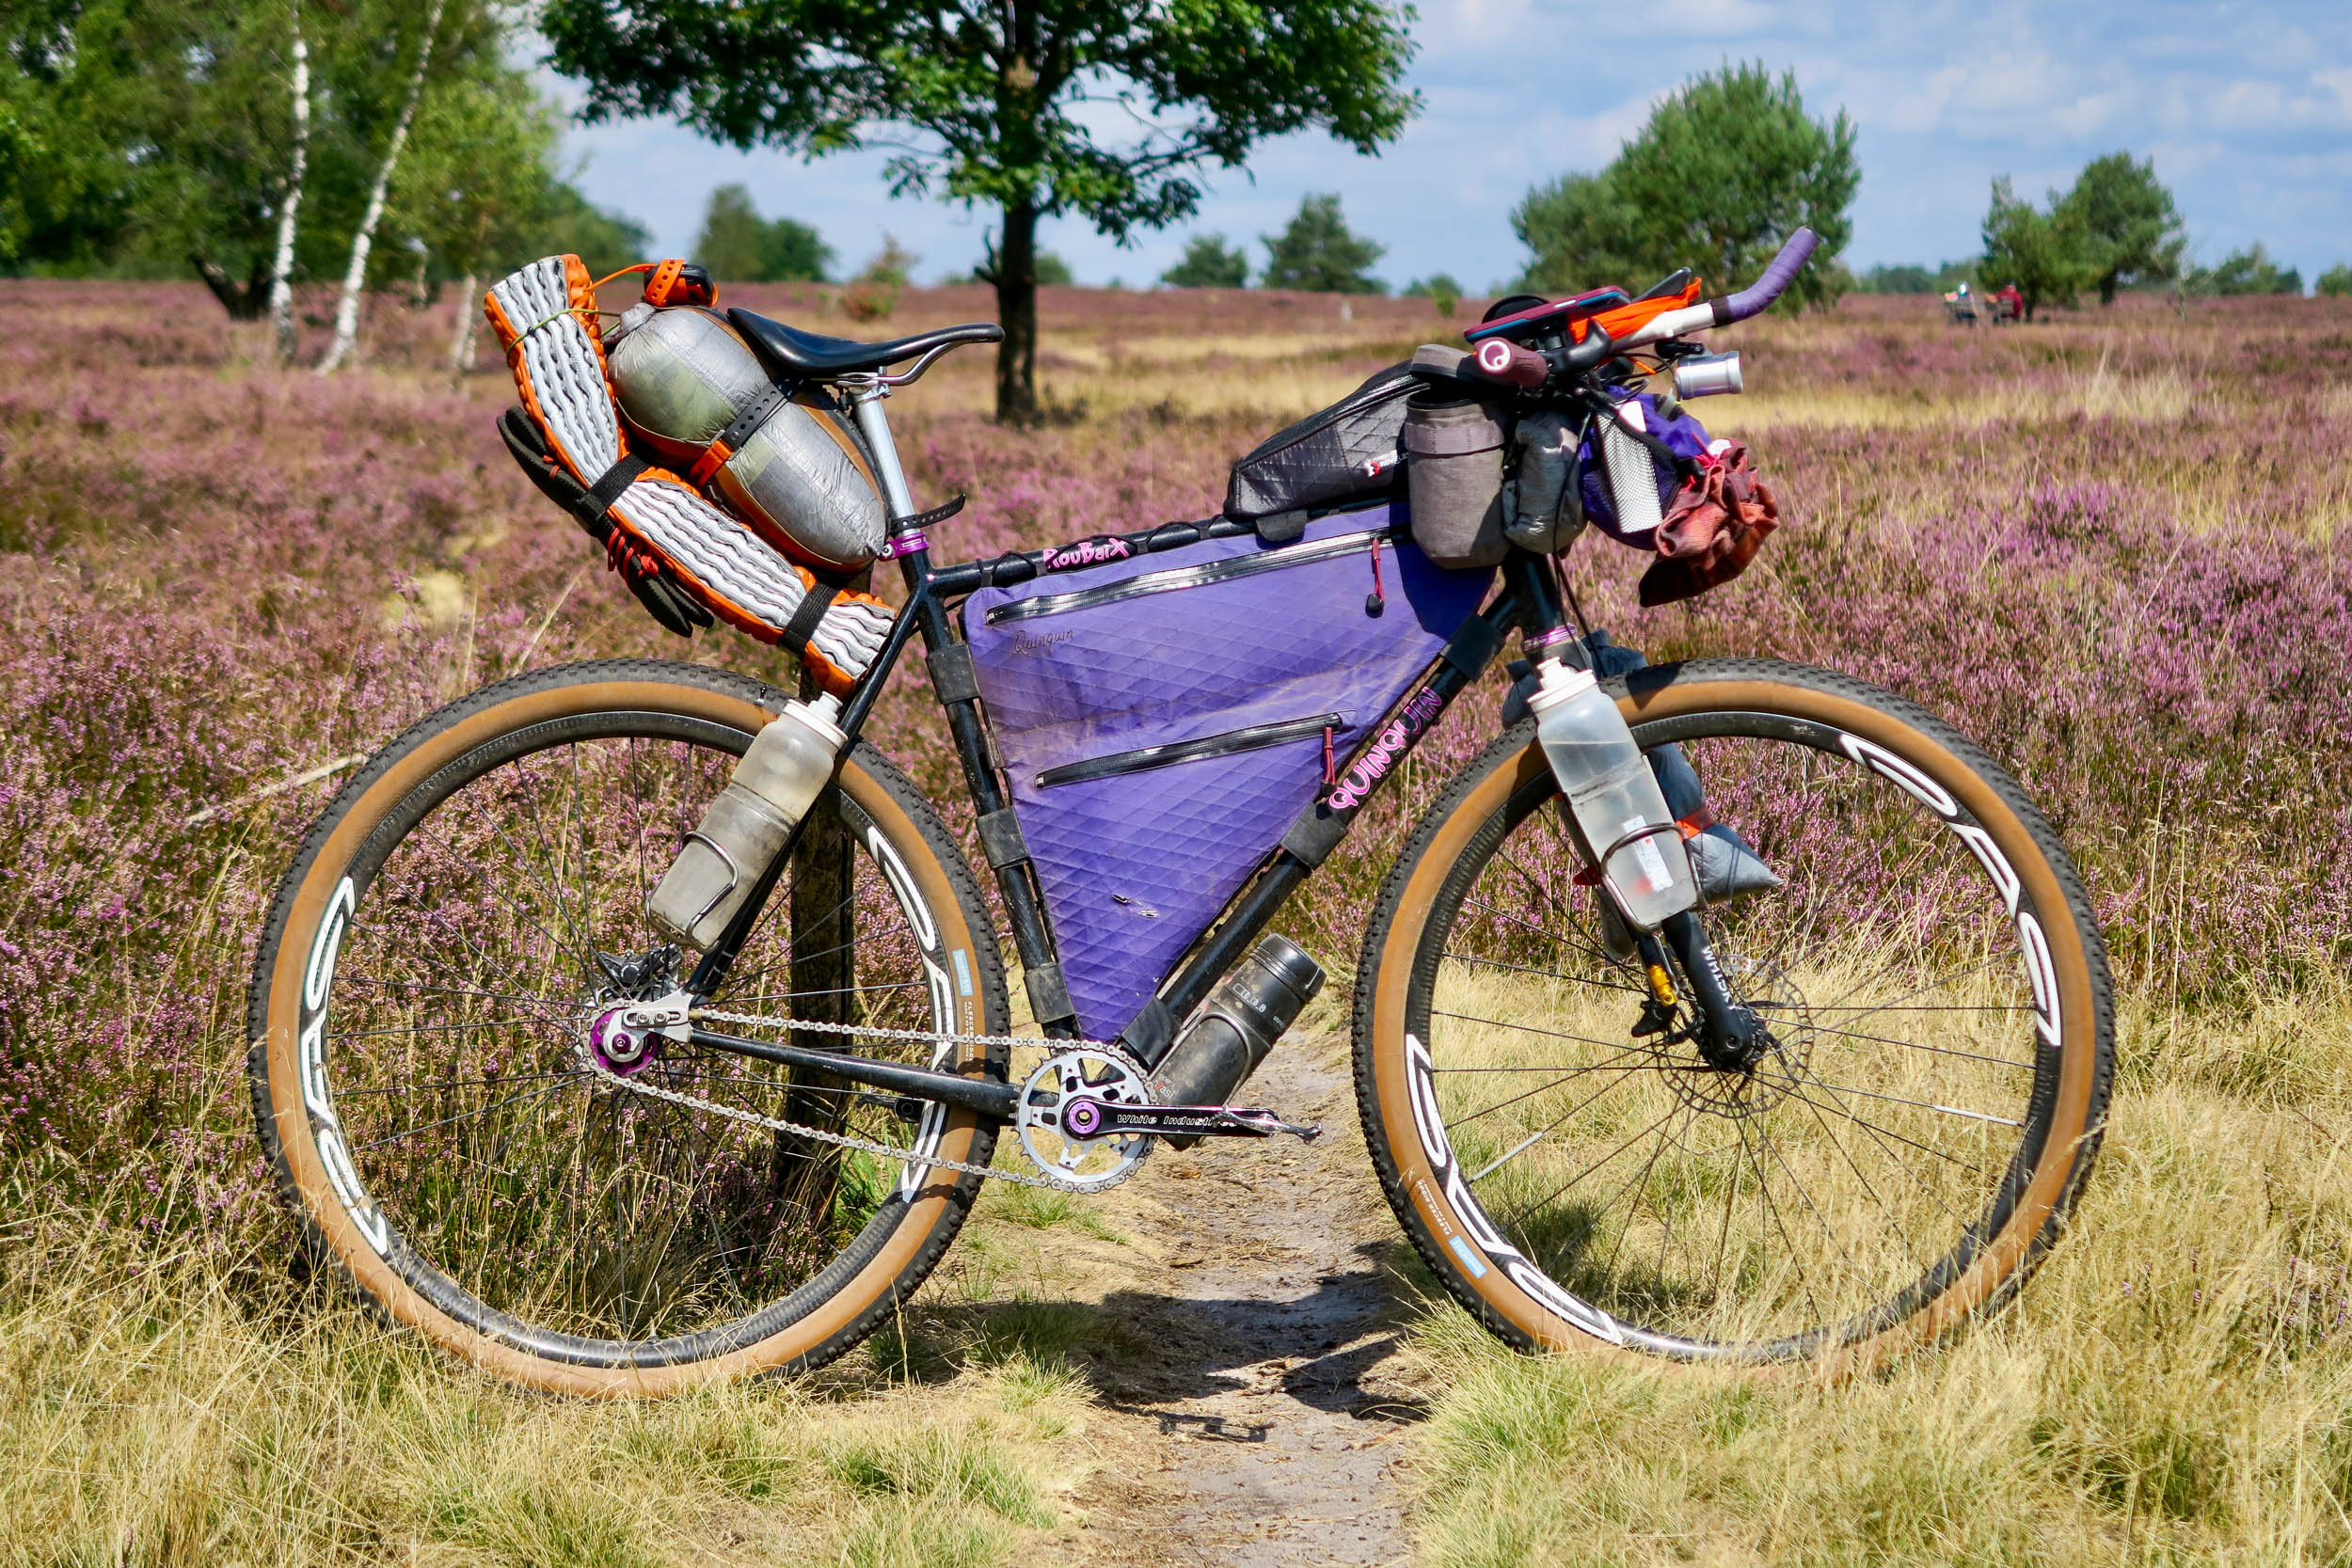
And that’s it. You’re prepared to move out on a bikepacking journey along with your cheap new low-tech saddle bag. You’ll want to ship us an image of your loaded harness once you do!
About Remi Quinquin
Rémi Quinquin is a cartographer and bikepacker who lives within the north of France. He likes to experience single-speed throughout Europe in occasions or on journeys. He organizes a variety of occasions and rides to assist folks uncover his area between the Monts des Flandres, the cobbled areas, and the mining basin. His small and enormous biking adventures usually finish with a beer. You could find him on Instagram @remiquinquin.
Associated Content material
Ensure that to dig into these associated articles for more information…
Please preserve the dialog civil, constructive, and inclusive, or your remark shall be eliminated.
[ad_2]