
[ad_1]
Lastly…. My break is over and I´m again engaged on the bike.
Please keep in mind I by no means did arrange any schedule for the restoration, as a result of I guessed it could be onerous getting stuff and I figured I would free focus and face instances of diminishing motivation sometimes. I do totally perceive when you suppose I´m having luxurious issues right here, however they’re very actual. Wouldn´t each Kawasaki triple fanatic simply dream of taking up this challenge? Completely! However they wouldn´t just like the infinite, resultless seek for these obscure, extremely-hard-to-find-bits wanted to proceed engaged on the bike.
Consider me, it is rather irritating to know persons are holding on to stuff they’ve in inventory as some form of funding as a substitute of sharing it with somebody really engaged on a motorcycle…. Oh properly, sufficient moaning. Right here´s what I’ve been doing the final couple of weeks!
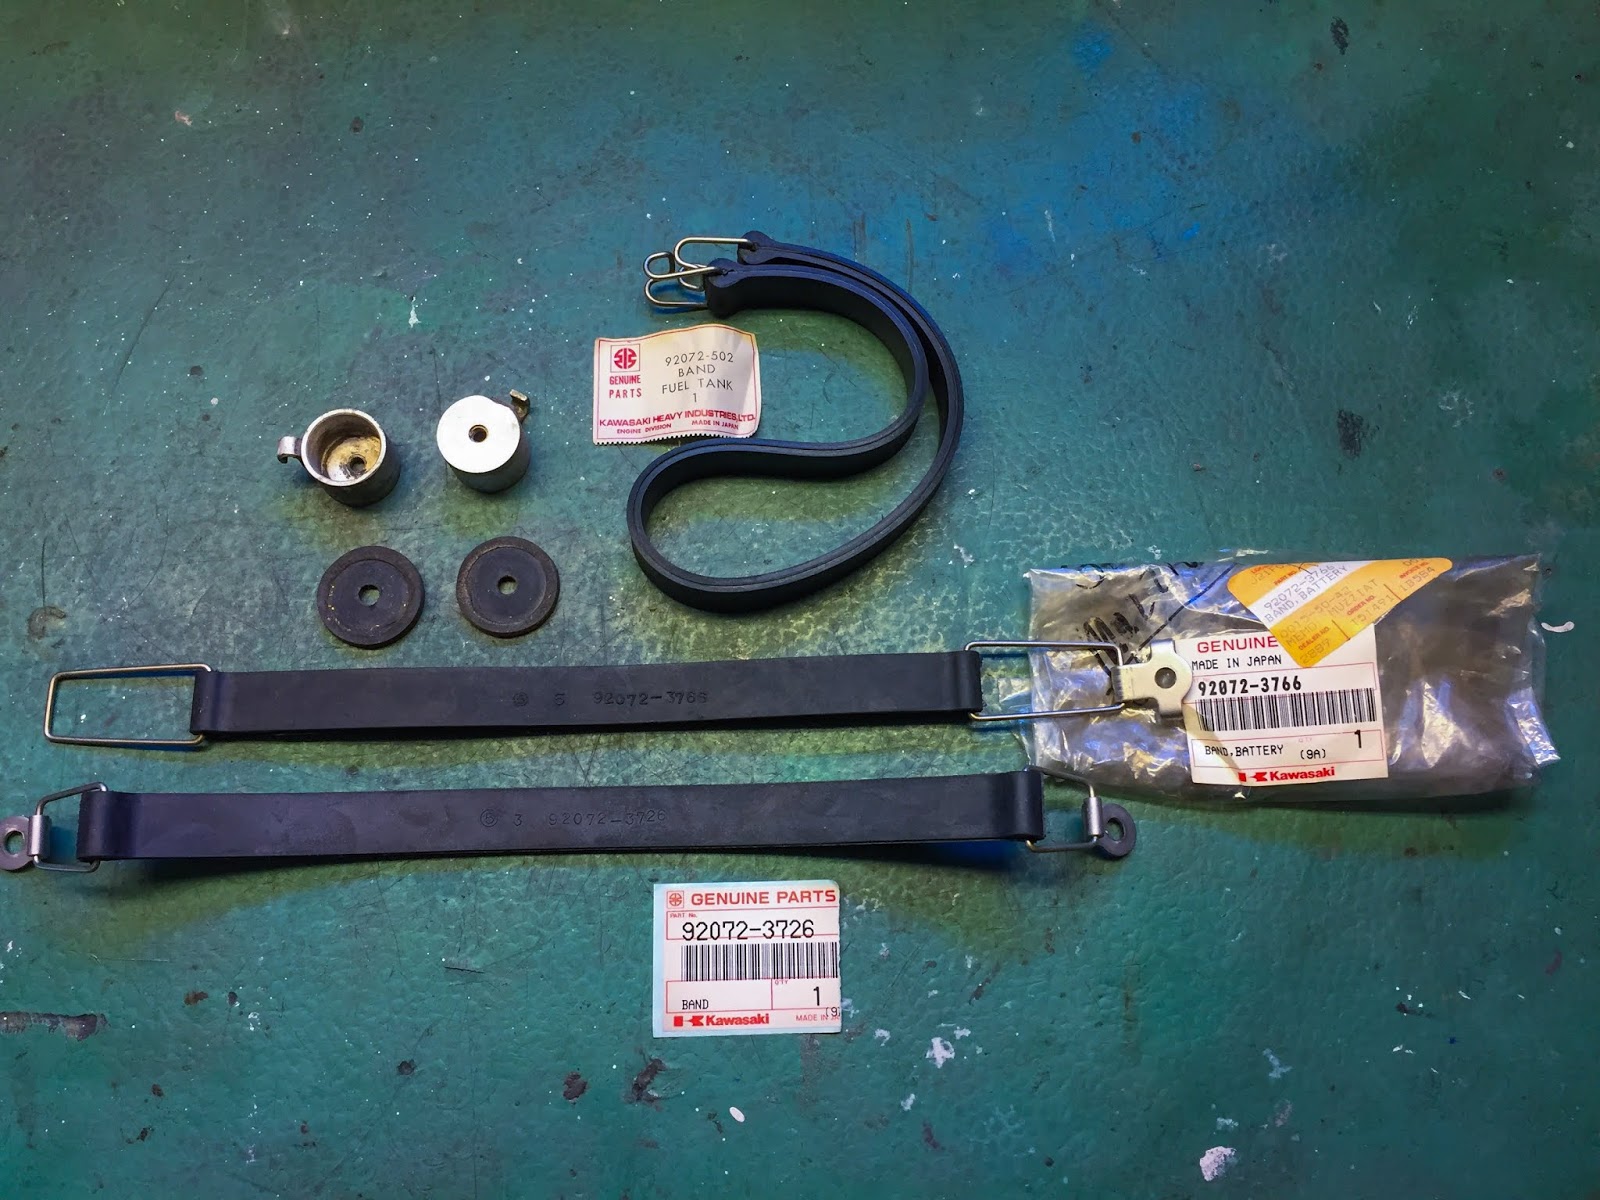
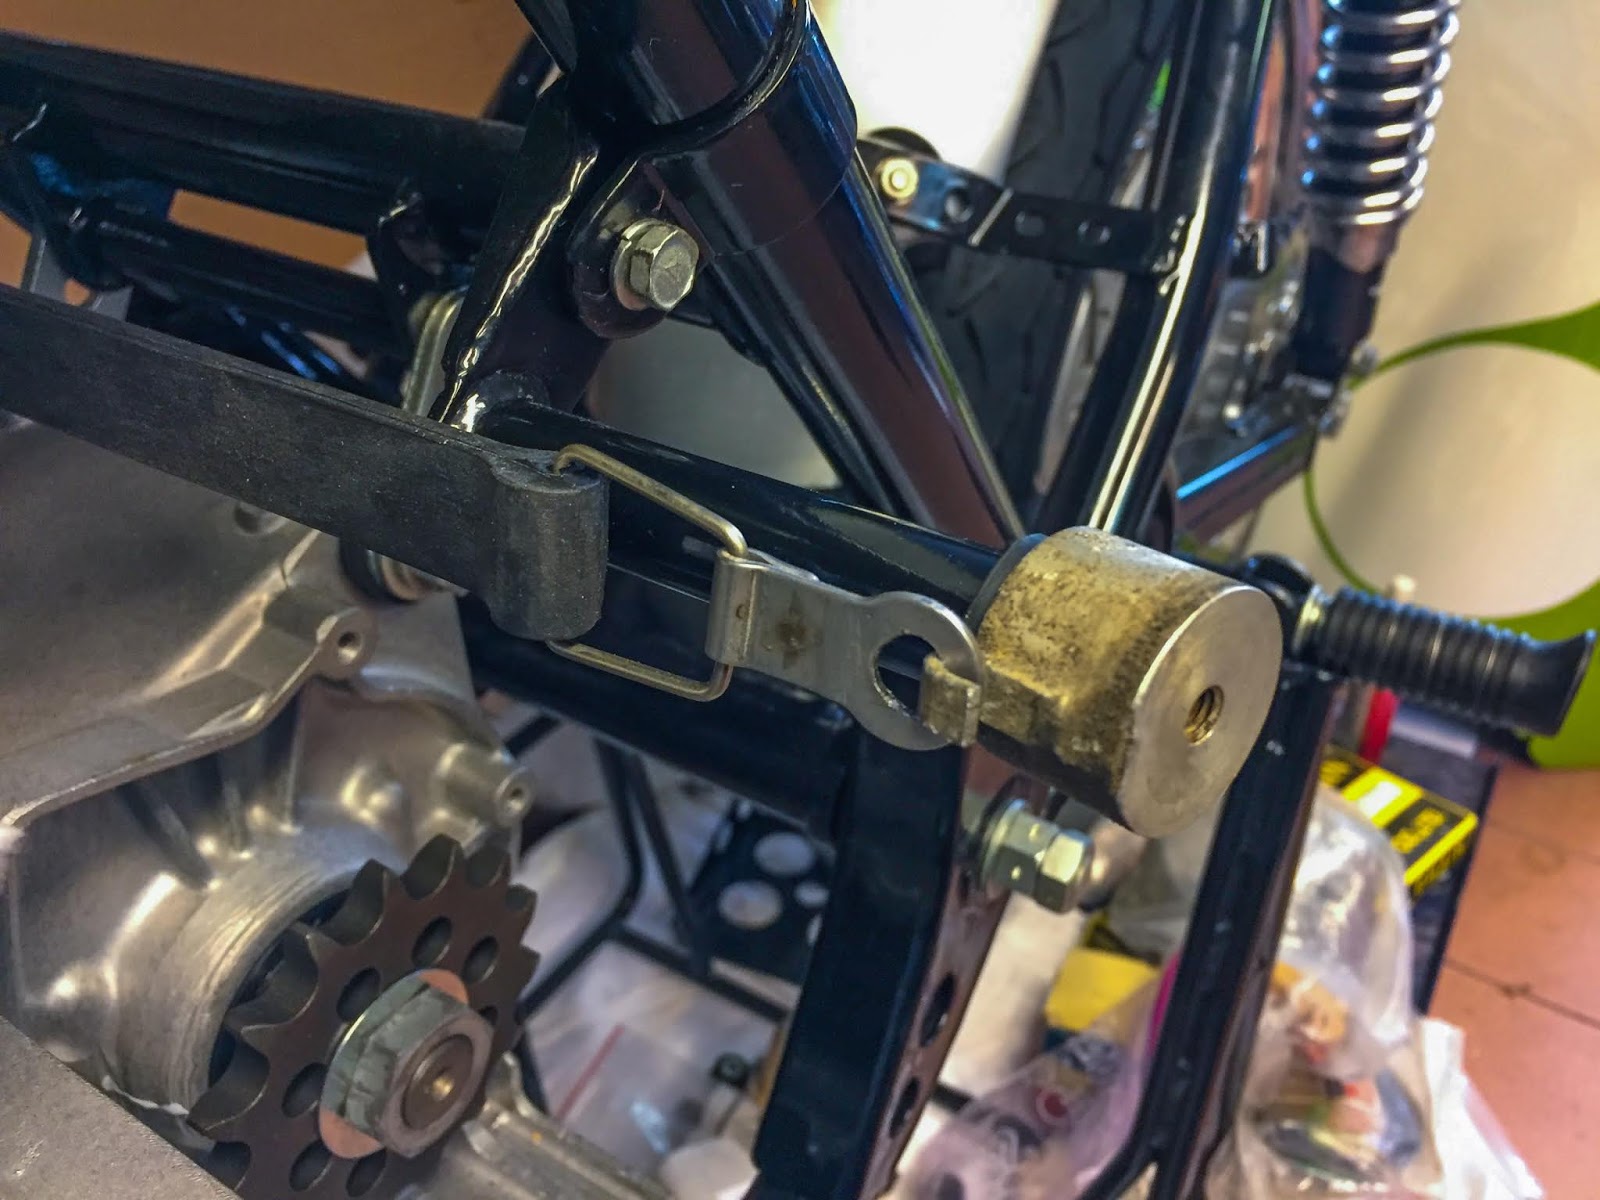
I figured I´d begin off with one thing simple. I knew from day one I would want to get a alternative for 92072-008, Band Instrument, that holds all sides of the fairing in place, linked to the body by the 2 small “cups” you possibly can see within the image high left. These components are, in fact, not possible to search out. I´ve been in search of 2 years now and have come to the conclusion I´ll by no means discover the unique one. So, what to make use of as a alternative?

I appeared up some options on eBay and acquired a couple of candidates. It´ll present afterward I made a mistake right here, however it’s a somewhat comprehensible one…. On the precise listed here are 3 of them and under comply with a presentation of the crafts they got here from. I do know it’s a parenthesis, however I discover it amusing.
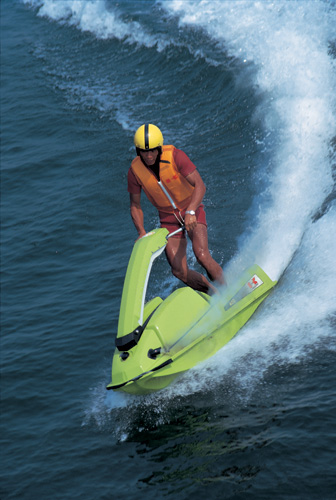
Within the image on the left you possibly can see the Kawasaki WSAA 1973-74. A really early “One passenger water craft” that makes use of 92072-502 as a gasoline tank band. Will I have the ability to apply it to the H1R? Possibly, perhaps not!

Right here on the precise is the Kawasaki Jet Ski 550 SX that makes use of 92072-3766 as a Battery band. Possibly that´ll work higher…?
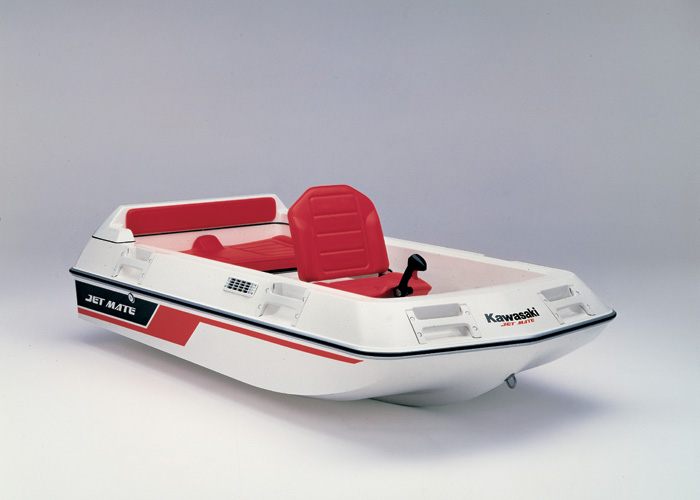
And final, however definitely not least… is the Kawasaki Jet boat “Jet Mate” from 1989-1992. Removed from an H1R, very far… However will the 92072-3726 “Band” work as a fairing retaining half? The reply quickly to come back!

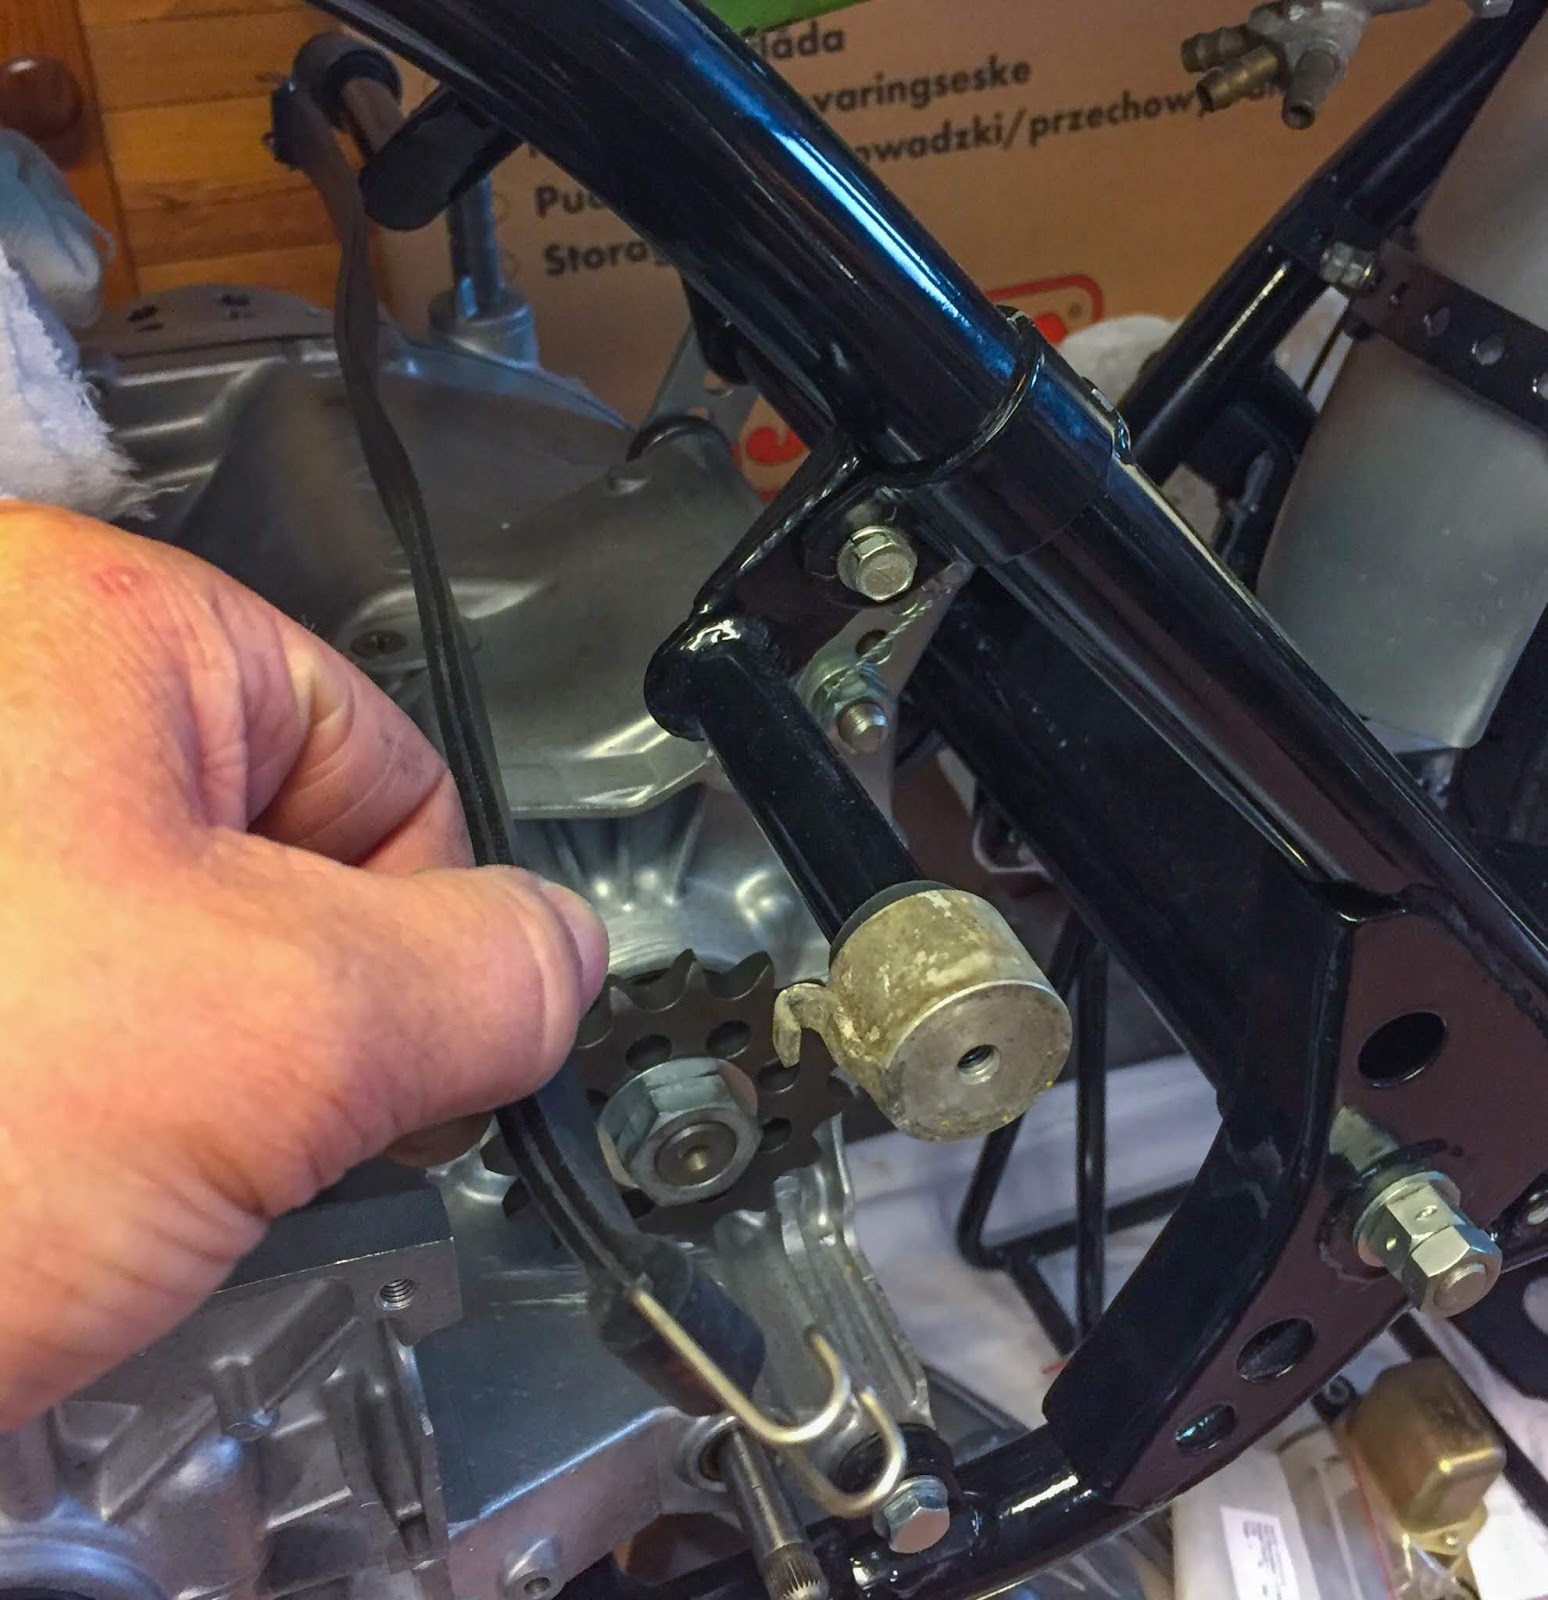
The “cups”, nonetheless uncleaned and unpolished right here, are hooked up to the fairing with a big headed M6 screw after which goes over the rubbers on the body brackets as proven right here on the precise. The hooks are for attaching the fairing rubber (band device) and pull them inwards and in that manner maintain the fairing snugly in place. All good in concept…
OK, first out is the WSAA gasoline tank band. Method too lengthy as clearly seen right here. Good form on the steel hooks, however no, they gained´t do. Too dangerous since thay had been the oldest components in my assortment of replacements. On to the subsequent one!

Subsequent up is 92072-3766, the Battery band from the 550SX. Significantly better! My plan right here was to take away that asymmetrical steel plate on one of many ends for a greater look. However, as you possibly can see, it really pulled a bit too onerous on the cups with out that bracket so I examined the final choice first…
92072-3726 appears to be the most effective alternative up to now. I straightened the brackets some and barely enlarged the holes to accommodate the hooks on the cups. Yeah, this works!

So, right here´s my resolution to the fairing retaining downside up to now. A “Band” from a somewhat ugly and never very glamorous Kawasaki Jet boat…. Will it work in the long run?
We´ll see… in any case this fettling I spotted they used TWO rubber components, one on all sides that was really simply wound up across the body brackets after which hooked as much as the fairing cups. I simply thought I´d share this somewhat odd hunt for alternative components with you guys…
The following challenge throughout the challenge happened after I lastly discovered that illusive 21103-004 cam. Immediately, sooner or later a couple of weeks in the past, it turned up in my saved searches for H1R-parts on eBay. It was my expensive pal and “components pusher” Dave Howard in England that had posted one on eBay. I double checked the half quantity inside seconds on my iPad, the place I maintain the components catalogue, and acquired it! I wrote him a “pleasant” reminder of the listing I despatched him about two years in the past the place this was one of many components I wanted for the restoration. He was very sorry for his mistake, forgetting about my want listing, and supplied me a second one proper off the bat. They arrived safely after a couple of days. Thanks loads, Dave. These are badly wanted right here!

Such small issues and nonetheless so very, essential. I´ve been looking for these for greater than 2 years and have seen precisely 0 throughout that point. And now I’ve 2 of them!
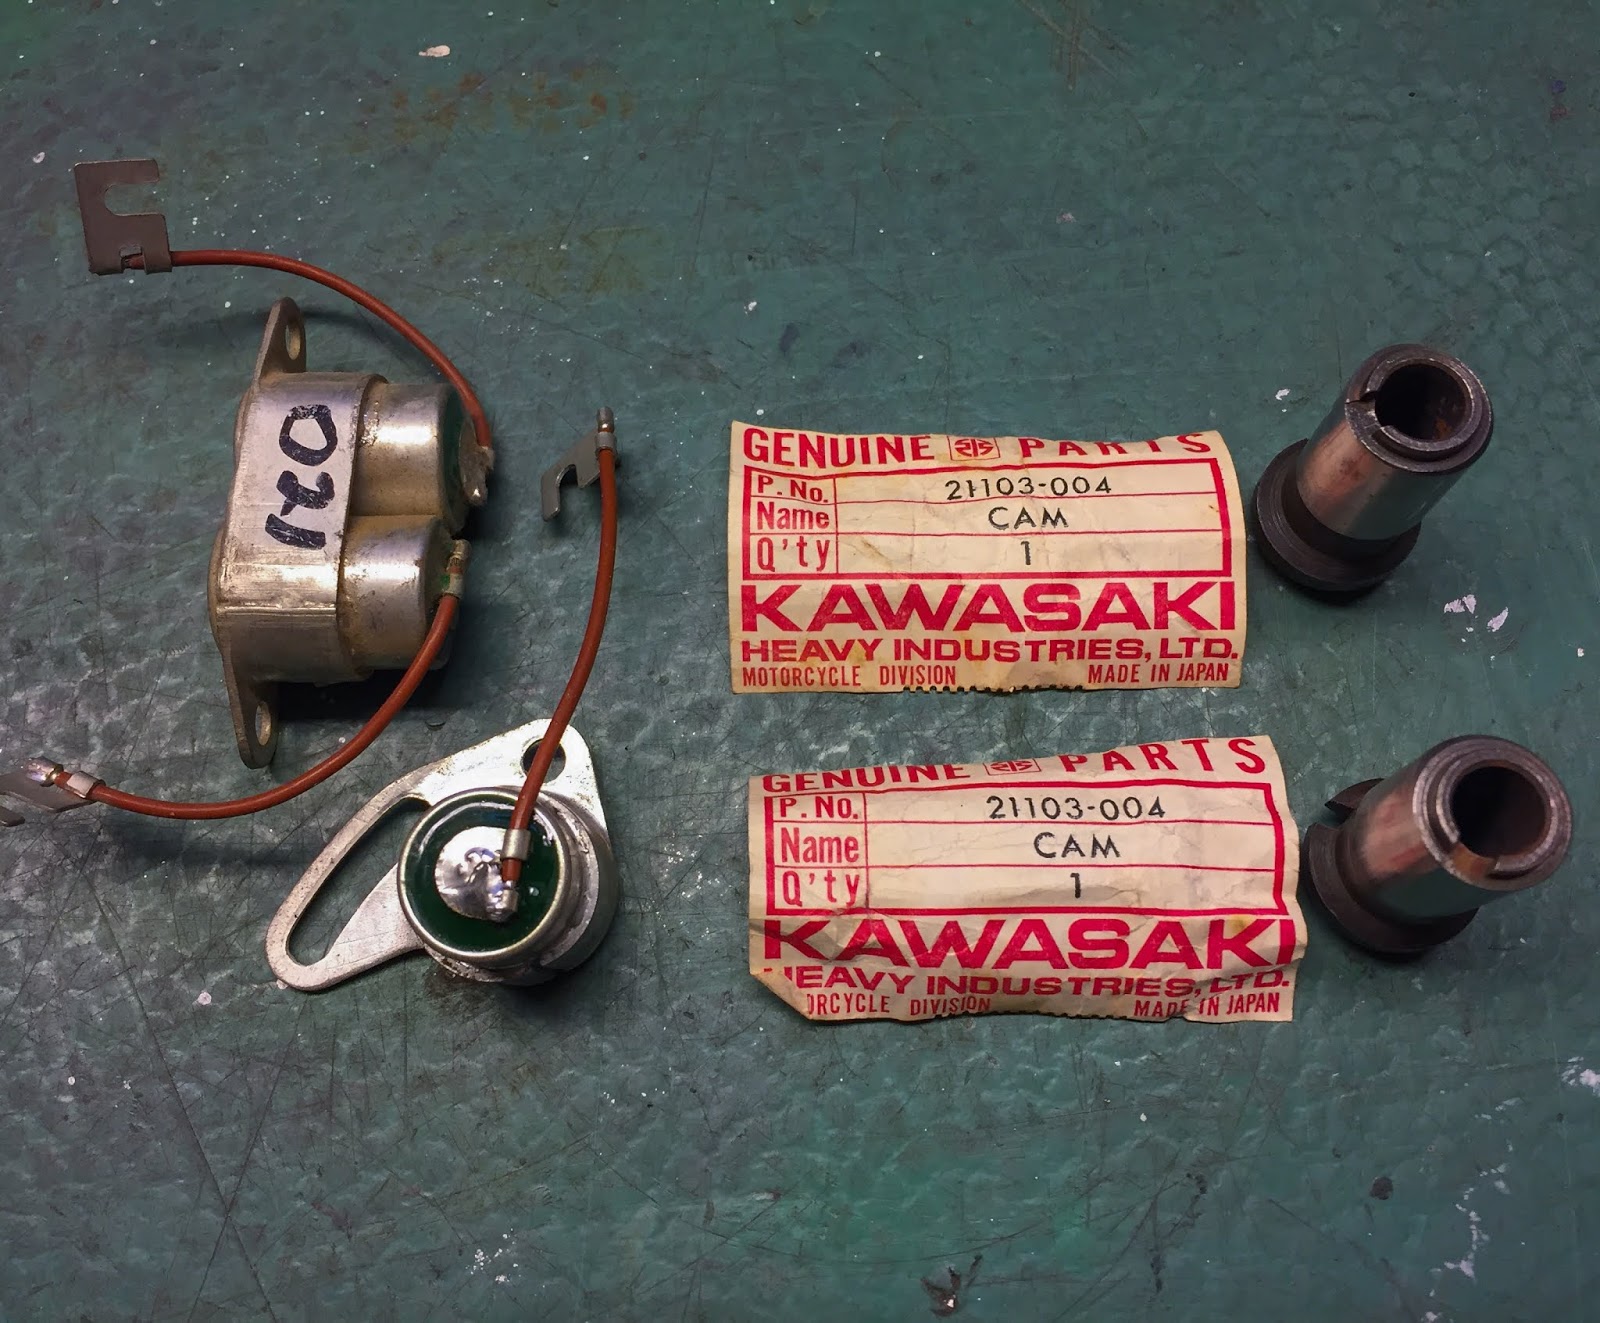
Not solely did he listing the cams, he additionally listed a set of NOS condensers for the H1R. Yeah, I do know, I’ve a few units already… However, as I stated earlier, when one thing exhibits up… BUY!
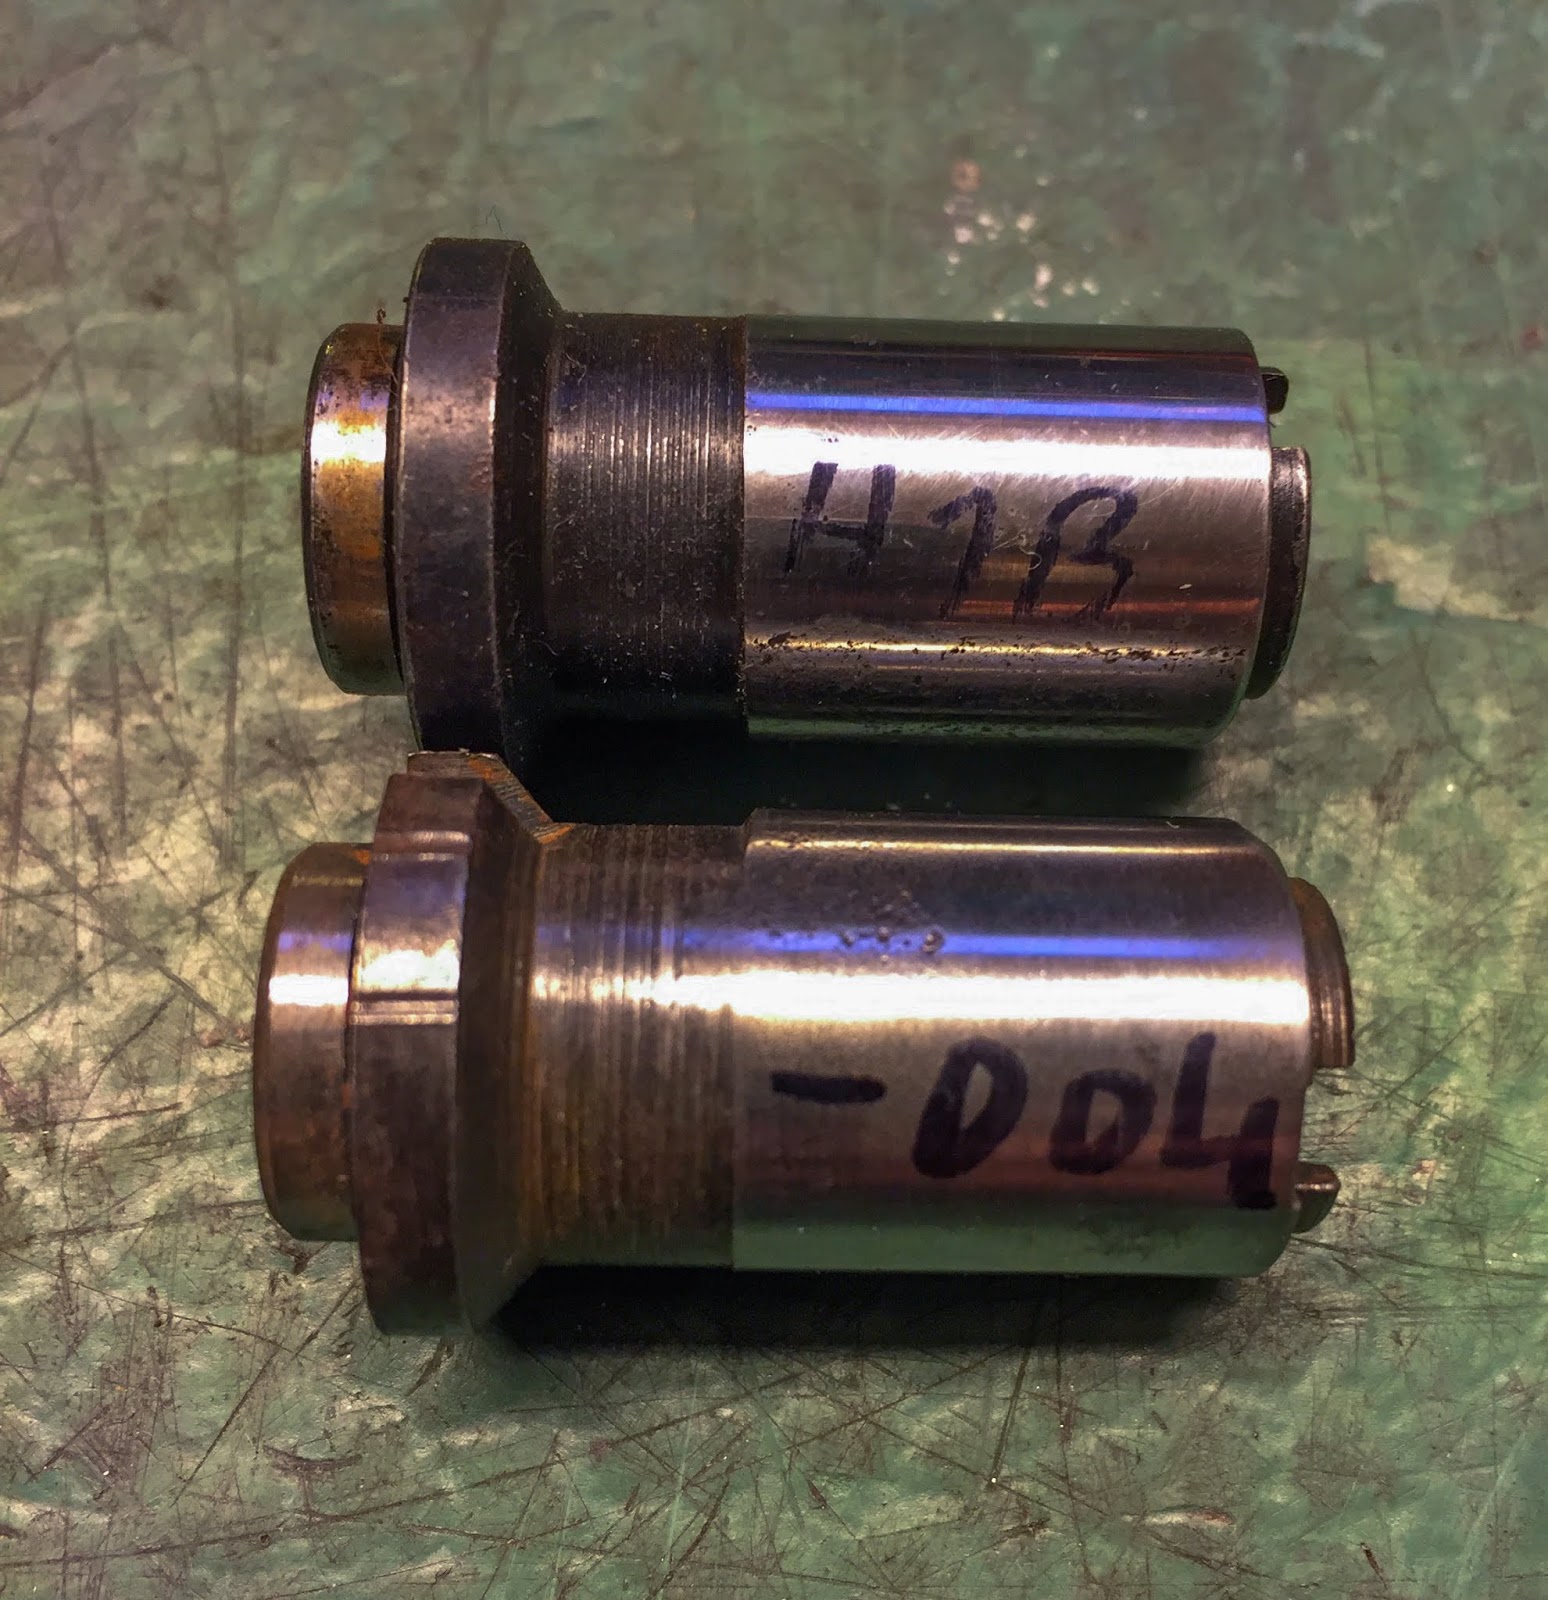
Now it was time for a really fascinating comparability. What’s the distinction between 21103-004 and 21103-005. Ignition cam for the H1R and the H1B? After a primary fast look there appears to be no distinction in any respect. Observe I needed to label them very rigorously to not interchange them…. From this angle there isn’t any distinction seen. There are some marks on the facet of -004 that aren’t current on -005 however with regards to measurements I couldn´t discover something completely different.
Let´s strive one other view. From the topside. Right here i’ve tried to catch the distinction in angle (if any) between the slot on the backside the place they connect to the rotor and the slot on the high the place the timing mark plate is located. I see none.

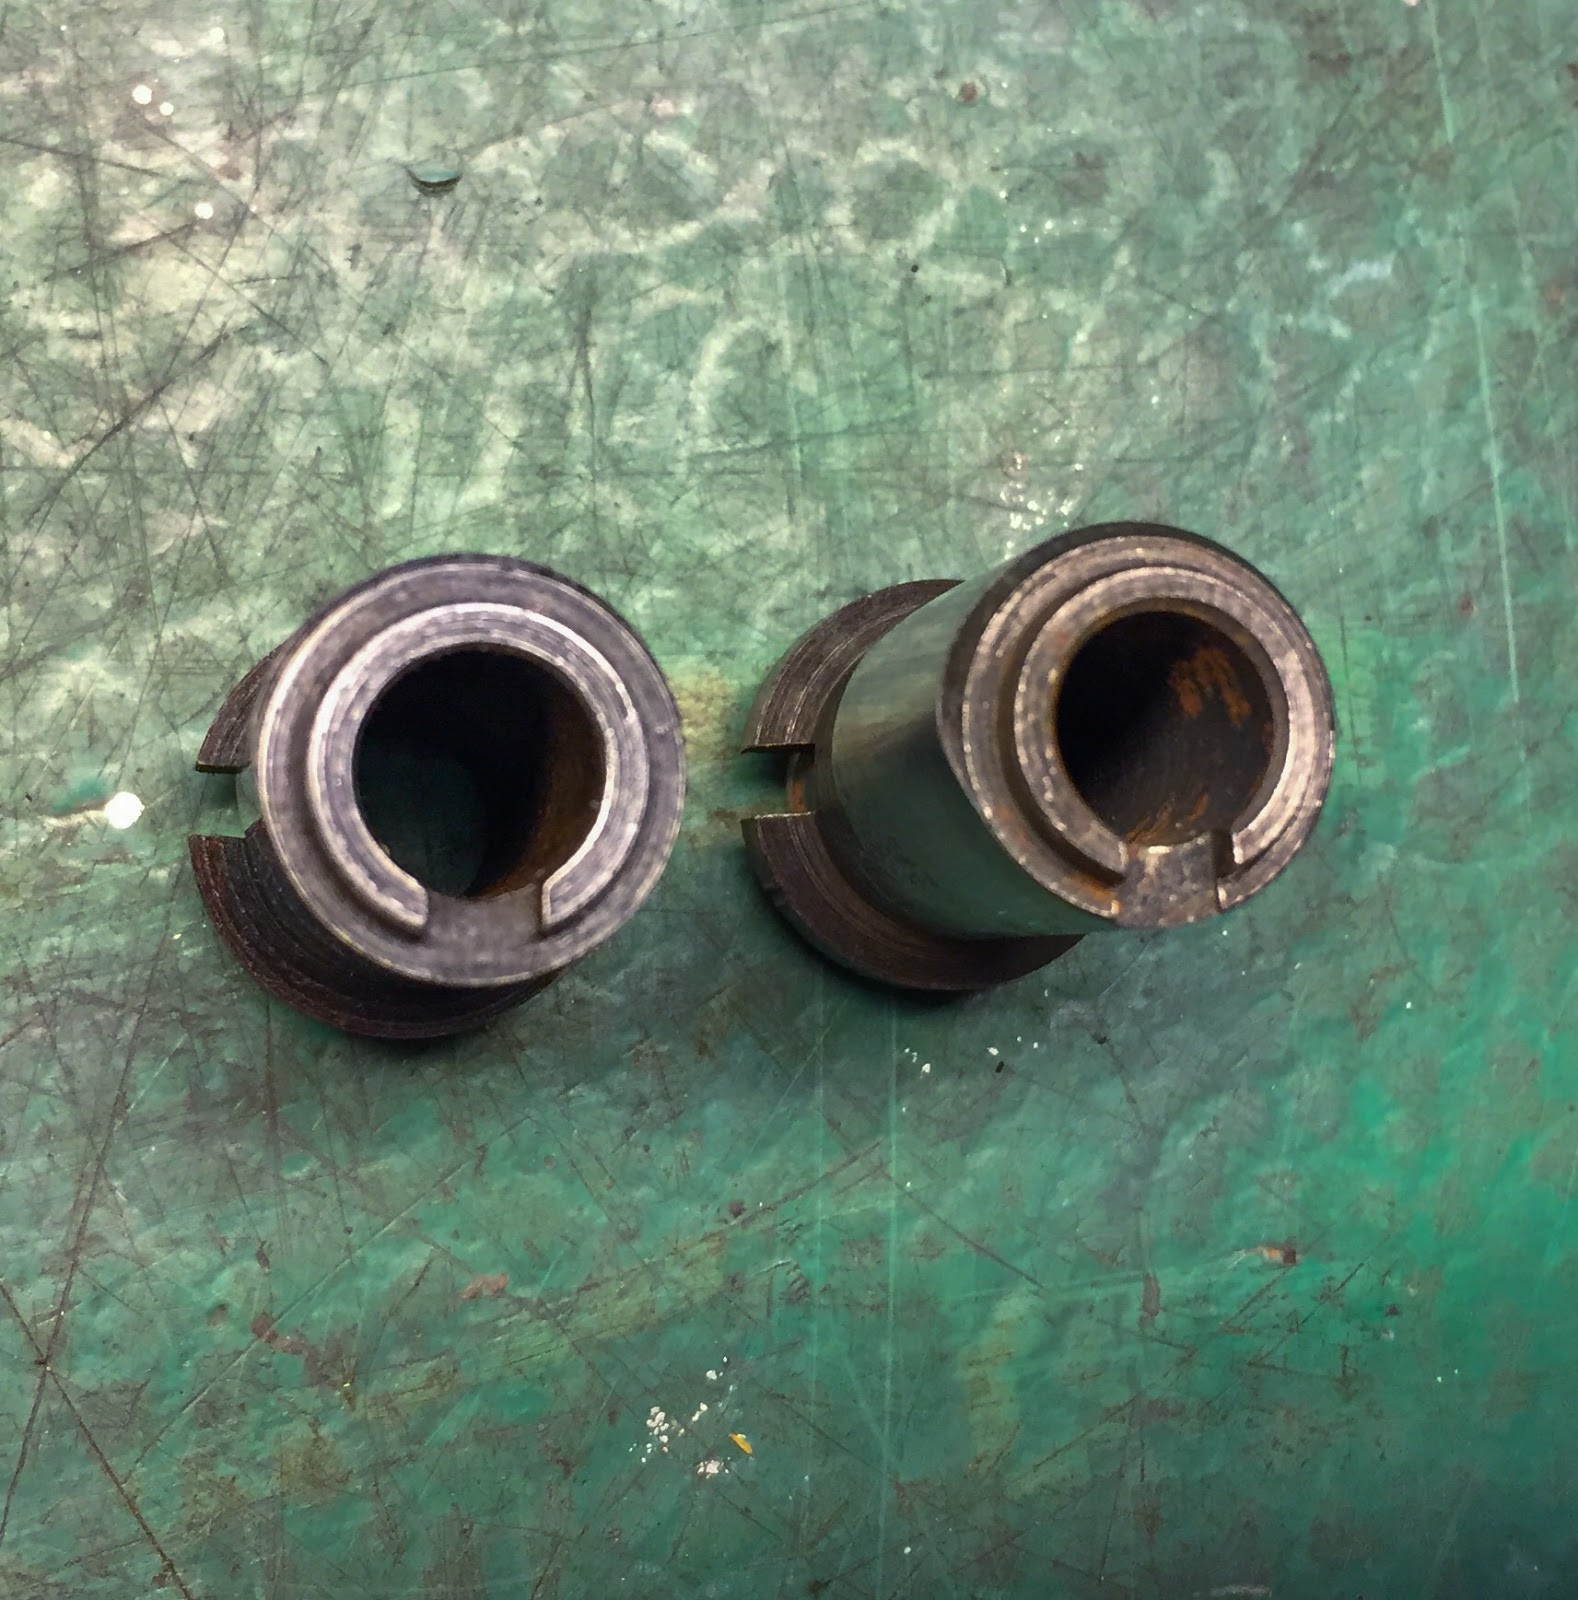
I additionally measured the diameter of the hardened floor the place the breaker level tab is resting and opening for the timing cam on these infants. Similar diameter each on high of the cam and on the lowest half. There appears to be no distinction in angle for the very best level of the cam both. the one factor I´m having issues measuring is the “length” of the breaker level lifting floor. Effectively, since they’re completely different half numbers I assume there may be some form of distinction between them however, up to now, I haven´t been in a position to find it…

Anyway, that analysis will proceed. I’ve two -004:s, keep in mind. And a few -005:s for the H1B. On the precise listed here are the components now able to go on to the bike!
My refurbished stator (nonetheless with H1B condensers), the rotor, the cam (now the proper one), fasteners for the stator to the engine circumstances, timing plate and the lengthy fastener for the rotor, cam and timing plate. Let´s begin placing the ignition on…

Right here we go! To start with the small 3mm woodruff key I managed to find in my earlier put up after which the rotor. This can be a model new, unique, appropriate half quantity, rotor for the H1R ignition. Good!
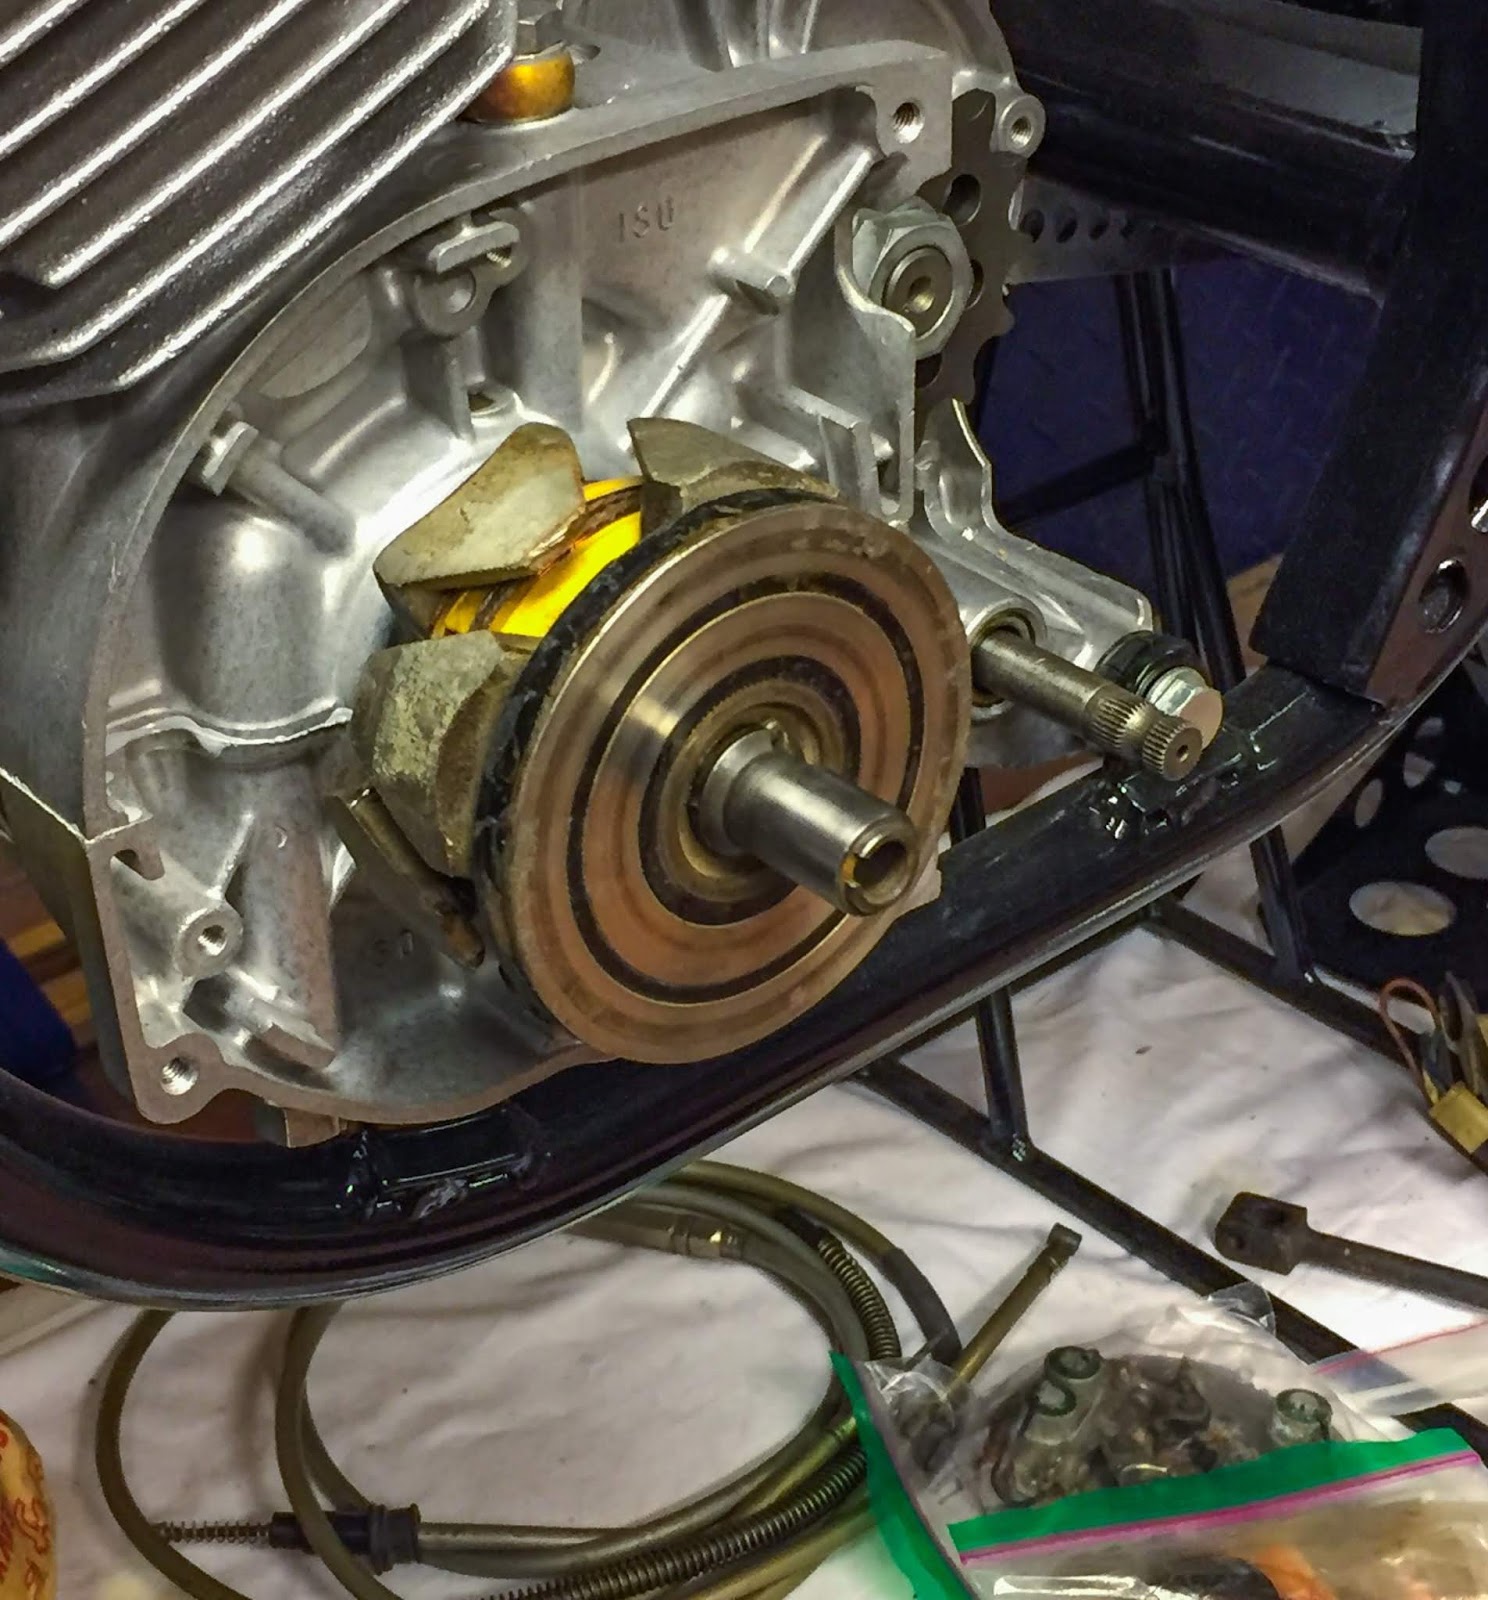
The right ignition timing CAM, 21103-004, now lastly in place. Subsequent is the stator itself after which the ignition timing plate and the retaining bolt that attaches the plate, cam and rotor to the turning a part of the igniton/generator.
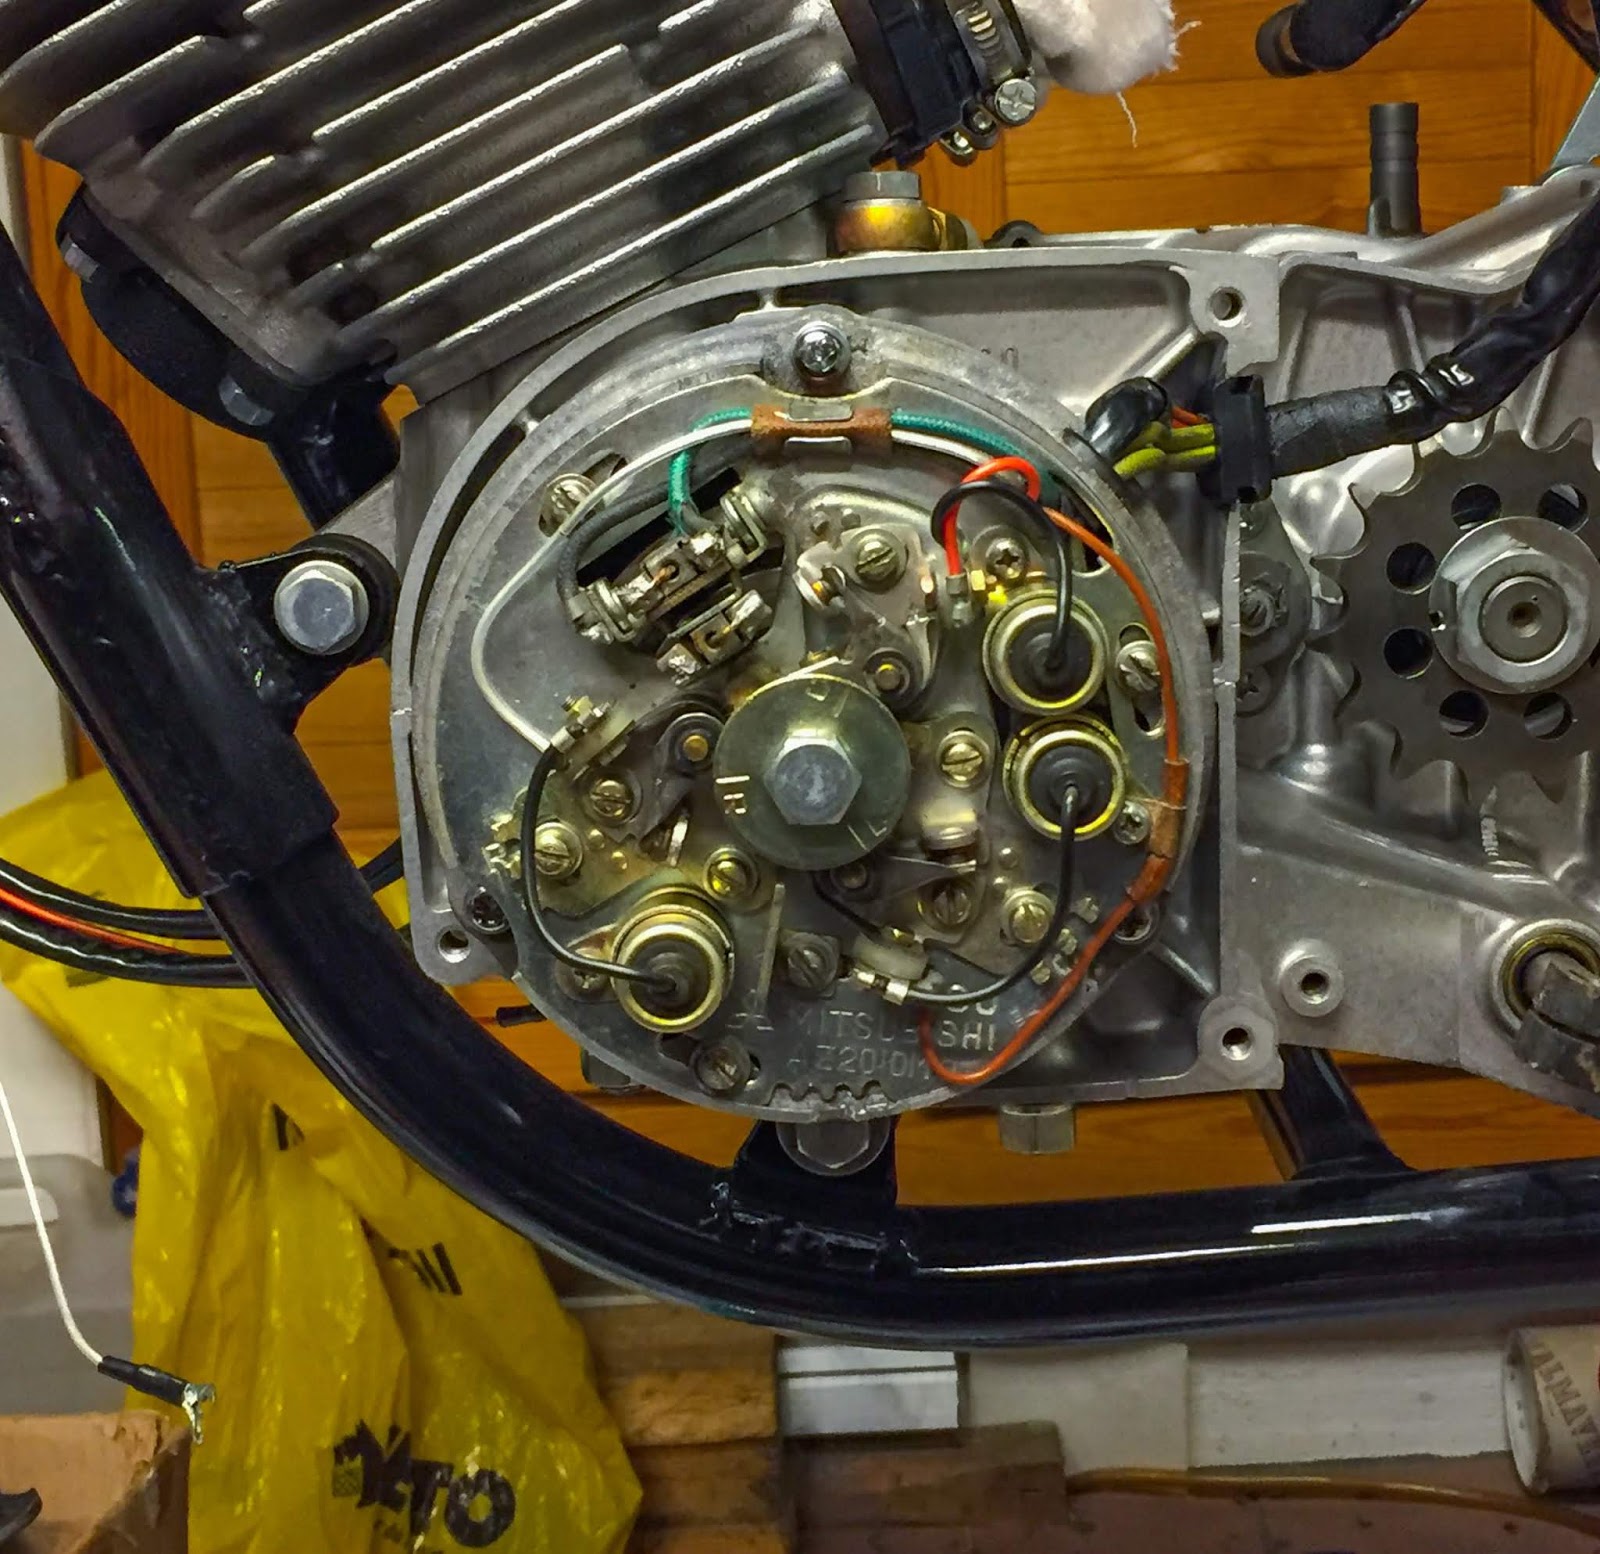
And right here it’s all in place! The three retaining screws connect the stator to the circumstances, the massive bolt secures the turning stuff on to the crankshaft.

Think about the rotor contained in the stator. That rotor is one huge magnet rotating (with the turning crankshaft) contained in the stator (stands nonetheless…) that’s lined on the within with a number of windings, stator coils, that generate electrical energy along with the turning magnet inside. This alternating present is then fed to the rectifier and voltage regulator up entrance on the bike. The factors generate the sparks within the spark plugs by means of the ignition coils and the condensers care for the excess energy every time the factors open up for a brand new spark. As quickly as I can find the proper ignition coils I can even have the ability to change the H1B condensers with the proper H1R ones. Any yr now…..

The ultimate contact for the day… That NOS H1B engine cowl. Appears a bit too good however it´ll must do for now. I could change that afterward and attempt to discover a floor that’s extra appropriate for a racer that has been used for 4-5 races.
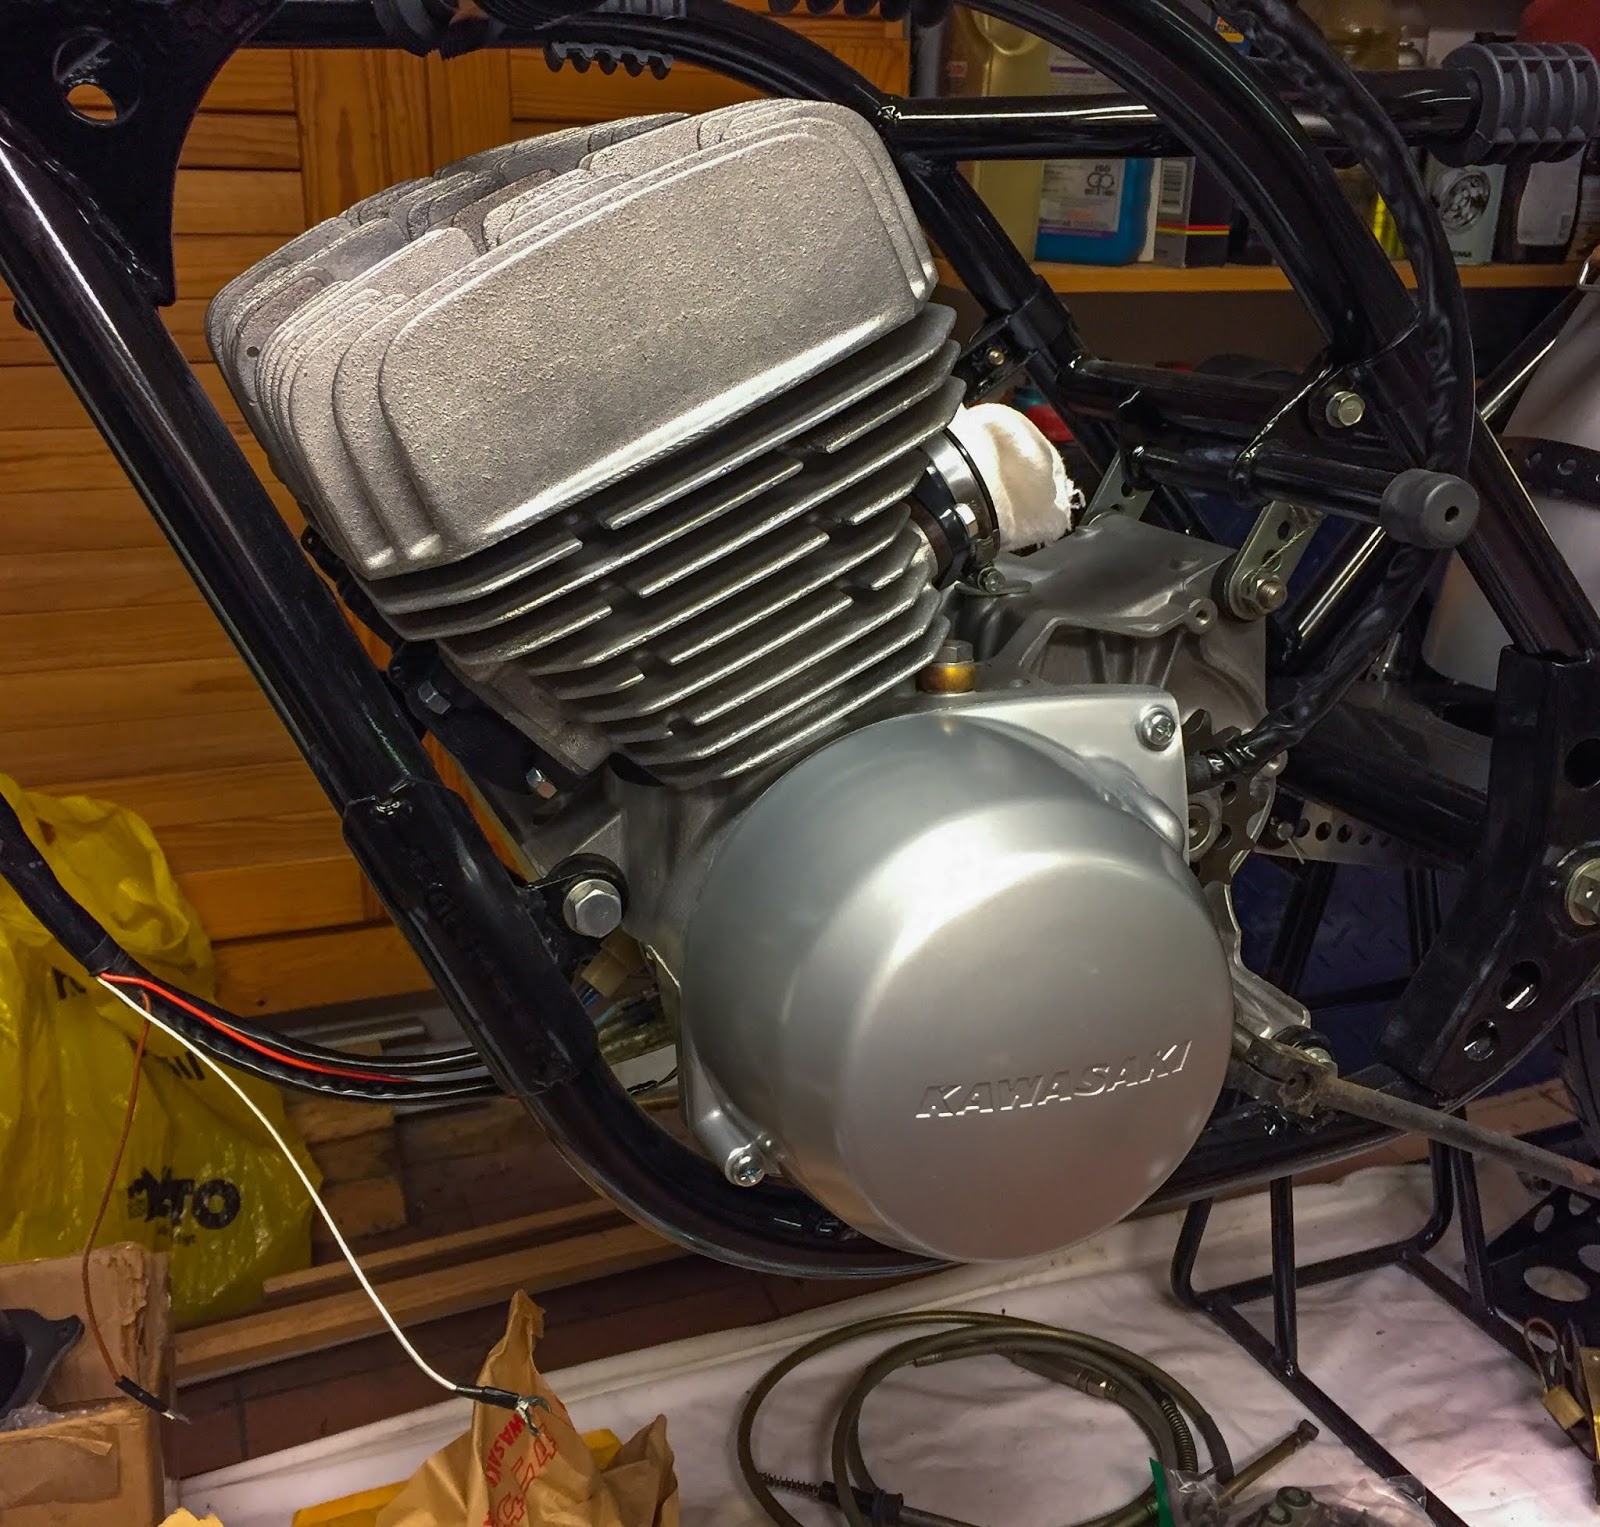
I managed to find three appropriate size pan head screws in my very own inventory of fasteners. In fact I solely use outdated, refurbished, Kawasaki fasteners at any time when doable. I’m fortunate to have been engaged on these outdated bikes for greater than 20 years and have by no means thrown something usable away, ever! I at all times attempt to reuse these outdated battered screws and restore them with renovated, or simply cleaned, threads and straightened pan heads. A contemporary coat of zink makes them look new once more.

Right here´s one other a kind of good finds taking place on eBay sometimes… NOS engine sprockets, particularly for the H1R. 15 enamel, one of many non-obligatory sizes accessible for various gearing. I feel i paid 25 bucks every, which actually is a steal!
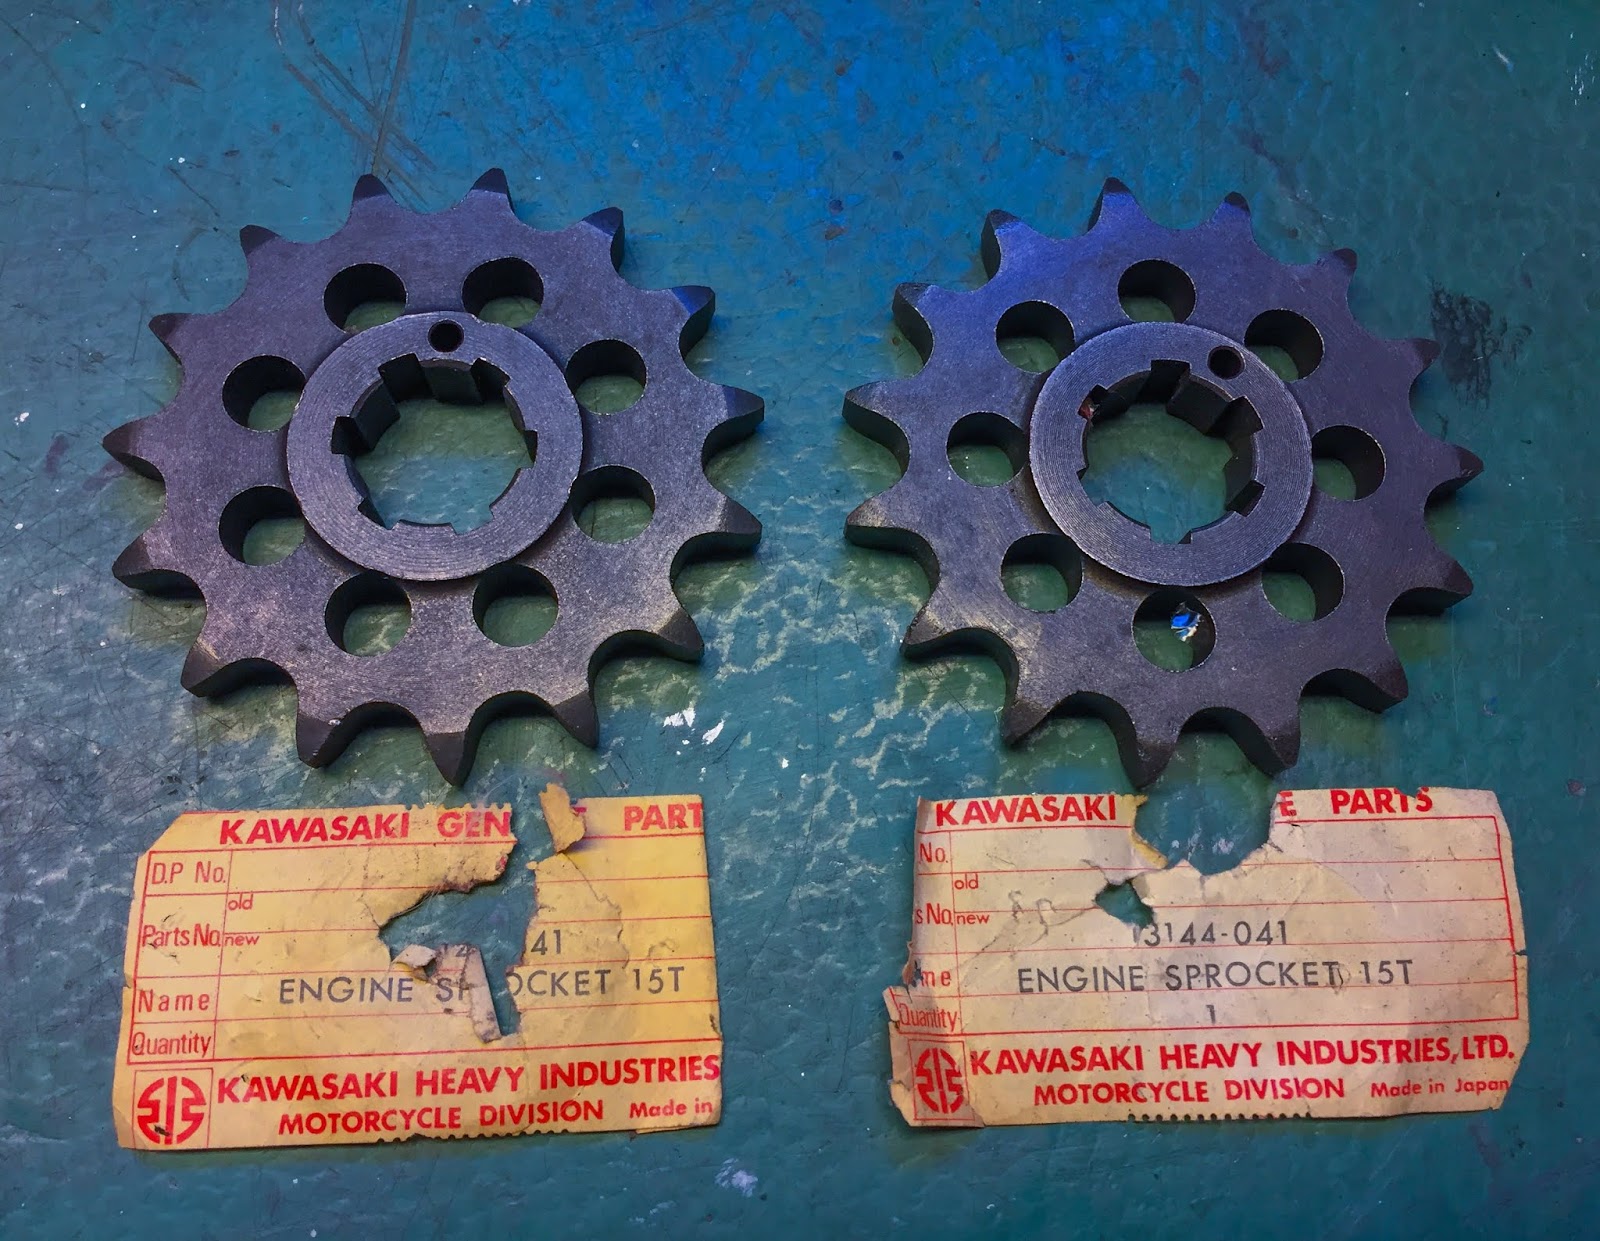
I actually benefit from the pastime when these lovely components present up and I´m in a position to get them. Take a look at these lightening holes round these sprockets! Not wanted on the road bikes however on a racer? Positive! Each gram counts in the direction of the ultimate, complete weight of the bike on the beginning line. That, my mates, is what constructing these racers was all about throughout the early seventies. Racing and successful and placing Kawasaki up there as one of many contenders within the race to be the quickest bike on the observe in addition to on the streets….
Subsequent up on my restoration is {the electrical} system and the opposite ignition components on the bike. I can even have to proceed with the rear wheel, the brakes and the drive chain. However earlier than placing the chain on I would like to wash the clutch cable and modify the clutch pusher and so forth, and so forth… Effectively, I´m again at it. I´m pondering H1R-restoration once more 50% of my awake time. The opposite 50% is getting extra H2:s to work on after I´m finished with this construct.
Keep tuned and, once more, Sorry for the delay!
/Per
[ad_2]