
[ad_1]
Lack of motivation and methods to get the spark again.
To be sincere I´ve been doing a lot of different issues within the storage recently. The H1R mission takes its toll on me and once in a while it´s exhausting to muster the motivation to stick with it, searching for elements and happening to the storage engaged on it.
I do know, I´m a whining sod, however generally I would like engaged on my two H2:s as a substitute. I’ve promised myself to complete the H1R earlier than beginning out with one thing else. I do know if I used to be to begin constructing an H2, the H1R would in all probability not be completed in any respect…. At the least not inside an affordable time-frame. So, what has occurred since my final submit? As I mentioned, not a lot. I posted an advert on a few boards on Fb searching for ignition elements. Chances are you’ll bear in mind I used to be asking for the H1R Factors breaker cam, ignition coils, cam plate, condensers and many others. Nicely, One among my greatest “half pushers”, Gary Horsman in New Zealand, got here by means of with the timing cam plate. 21106-003 is definitely used on each the H1R and the H1B 1972 with factors ignition.
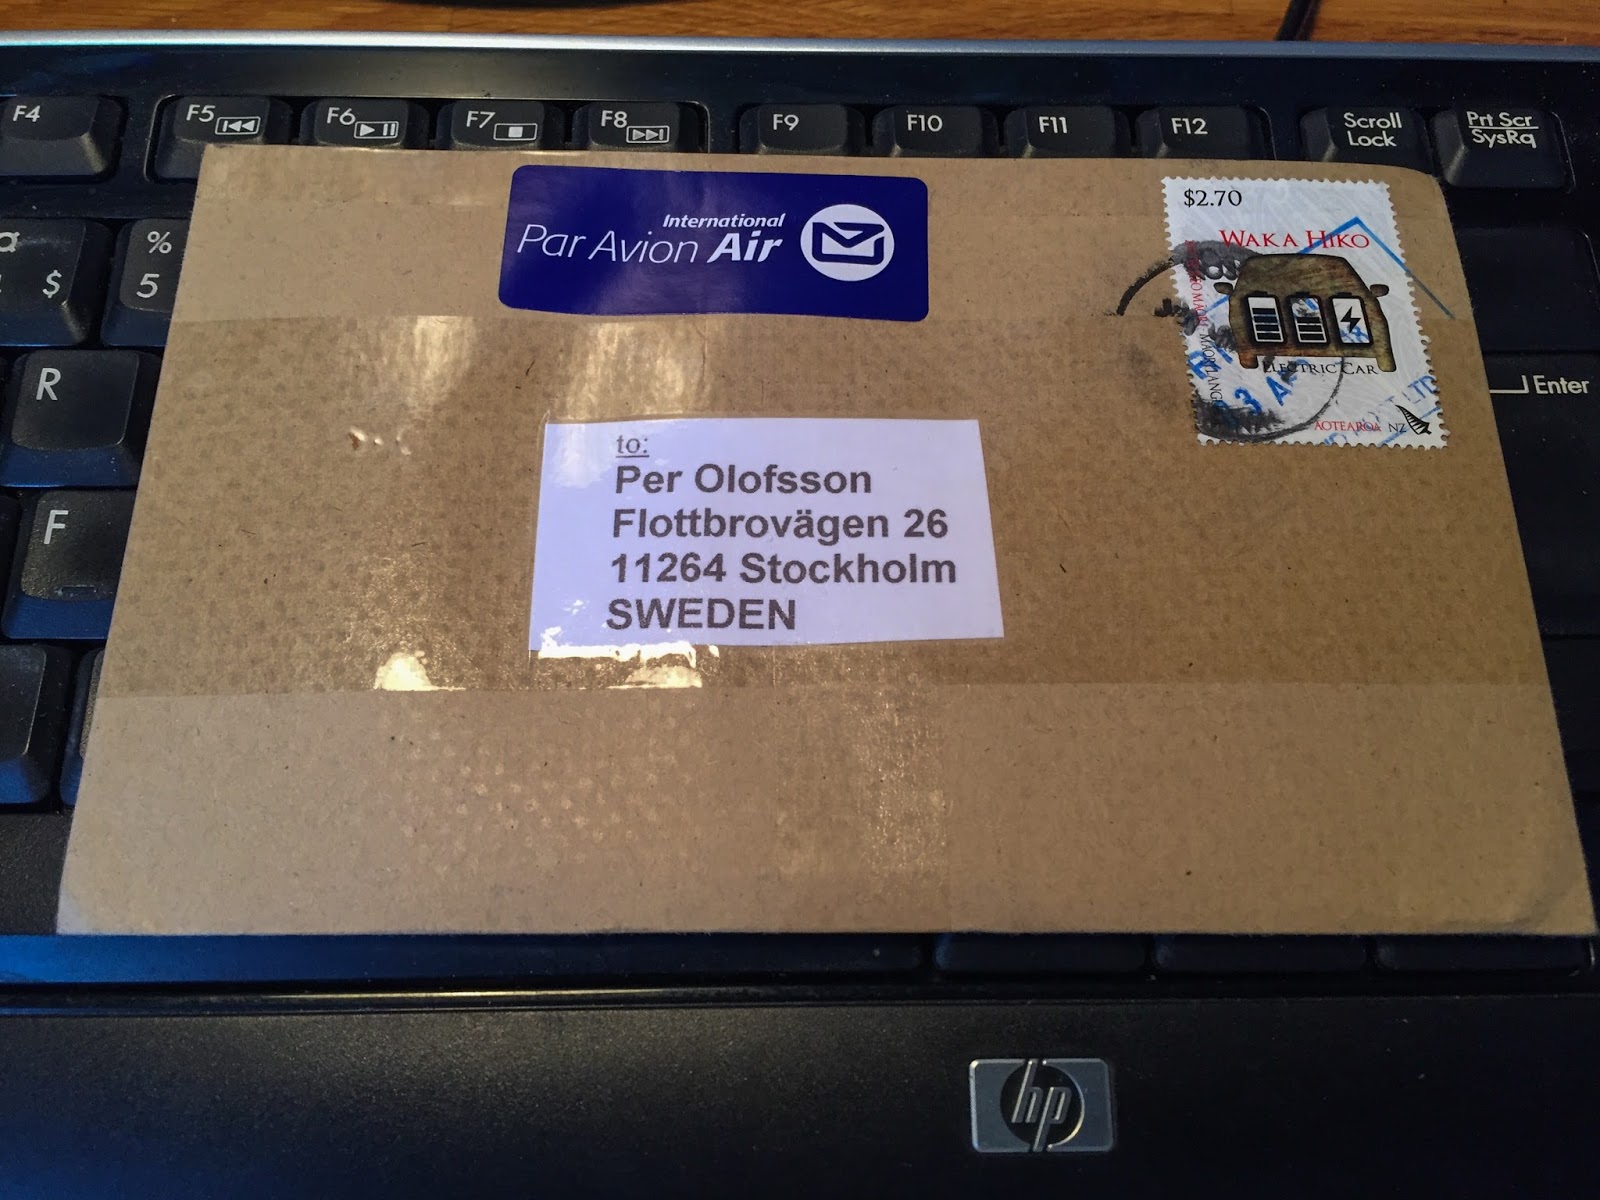
This small envelope for positive was a sight for sore eyes when it lastly arrived. I remorse transport it as atypical letter submit with out monitoring. But it surely did get right here… After two agonizing weeks! I often ship all H1R-parts through safe, insured mail. Be aware to self: Don´t ever try this once more!
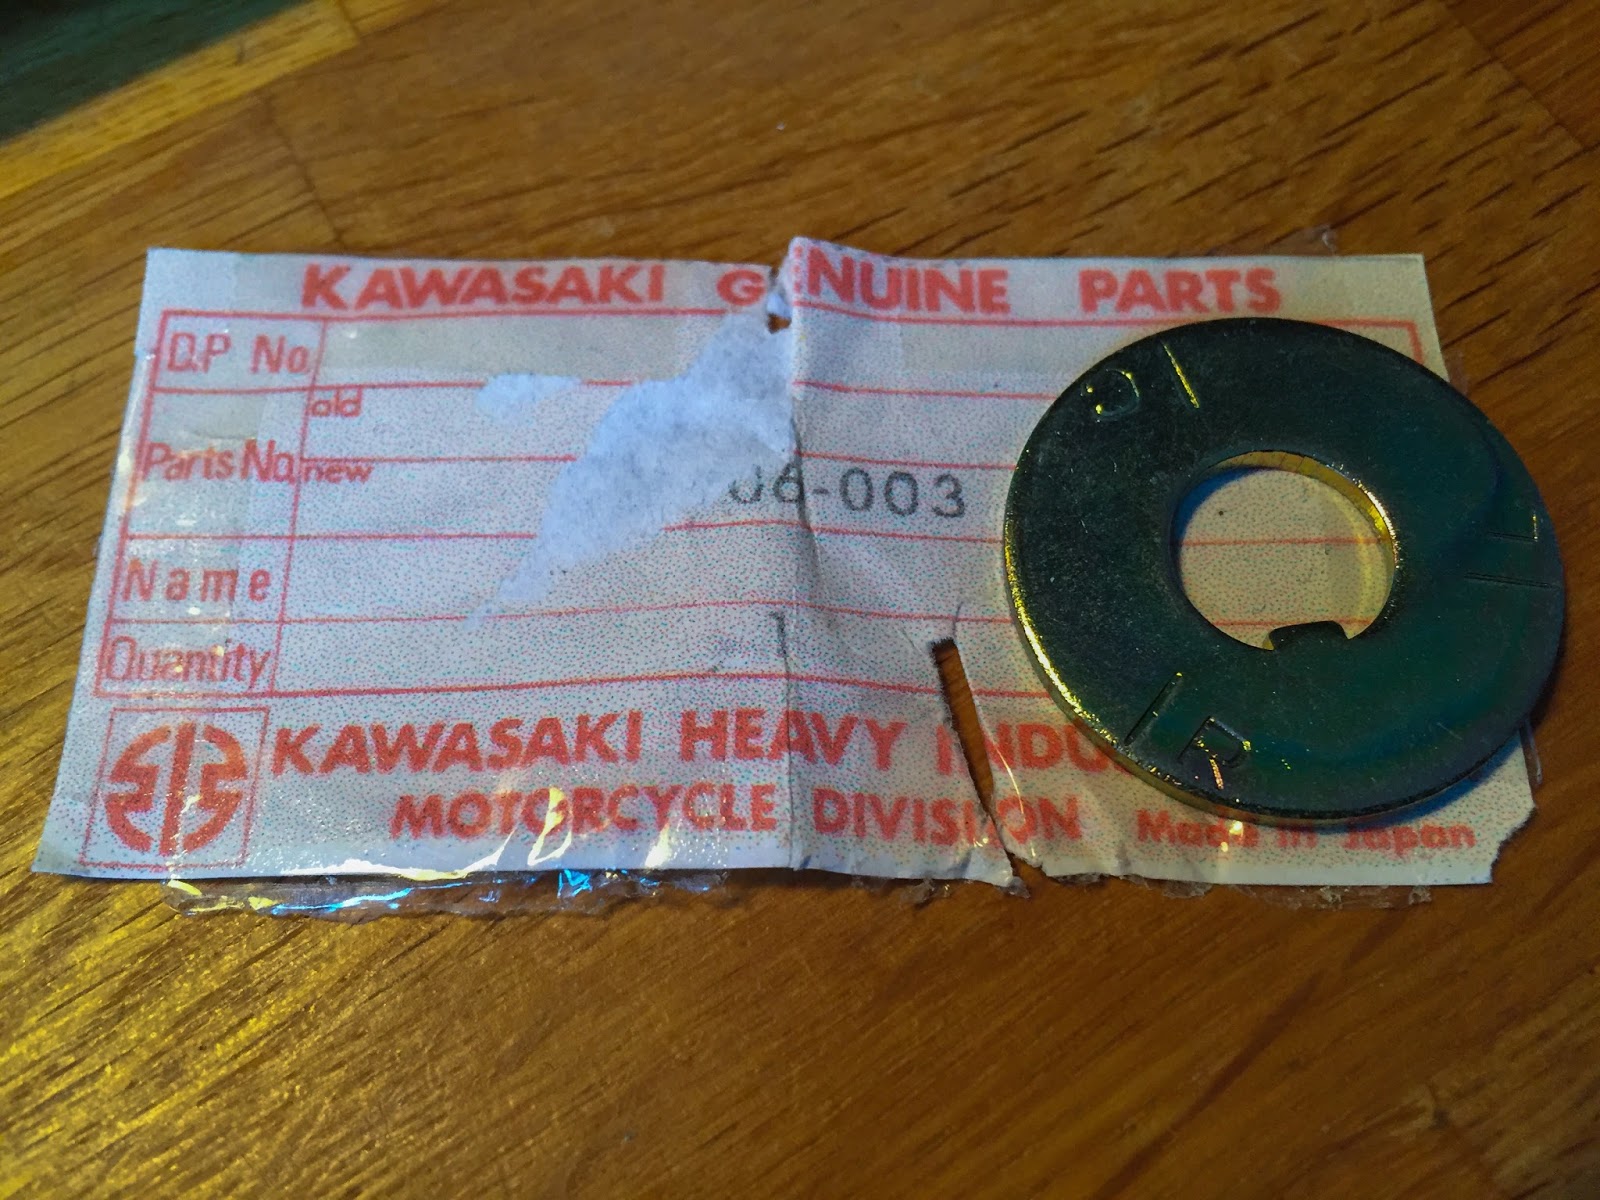
And right here it’s, the little jewel… NOS (New Previous Inventory). With the half quantity tag intact. I’ve already discovered the rotor, bolt and the woodruff key. The toughest elements to search out are the ignition coils and that freakin´little cam… 21103-004. Nonetheless no pleasure!
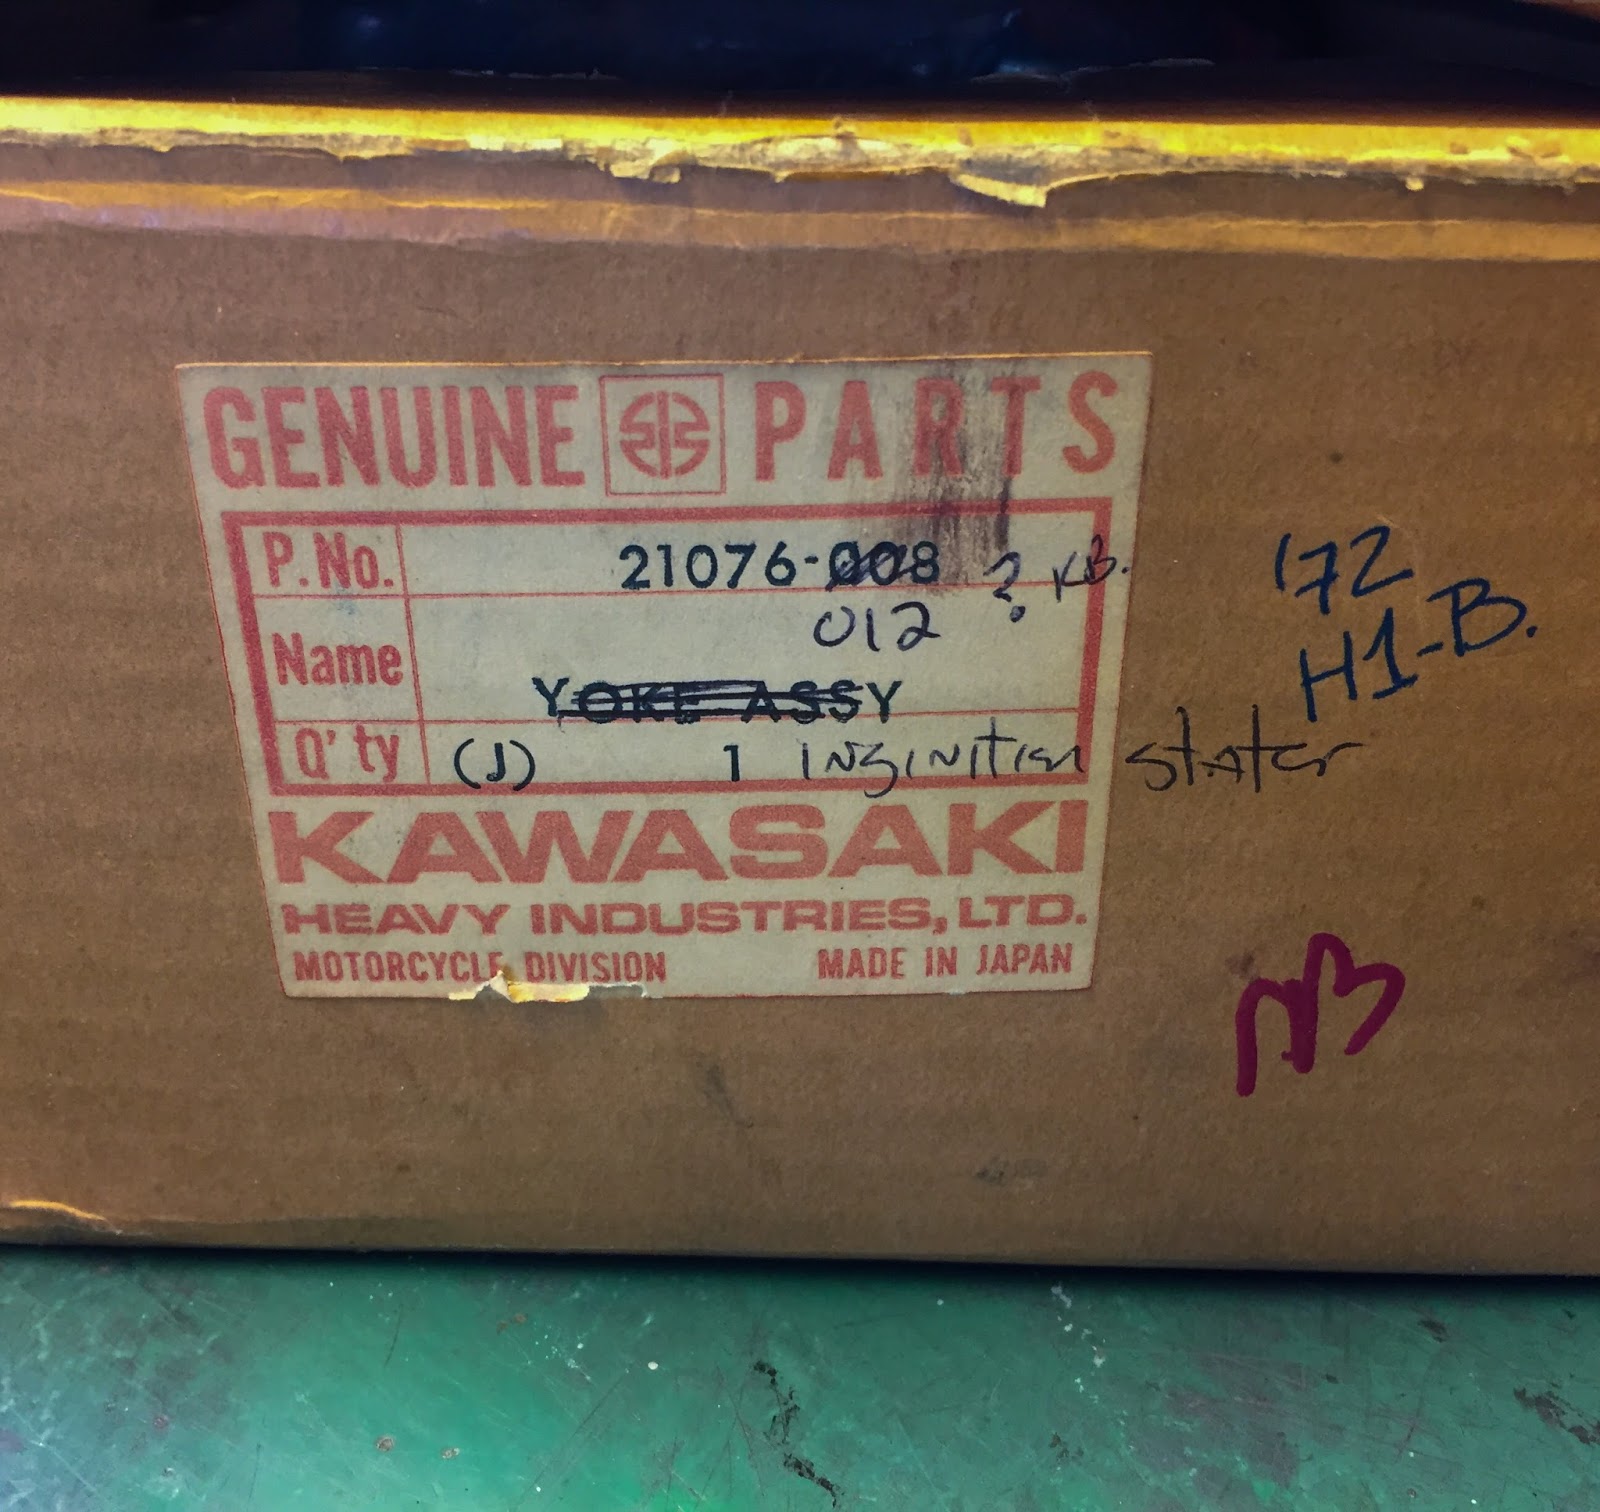
One possibility right here is to go one other route solely in the case of rebuilding the ignition yoke. Because it appears unimaginable to supply the wanted elements to rebuild it to H1R requirements, I’ll should go H1B 1972 factors ignition as a substitute. I discovered this stator on eBay in Canada, made a suggestion, and bought it at an OK worth of 500$US…
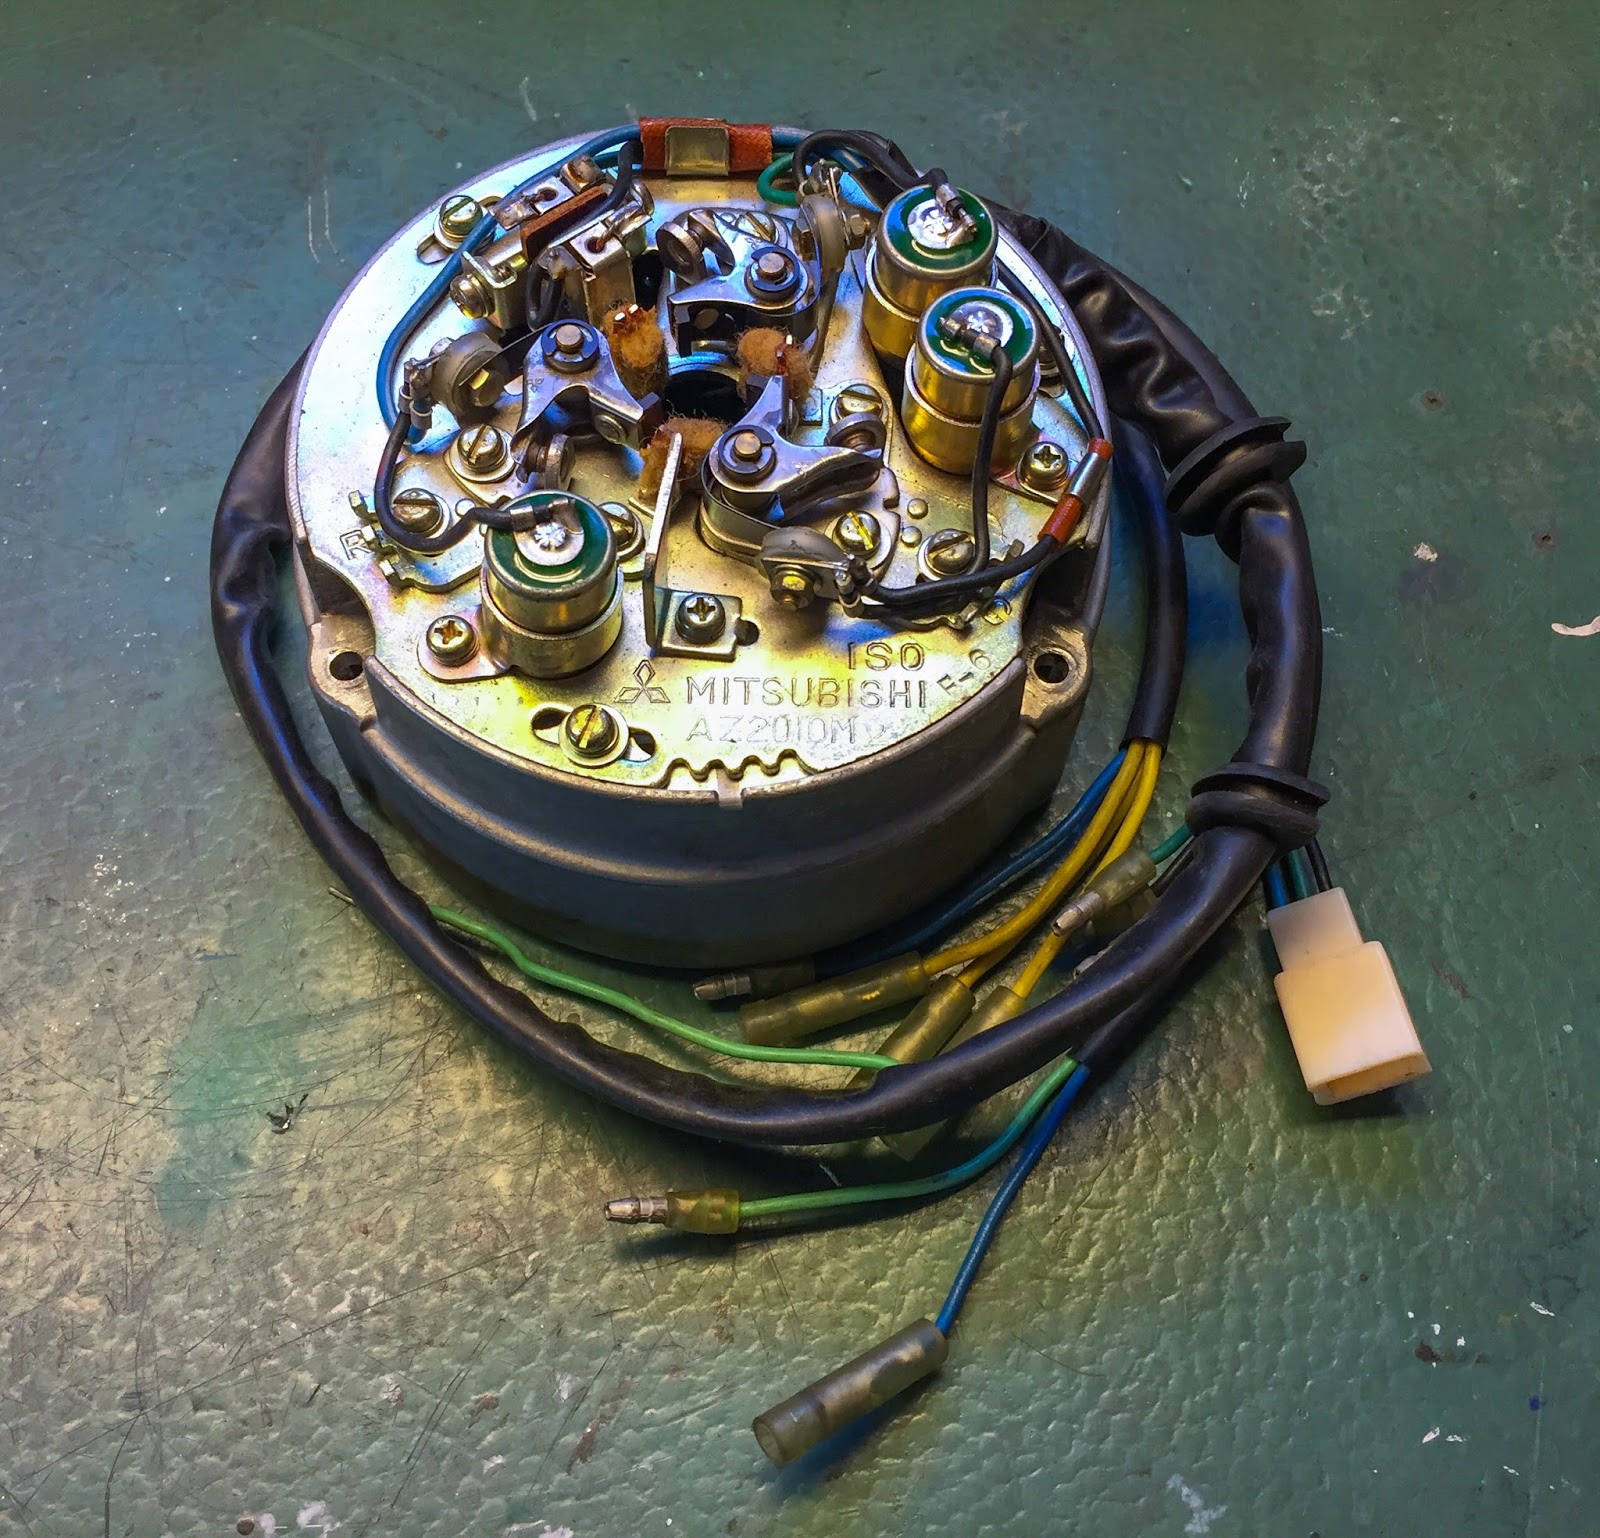
NOS is NOS and all the time most well-liked if out there. On this yoke there are many NOS elements I can use. The factor when changing from H1R ignition to H1B is it’s important to use H1B condensers and H1B ignition coils. The coils and the condensers kind the ignition circuit and their respective traits make them non-mixable. In case you change the coils, you’ll want to pair them with their type of condensers.
Within the hunt for H1R coils I´ve seen a number of NOS H1B coils and at one level I made a decision to purchase 3 of them. On the left right here you may see one in every of them along with the coil bands and the particular spacer somebody made to suit the Kröber coils to the body. By coincidence the diameter of the H1B coils and the Kröbers are the identical so I’ll more than likely use the identical bands. Finding unique H1R bands, 92037-052, has additionally been unimaginable, up to now. Please give me discover you probably have them or know somebody who has…
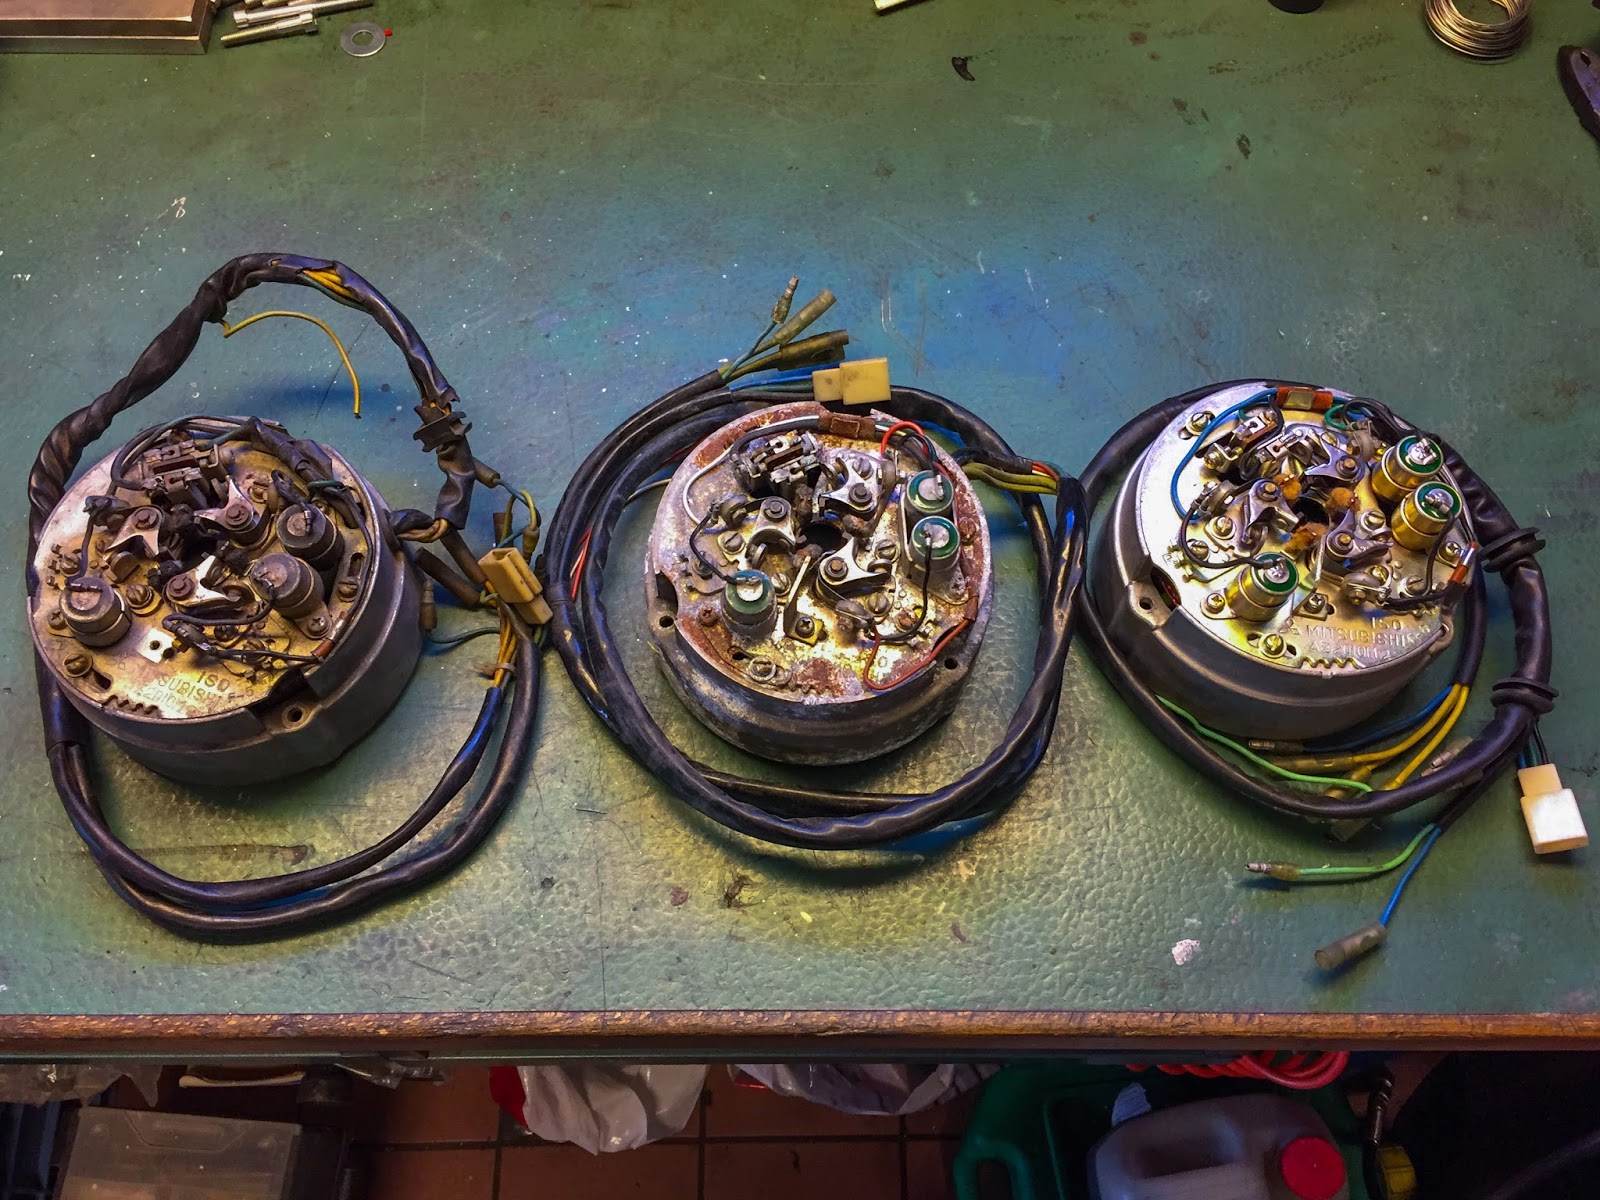
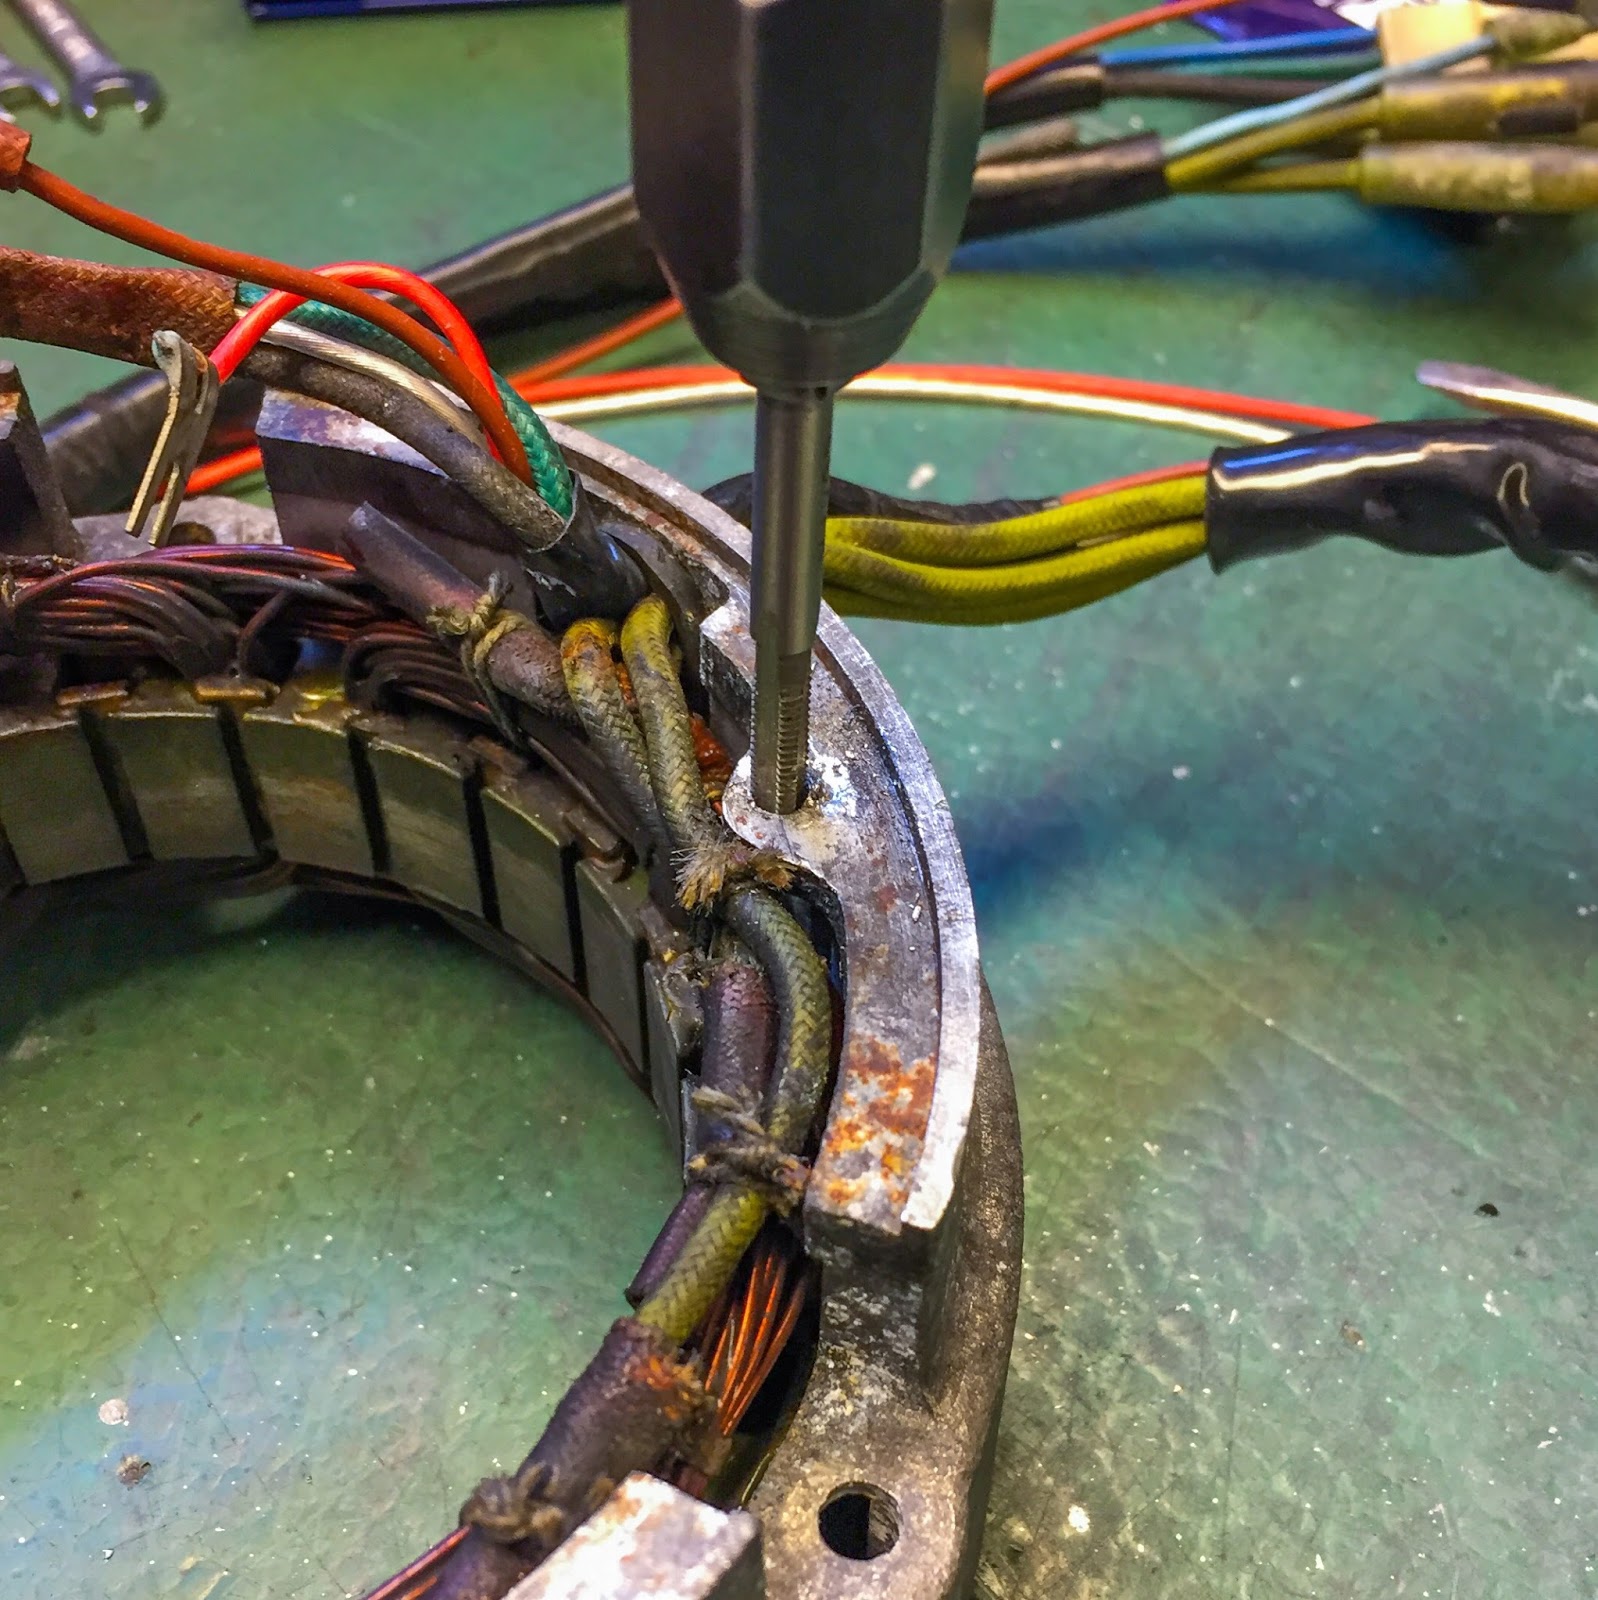
Right here´s the gathering of various H1 stators I’ve proper now. The used one I purchased on eBay some time in the past on the left, the unique H1R within the center and the NOS H1B on the correct. My plan right here is to rebuild the unique yoke with elements from H1B. I want to make use of the wiring from the unique one since it’s longer than the H1B. On the H1R {the electrical} parts are positioned manner up entrance within the fairing along with the RPM indicator. The 2 wiring harnesses should not equivalent both, so I’ve no alternative however to revive the unique stator…
First up was softening the sheath a bit with my warmth gun. The plastic sheath had dried and turn into a bit brittle. Braking it unfastened with out warming it first would in all probability brake it in items. A sluggish, light warming from a distance softened it sufficient to straighten it out.
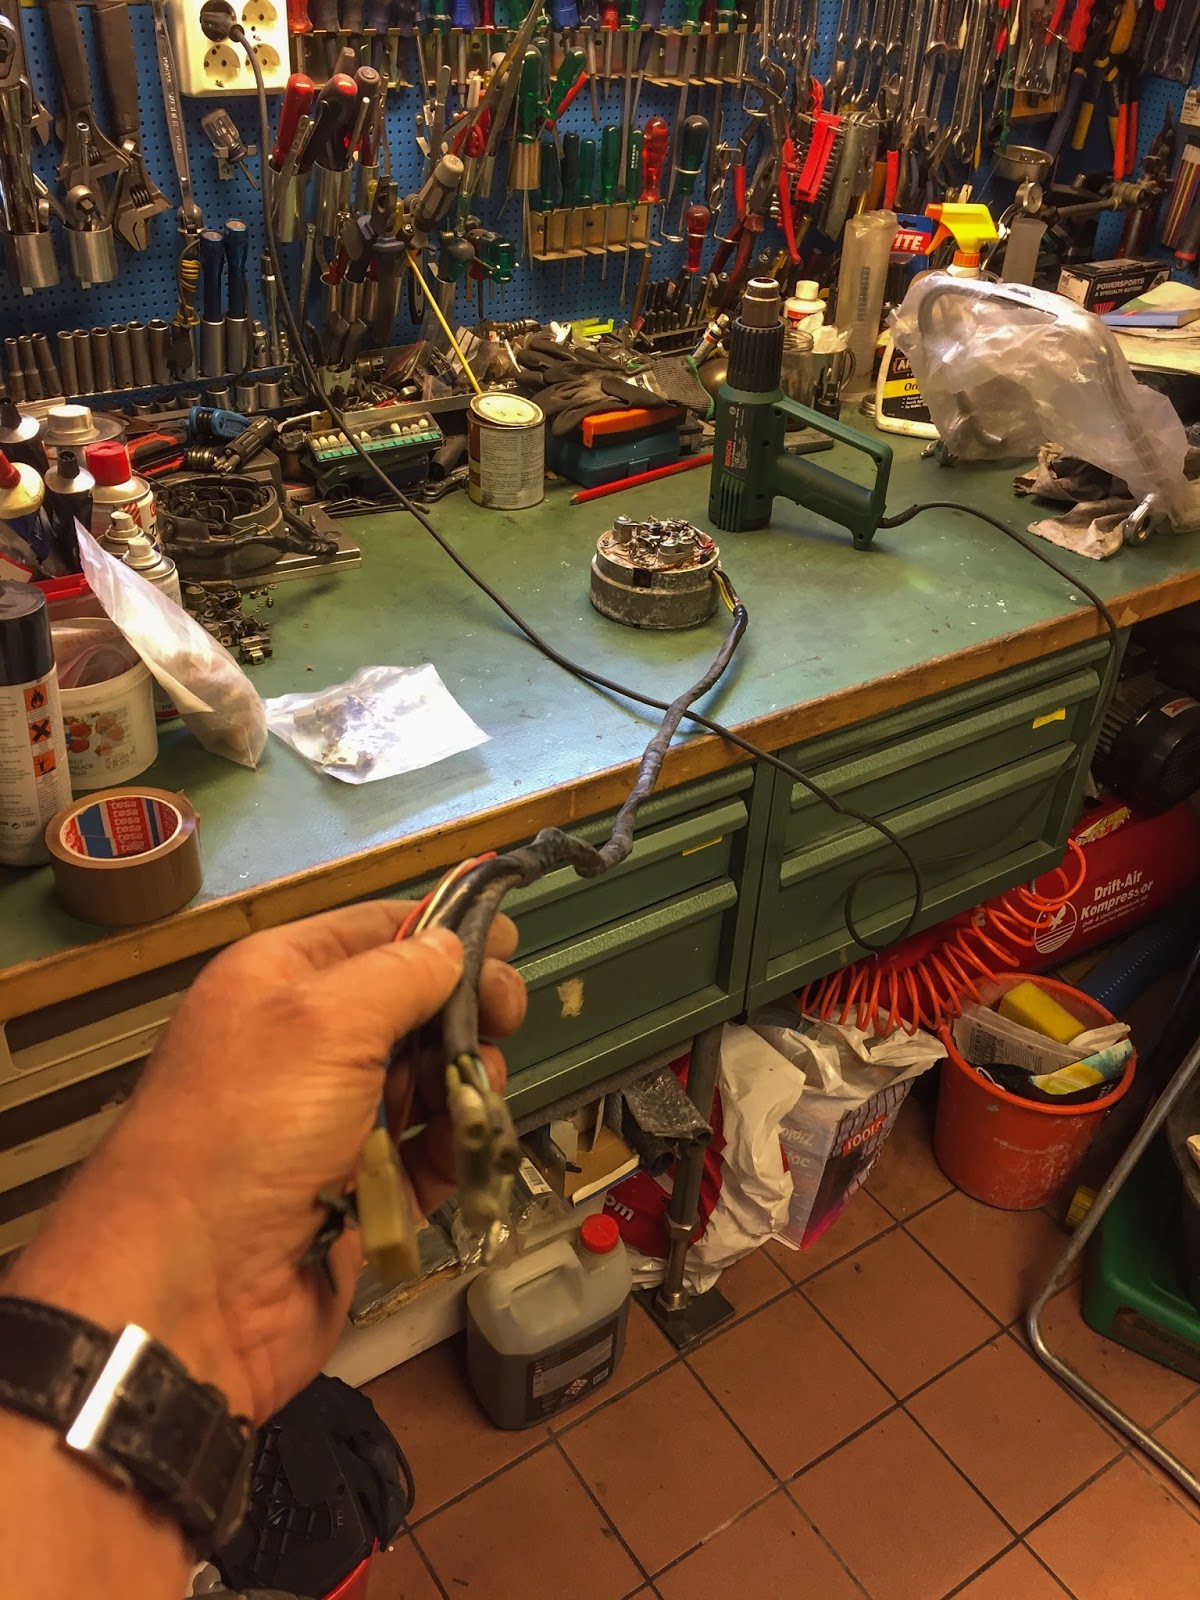
Success! Straight, heat, supple and versatile piece of wiring able to be handled with my beloved “POL” after which “Armour All” for the ending touch-up. Be aware how lengthy the harness is! I´m really fairly fortunate this stator was nonetheless round when the bike was discovered. It puzzles me a bit since “Esso” modified the ignition already throughout 1970 or 1971 to the Kröber that was nonetheless on it once I purchased it.

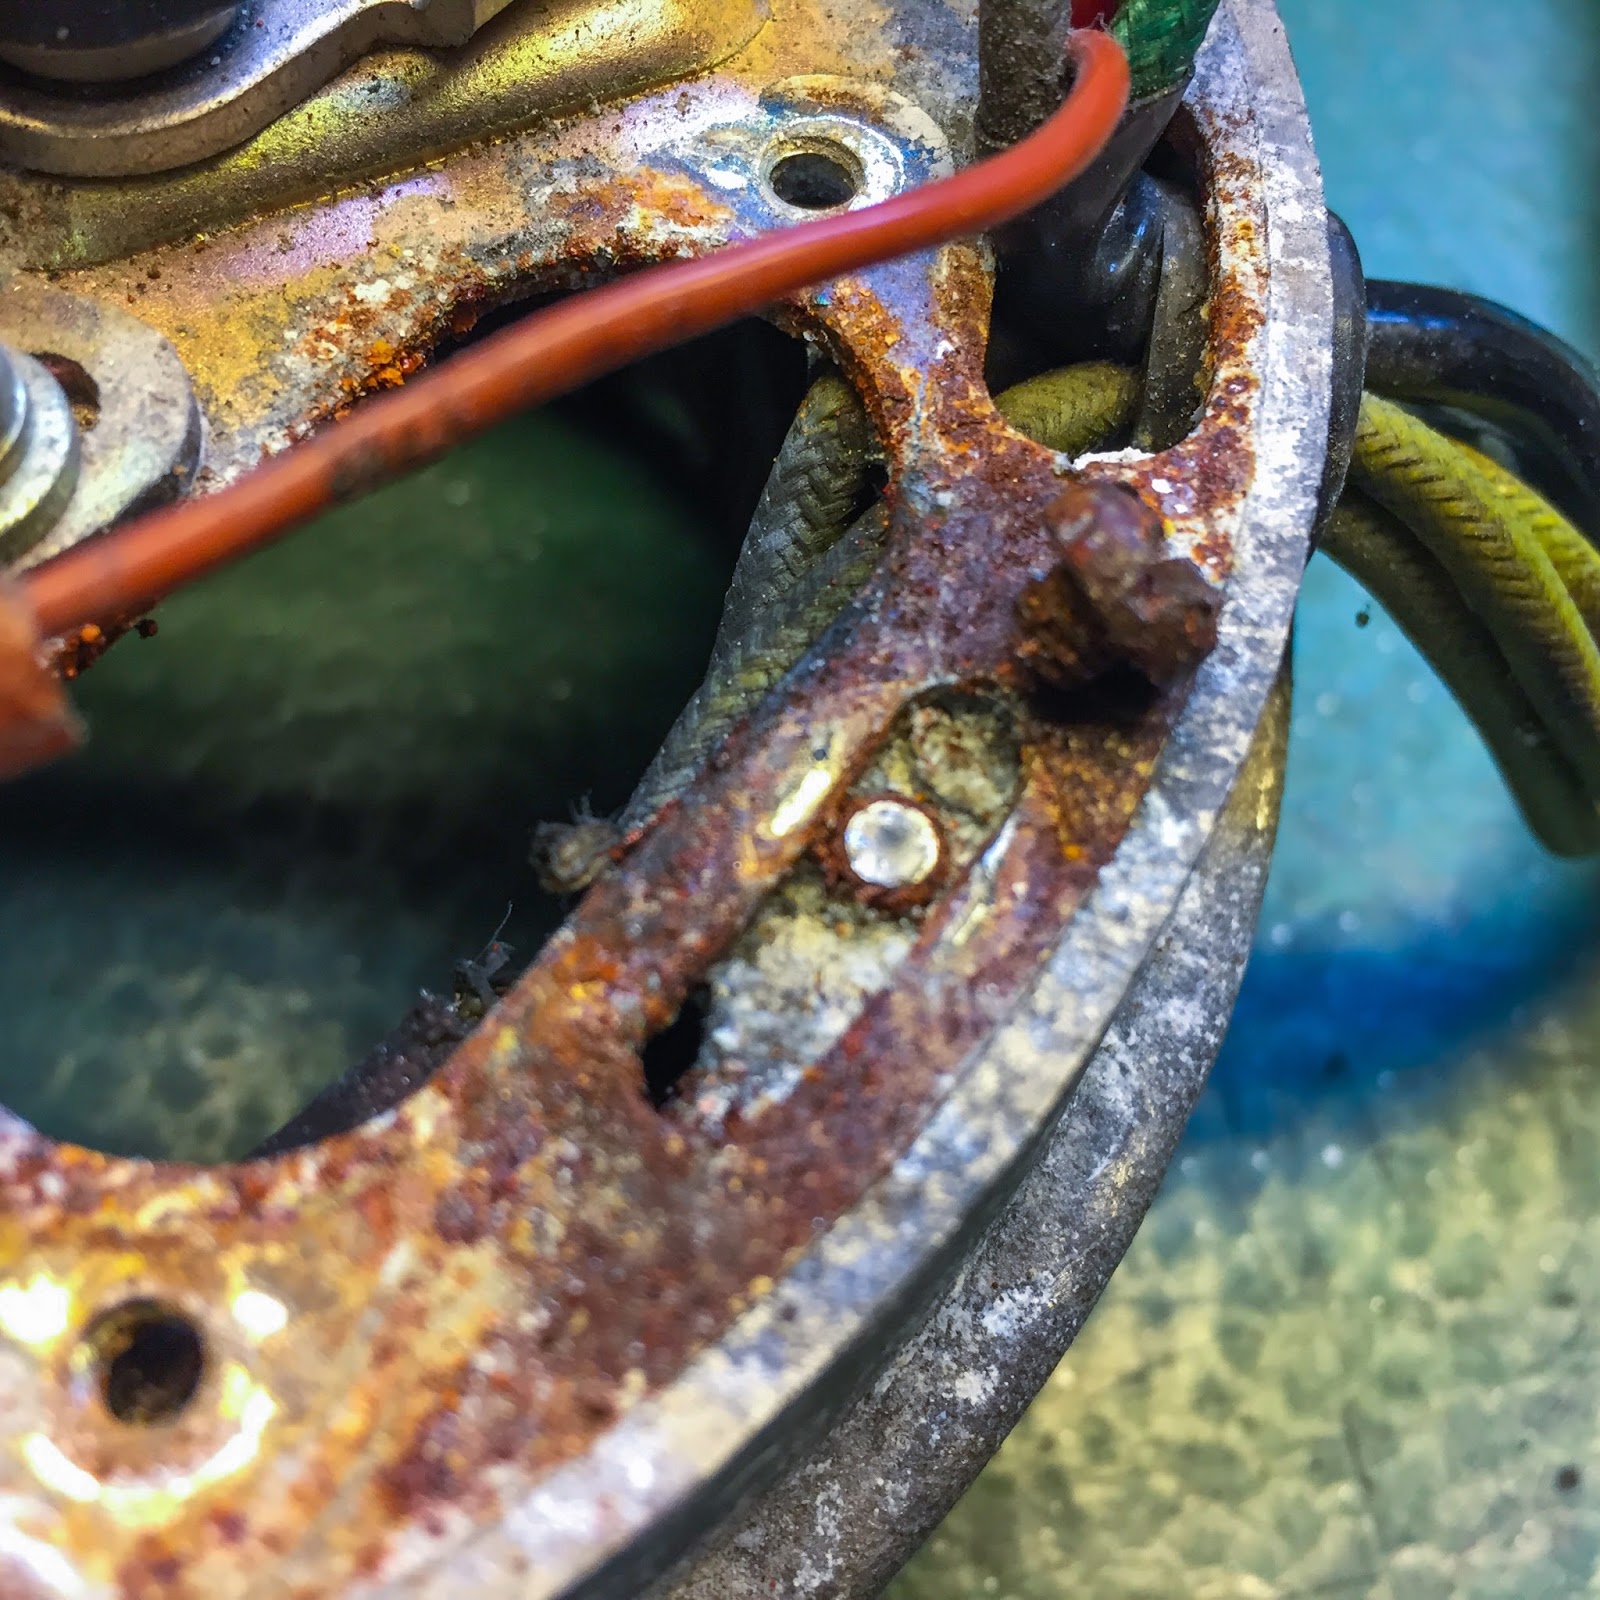
There´s some cleansing and sprucing to do additionally on wiring and connectors. These will look model new once I´m carried out with them. So blissful to see they’re nonetheless round and absolutely usable. These connect to the respective ignition coil up entrance.

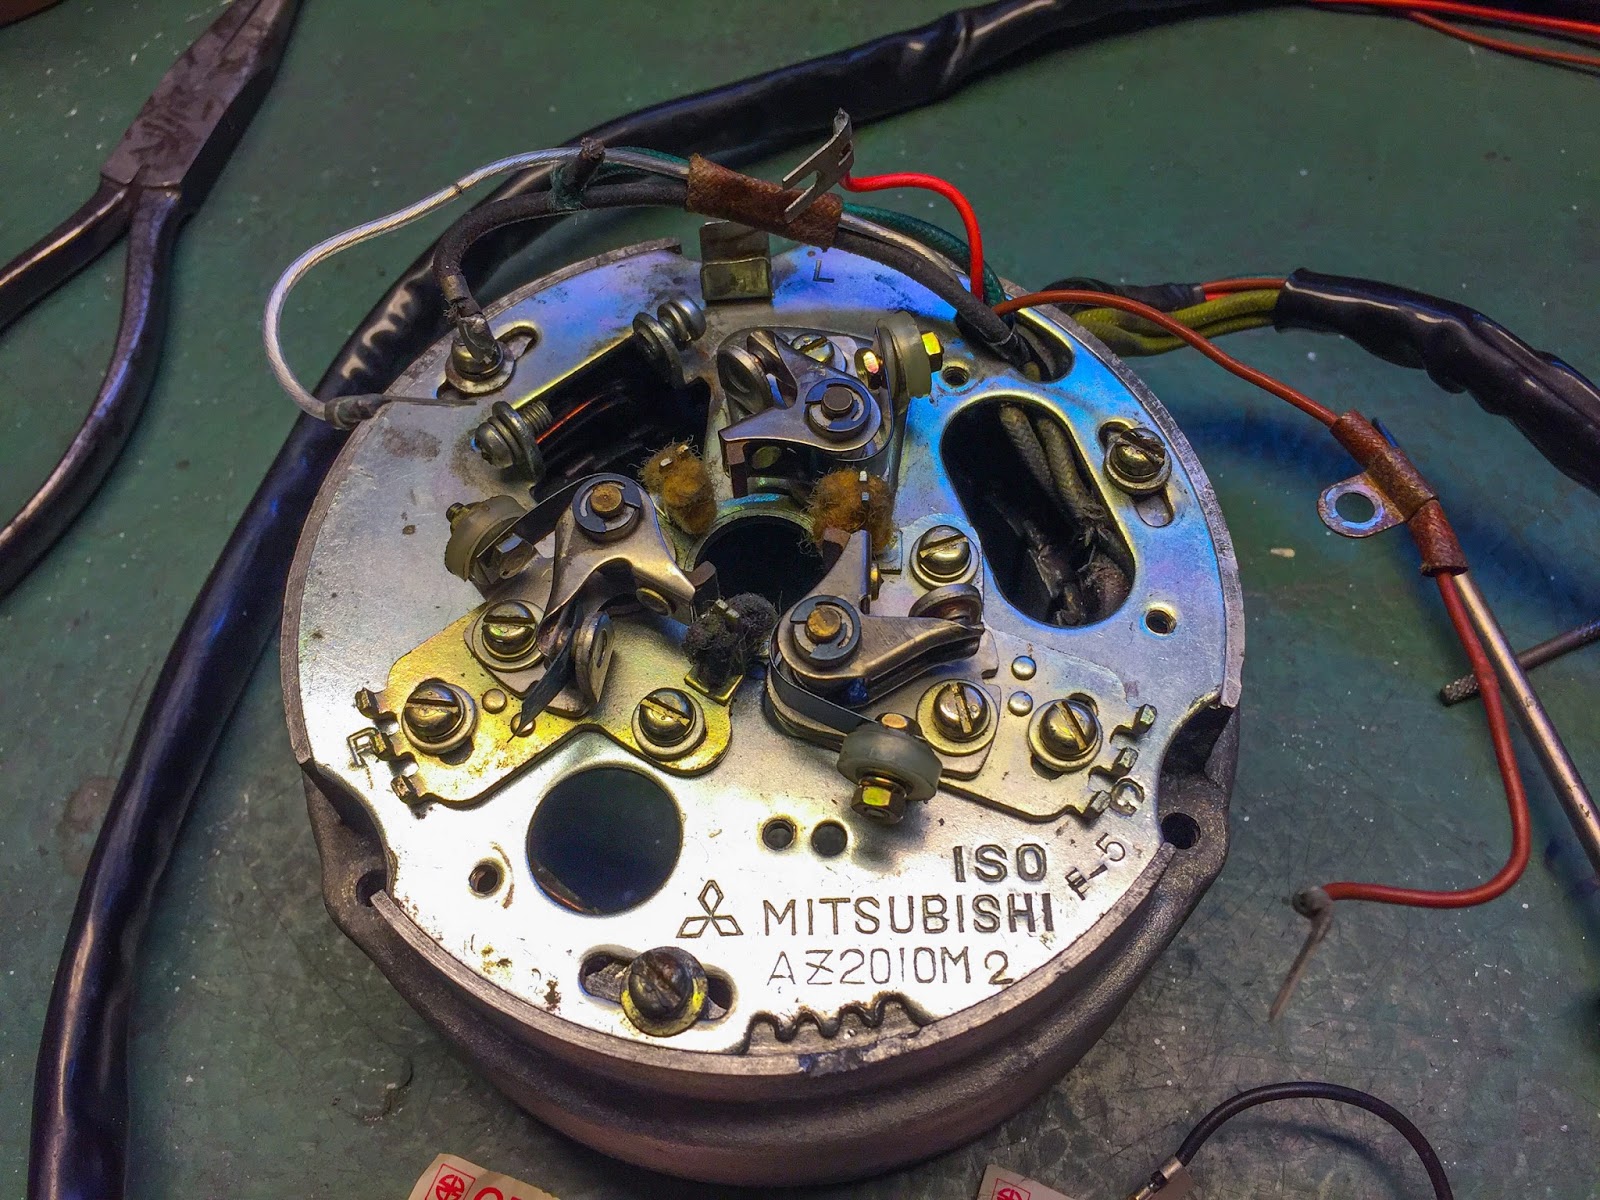
A few of the different connectors on the unique yoke. There are only a few wires on the racer in comparison with the road bike, H1B 1972, regardless that they each have factors ignition. That fits me fantastic since I´m not excellent at electrics or electronics. Ignition techniques aren’t any little one´s play!
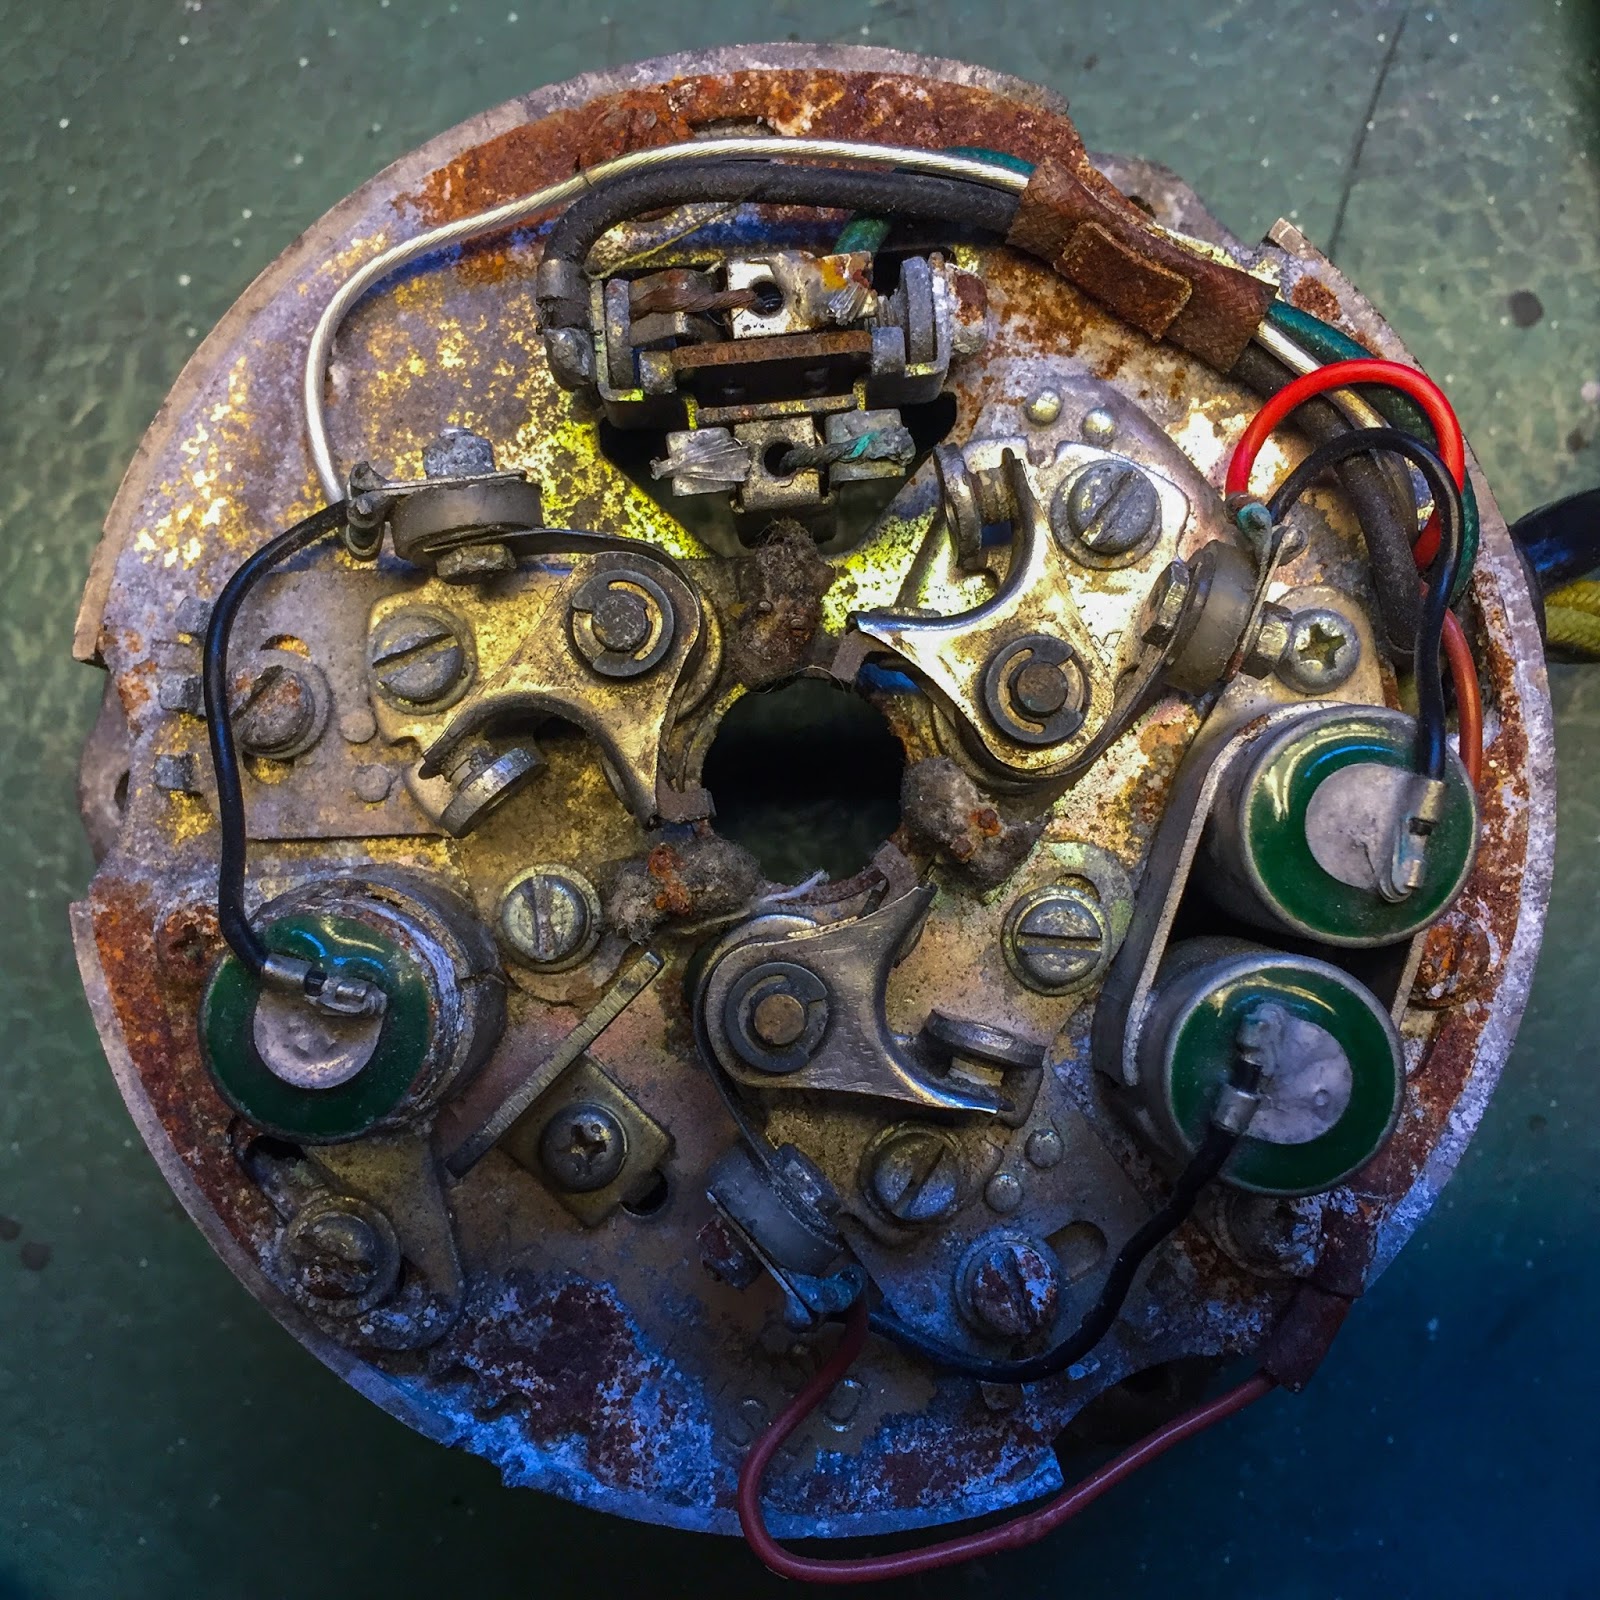
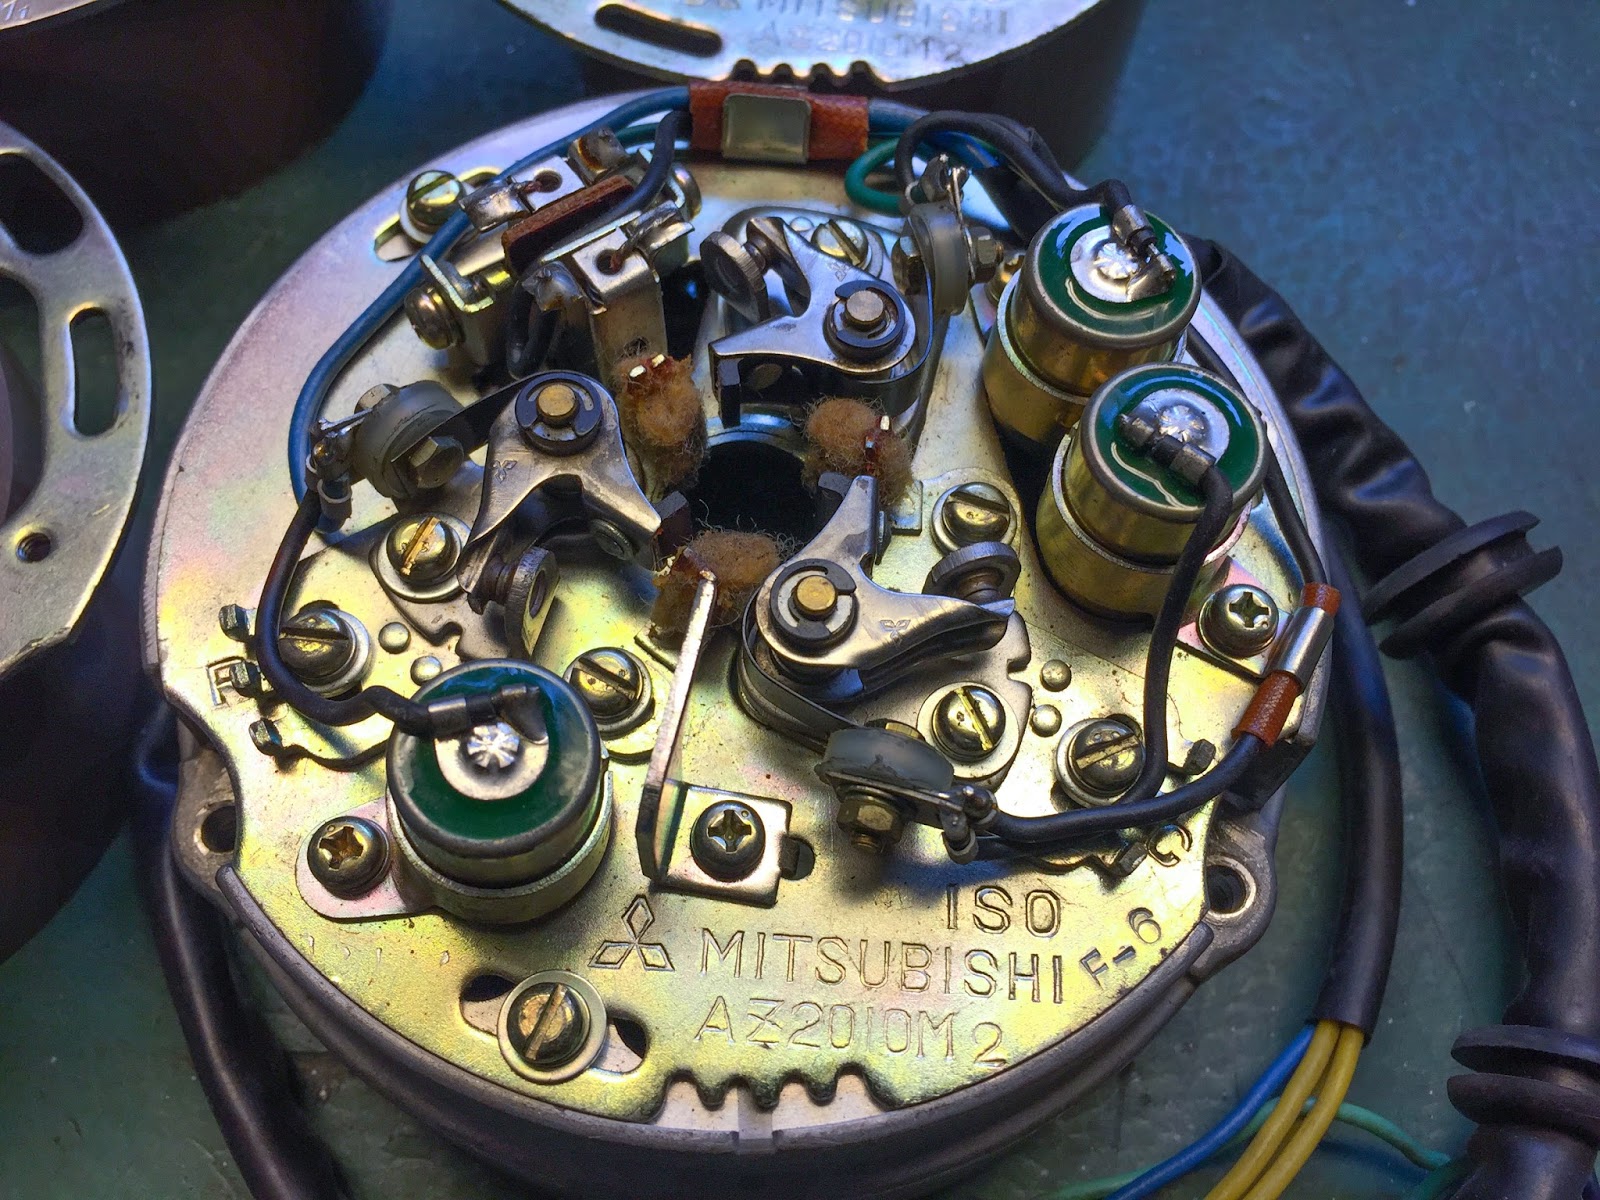
That is what I’ve to work with. I took a lot of footage to doc how issues are mounted in relation to one another. We will additionally see the particular condensers used on the H1R. Two models, one single condenser to the left and a double-mounted unit to the correct. These should go since I´m utilizing parts from H1B that aren’t appropriate with these condensers.
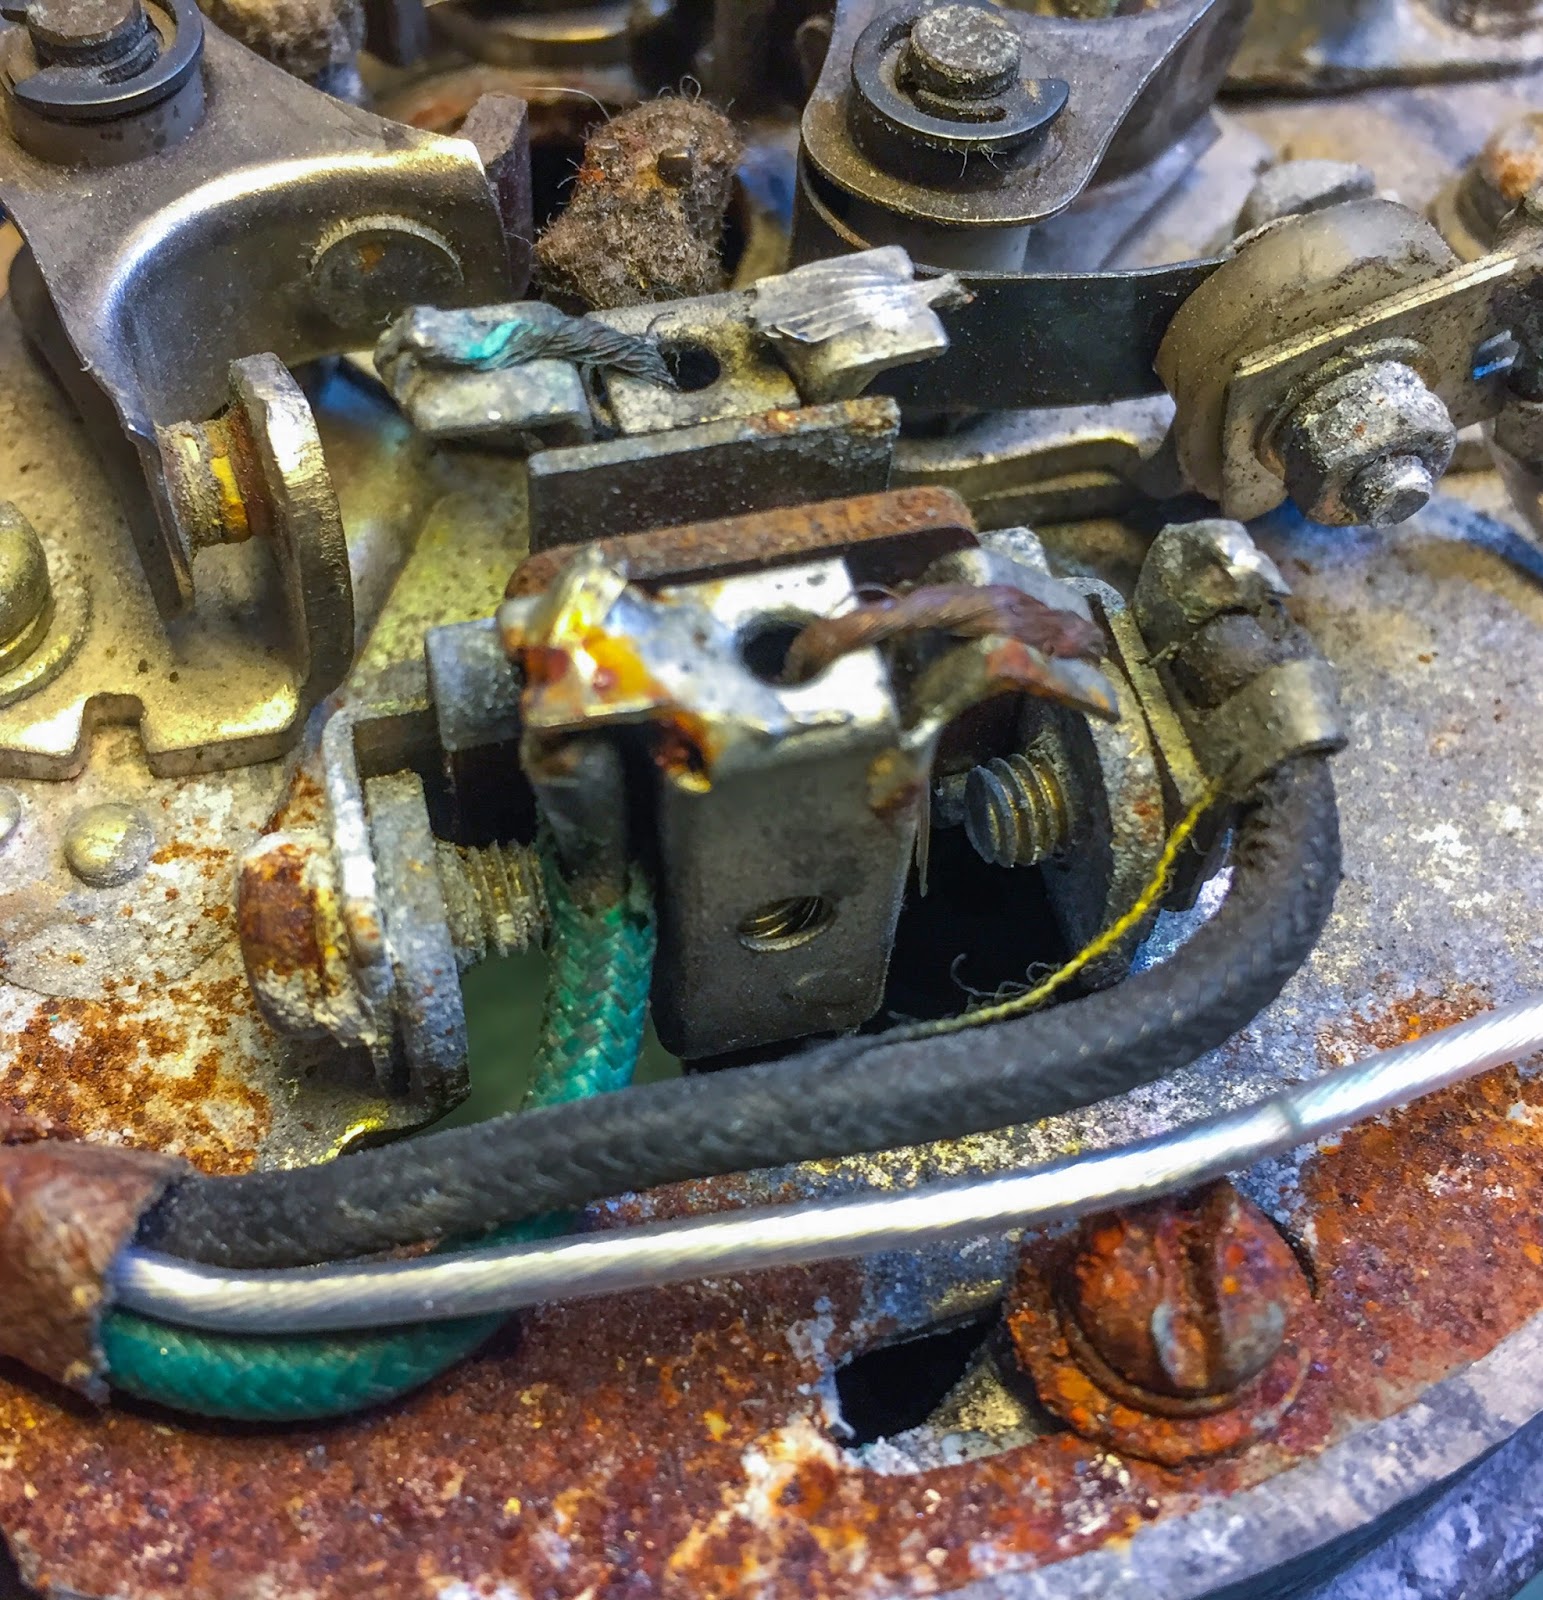
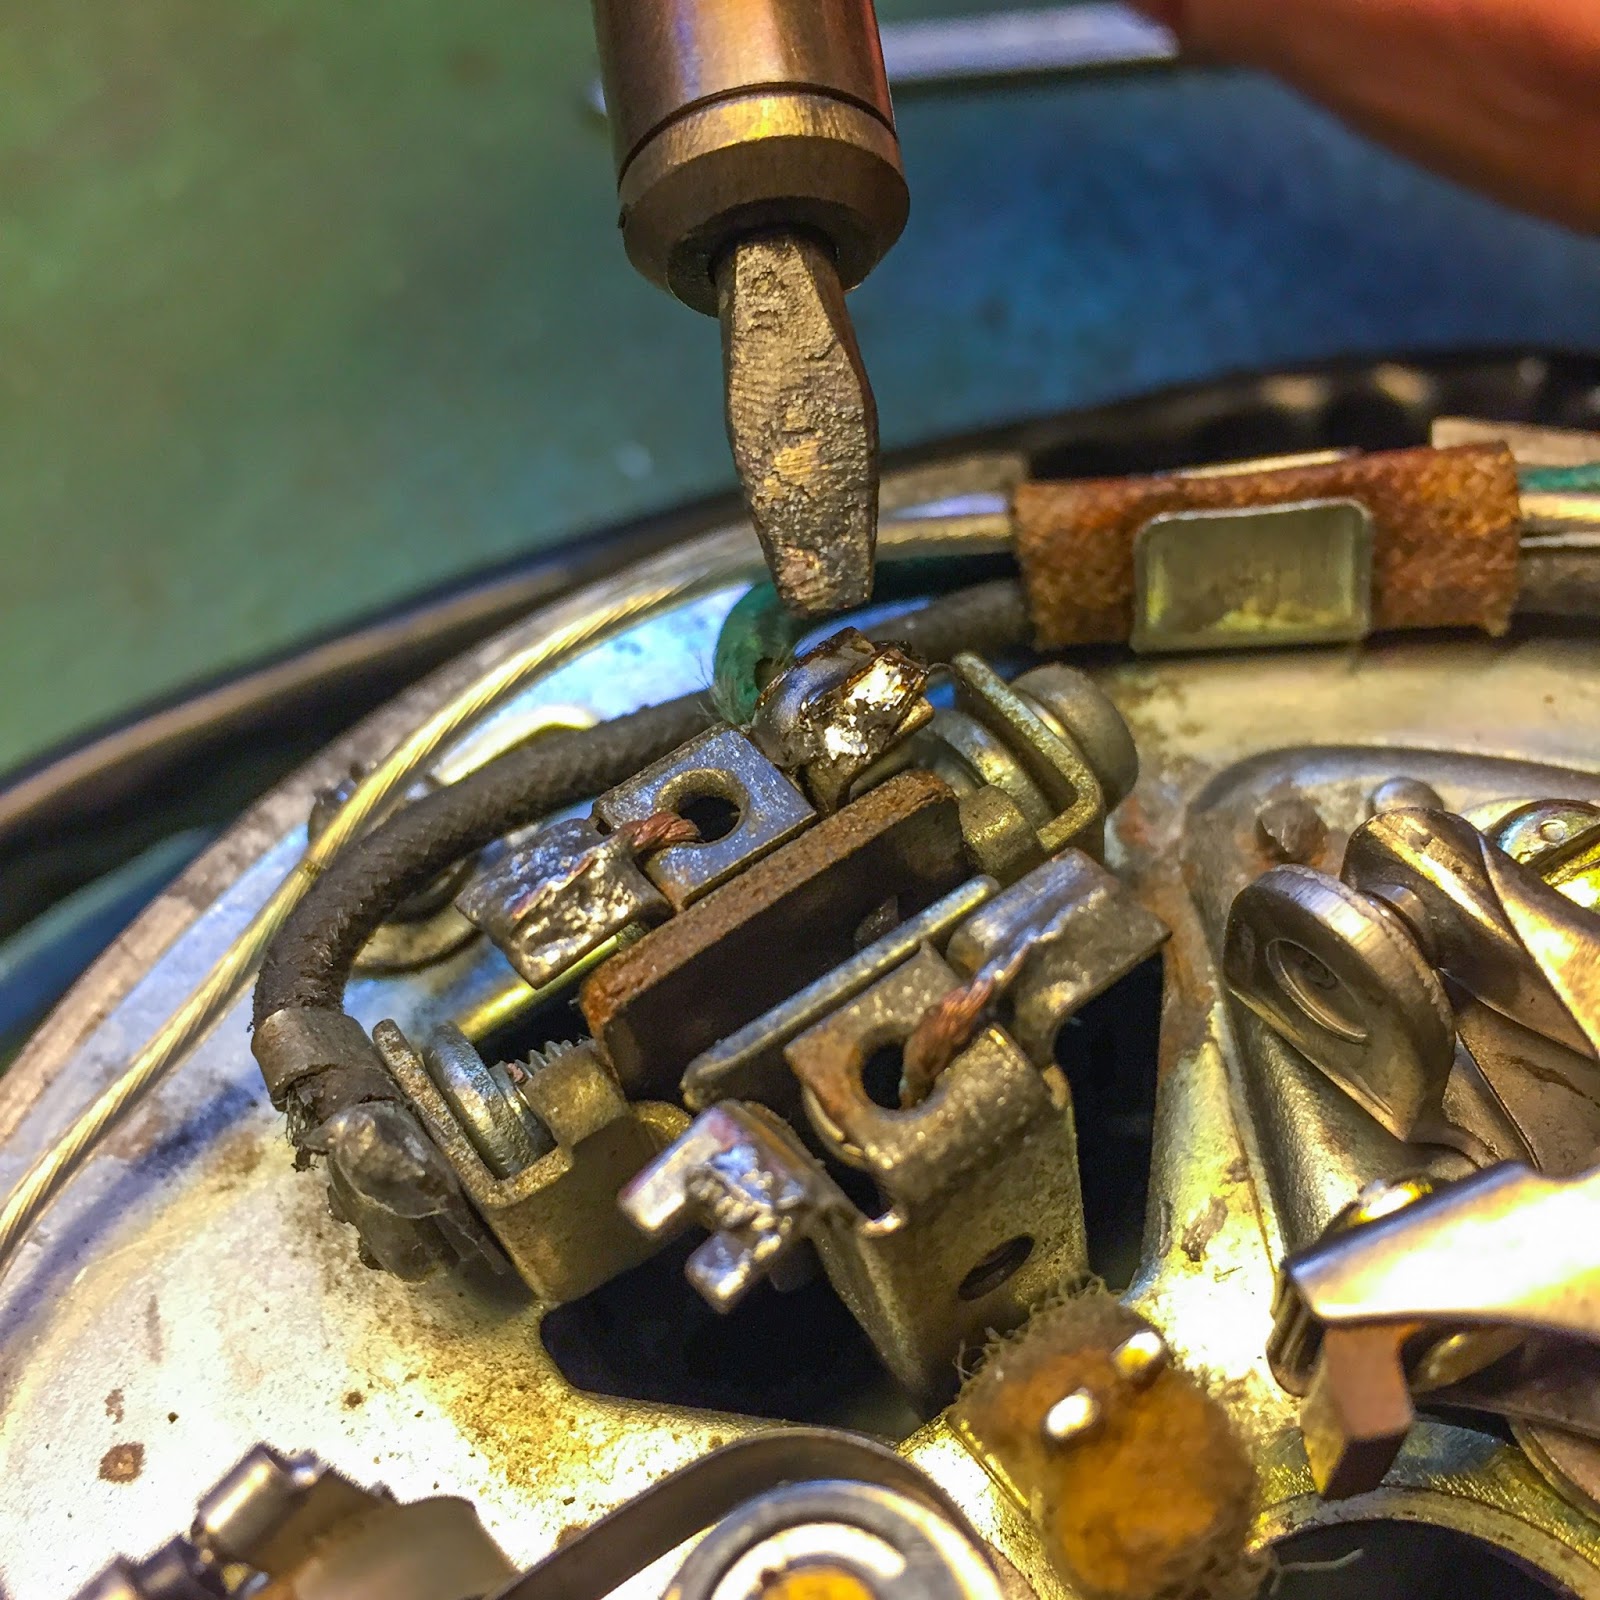
Right here´s the “Carbon Brush and Holder”, 21088-009, generally used on the H1B and H1R. I did contemplate taking the brand new one from the NOS H1B yoke, however opted to not. Sufficient is sufficient! There was sufficient carbon left within the holders right here so it might keep. I simply needed to solder it unfastened to be able to take away that rusted ignition timing plate and substitute it with one of many others.
Two of the screws holding the timing plate to the yoke loosened simply sufficient, however one needed to snap off! I ought to have been much more cautious right here, however I used to be keen to maneuver on… Nicely, simply extra work to do. I´ll get again to that later…
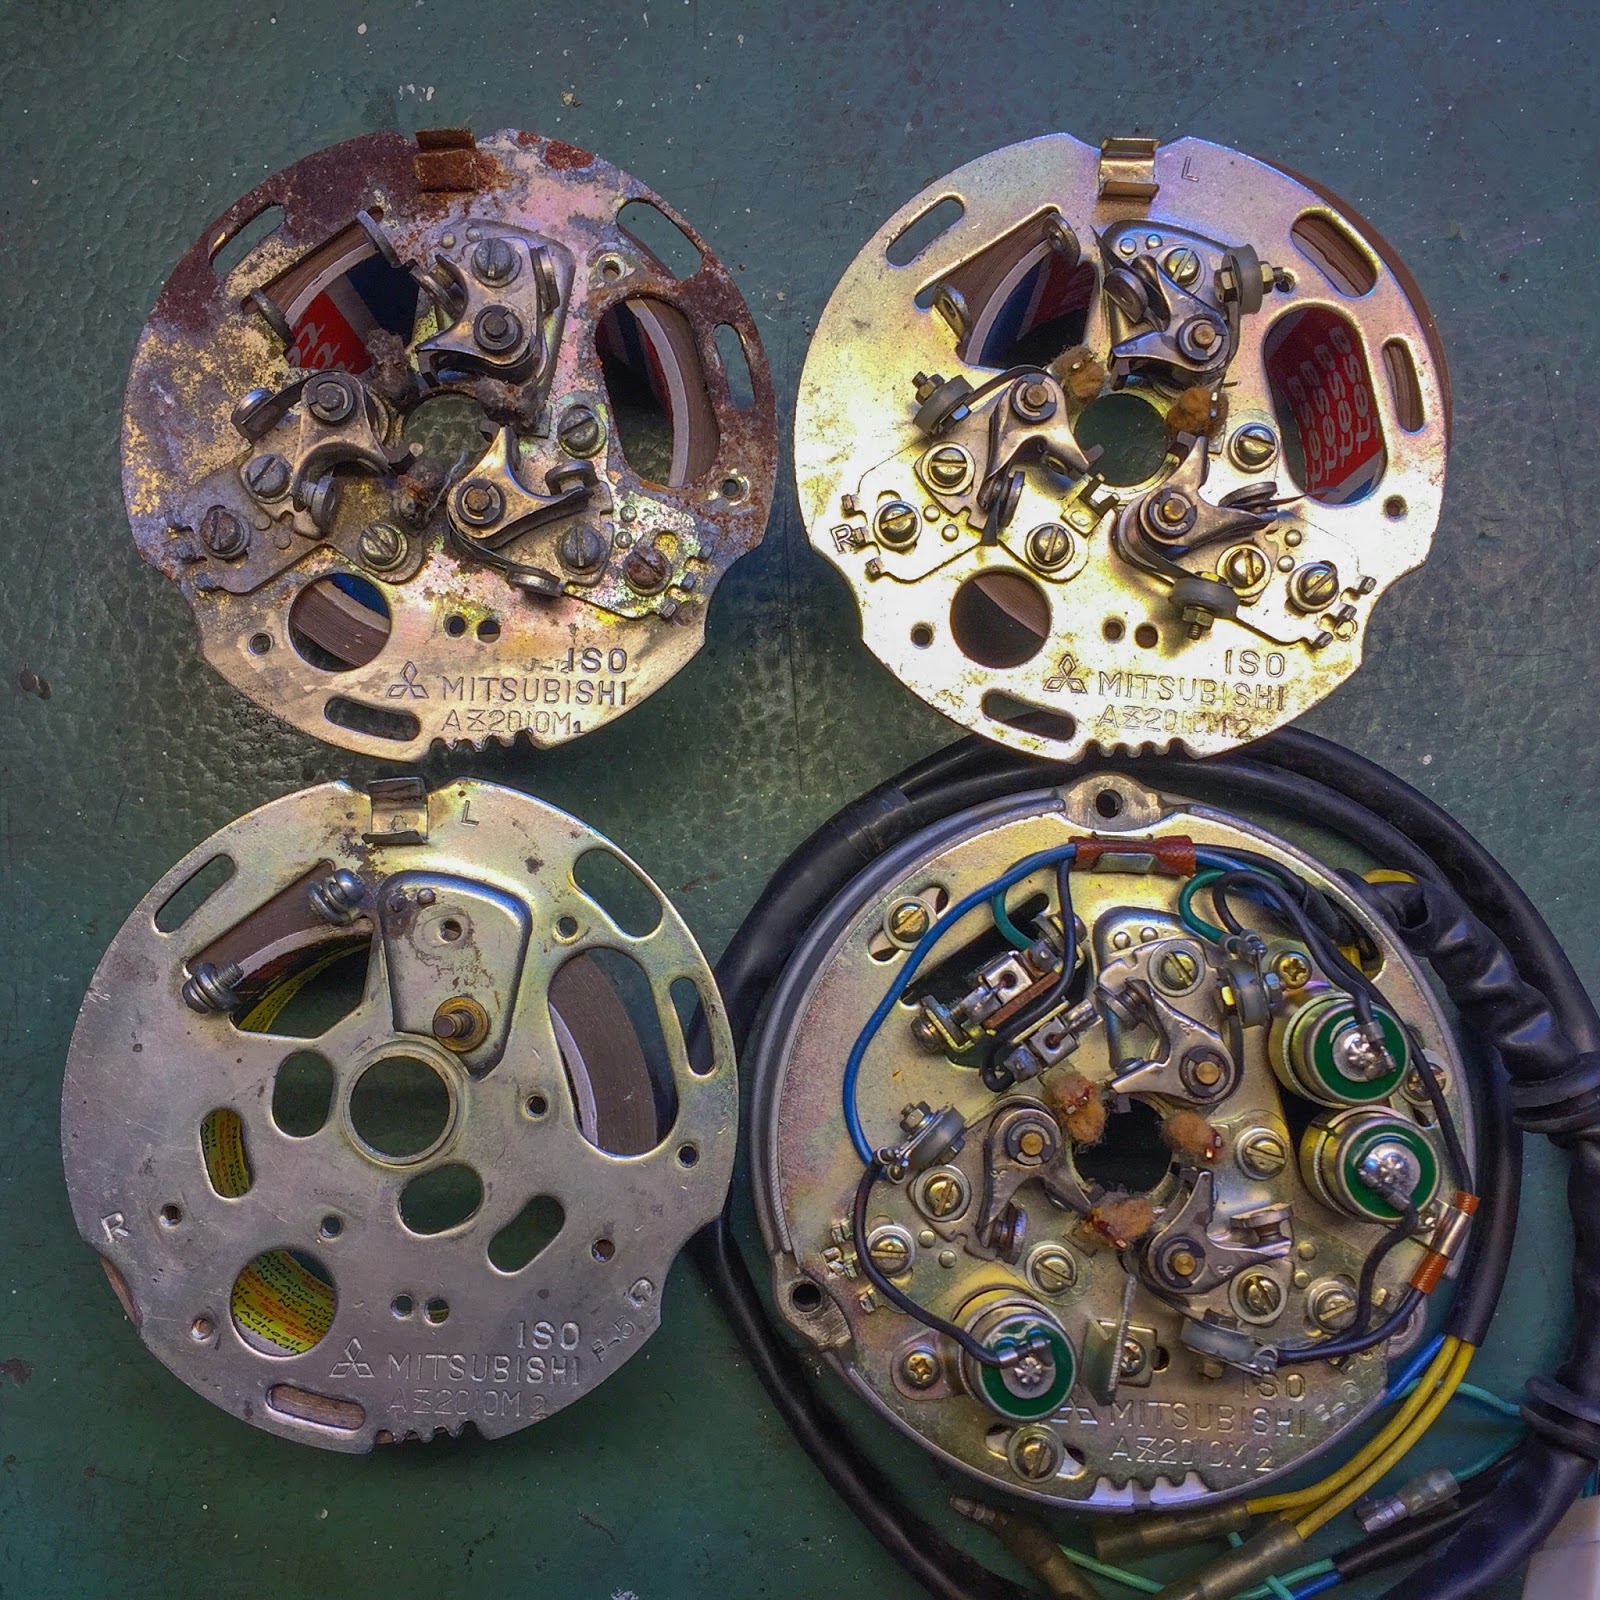
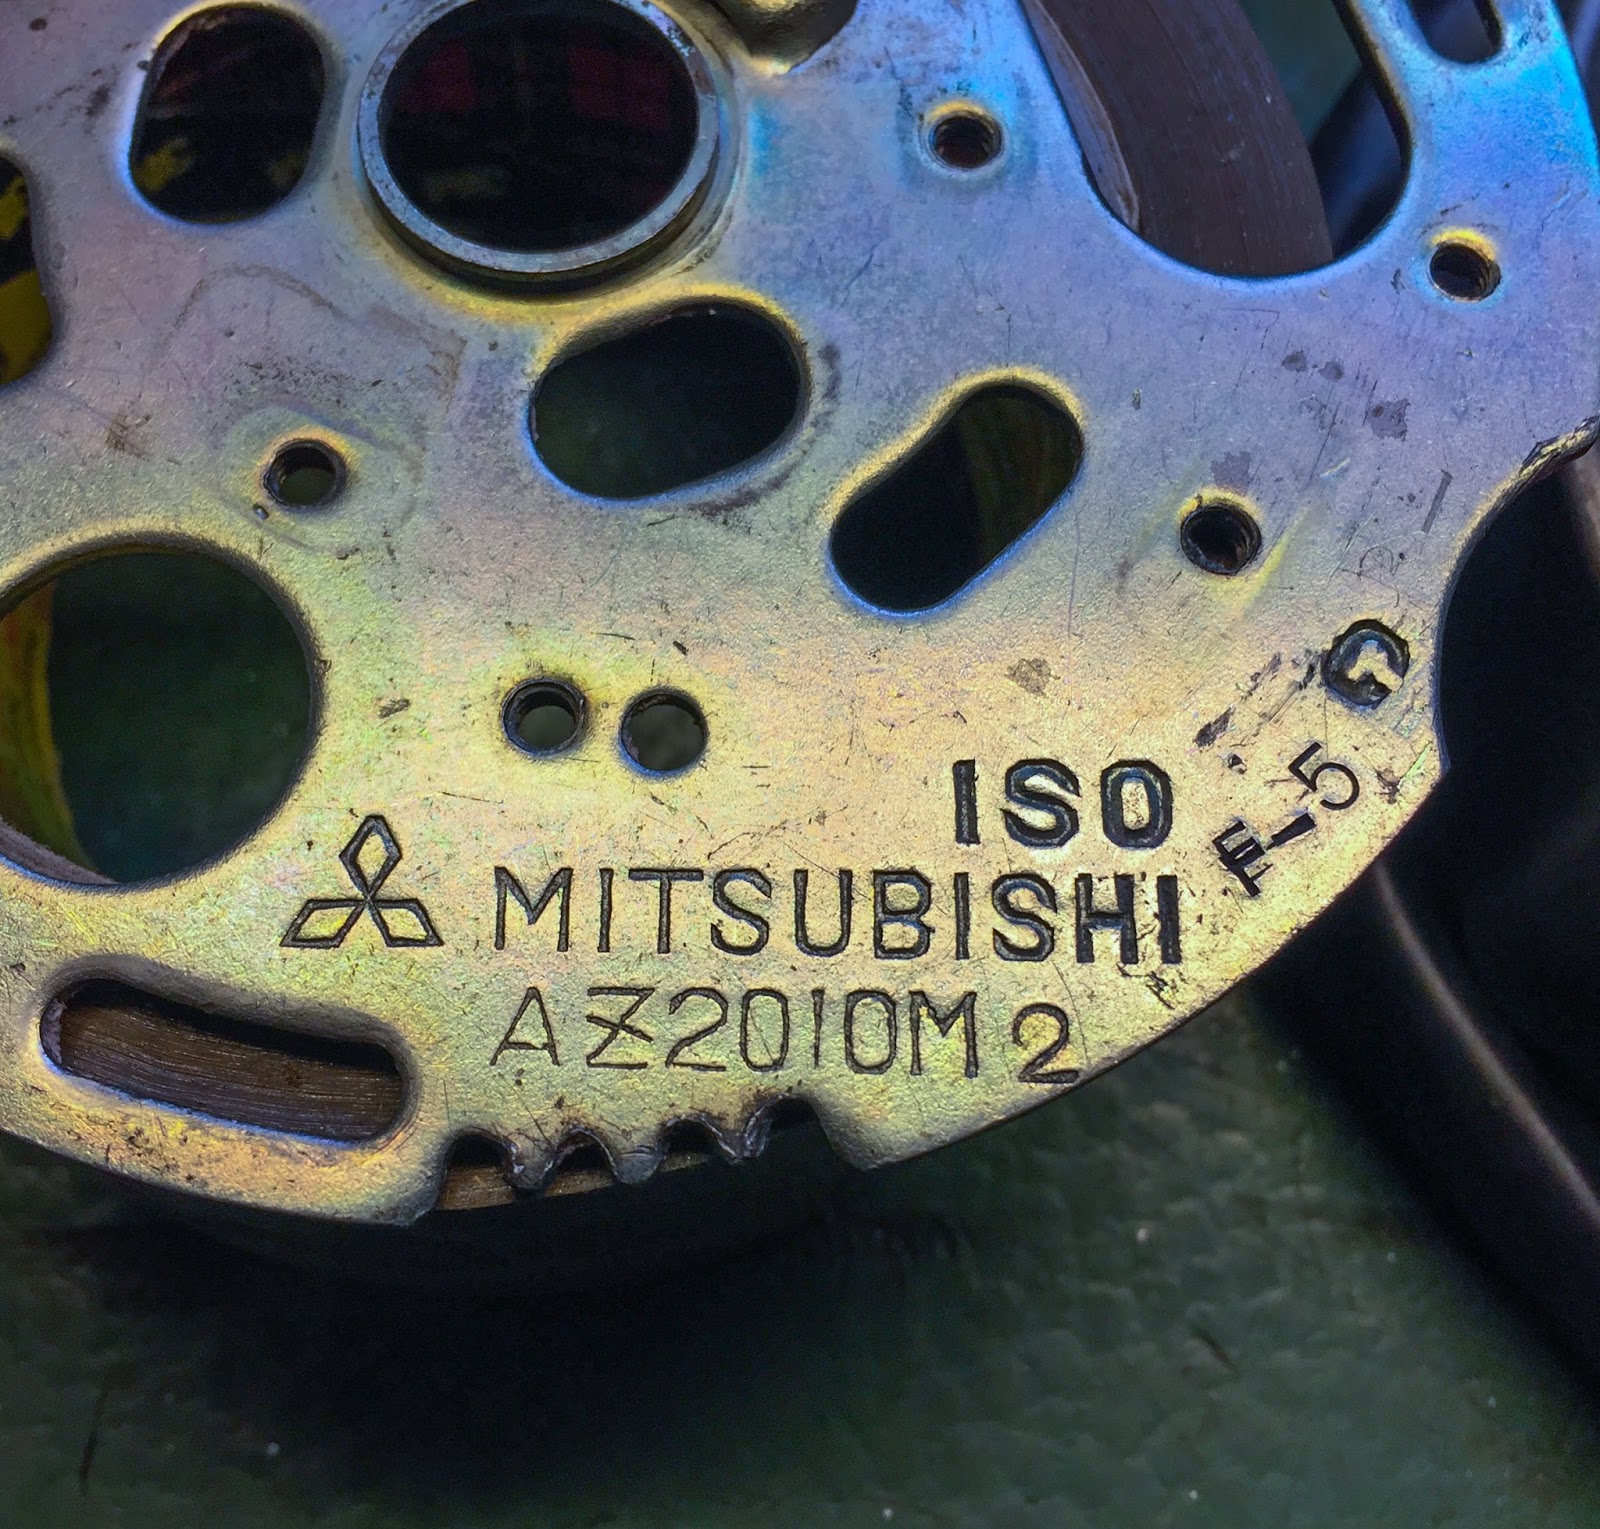
Now, right here´s an fascinating comparability between completely different timing plates. The unique H1R plate, high left. One other used H1B plate I purchased from a man in New Jersey, high proper. The plate from the used H1B I dismantled earlier, decrease left and the NOS H1B, on the decrease proper.
What I used to be searching for right here was if I might have the ability to substitute the unique H1R plate with one of many different ones. They DO look precisely the identical! They’ve completely different lettering and stamped numbers solely. To be fairly frank, I don´t care an excessive amount of about that for now. The used, unique H1R plate will likely be refurbished in due time and once I discover the right coils and different elements I will rebuild it appropriately. The NOS H1B has a “2” plus “F-6” stamped into it. “F-6” could be a date code, perhaps?

The highest proper H1B plate additionally has the “2” stamped within the decrease proper hand nook subsequent to the “AZ2010M” stamp.
The primary used H1B plate has “F-5” and likewise the “2” stamped.
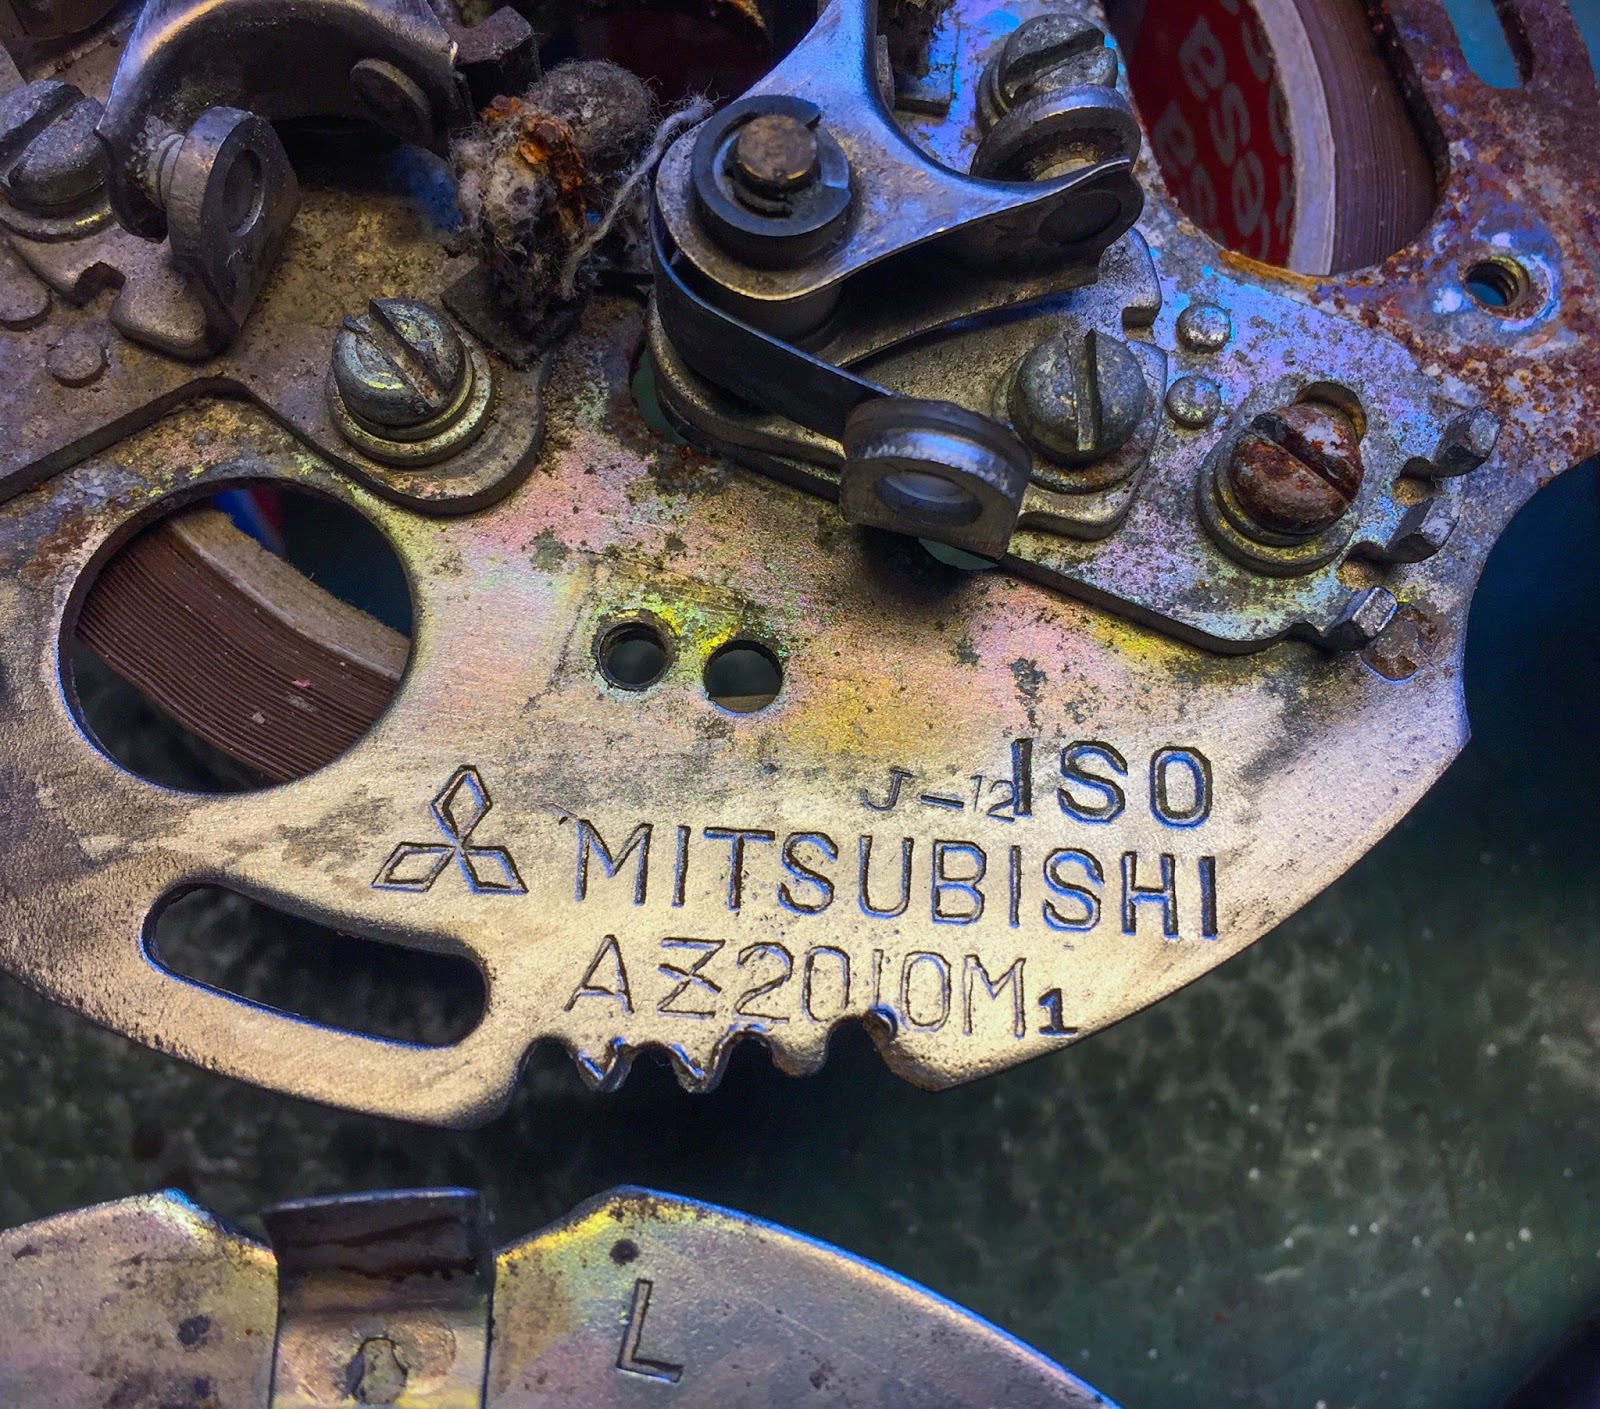
And eventually, the unique H1R plate has “1” near the “AZ2010M” stamp and nothing extra. The cool factor is all of them match completely within the H1R stator housing! The marginally higher wanting, used, H1B plate has a tighter match so I´ll use the opposite one. The NOS yoke will keep NOS…. I´m not going to cannibalize it to construct my H1R plate… 500 bucks is 500 bucks and that yoke will perhaps be value that to another needy man sometime.
OK, again to the stator housing. I couldn´t get that broken-off screw out with out drilling. I attempted warmth, penetrating oil and a mixture thereof with out success. I used to be capable of drill it out in such a manner that I might clear out the threads with a faucet and reuse the outlet with out helicoiling it this time.
As I bought the thread repaired it was time to begin placing elements again on. 3 NOS breaker factors, 21082-007, had been added. These are appropriate for the H1B however look precisely the identical because the 21082-001, H1R factors. I don´t know what the distinction could be…
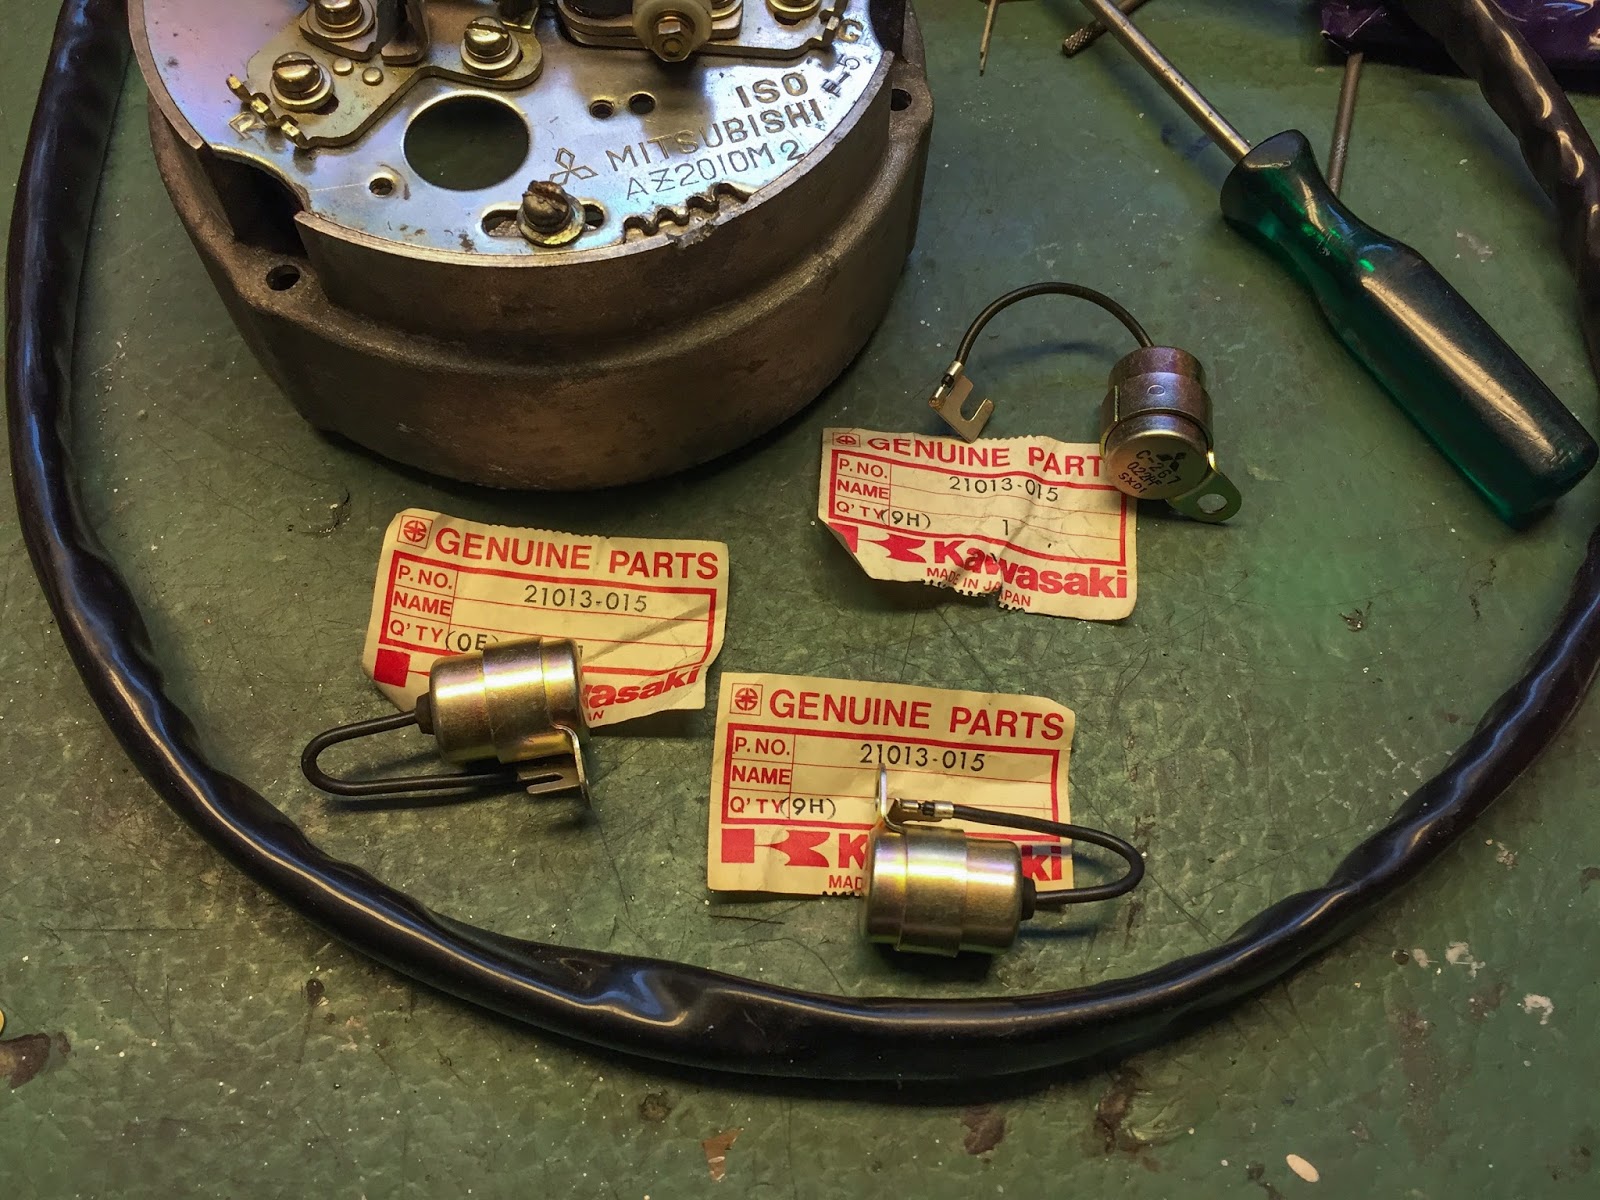
The identical goes for the condensers. 21013-015 are H1B and they are going to be good for this H1R/H1B hybrid ignition… The originals, 21013-020 and 21013-021 are left the place they’re, in inventory for later!
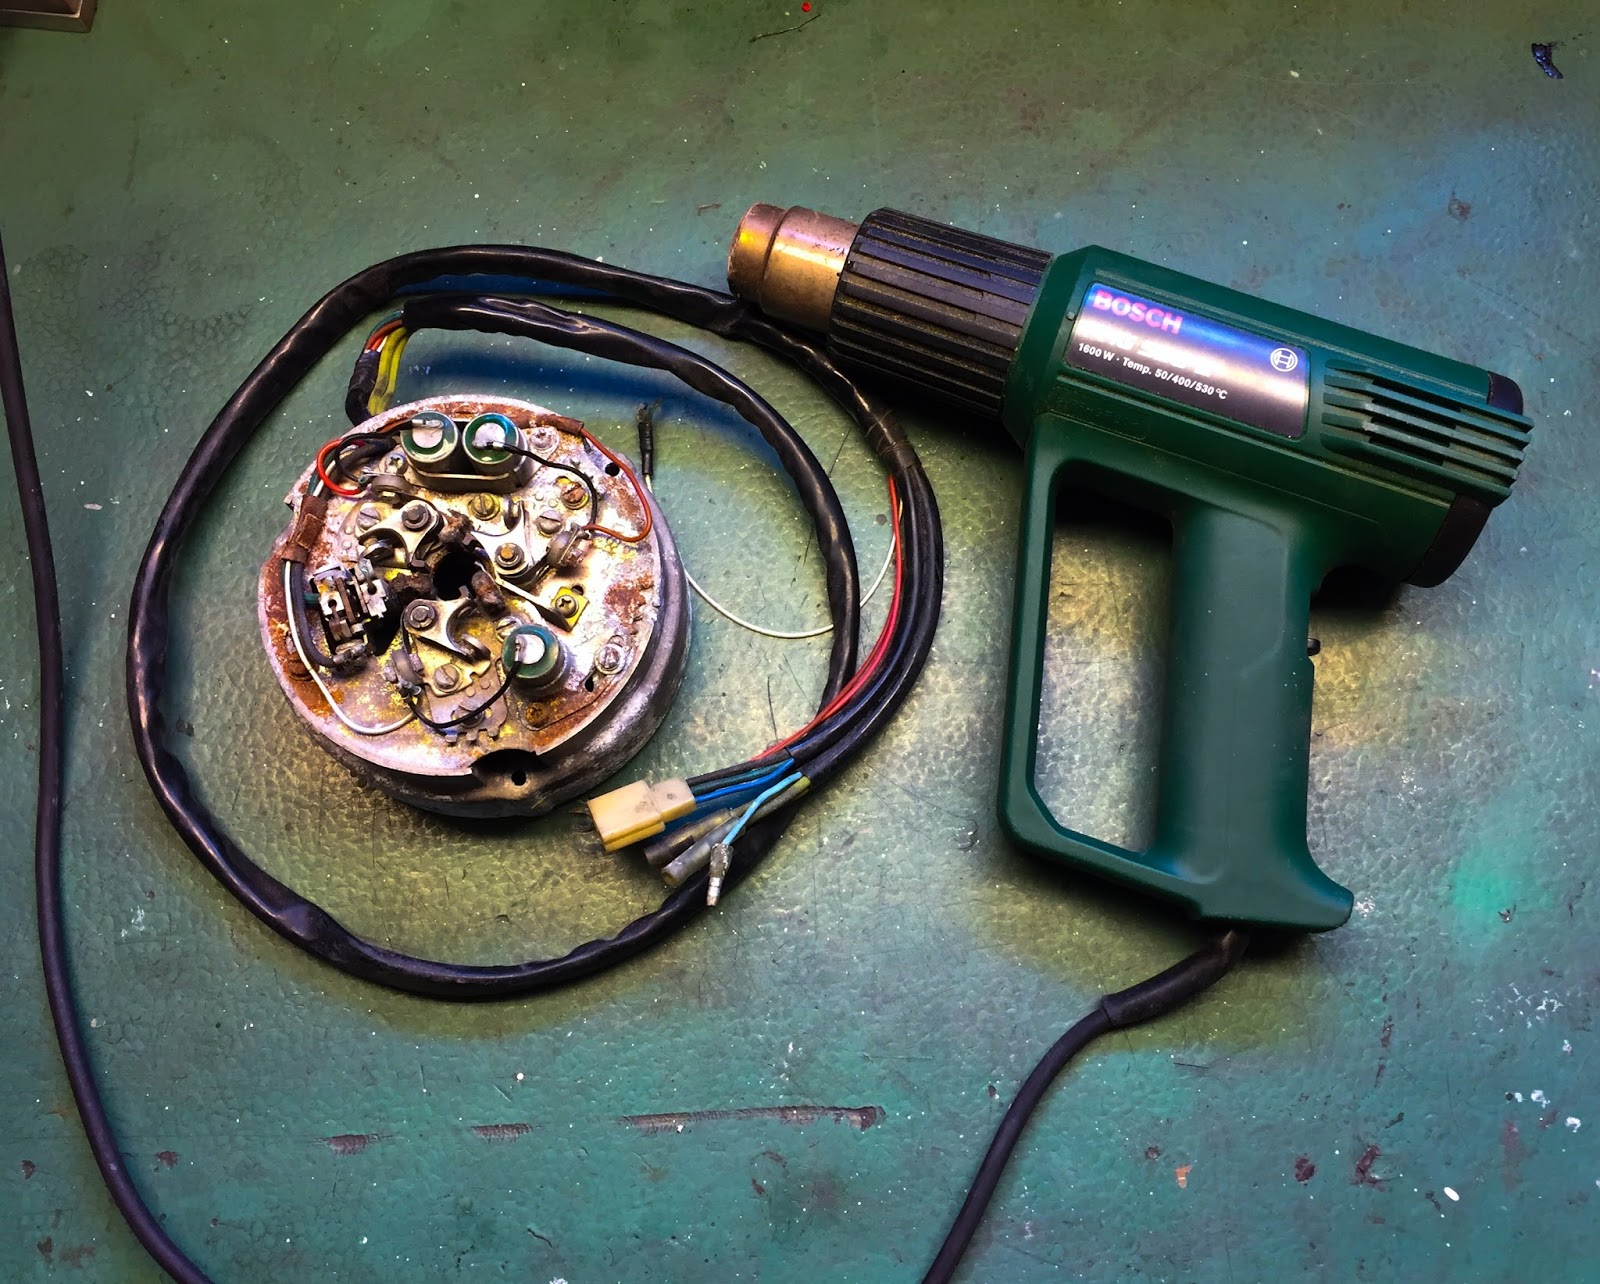
The Carbon Brush Holder goes again on the plate. The earth lead is screwed on to one of many fasteners and the facility line is soldered again in place on the insulated a part of the comb holder. It’ll be VERY fascinating to see if this rebuild/restoration will work…All of it comes down as to whether or not the cam from an H1B could be fitted to the crank of an H1R and the angles will coincide… let´s hope so! That´ll present very clearly when the time comes for ignition timing and factors hole changes.

Right here´s an image of the completed product. A few hours value of fettling and tinkering within the storage. Good H1R stator with its unique, lengthy, wiring harness and refurbished with parts from the H1B factors ignition.

I actually hope I’ve bought all of it appropriately fitted on to the plate. The condensers and the breaker factors are completely remoted from contact with the timing plate by means of small plastic elements. Tiny, small and really, very simple to unfastened. Fortunately I had a couple of additional. The small E-rings holding the factors to the plate are additionally actually difficult to get in place.
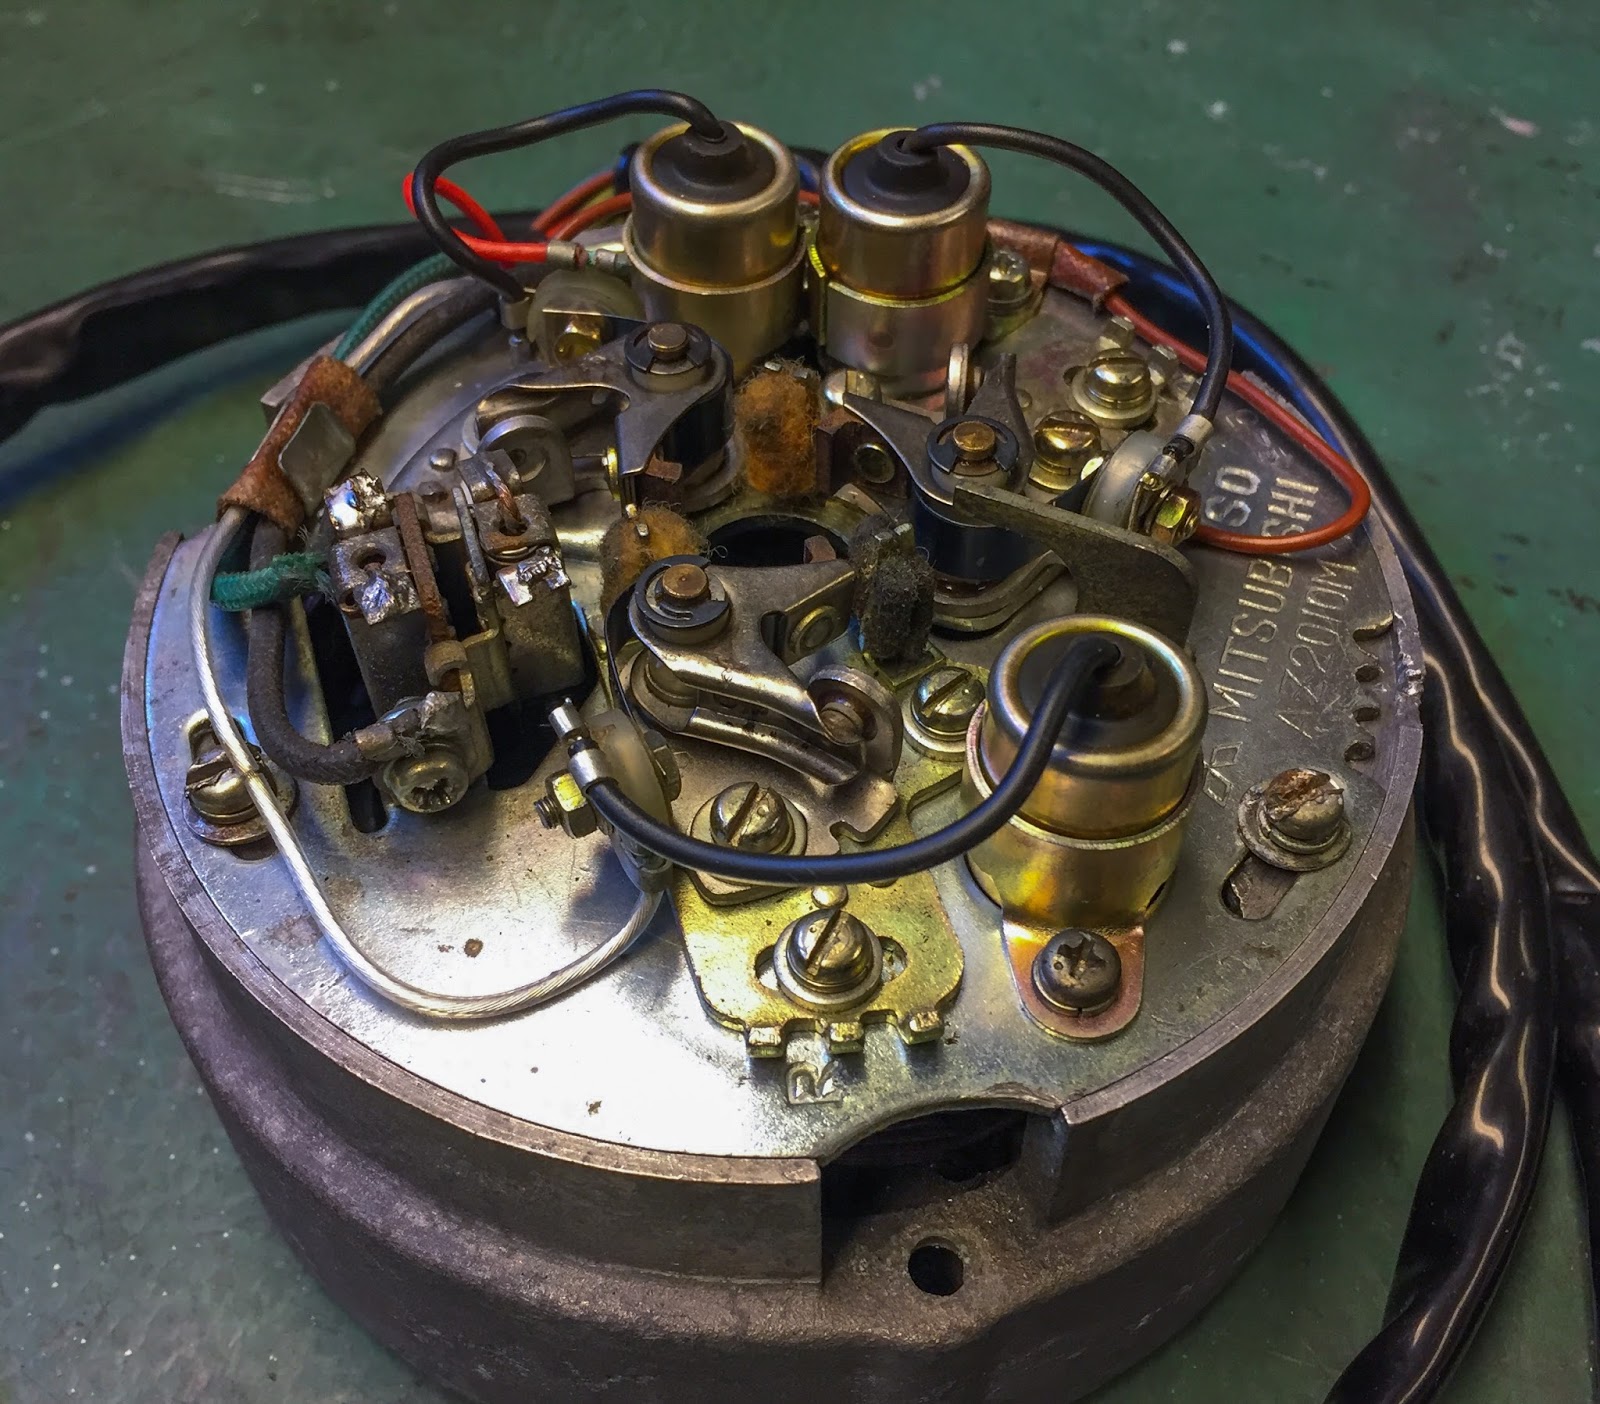
You can too see how the factors are adjusted for timing one-by-one. One of many factors are hooked up on to the timing plate and two are mounted to their very own adjusting plates on the timing plate. That manner all three could be individually adjusted as soon as the “grasp” one is appropriately timed with one of many pistons on the appropriate place in relation to TDC, high lifeless middle. Extra about that in a while…
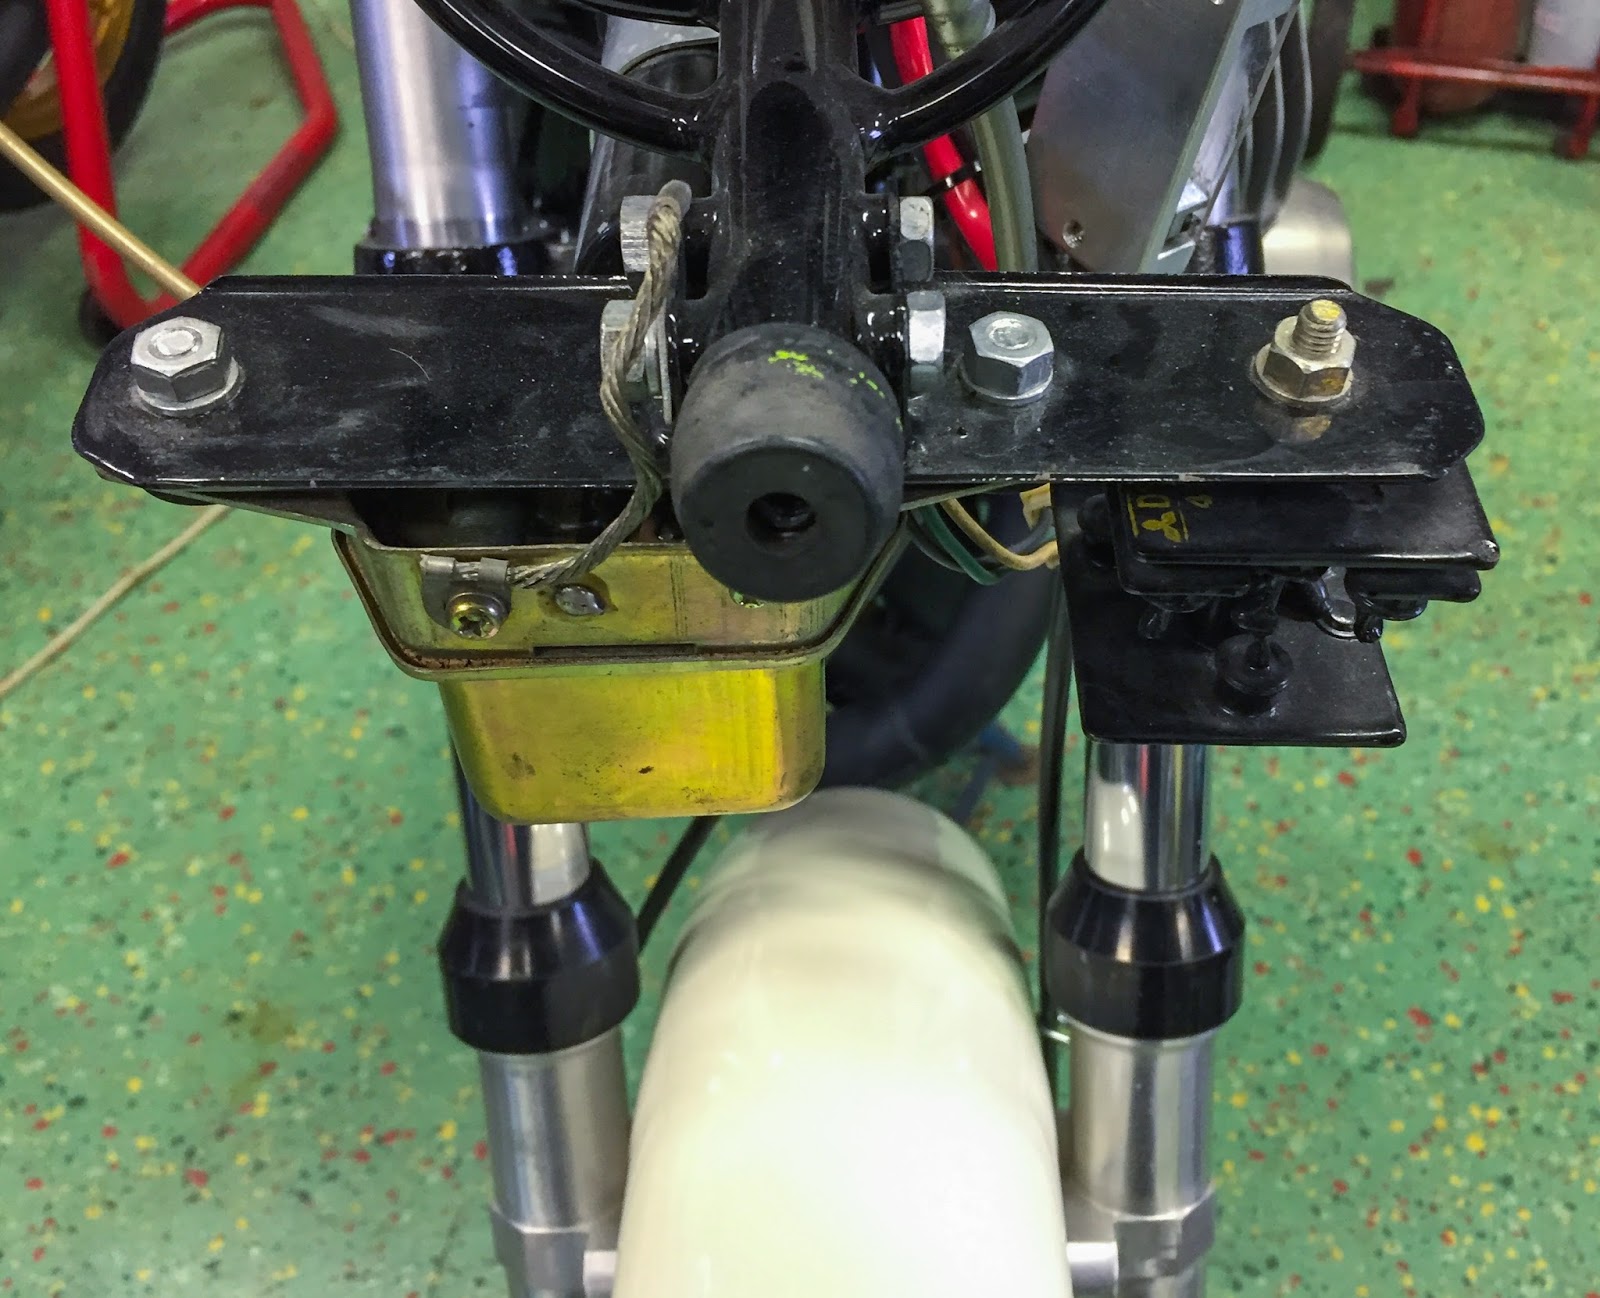
A few days in the past I paid Janne a go to. I wanted inspiration to go on and likewise to doc the position of the elements right here and there on the bike. On the image to the left right here, we will see the rectifier on the correct and the voltage regulator on the left. These elements I’ve discovered. They’re the identical on the road bikes, so no huge deal…
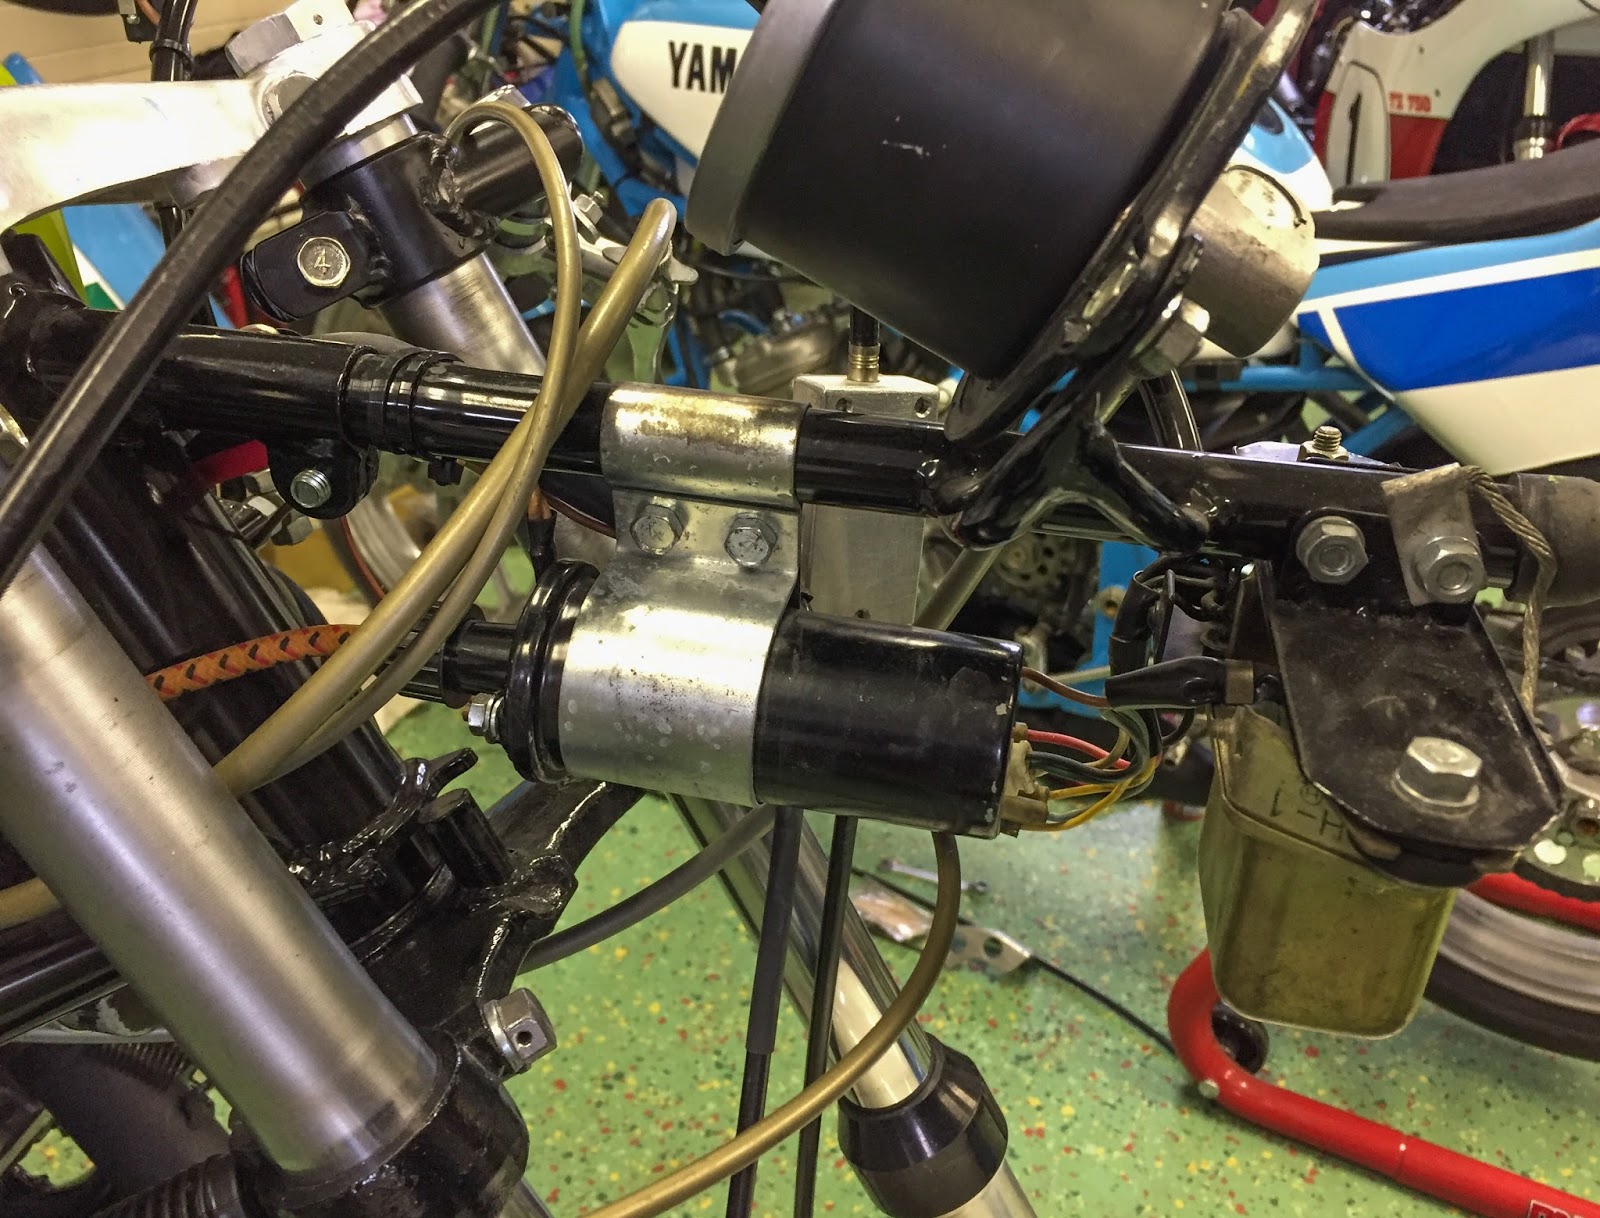
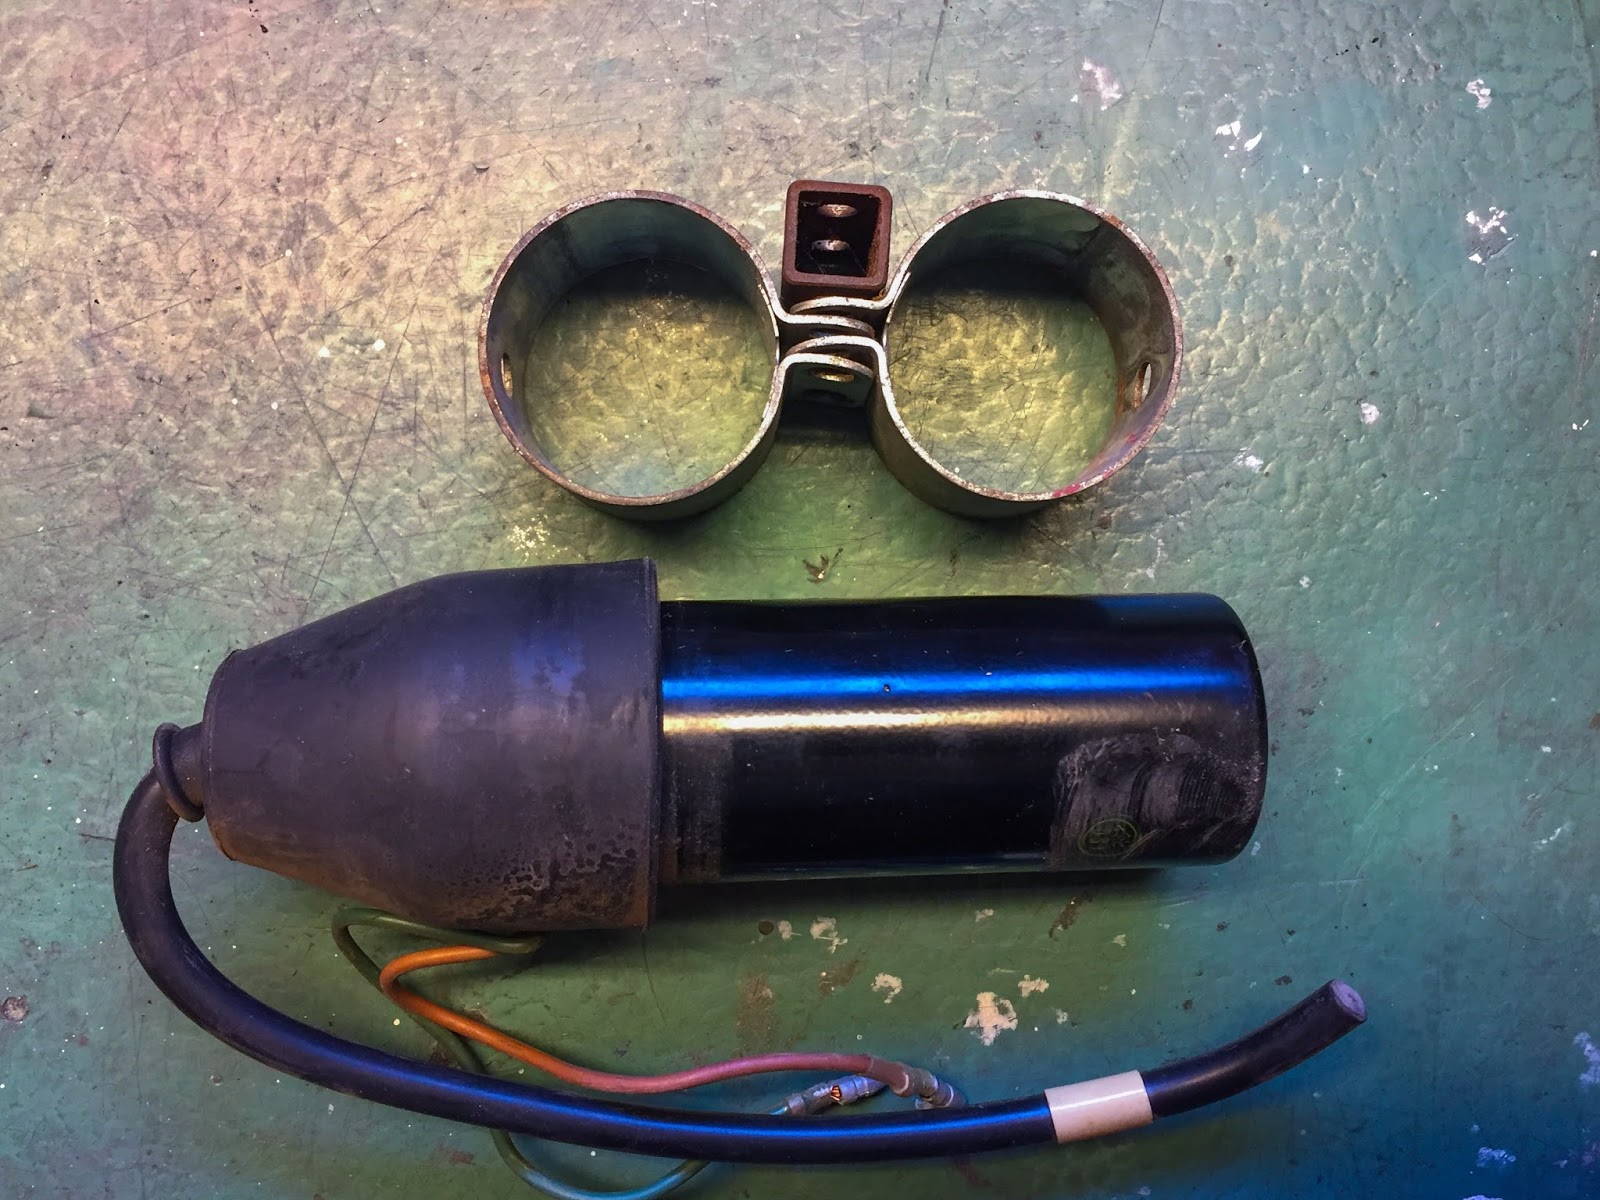
One of many coils is mounted on the ahead going through “spear” with a particular bracket and a clamp. I believe I can reuse what I’ve right here.

Janne has his engine prepared for start-up any day now. Take a look at that cheesy battery mount! Two lengthy rubbers and a spring to the body…

Right here´s the “chain cowl” in place on Janne´s bike. He additionally made one for me and I must get the bracket that sits across the body on the different finish of the duvet. No pleasure discovering one but… I´ll simply should make one myself!
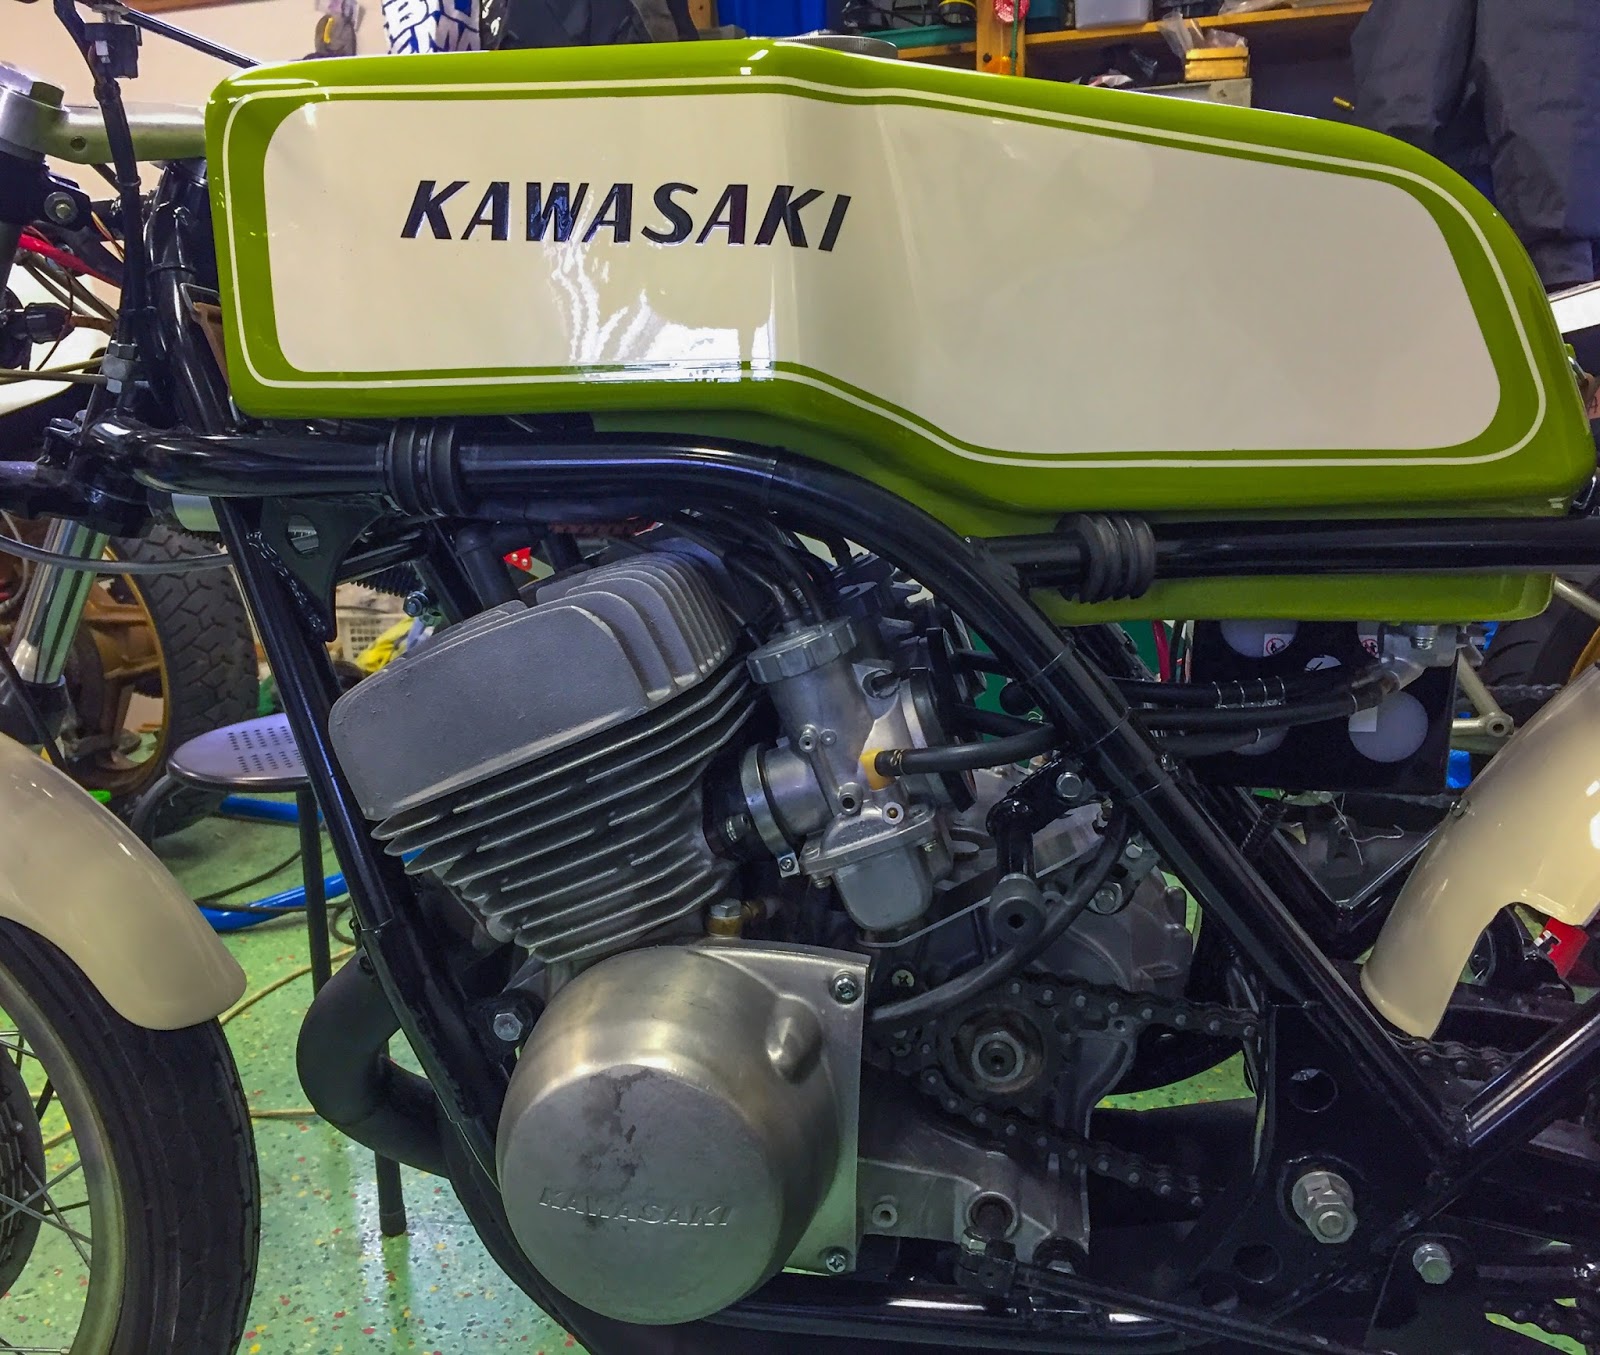
His tank is prepared for gas and every part is ready to go! He´ll go over every part once more after which he’ll begin it up.. I hope I´ll have the ability to doc that occasion!
That’s going to should be it for now… Subsequent up is finding all of the elements for the ignition to lastly go on to the bike, get the engine completely mounted and safe-wired to the body, fixing the rear brake pedal stopper screw, becoming the clutch cable, throttle cable and carbs and this and that after which the following factor….
I don´t have any issues filling my days with this mission, that’s for positive. What i do have issues with is my motivation proper now. To be sincere I don´t perceive how I´ve been capable of get all of the issues I´ve carried out up to now carried out in any respect. I can´t think about doing it another time, ever. Not that I’ll ever should, since these bikes are so extraordinarily uncommon. What I DO stay up for is constructing one thing from my very own concepts and ambitions after this restoration. These two H2:s are looming up forward and, to be sincere, they’re my motivation to complete this mission proper now.
Thanks for studying and having the ability to naked with me and my ranting!
/Per
[ad_2]