
[ad_1]
✓ PRO TIP: New to using a motorbike?
Get one of the best deal on insurance coverage by evaluating quotes.
Enter your zip to get began.
ZIP:
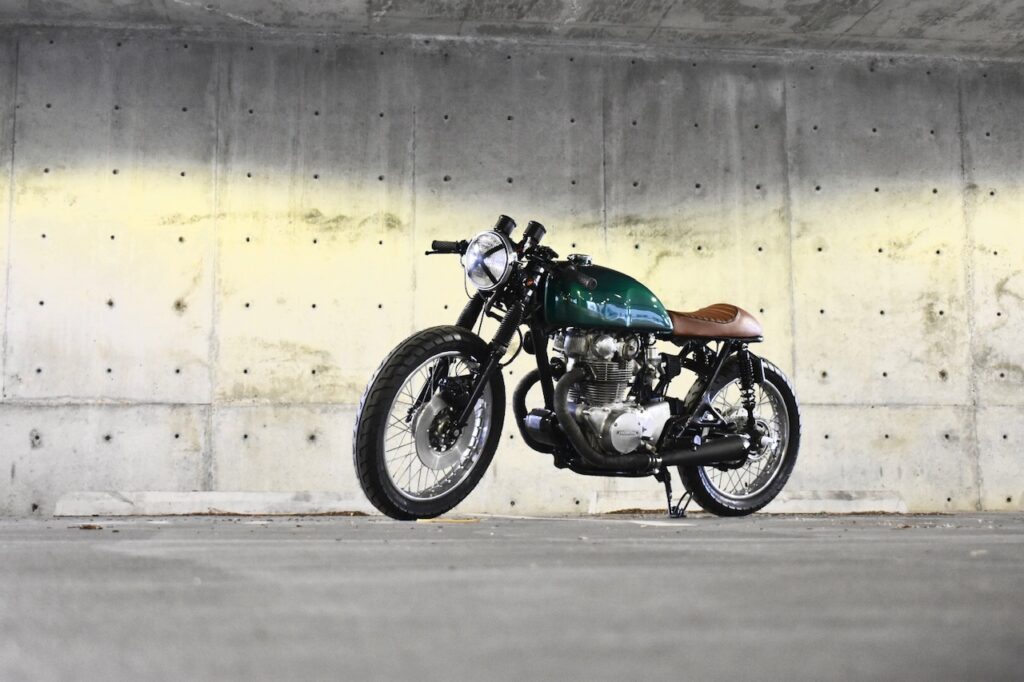
Cafe racers have gotten a increasingly more in style today. The previous classic look it has together with it’s simplicity is agreeable to any pair of eyes that see it. When you’re fascinated by turning your bike into a restaurant racer, you’ve completely come to the correct place.
I’ve restored 18 bikes over the previous few years and I turned each single one in all them into cafe racers. As an expert engineer that consistently pursues mechanical hobbies, I’m assured once I say I do know bikes and I understand how to construct a restaurant racer. Whether or not you’ve constructed a restaurant racer earlier than or that is your first try, this information will assist you by way of every thing you’ll have to know to make that cafe racer dream of yours come true.
I must also point out that I’ve created a complete video collection about rebuilding a motorbike from begin to end. Click on right here for extra data should you’re within the video model!
A Temporary Historical past Behind The Cafe Racer
First, let’s focus on what a restaurant racer is, the place it got here from, and what it was used for. I’m positive you understand the fundamentals because you’ve already expressed curiosity within the concept, proper? However understanding what a restaurant racer is is crucial should you want to construct one. You might take a look at another person’s and suppose “Oh, I wish to have that!” However you’ll have to first perceive how they’re constructed and what alterations should be executed to get to that glossy look.
Cafe racers initially got here to fruition in Britain through the publish WWII period. Bikes have been extra frequent on the streets and have been additionally turning into extra inexpensive. The youthful technology took an interest within the interest, however solely capable of afford essentially the most fundamental fashions of bikes. These fundamental fashions have been then remodeled into the model we all know now in the present day as cafe racers.
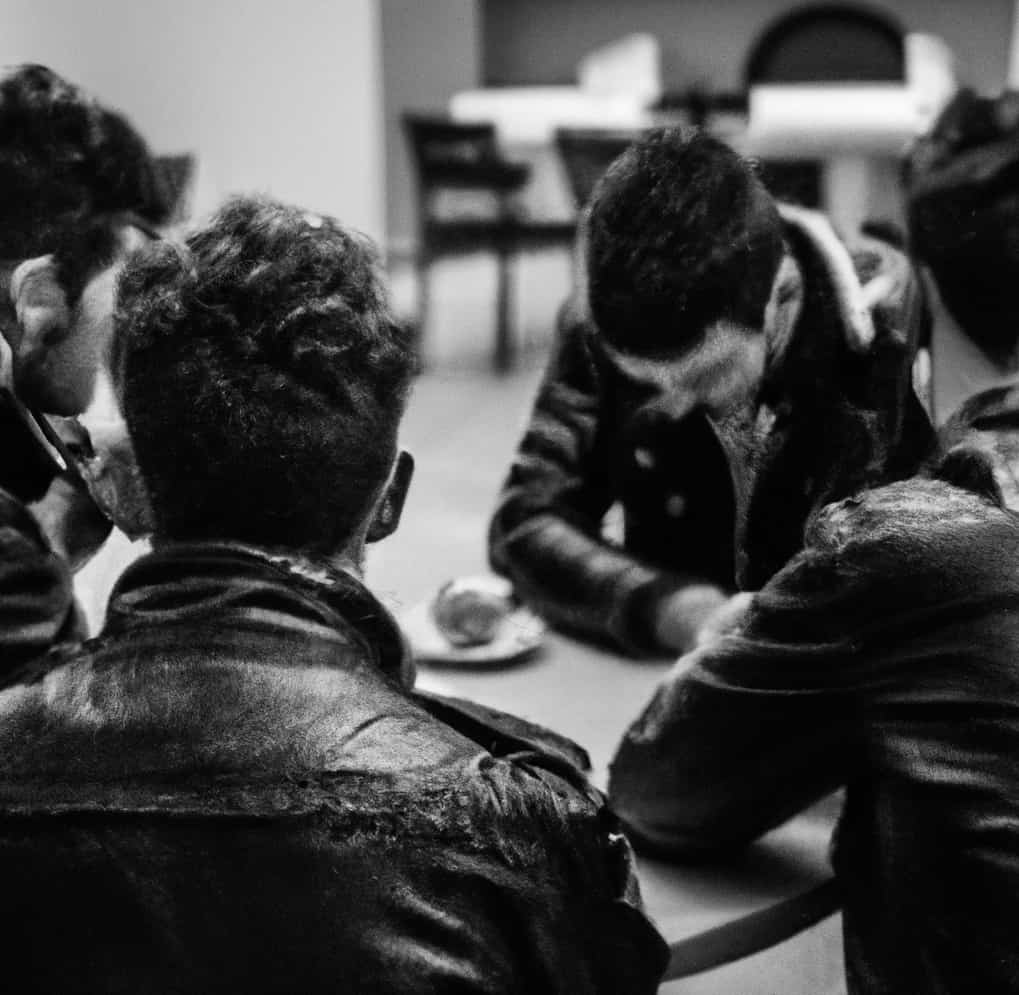
These teenager have been usually discovered with their bikes in teams at cafes. They rapidly adopted the “Grease” look and seemed for cafes that performed American rock and roll music which often meant “truck cease” cafes. Different teams of motorcyclists would zoom previous the cafes (seeing a bunch of bikes parked outdoors of it), which primarily meant they have been “difficult” the group inside to a race.
In the end, these teams would race one another from cafe to cafe, thus bringing to life the time period “cafe racer.” Over time, these motorcyclists would alter their bike to be quick and environment friendly which is the place the minimalist look got here from.
The Appears That Make A Cafe Racer
When you want to make a restaurant racer, there are a couple of guidelines you’ll have to abide by with a view to get your bike categorized as such. These are all the foundations I utilized to my 18 cafe racer builds and noticed nice success. Folks went insane over my bikes and I assure they’ll do the identical for yours with these guidelines.
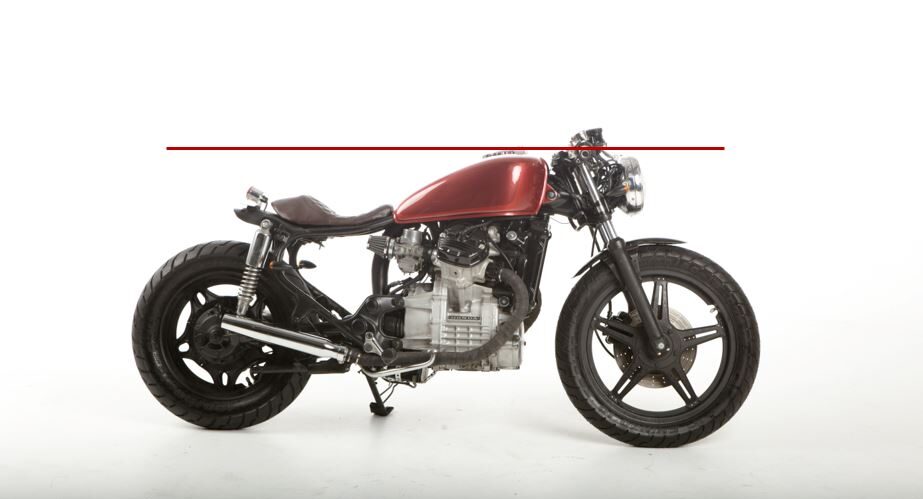
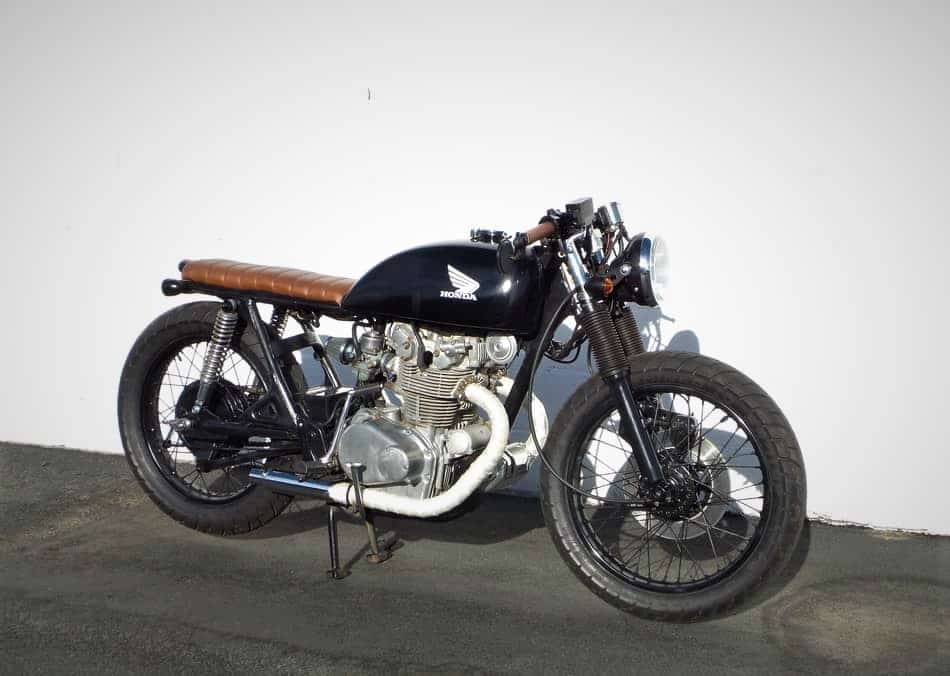
At the start, a restaurant racer is extraordinarily minimalist and low-profile. Because of this nothing ought to go a lot increased than the bike gasoline tank.
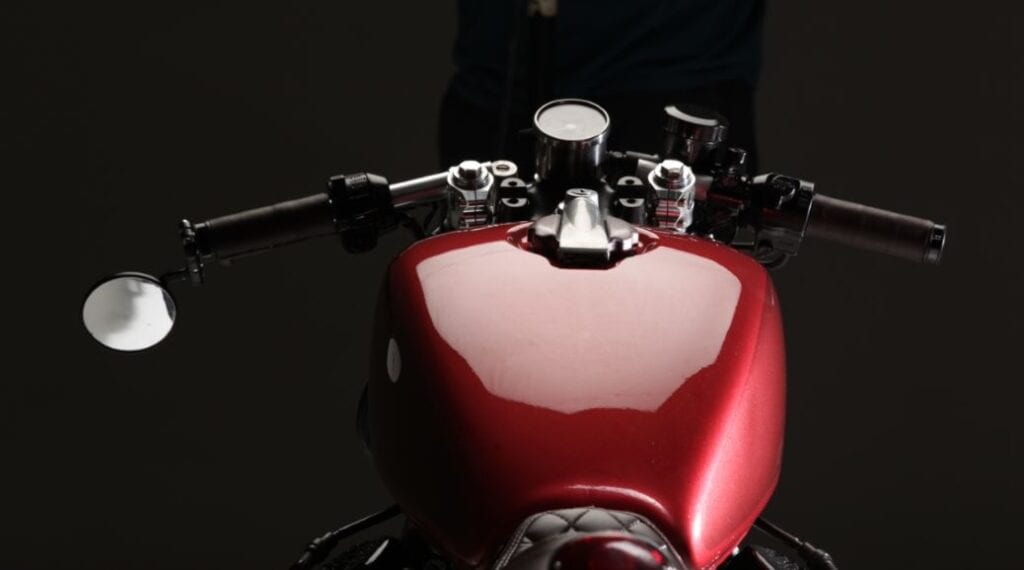
To ensure that nothing to go a lot increased than the gasoline tank, you’ll want low profile handlebars. Clip-ons or clubmans ought to do the trick.
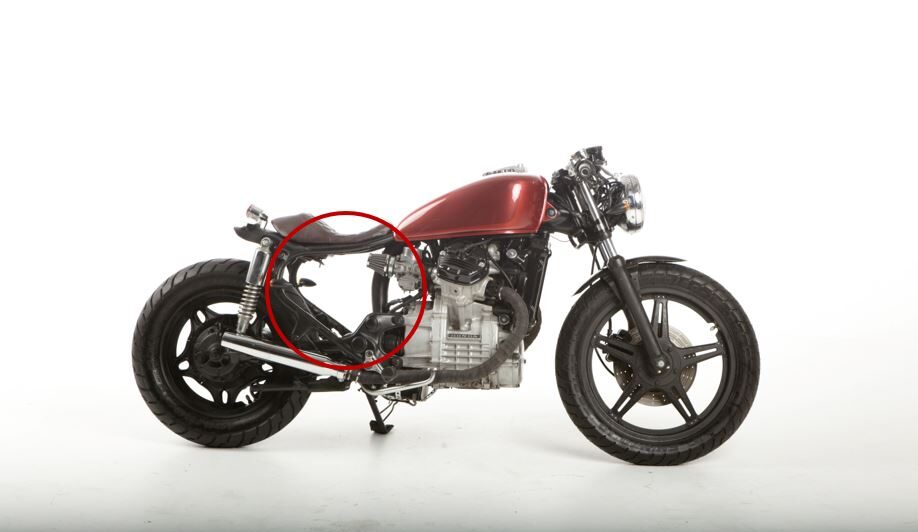
Subsequent, you’ll have to attempt to cover that battery as a lot as attainable. My aim with my cafe racers is to at all times get this “gap” clear below the seat. It actually goes a protracted strategy to get that cafe racer look. You’ll be able to cover the battery by both laying it on its aspect or mounting it proper below the seat. I’ve a full article about how one can cover a motorbike battery, you’ll be able to see that by clicking right here.
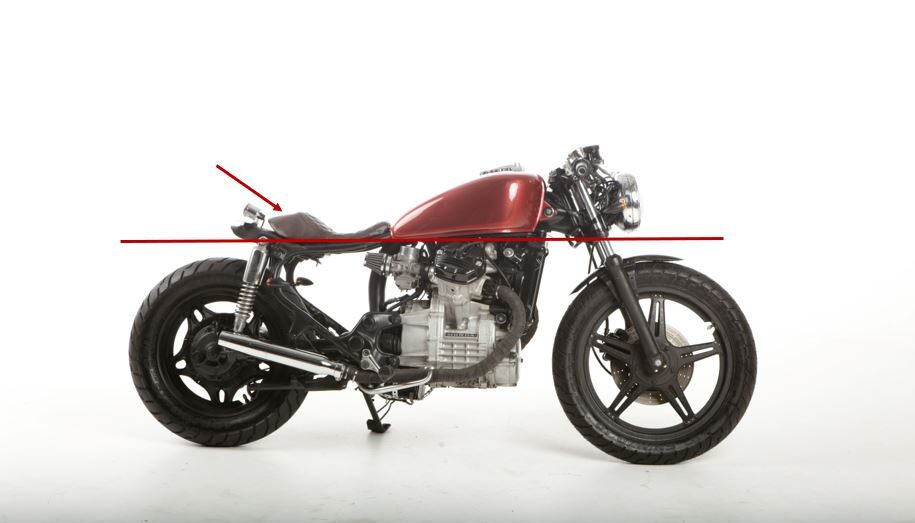
Having a restaurant racer means the seat must be consistent with or virtually consistent with the underside of the bike gasoline tank. The seat must also have a rear hump on it or be utterly flat.
A great quantity of effort ought to be put in to hiding the wiring. There are a number of inventive methods of doing this, one in all my private favorites being attaching them between body rails beneath the seat. You’ll be able to study extra methods to cover the wiring by studying my different article right here.
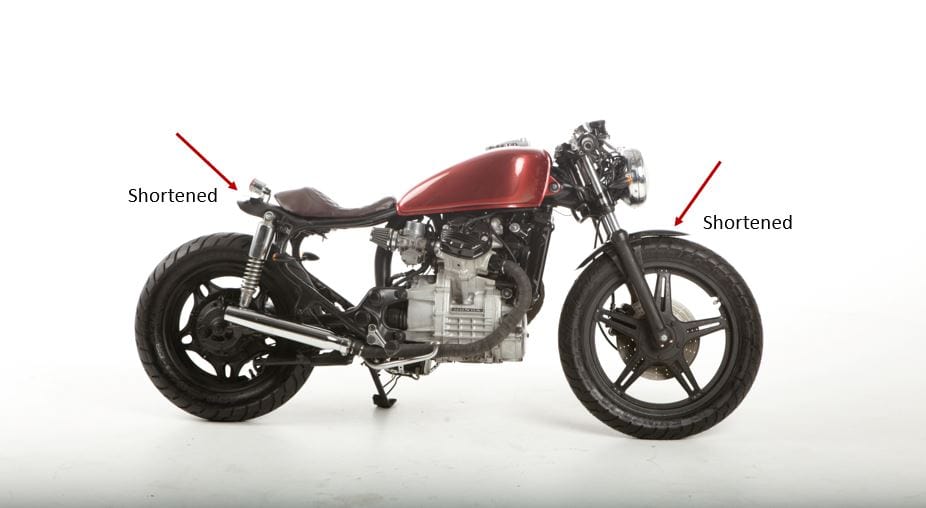
Subsequent, let’s discuss in regards to the fenders. These will often require some alterations. What is often executed for cafe racers is shortening the entrance fender and simply utterly eradicating the rear fender. I’ve had plenty of success simply grinding the entrance fender to the dimensions I would like. You’ll want to test together with your native legal guidelines about fenders in your bike since some states and areas require them for registration.
Bonus: This isn’t essentially wanted for making a restaurant racer bike, but it surely definitely provides a cultured look. Taping an “x” on the headlight is a standard observe amongst cafe racer house owners due to the historical past behind it. Oftentimes when these greasers would race from cafe to cafe, they might tape an “x” with electrical tape on the headlight to assist with harm management in case the sunshine broke. It was a observe tailored from racecar drivers who did the identical factor on the time.
Earlier than You Begin
There are some things you’ll wish to take into consideration earlier than you begin restoring/making your cafe racer. First, you’ll want to determine the place you’re going to work earlier than you begin on any sort of bike mission. Attempt to discover a place that you simply don’t thoughts retaining a bit of messy for the following few months; rebuilding a motorbike isn’t precisely the cleanest job.
Second, be sure you have the correct instruments for the job. It’s vital to make use of high quality instruments when you’re working in your cafe racer construct. I’m not saying it’s a must to go on the market and have the costliest and greatest instruments provided; simply don’t purchase the most cost effective stuff there may be. Click on right here to see the record of instruments I like to recommend and consistently use myself whereas engaged on my cafe racer builds.
Rebuilding and modifying a motorbike takes plenty of time and also you should be keen to sacrifice a few of your evenings and weekends to get the mission executed. Price range your time properly. Have an open dialogue with family members and your important different in regards to the time you’ll be spending in your bike.
Stick with the time you’ve mentioned out of respect to the opposite family members you reside with in addition to your accomplice. This will trigger plenty of rivalry should you don’t and it’s not well worth the stress you deliver upon your self in case your time isn’t used properly. My first few cafe racer builds have been purely a interest (earlier than I made it an official enterprise) and the time I spent on it brought about some rivalry with my spouse. I’ve discovered now how one can schedule that point out properly.
Lastly, assess your funds and ensure you’ll be able to sufficiently fund your cafe racer construct (see my article right here in regards to the detailed price). Make a plan, know the way a lot you’re going to spend, and keep it up. It helps to undergo every system and elements of your bike that you simply’ll want to interchange and plan accordingly. All the time add in a couple of additional hundred {dollars} into your funds as a result of surprises will come.
Discover Your Motorbike

Okay, so it’s time for the nitty gritty stuff……really getting to construct your cafe racer! Now’s the time to search out the bike you’ll be engaged on. This is likely one of the most fulfilling and thrilling elements in regards to the means of constructing a restaurant racer. When you don’t have already got a motorbike to rebuild, now’s the time to exit and discover one. Click on right here to see what I at all times search for when shopping for a mission bike.
I like to recommend restoring one thing that was made between the 70’s and 90’s. All these bikes are typically loads simpler to revive and convert into cafe racers due to their simplicity and fundamental techniques. They’re additionally loads cheaper to purchase in comparison with newer bikes.
If that is your first restoration, I like to recommend restoring a Japanese bike (akin to Yamaha or Honda) as a result of they are typically the simplest sort of motorbike to rebuild.
When you’ve got extra expertise, go forward and department out a bit of additional. European bikes make stunning cafe racers, however be warned that they’re much extra difficult than different bikes; they’re dearer, use random threads (some have neither metric nor english), and the elements are harder to search out. I discovered this out the onerous approach with my 1969 TR25W Triumph. It turned out stunning, however man was the work on that a lot harder due to the bizarre instruments I wanted!
Needless to say plenty of used bikes gained’t include the unique proprietor’s handbook. Having one particular to your bike will drastically assist throughout this course of so should you don’t have one, I extremely advocate utilizing emanualonline.com. It’s a straightforward and inexpensive instrument to entry your bike’s handbook rapidly.
Strip Your Motorbike
After getting bought your bike and introduced it residence into your work area, now’s the time to strip it utterly down aside from the engine (I discover that engine removing is pointless, some are thorough and take away it anyway). In my expertise, I’ve discovered that the bike seems to be so a lot better once you strip it, clear it, repaint, and put every thing again on. It’ll appear and feel like a model new bike.
All the time bear in mind to take a whole bunch of images while you’re disassembling your bike. That is one thing you completely can’t overlook! You might take off an element and suppose you’ll bear in mind the place it goes, however once you’re placing it again on a couple of weeks or months later, you should have no concept the place it goes. Take photos earlier than you’re taking something off, it saves a lot time and frustration ultimately.
Label each wire you see. Take a couple of minutes to establish the place every wire connects and what it does. It helps to maintain them related and take a look at them out to be sure you know what their job is. Wrap some tape round it with an in depth description in regards to the wire. By no means minimize wires earlier than you understand what they do.
You must put each single bolt you’re taking off the bike right into a labeled plastic baggie. Once more, it’s possible you’ll suppose you’ll bear in mind the place every bolt goes, however you’ll quickly discover that your bike has plenty of bolts and you’ll by no means bear in mind which of them goes precisely the place.
I as soon as had a good friend who tried to revive a motorbike and simply threw all of his bolts and nuts right into a bucket. One of many bolts was from the engine. He tried placing what he thought was the correct bolt again onto the engine, solely to search out that he had used too lengthy of a bolt and cracked the cylinder head.
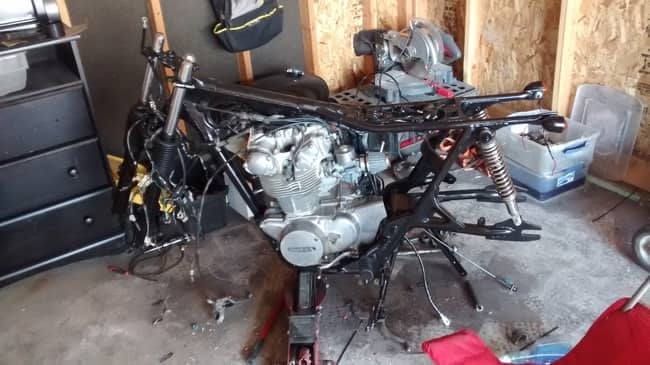
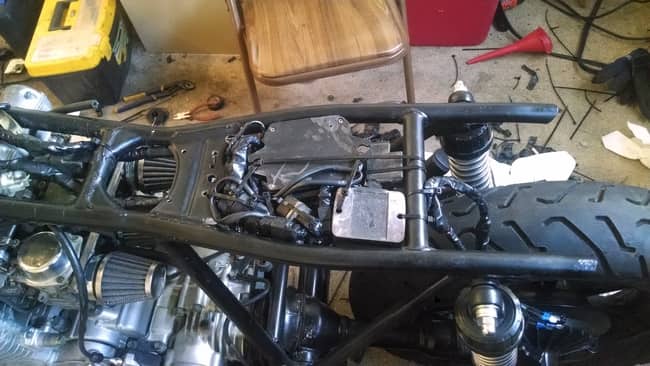
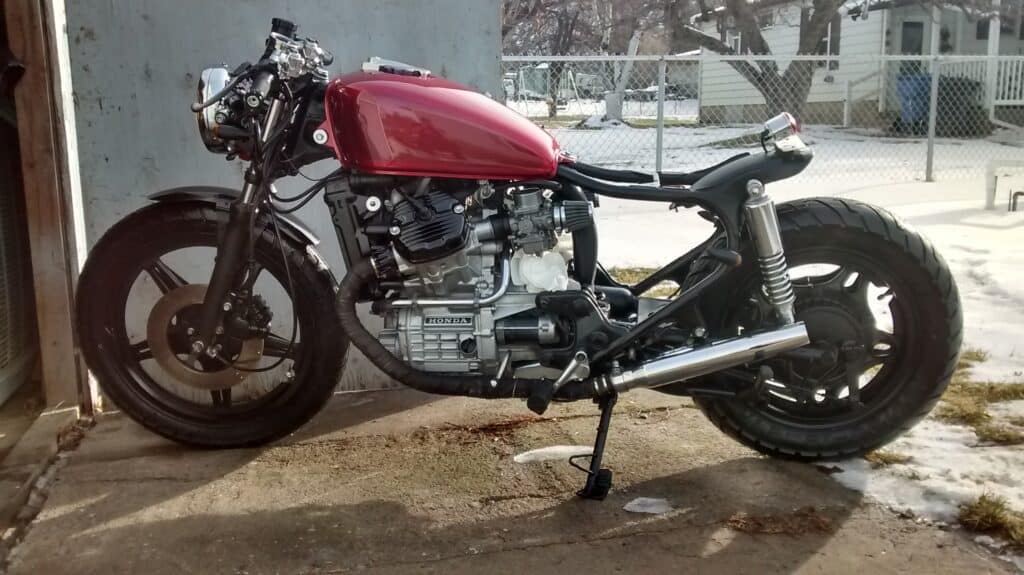
When you’ve got a middle stand, I might interact that and now have some kind of raise below which ever a part of the bike is heaviest to maintain it balanced (like I’ve pictured above).
I might first begin with taking off the tank to stop inflicting any extra harm to it even should you plan on repainting it. Subsequent, take away any massive devices akin to windshields, aspect panels, and many others. Subsequent ought to be the seat, chain and tires, fenders, battery, carburetor, air field/pod filters, exhaust, lights, and instrument panel. I like to recommend retaining your wiring harness on.
Seat
The very first thing you’ll wish to concentrate on after stripping down your bike to the body is your seat. Now can also be the time to make any body alterations you want.
Fairly often I might shorten the rear hoop of the bike body. I exploit an angle grinder to chop it brief. You’ll be able to simply discover rear hoop replacements on Amazon. You might want to switch the ring a bit of, however that’s what it’s for. When you don’t have a welder your self, take your bike in to get the brand new hoop welded on.
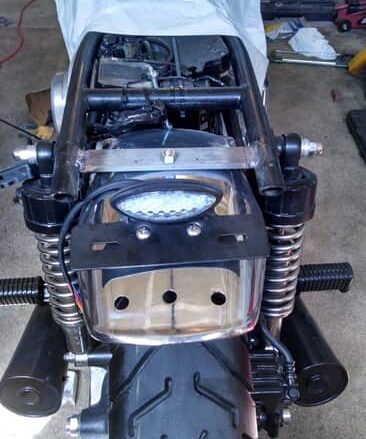
Some discover that they need a two-seater cafe racer in order that they don’t hassle modifying any a part of the body. That’s utterly tremendous, too. With this specific bike, I merely minimize off the rear hoop, closed up the ends of the body, and left it as is because the seat I used to be utilizing was smaller. Typically I’ll use the rear fender as a raised platform to put the taillight on.
You can even discover some good bike seat replacements on Amazon. Simply be sure you get the correct dimension appropriate on your bike, particularly should you alter the rear hoop.
When you plan on having your seat customized made, now’s the time to do it. In my expertise, it often takes a number of weeks or as much as a month for seats to get completed by an upholsterer. When you’ve got this sorted out first, you gained’t danger any likelihood of sitting round ready for it to get completed; as a substitute, you’ll be able to work on different elements of your bike as your seat in being made.
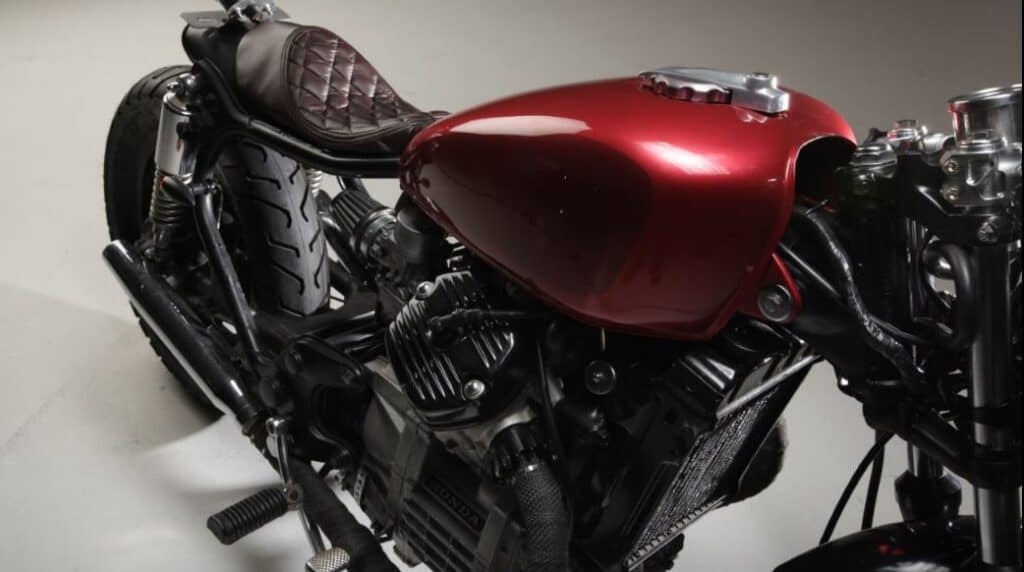
Tank
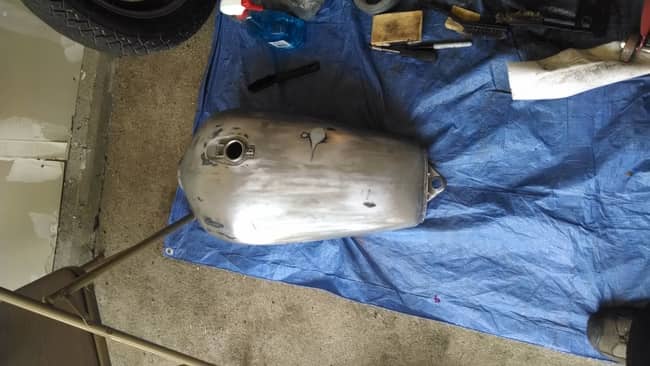
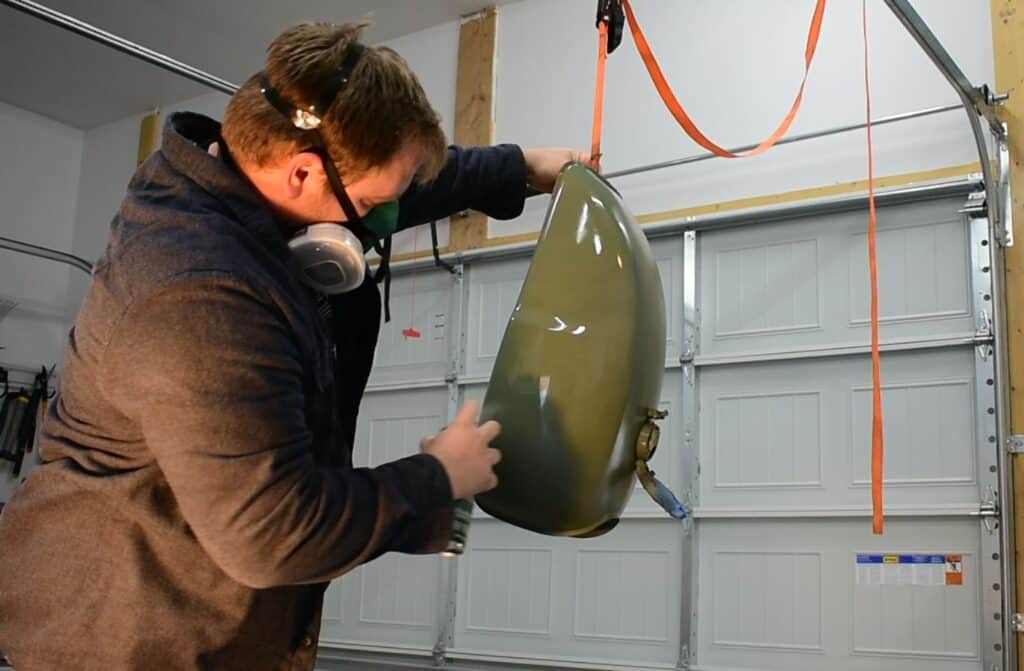
The following job it is best to concentrate on is your tank. When you’re a bit intimidated about repainting your tank, particularly if it has some physique work that must be executed, you’re not alone. The excellent news is, portray a motorbike tank is definitely comparatively easy, however fairly time consuming.
When you’re keen to be affected person with the method, you’ll create a shocking tank that can for positive be a head-turner. The tank is often the very first thing folks discover once they take a look at a motorbike.
When you plan on altering the colour of the tank, there’s no have to utterly sand it all the way down to metallic (except it’s apparent that some spots should be sanded all the way down to metallic). Be sure that to only roughly sand the entire tank and get it clean.
Subsequent you’ll have to fill within the dents with filler or bondo utilizing a plastic scraper. Comply with the instructions in accordance with the filler you employ, you’ll most likely want to attend a sure period of time earlier than you sand your filler. Be sure that to sand your filler utilizing a sanding block, this may stop any grooves made by your fingers. As soon as filler has been positioned, wash off the tank with a moist material then let it dry.
Subsequent is priming. Do very mild layers and plan on doing a number of layers of primer, about 4-5. As soon as that’s dry, assess another dents you didn’t see and repeat utilizing filler and primer.
Now’s the time to moist sand with tremendous sand paper to ensure every thing is clean. After getting deemed the tank to be clean, you can begin portray the tank the colour you want. Once more, do mild layers, about 4-5. As soon as that’s dried and you want the way it seems to be, spray your tank with a 2-part clear coat (NOT a single half clear coat). Do a number of layers, about 3-4.
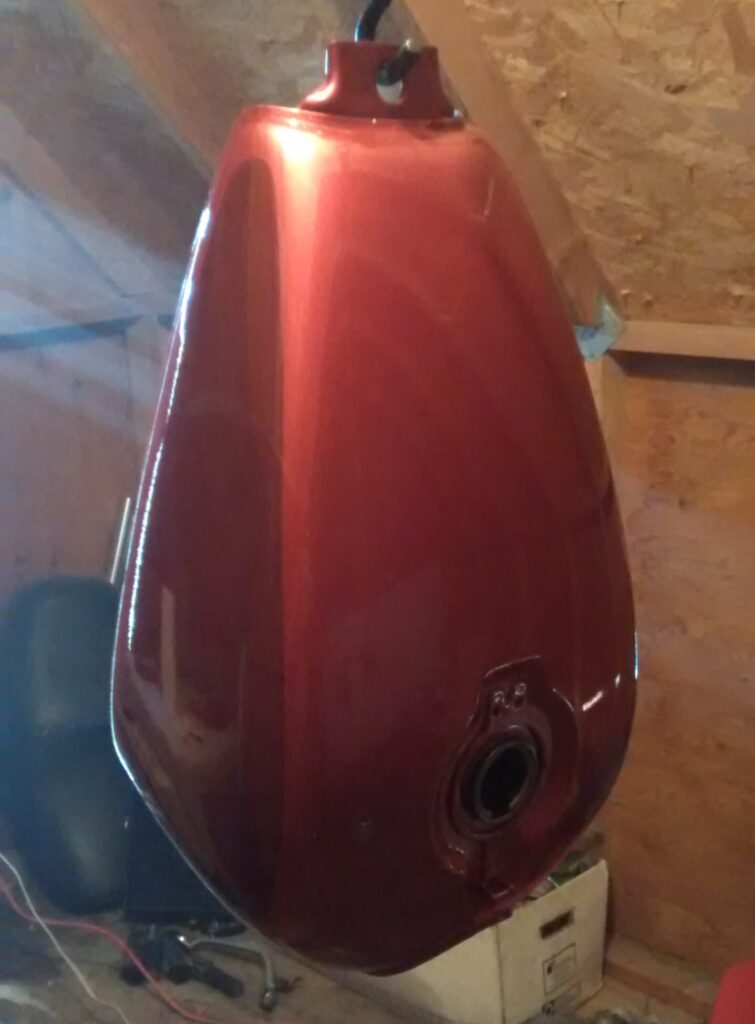
I like to recommend doing the tank at this level throughout your cafe racer construct so it has time to remedy through the time you spend on the remainder of your bike. See my full information right here in regards to the paint I like to recommend for bike gasoline tanks in addition to how one can correctly paint the tank.
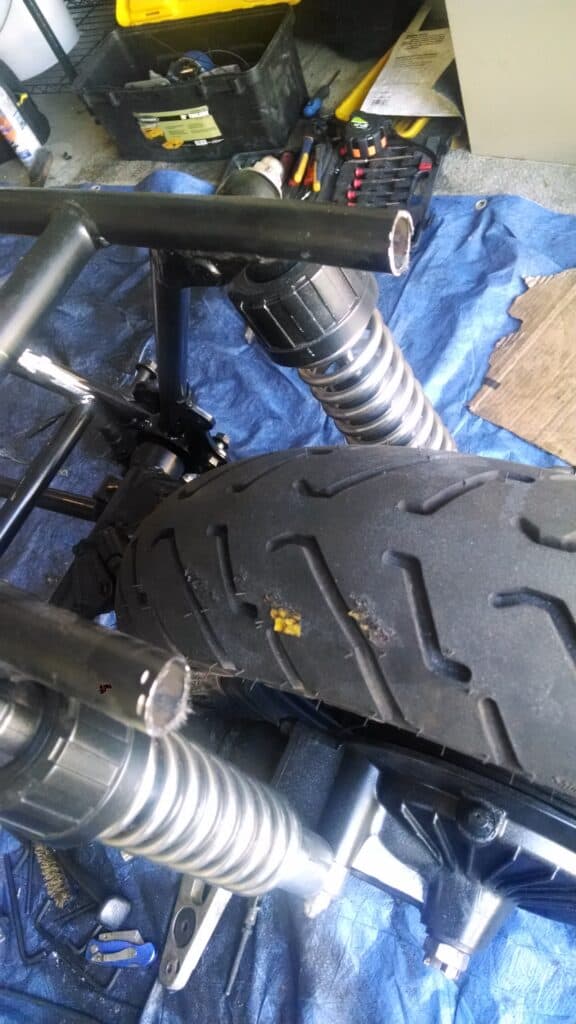
Mount New Tires
When you’ve got new tires to mount, now’s the time to do it. I at all times purchase my tires on-line; some are skeptical about that, however I’ve by no means had an issue. You’ll find that greatest offers that approach. Simply be sure the positioning is credible and you buy the correct dimension (you’ll be able to test the dimensions on previous tires). The tires I like to recommend for bikes might be present in my record of advised bike upgrades.
Take your tires in to a tire store to have them mounted. I like to recommend doing this earlier than you do any portray on the edges. The mounting machine scrapes all the way in which across the rim to take the previous tire off and once more to get the brand new tire on. Any paint that was executed beforehand will probably be scratched and chipped.
As soon as your tires are mounted, go forward and paint your rims if that’s what you might be planning. Typically I preserve mine chrome if I’m capable of get it to shine with some water and metal wool. In the event that they don’t look excellent, portray them will give a contemporary look.

It’s best to place some paint tape on the tire and beneath the rim lip just a bit. Then you’ll be able to put some paper towels or paper across the tire themselves to stop any over spray getting on them. Let the edges sit for a day or two so the paint can remedy. Don’t place them again on to the bike simply but.
Clear And Paint The Body
When you have got every thing off your bike besides the engine and the wiring harness, this is able to be the time to concentrate to the body.
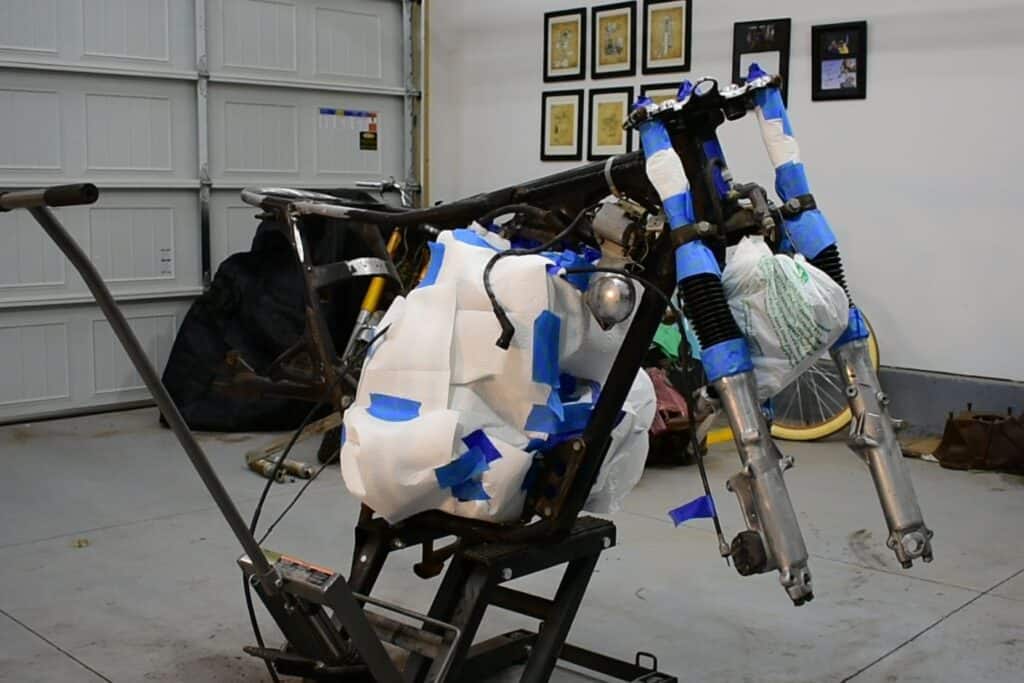
I typically find yourself portray my bike frames black as a result of that’s how they got here in inventory, however you’ll be able to actually use no matter shade you’re feeling works greatest together with your cafe racer. You’ll want to plug any open holes with a washcloth akin to air consumption and exhaust ports.
Preparation on the body is an important step you’ll be able to take to make your body look superb. Step one you’ll have to take is masking every thing on the bike you don’t wish to paint. Wrap paper towels and tape round your engine and wiring harness and ensure the tape is safe. Over spray tends to get into locations that you simply don’t need. Be utterly thorough about this.
Take a wire brush and brush in all of the cracks and crevices on the body and brush out any elements which have thick, caked-on oil and filth (often the underside).
Now start utilizing 150 grit sandpaper and do a tough sand-through in your body. You don’t have to get to reveal metallic, simply sand it sufficient to scuff it up so the brand new paint will stick. If there are any spots which have rust, then you have to to sand down these spots to reveal metallic earlier than you paint to stop the rust from spreading any additional.
Do wipe-down of the body with a wax and grease remover to take away mud and another particles it’s possible you’ll not have gotten.
Now you’ll be able to prime your body. I often like to make use of the inexperienced self-etching primer if it’s down to reveal metallic. If it’s not, go forward and use a daily sandable filler primer.
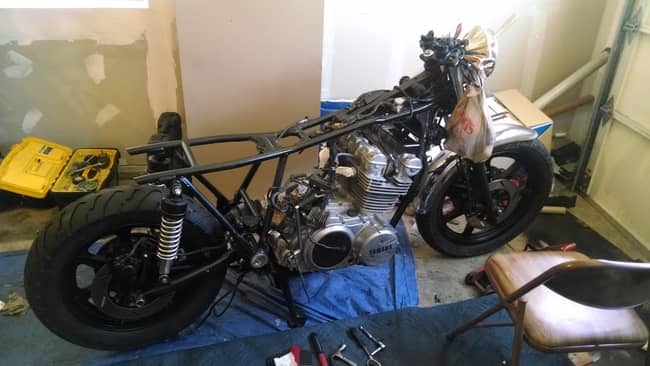
As soon as that’s dry, proceed with portray the body together with your desired shade. It’s okay to make use of a top quality spray can slightly than powder coating. Do a number of coats (4-5) to be sure you get in all places. Let the paint remedy for a day or two.
As soon as the body paint has cured, now you’ll be able to place the tires again on to the bike and fasten the braking system. This can be a actually cool half about constructing a restaurant racer as a result of it begins to appear like a motorbike once more, besides it seems to be so a lot better than it did earlier than. For extra details about how one can paint your bike body with out eradicating the engine, see my information by clicking right here.
Clear/Rebuild Engine
In case your bike wants any engine repairs, now’s the time to do it. When you want an engine rebuild, take it into a store and have them do it for you. It’s annoying having to tow a motorbike that isn’t operating, however no less than now you have got the wheels on it to push it round.
There could possibly be a number of points that may occur with a motorbike engine, however the commonest engine drawback I’ve run into is worn down piston rings (that is particularly frequent for older bikes).
In case your bike ran earlier than you began taking issues aside however observed it blew out a ton of smoke, that’s an indication that your piston rings should be changed. Meaning the oil is seeping by the rings and is getting ignited with the gasoline from the carburetor and is blowing out all that smoke.
In case your bike ran nice earlier than you took it aside, all you’ll have to do on this step is clear and shine up your engine. There are numerous methods to wash your engine and all of it depends upon the kind of metallic your engine is manufactured from.
The most typical sort of metallic bike engines are made out of is cast-aluminum which seems to be and feels a bit of tough to the contact. You’ll be able to clear it through the use of a scotch-brite pad and soapy water to wipe off the grease and dirt that builds up on it. Sadly you can’t shine cast-aluminum engines.
The aspect engine covers, nevertheless, are often constructed from block-aluminum which might very simply be shined up. That is the place I spend most of my time cleansing on the engine. Older bikes will often have scratched up aspect engine covers resulting from dropping the bike.
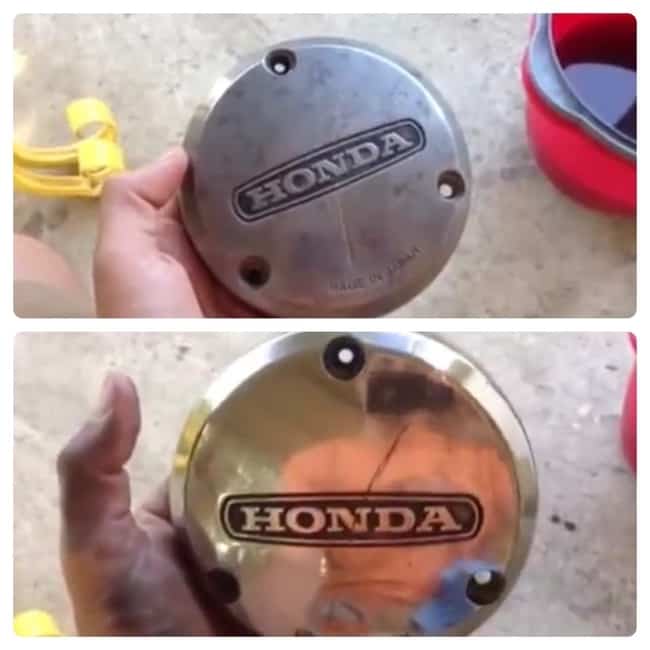
You’ll be able to shine up the engine covers by sanding them with 60 grit, 150 grit, 220 grit, 400 grit, 600 grit, and 1000 grit. After sanding, use a metallic polish to actually give the aspect covers that brand-new look.
Clear/Rebuild Carbs
Earlier than you’re taking the carbs off your engine, take photos of it so you understand precisely how one can place it again on. Folks usually attempt to put them on incorrectly, even backwards. Clearly that gained’t work.
Don’t rebuild your carburetor except you have got a information exhibiting you how one can do it; there are numerous small elements to a carburetor which might be straightforward to lose and onerous to recollect the place they go; carbs additionally usually have screws that shouldn’t be turned in all the way in which, slightly some want sure thread counts.
Verify on-line for boards and restore guides particular to your bike carburetor as every one is totally different. These will have the ability to offer you a step-by-step information on how one can take aside your carburetor, what rebuilding equipment to buy, and how one can put it again collectively.
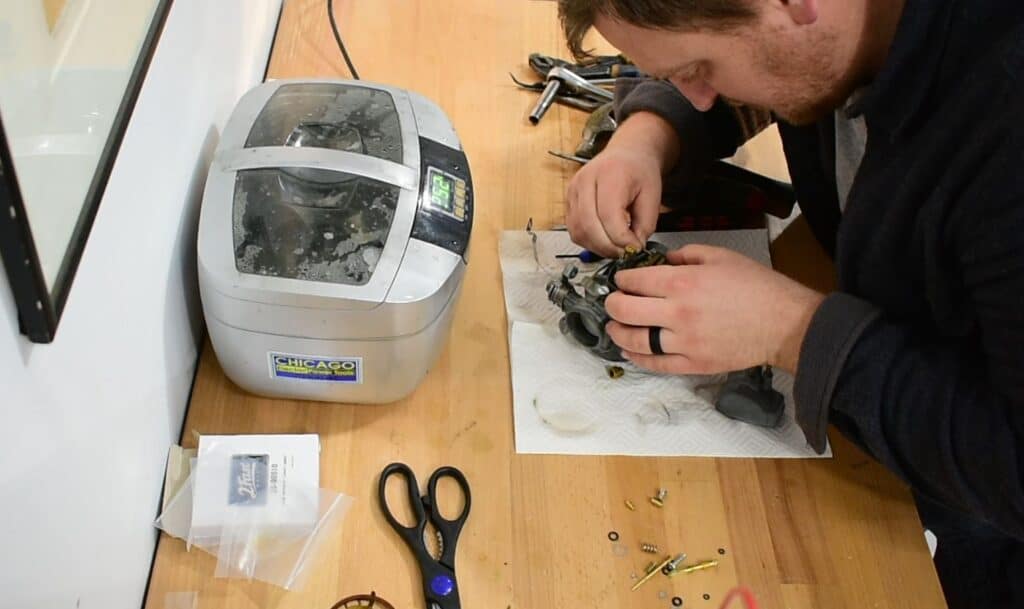
I like to recommend additionally utilizing an ultrasonic cleaner to wash your carbs. These are typically cheap and might be discovered on-line, at residence enchancment shops, or auto shops. You’ll be able to place all of the carburetor elements in an ultrasonic cleaner as soon as it’s all taken aside; the cleaner will break aside all of the gelled up gasoline.
When you desire to wash your carbs with out eradicating it, you’ll be able to discover ways to do it by seeing my step-by-step information right here.
Set up Lights, Instrument Panel, Handlebars, and Fenders
Now’s the time to put in your lights, instrument panel, handlebars, and fenders. Don’t fear about hooking every thing as much as the wiring harness simply but. Simply place the lights the place you need them to be and label the wires hooked up with some tape in order that they’re simpler to establish sooner or later once you do hook them as much as the wiring harness.
If you find yourself shopping for a brand new speedometer or tachometer, watch out of shopping for ones that state they’re “common.” There actually isn’t any such factor as a “common” tachometer or speedometer.
You’ll be able to establish the correct tachometer and speedometer in your bike by wanting in your proprietor’s handbook or wanting on the again of the previous ones which may have a ratio akin to “4:1” or “600:1,” and many others.
These numbers are the gear ratios inside these devices. For instance, a “4:1” ratio means for each one rotation of the wheel, the gear contained in the instrument will rotate 4 instances. A common or totally different ratio speedometer and/or tachometer put in offers you false readings.
Set up Battery And Wiring Harness
Now that you’ve got all your electrical elements in place, hook them as much as the sources of energy.
Get a take a look at mild so you should use it to know when you have got energy, the place it is best to have energy, and print off a wiring diagram in addition to watch some movies on how one can monitor down some electrical issues.
That is usually essentially the most irritating half about rebuilding a motorbike. {The electrical} elements can get a bit of complicated even for individuals who are skilled. Have a good friend or co-worker come over that is aware of a bit of bit about wiring and electrical energy that can assist you out when you hook up your electrical elements.
After getting every thing attached correctly, attempt to cover as a lot of the wiring as attainable. I often use some zip ties and tie them to the body beneath the seat the place you’ll be able to’t see it. That’ll give your cafe racer the sought-after wi-fi look.
Exhaust
Exhaust is vital to concentrate to as a result of it might actually make or break a restaurant racer.
Typically I exploit the identical exhaust pipes that have been already on the bike, or I order some new, smaller ones to provide a cleaner look to the exhaust system.
You’ll have to take away the exhaust pipes and look at them to ensure there aren’t any holes in them. Exhaust pipes are inclined to holes due to the warmth operating by way of them and are extra liable to rust with them being on the underside of the bike. Make any wanted repairs to them.
Exhaust pipes are typically a bit ugly because of the warmth that’s consistently going by way of them, so I often use some exhaust wrap to cowl any potential beauty points.
Set up Tank
Now that your tank has cured for some time, you’ll be able to place it in your bike. This can be a easy step, nevertheless, be sure you are extraordinarily cautious as you accomplish that. There’s nothing extra irritating than putting in your freshly painted bike tank and scratching it when you set up it.
Screw within the bolts essential to preserve the tank in place. Subsequent, join the gas line to the gas valve on the tank. Now you’ll be able to pour some gasoline into the tank. I like to recommend not filling up your tank utterly in case it’s essential take away it once more for no matter purpose. Be sure that your petcock is turned to “on” when you have one.
Warning! Earlier than you strive beginning your bike, slowly flip your deal with bars backward and forward and ensure they don’t stumble upon your tank. When you discover it’s too shut for consolation, alter your handlebars in order that they gained’t collide together with your tank when you’re making future turns.
Now’s the second of reality: beginning up your cafe racer! It can most likely take a couple of tries to get your bike began as a result of it’s attempting to work out a number of the mud that will have gotten inside when you labored.
Set up Seat/High quality Verify
Your seat ought to be executed by now should you had it professionally executed by an upholsterer. Prior to installing it, do a high quality test in your cafe racer and ensure every thing seems to be the way in which you need it.
Throughout this step, I’ll often discover a small spot on the body I missed or a wire protruding that I don’t like. Take the suitable steps to wash up every thing and make it look the way in which you need it to.
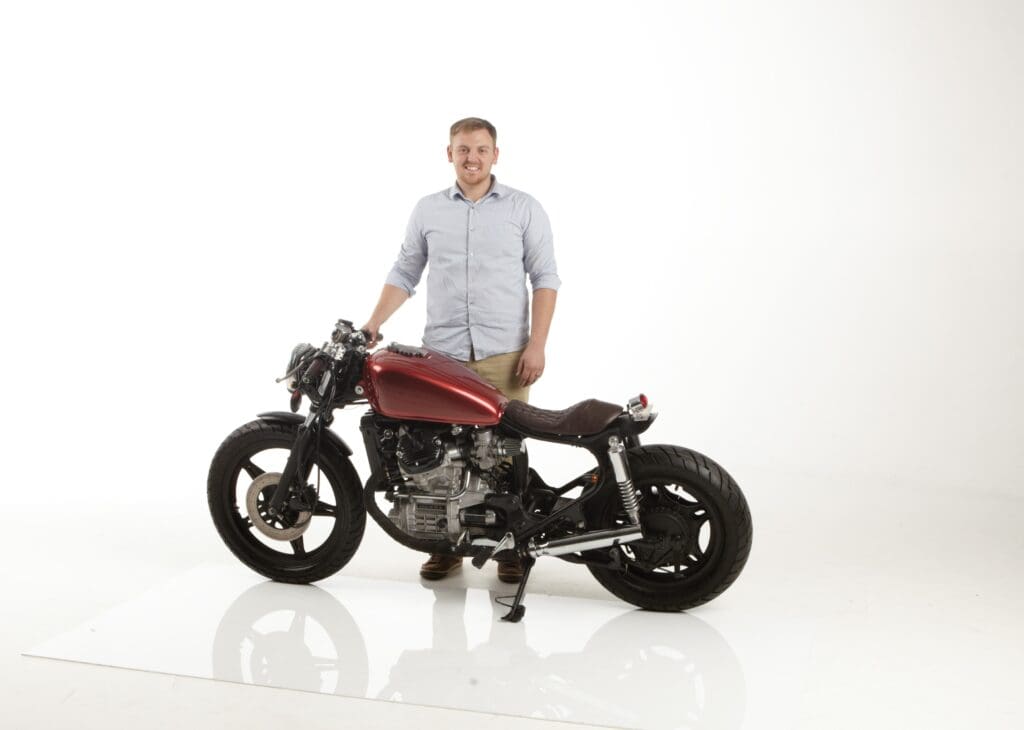
Now you’ll be able to add the ultimate contact: your seat. And voila! You simply rebuilt your individual gorgeous cafe racer!
Conclusion
One of many coolest issues about constructing a restaurant racer is that not solely is the completed product superb, however they’re really fairly easy to construct. I had zero expertise once I began rebuilding cafe racers. However a busy engineering faculty pupil nonetheless had the time and skill to not solely construct one, however later construct 17 extra! If I can do it, you definitely can too. Please be happy to contact us when you have any questions!
This text has been reviewed in accordance with our editorial coverage.
[ad_2]