
[ad_1]
Throughout my trip I used to be pondering it could be actual good if Bert at Alucars would begin out with the restore of the growth chambers as a substitute of constructing the aluminium tank. I have to proceed engaged on the bike greater than getting the tank prepared for the start-up. I despatched him an e- mail whereas on trip and hoped he may change his schedule if he hadn´t began engaged on the tank already…

There have been two damages on the chambers I wanted to get repaired. One was the straight half between the 2 cones on one of many pipes, seen right here on the left. The opposite was a dented and bent stinger pipe on one of many different chambers.
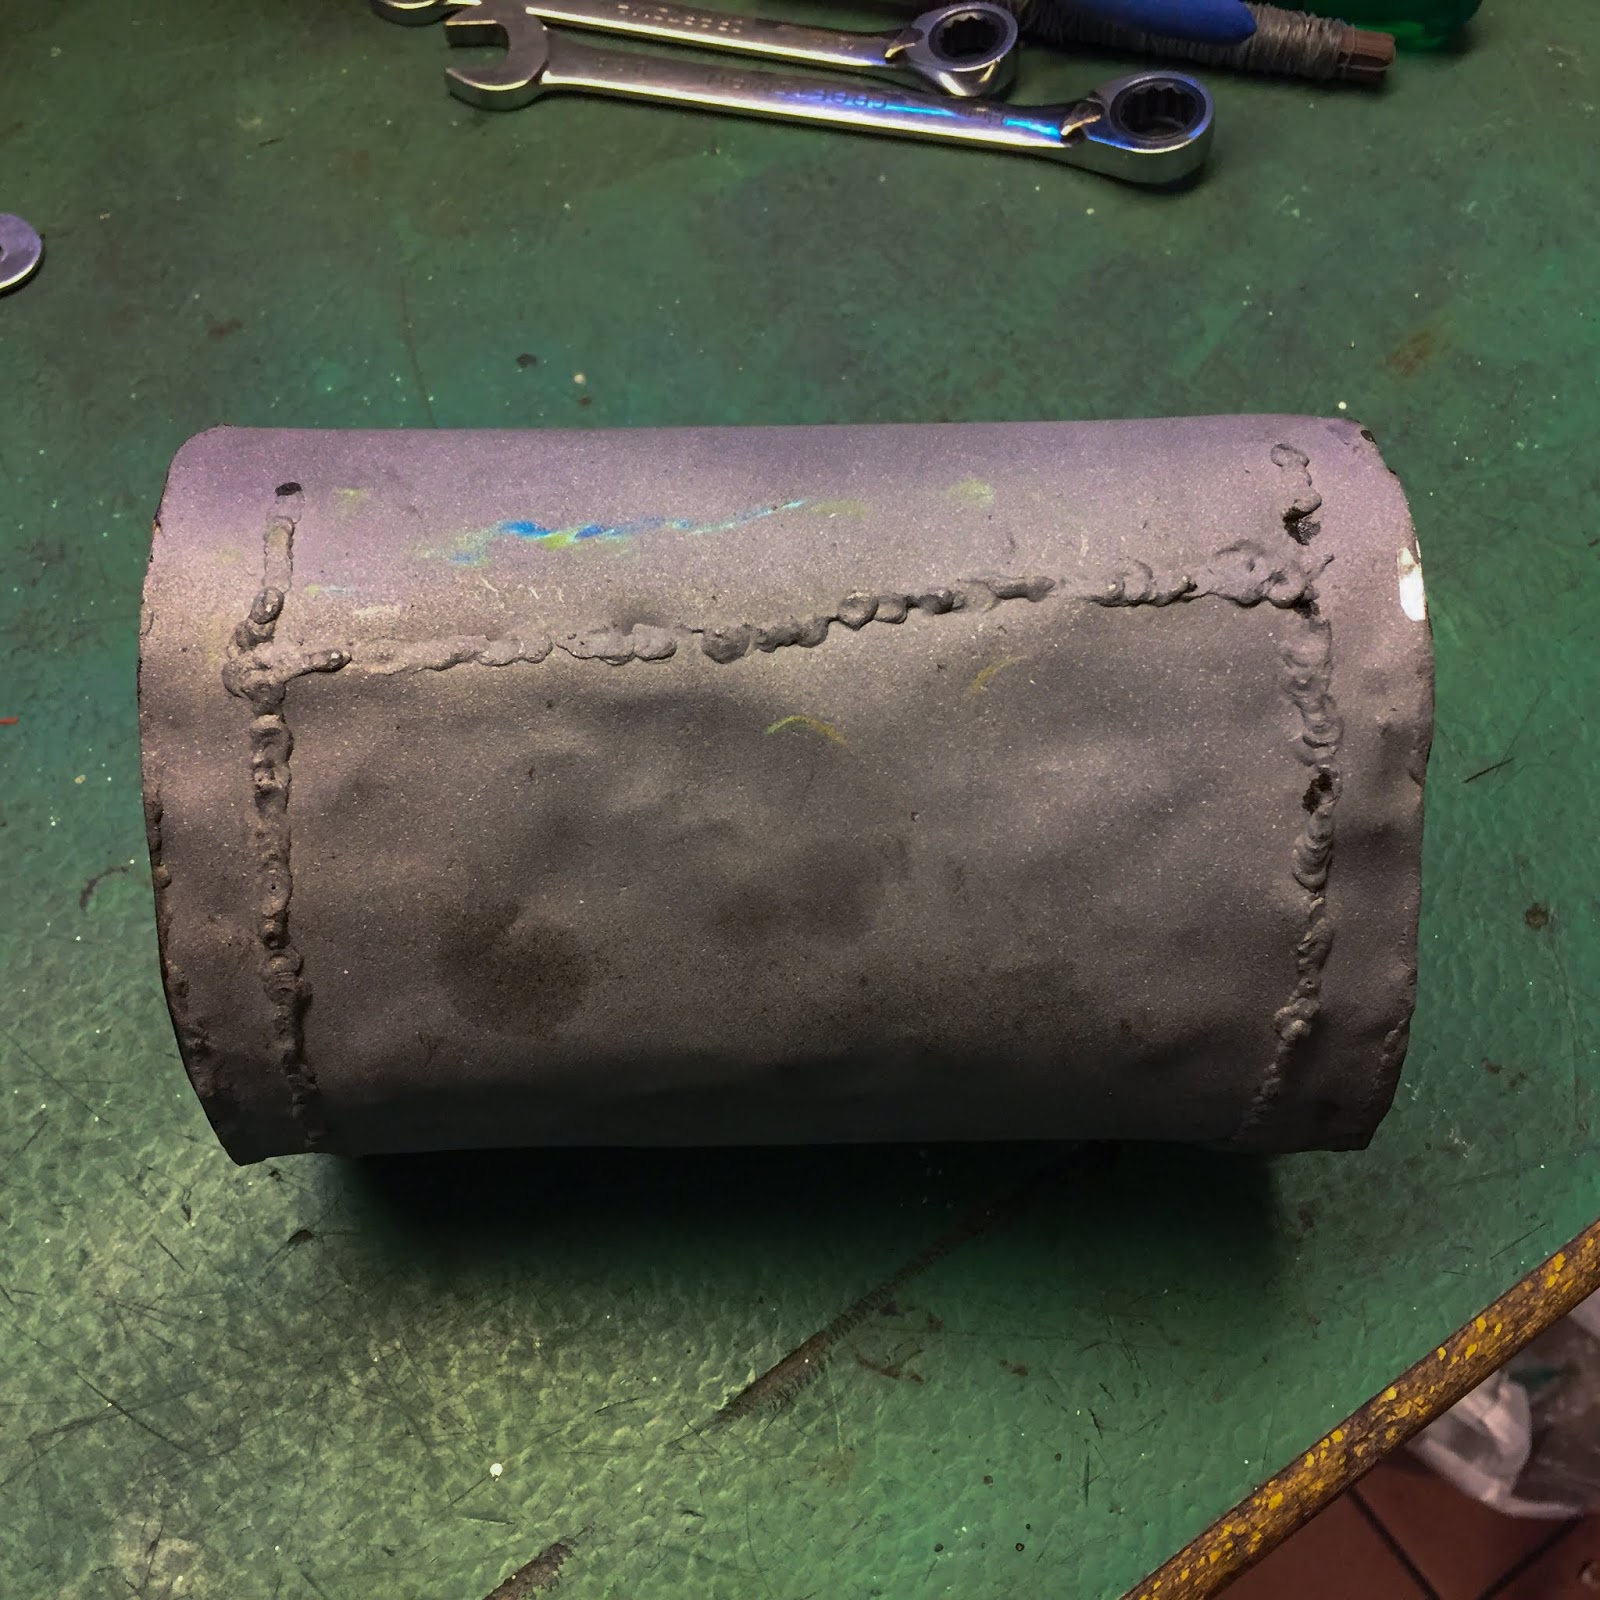
On the appropriate right here you’ll be able to see the restore on the broken chamber. The piece Bert minimize out is standing up high proper within the image and is, as you’ll be able to see, fairly dented and ugly. the flat items of iron was used to maintain the entrance and rear a part of the muffler in place when Bert eliminated the center half and had it changed with new sheet metallic.
He had an actual exhausting time welding this materials! The metallic is skinny, simply 0.5-0.6mm thick and the within completely coated in soot and unburnt two stroke oil. These impurities on the within caught hearth on a regular basis and made it extraordinarily troublesome to weld.
He ended up utilizing his oldest welding gear, the fuel torch. That was the one option to management the melting adequately. Bert wasn´t to proud of the appears to be like of the restore, however I´m proud of it! 100% higher than earlier than.
Throughout the drive all the way down to Bert I had been eager about the following step within the restoration of the pipes. I would want some type of warmth resistant therapy performed on them.

My plan initially was to have them painted with a warmth resistant spray paint. Simple sufficient, however one downside is these paints must be hardened in an oven at 200-250 levels Celsius for an hour or two. I don´t have any oven giant sufficient for these pipes. My sister, who’s a Grasp of Pottery, has a few kilns, however they don’t seem to be sufficiently big both.
I known as my powder coater and requested him if he may present a warmth resistant powder coating. Not potential, however his oven is giant sufficient and will be pushed as much as 250 levels. We agreed I may get the spray cans, paint the mufflers and he would “bake” them in his oven. Tremendous good of him to supply that service!
Expertise has taught me to all the time ask each silly query you ever can give you. So, I requested Bert.
“What sort of warmth resistant therapy would you give these pipes?”
“Simple! There´s a man far out within the Stockholm archipelago that provides ceramic coating on headers and exhaust elements for our racing vehicles. Ask him!”
Good tip! As quickly as I bought again house I known as “Leffe” at “Bizarre efficiency and coatings”.
“Completely, I can do this for you”
Precisely what I needed to listen to! The following day I took the 1 hour drive straight eastward from Stockholm out within the archipelago on wintery, icy roads and delivered the three pipes and their fasteners for ceramic coating. It will be no less than per week and a half he stated… No biggie, simply having an answer to that main downside made me really feel nice!
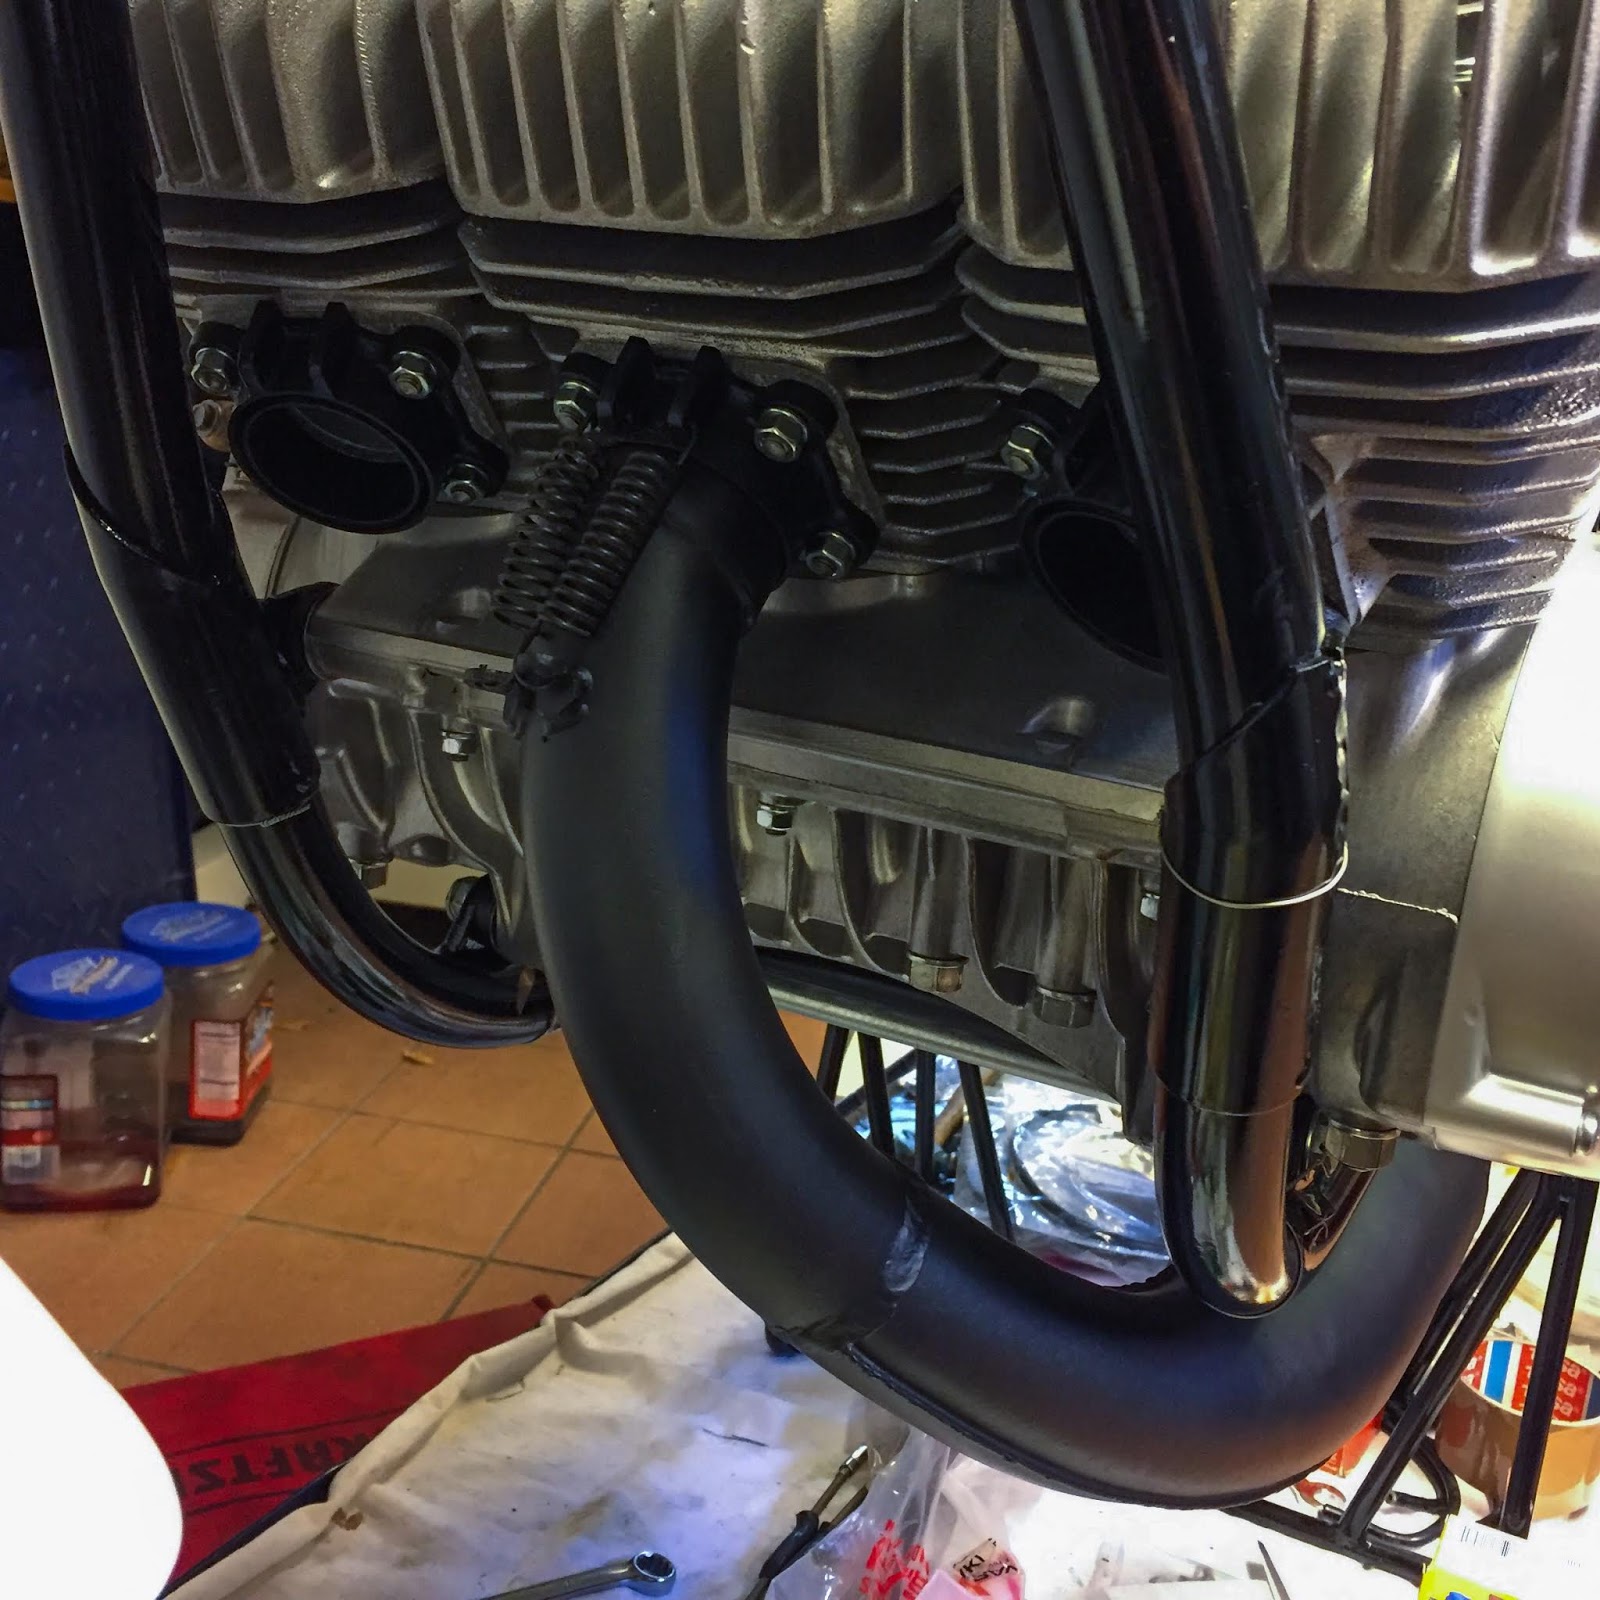
As you most likely have discovered by now, these final footage present me testing them on the bike earlier than getting them coated. Only a small precaution to see to examine they are going to match completely additionally when restoration accomplished.
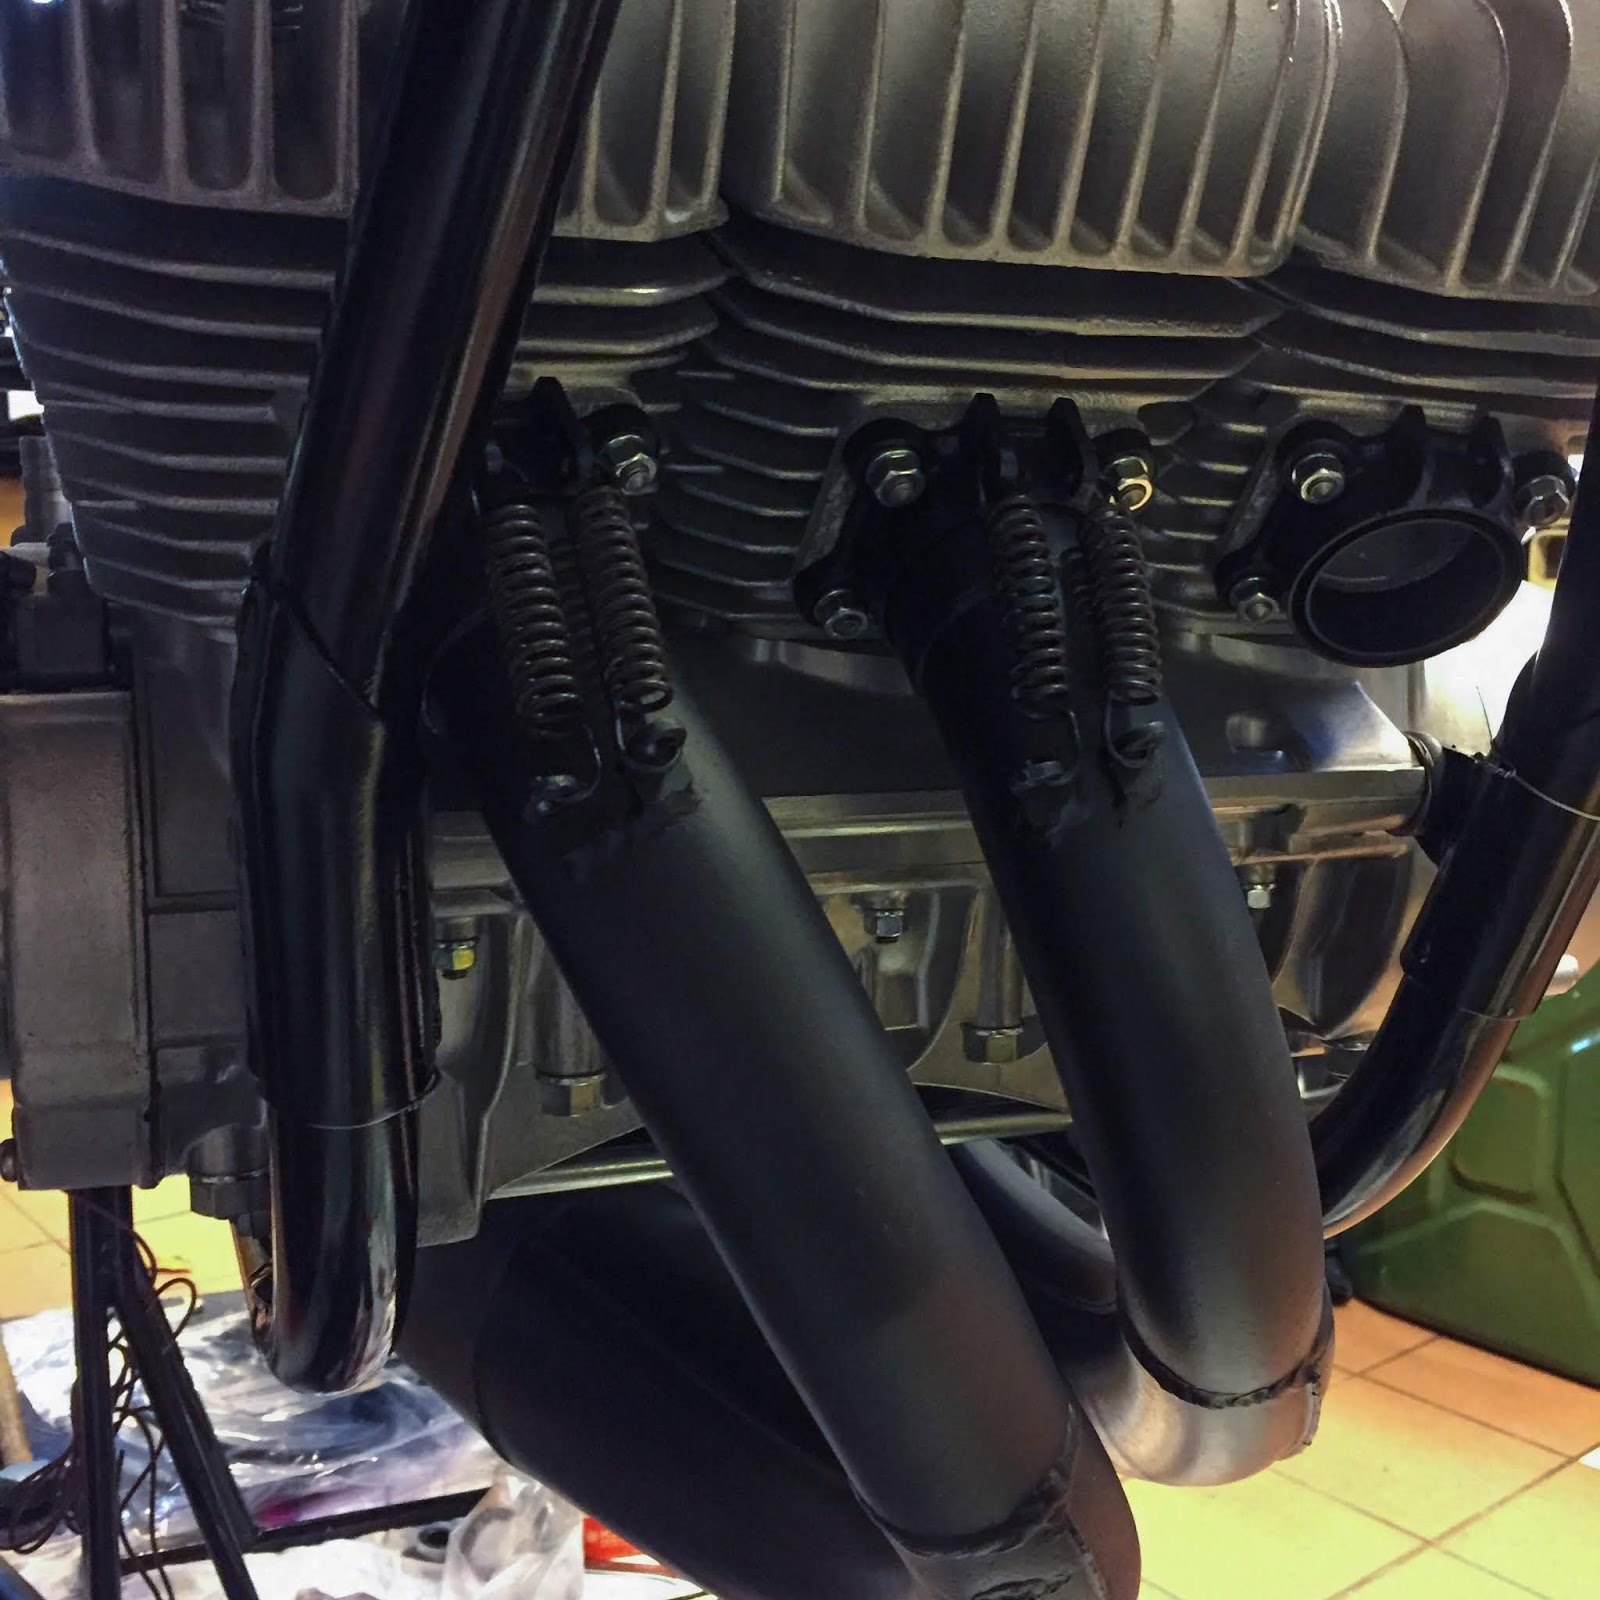
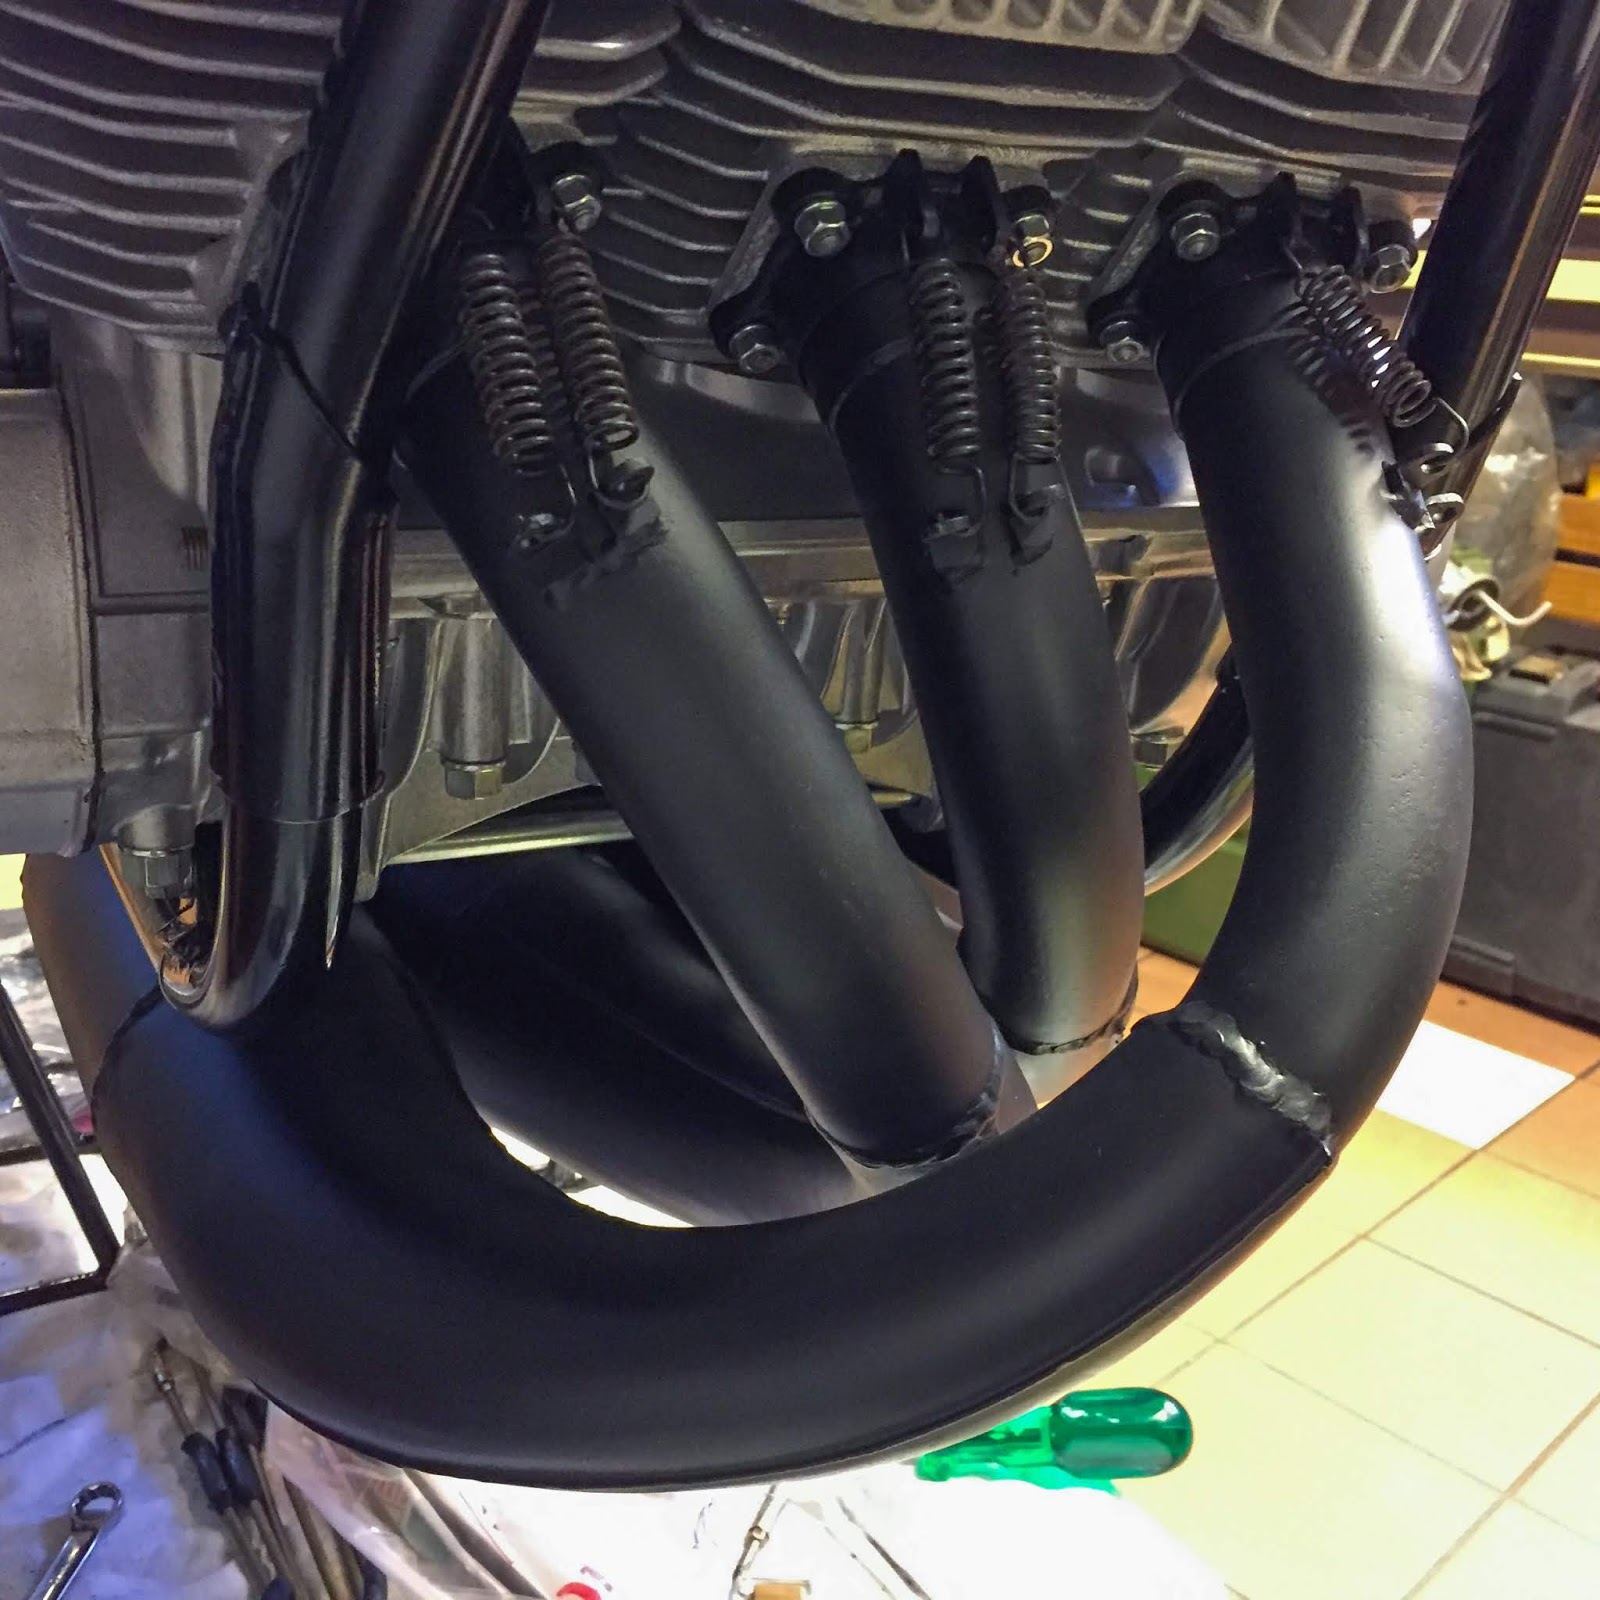
The primary image exhibits the “cross-over-design” and that the pipes do match into the cylinder spigots. The second exhibits the left aspect of the bike the place the center pipe goes out beneath the engine. Right here on the left was the broken stinger pipe, now straightened by Bert and nonetheless away from the drive chain and many others. Good fitment and an outstanding restore!
On the appropriate right here we will see the appropriate aspect of the engine and the left pipe crossing over to the appropriate aspect. The restore performed to this pipe is seen beneath the engine. We are able to additionally see the brackets for the retaining springs welded to the ahead a part of the pipes.
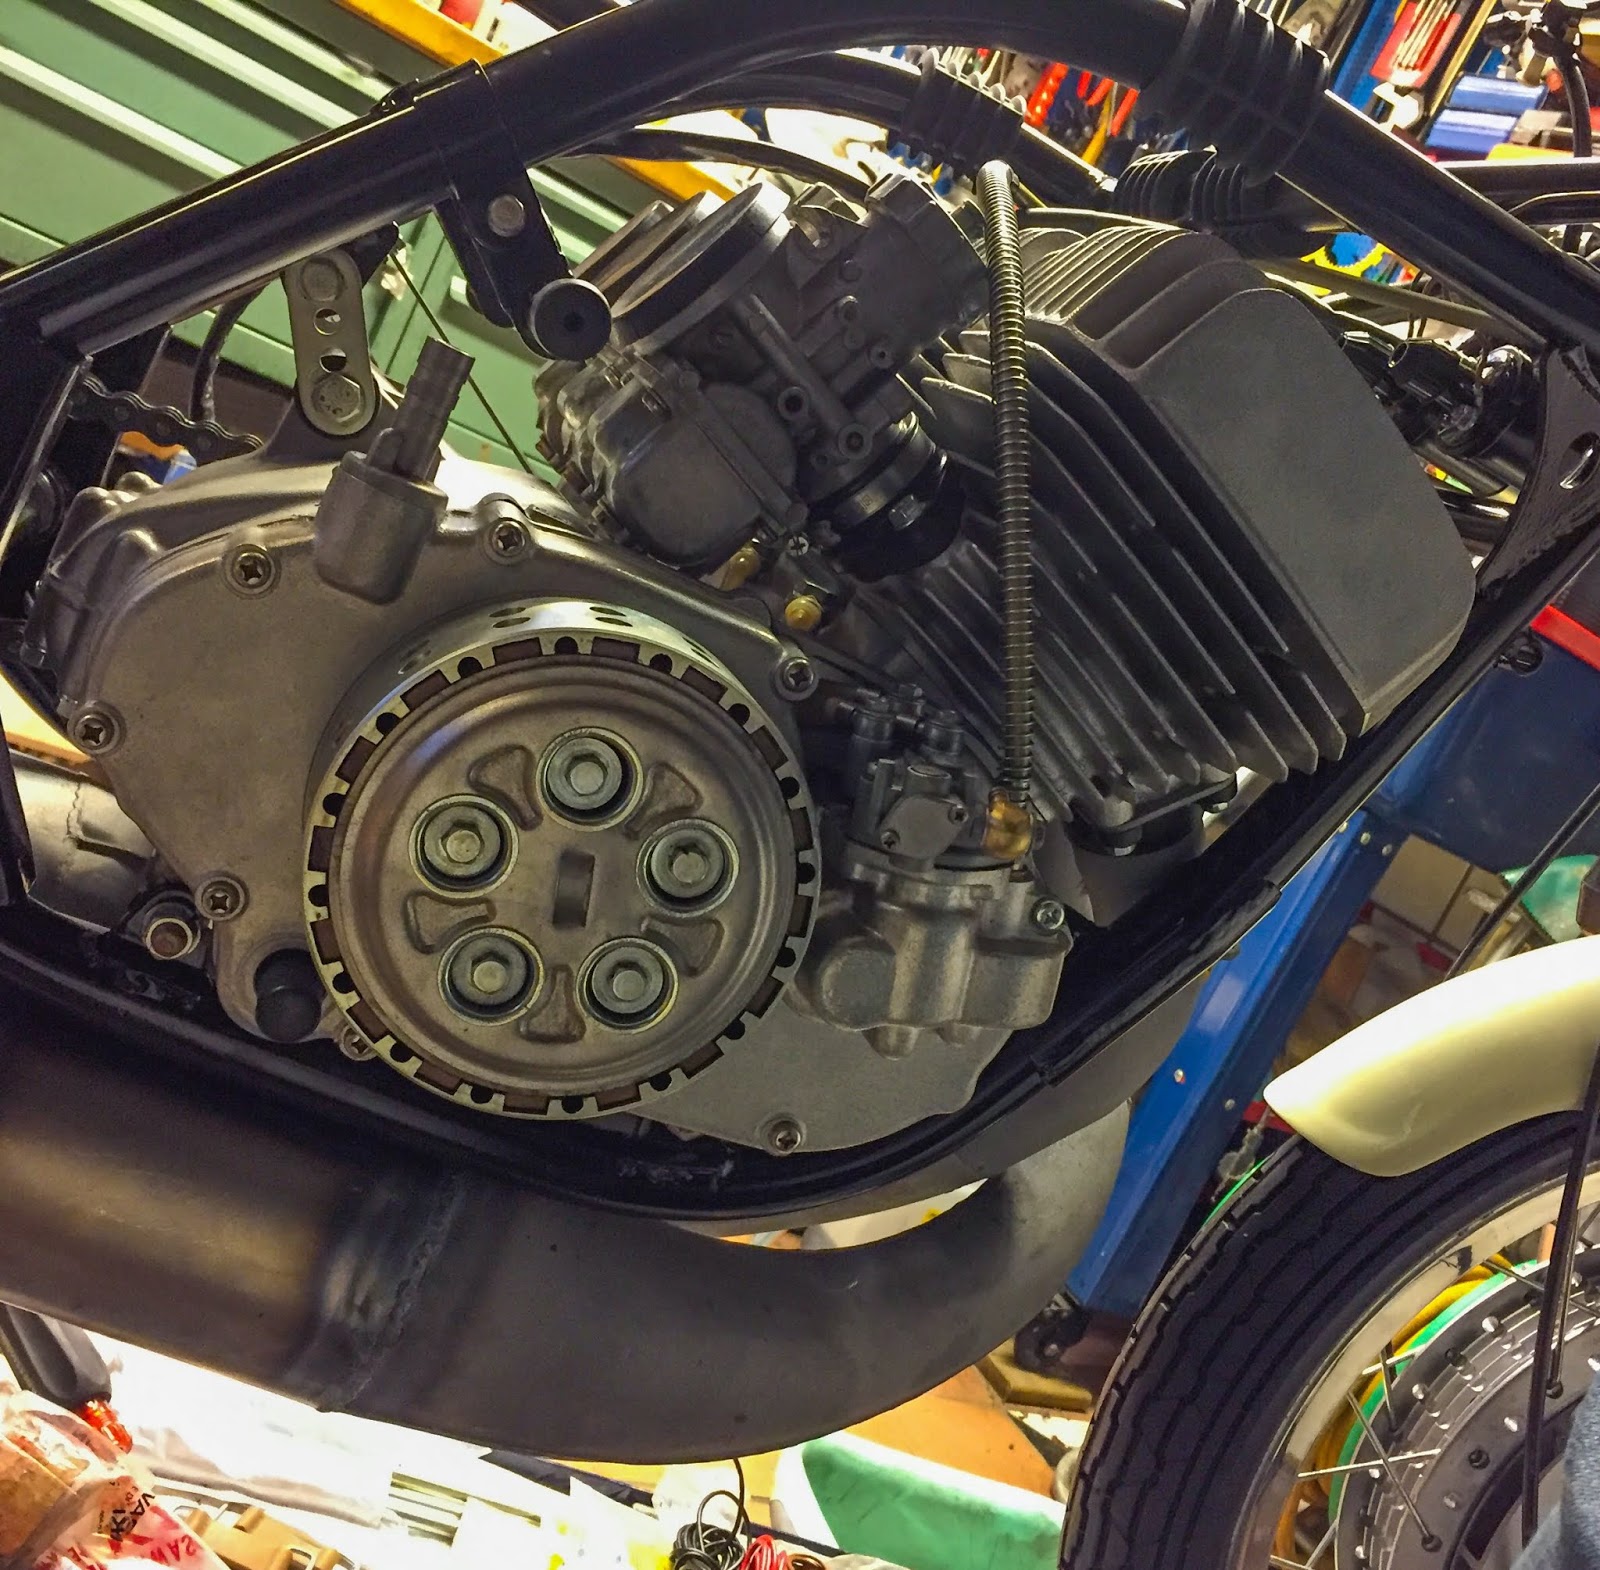
The clutch aspect with the mended chamber beneath the body pipe. That restore Bert did will hardly be seen in any respect when every thing is again on the bike. With the fairing in place it´ll be completely invisible! I really feel excellent and very relieved about it being fastened. The exhaust system was one in every of my main worries on this restoration and now it’s coming again collectively very properly.

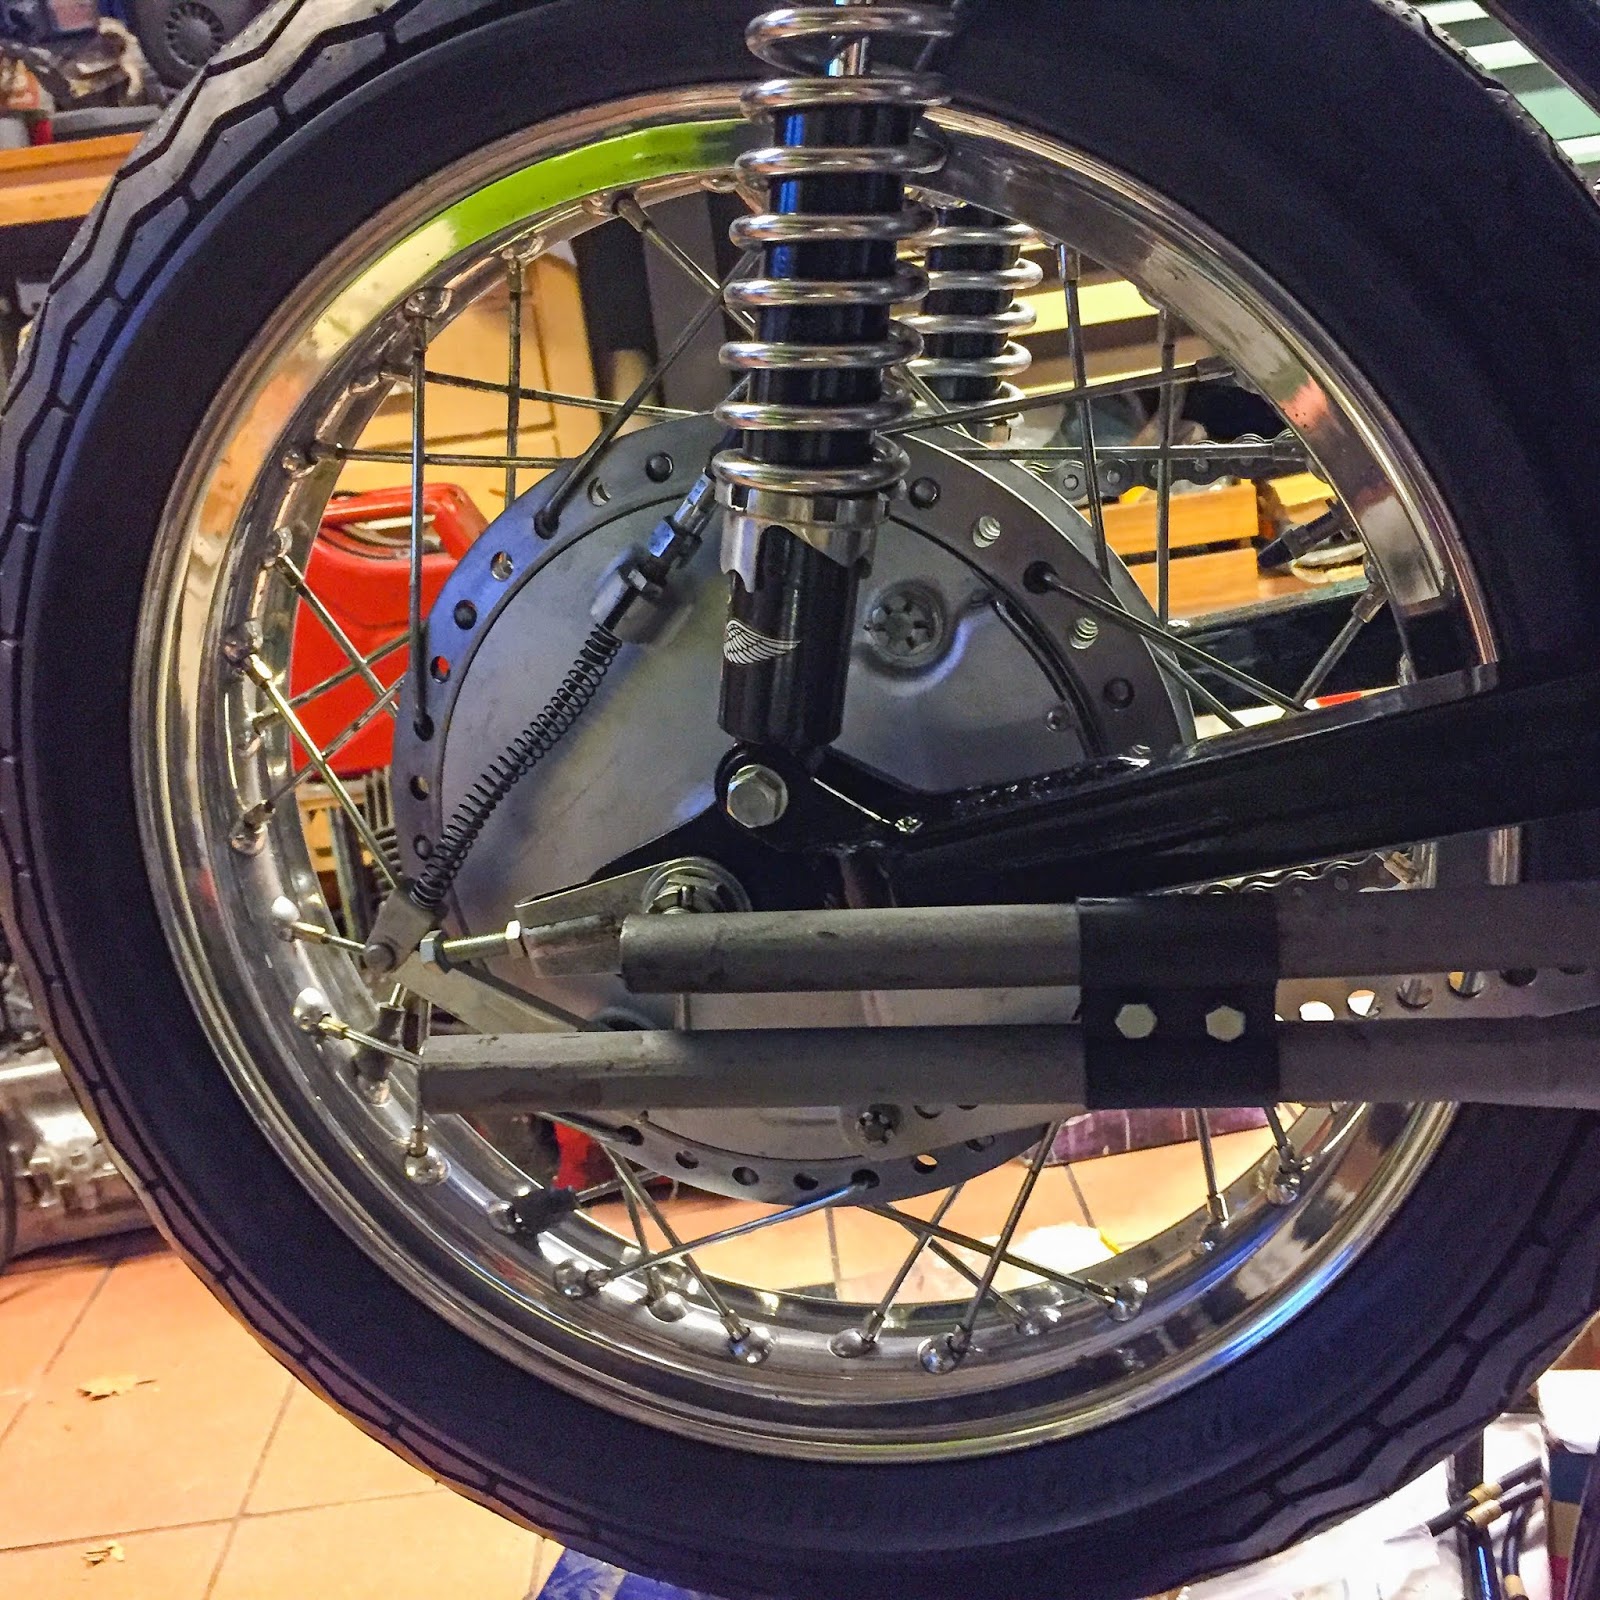
Right here on the appropriate we will see that the rear brake lever strikes freely outdoors the bracket and bolts holding the pipe to the body. That was one of many issues that had me worrying. We´ll see if I can use these brackets or if I´ll must manufacture new ones. The opening within the bracket appears just a few mm off middle in the direction of the body bracket. That downside is likely to be solved by merely turning it round. Stays to be seen!
The center chamber is connected to the appropriate one with this small bracket proper subsequent to the rear wheel. Match like a attraction! It was tremendous good to see that the pipes match on the bike comfortable and tight. No worries then, getting them coated with that warmth resistant ceramic coating.
I saved the a part of the chamber that Bert eliminated and changed. I believed it could be enjoyable to maintain as a reminder what it regarded like once I purchased it. It’s fairly apparent I wanted to have this half repaired if you see it now.
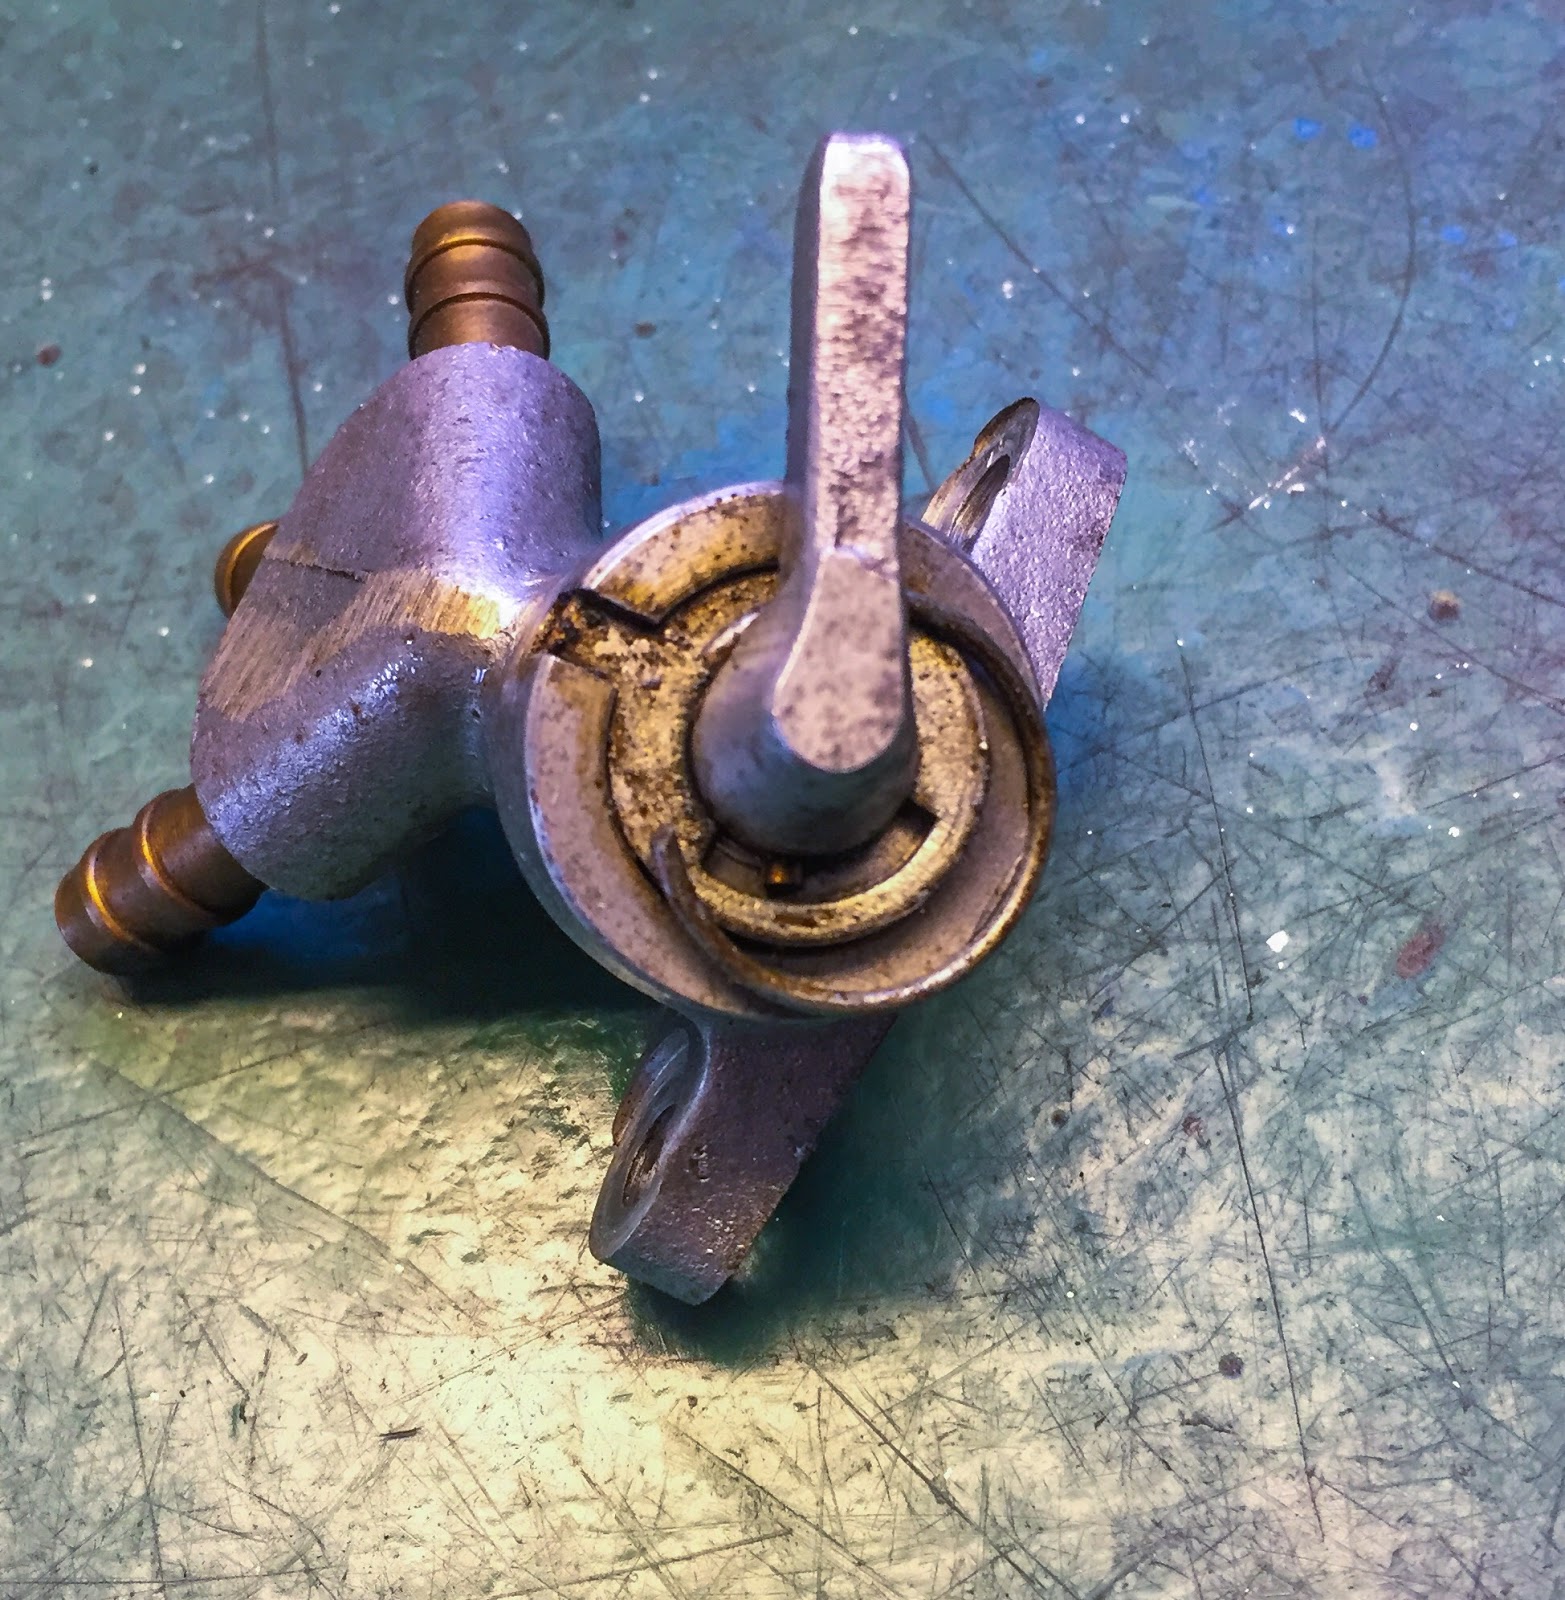
After I left the tank in Hällestad I eliminated the gas faucet, bear in mind?
Properly, now was time to take a more in-depth have a look at it. I by no means gave it a lot thought earlier, however I spotted it would show exhausting, even unattainable, to search out elements to revive it if it had rubber gaskets or seals in it.
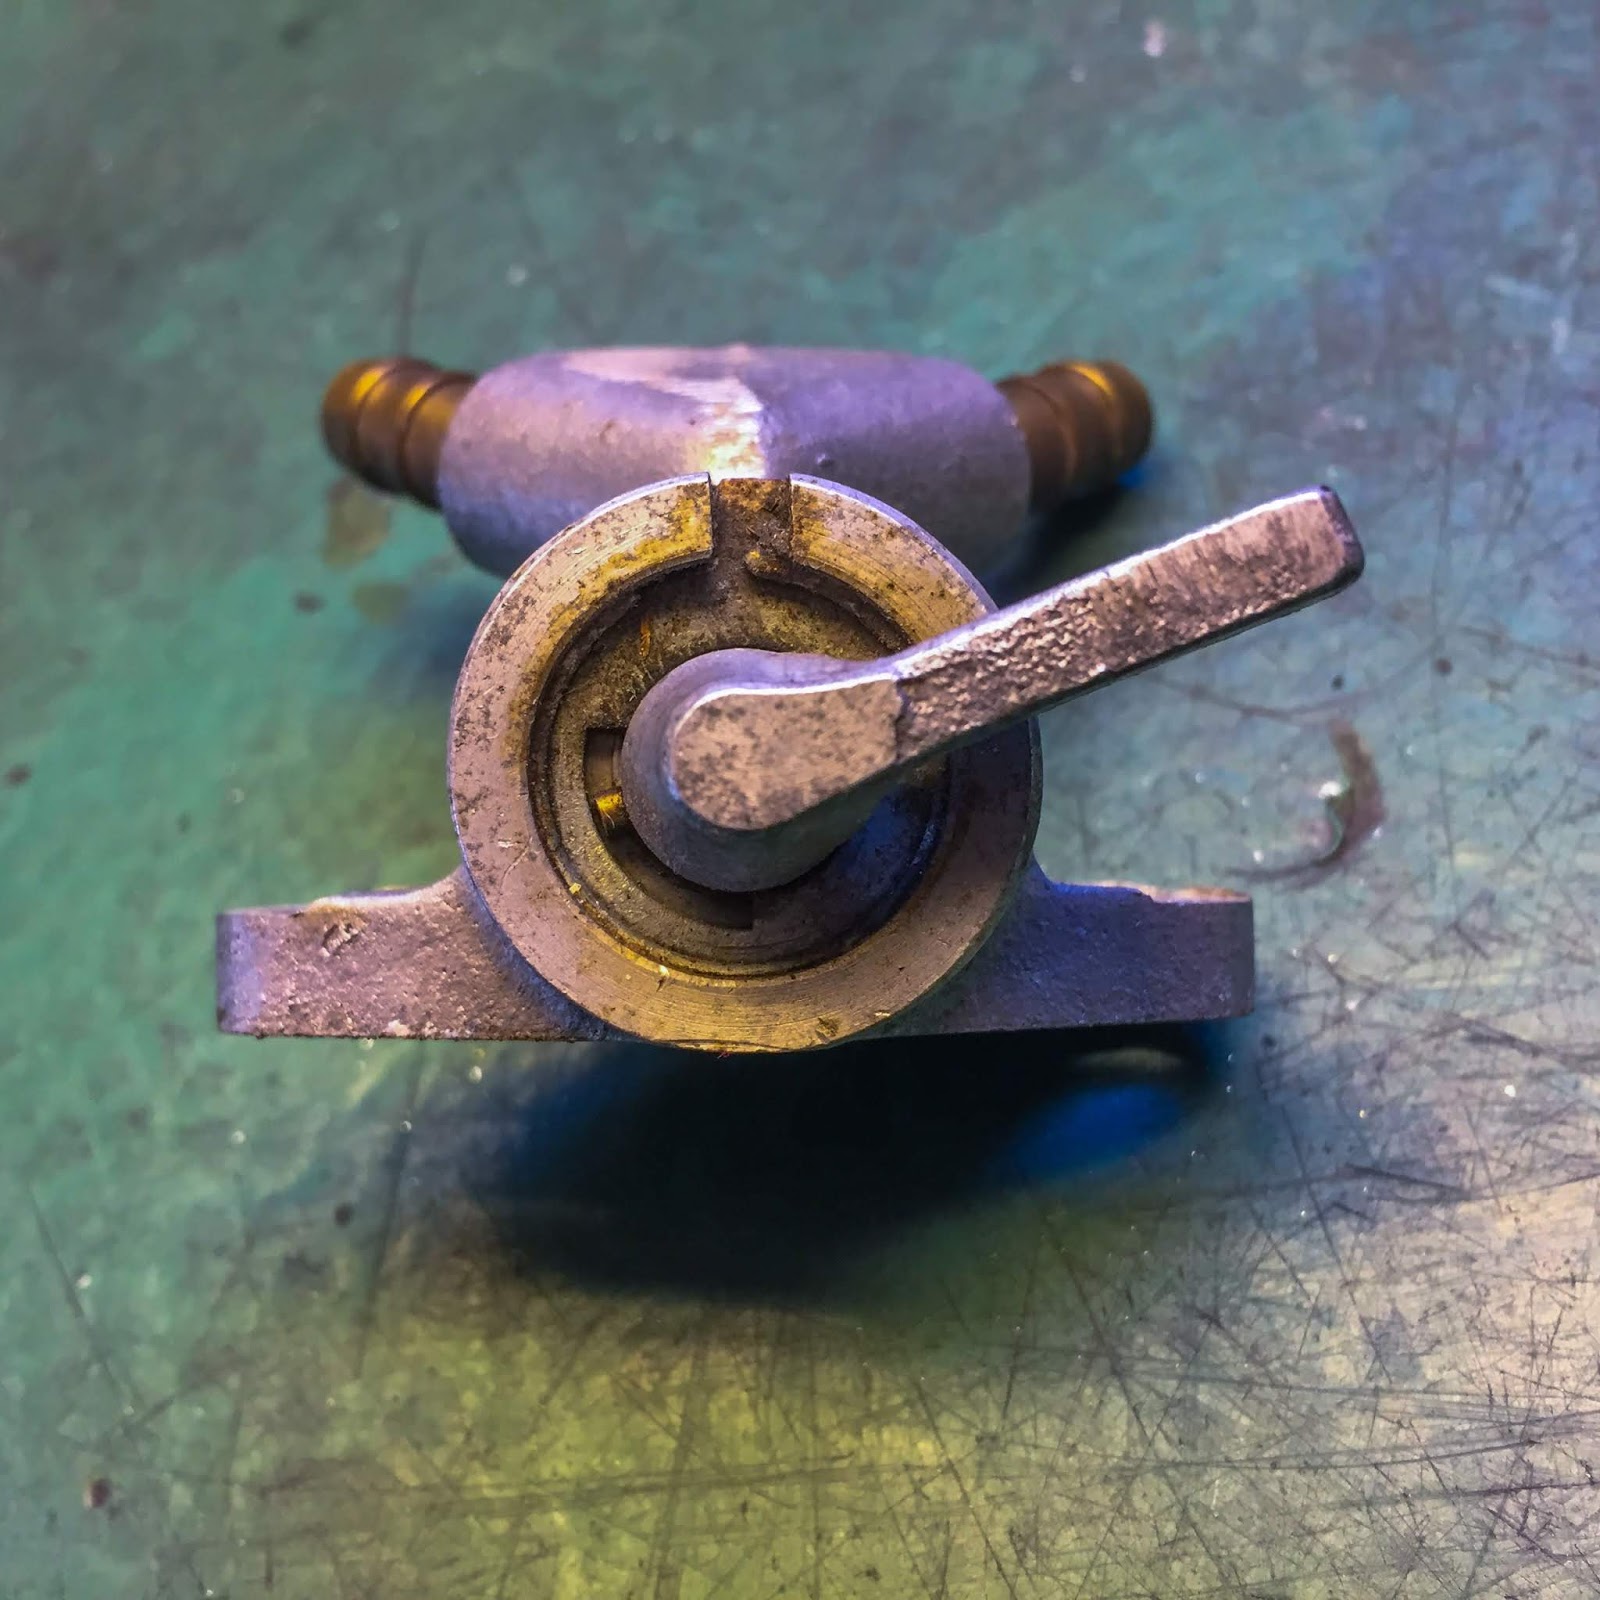
It’s clearly potential to take it aside in case you look nearer at it right here on the left. There’s a small retaining circlip contained in the housing. The top of it protrudes in to the hole at “12 o´clock” above the lever. Let´s see what it appears to be like like on the within…
Step one, getting the circlip unfastened. Additionally it is very clearly seen right here how “man-made” this petcock is. The casting is fairly tough and all elements seem like “one-offs” roughly. I think about they made some 2-300 of those in 1970-71 and doubtless by no means made them once more. I´ve heard of petcocks for these bikes promoting for 1000-1200 $ US. With that in thoughts I have to get this one fastened and dealing.
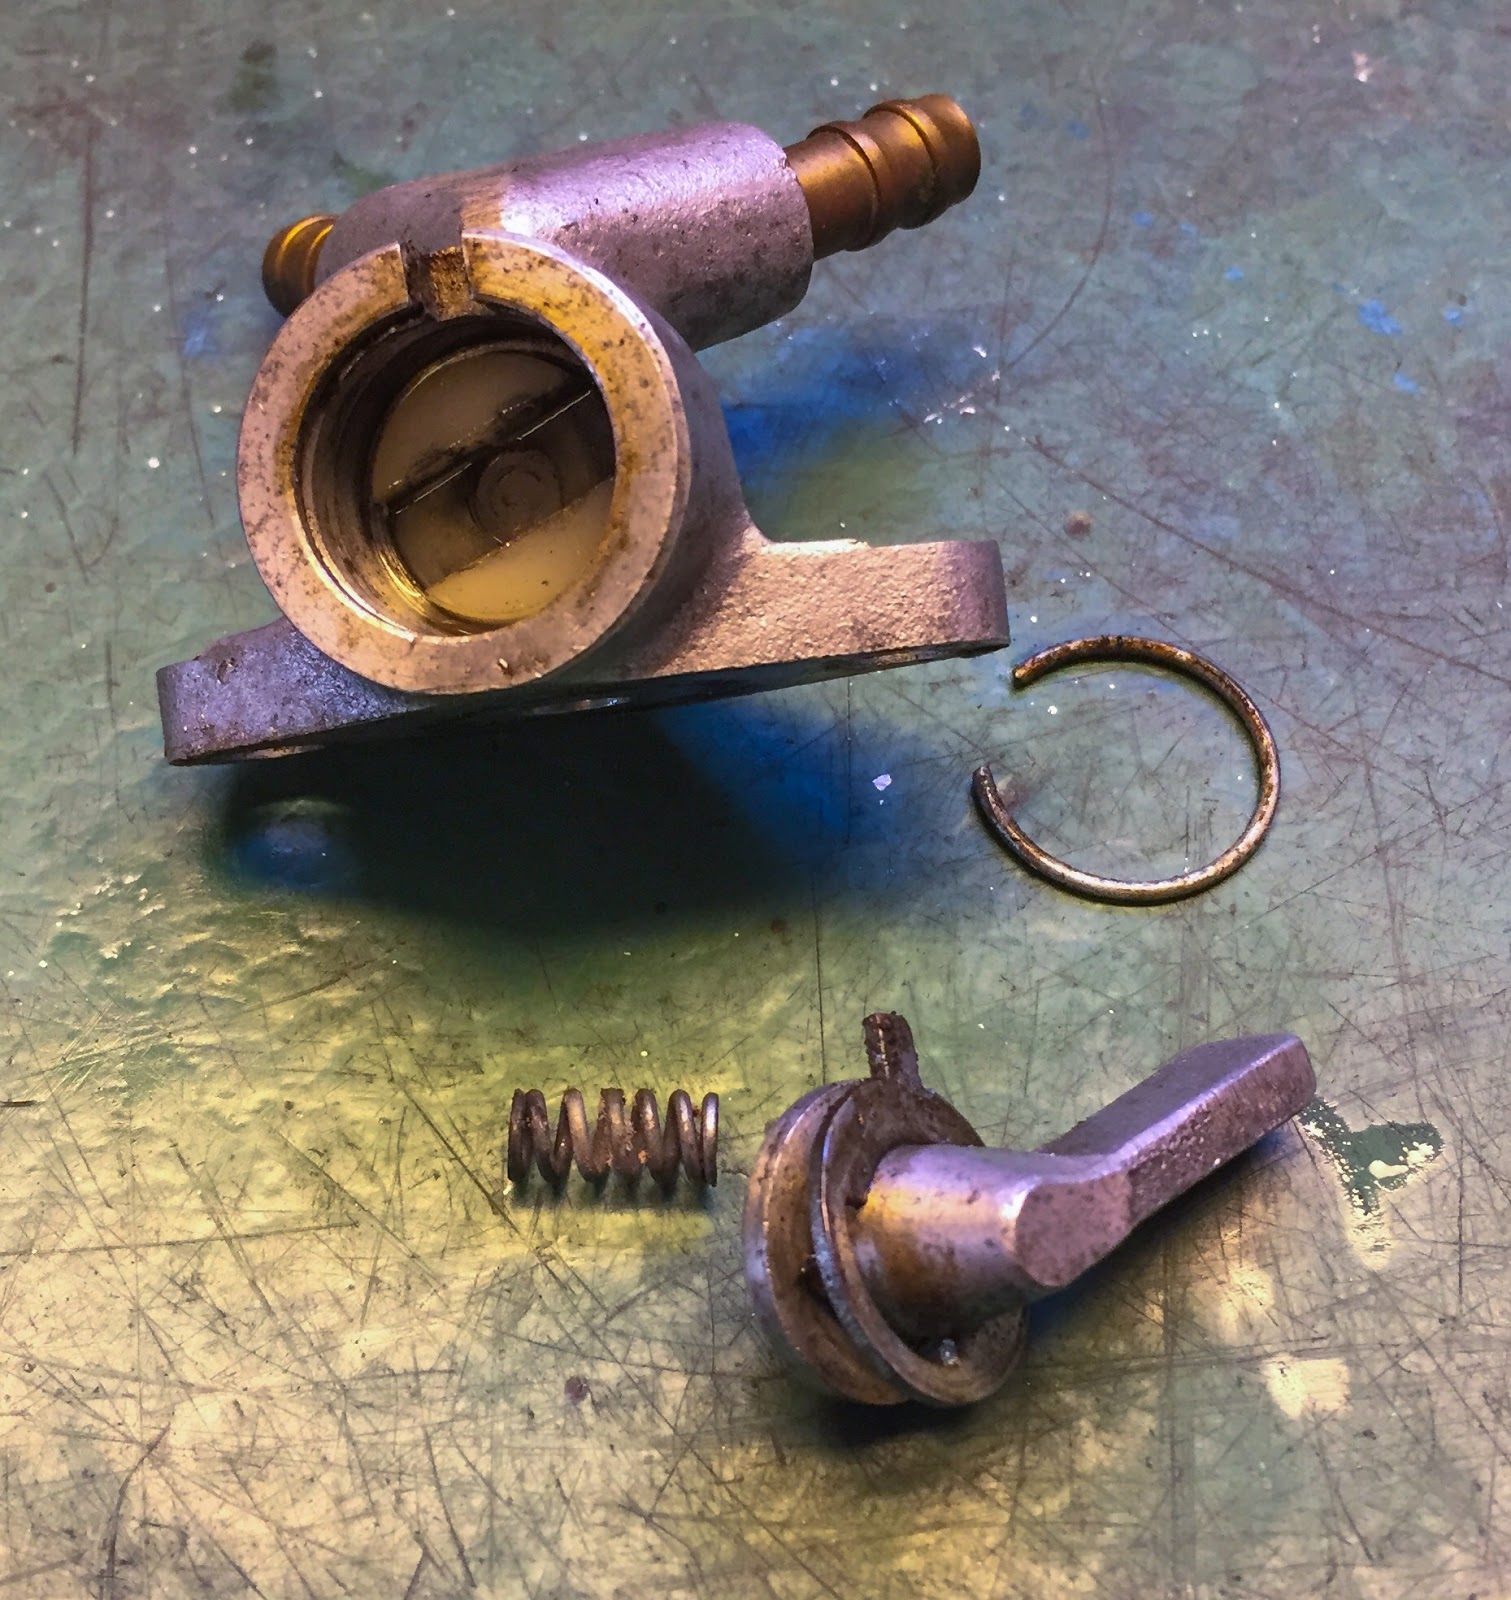
With the retaining clip off the lever, washer and spring got here loos simply sufficient.
Excellent news! No rubber seal or gaskets up to now. These 4-holed-rubber gaskets used on the road bikes of their gas petcocks are an enormous ache to repair. You purchase new ones, set up them and as you flip the lever the primary time you chop your model new rubber gasket to items. Shitty stuff. I don´t know what number of inventory road petcocks I’ve rebuilt over time, utilizing solely NOS unique elements, good repro elements and even the perfect fashionable replacement-fuel-resistant-high-quality rubber elements… And so they ALWAYS begin to leak. Ultimately. I believe I’ve greater than 10 used petcocks in inventory, however all the time use the excessive movement Pingel alternative items on all my triple builds.

Oh properly, again to the H1R… In right here was a nylon conical seal that turns with the lever and opens for the gas to movement freely via the petcock. The one downside…. It was caught. All the time these caught elements!
Because it was manufactured from nylon I may use 5-56 or WD40 and attempt to free it. I didn´t need to use an excessive amount of pressure right here so as soon as once more. The torch.
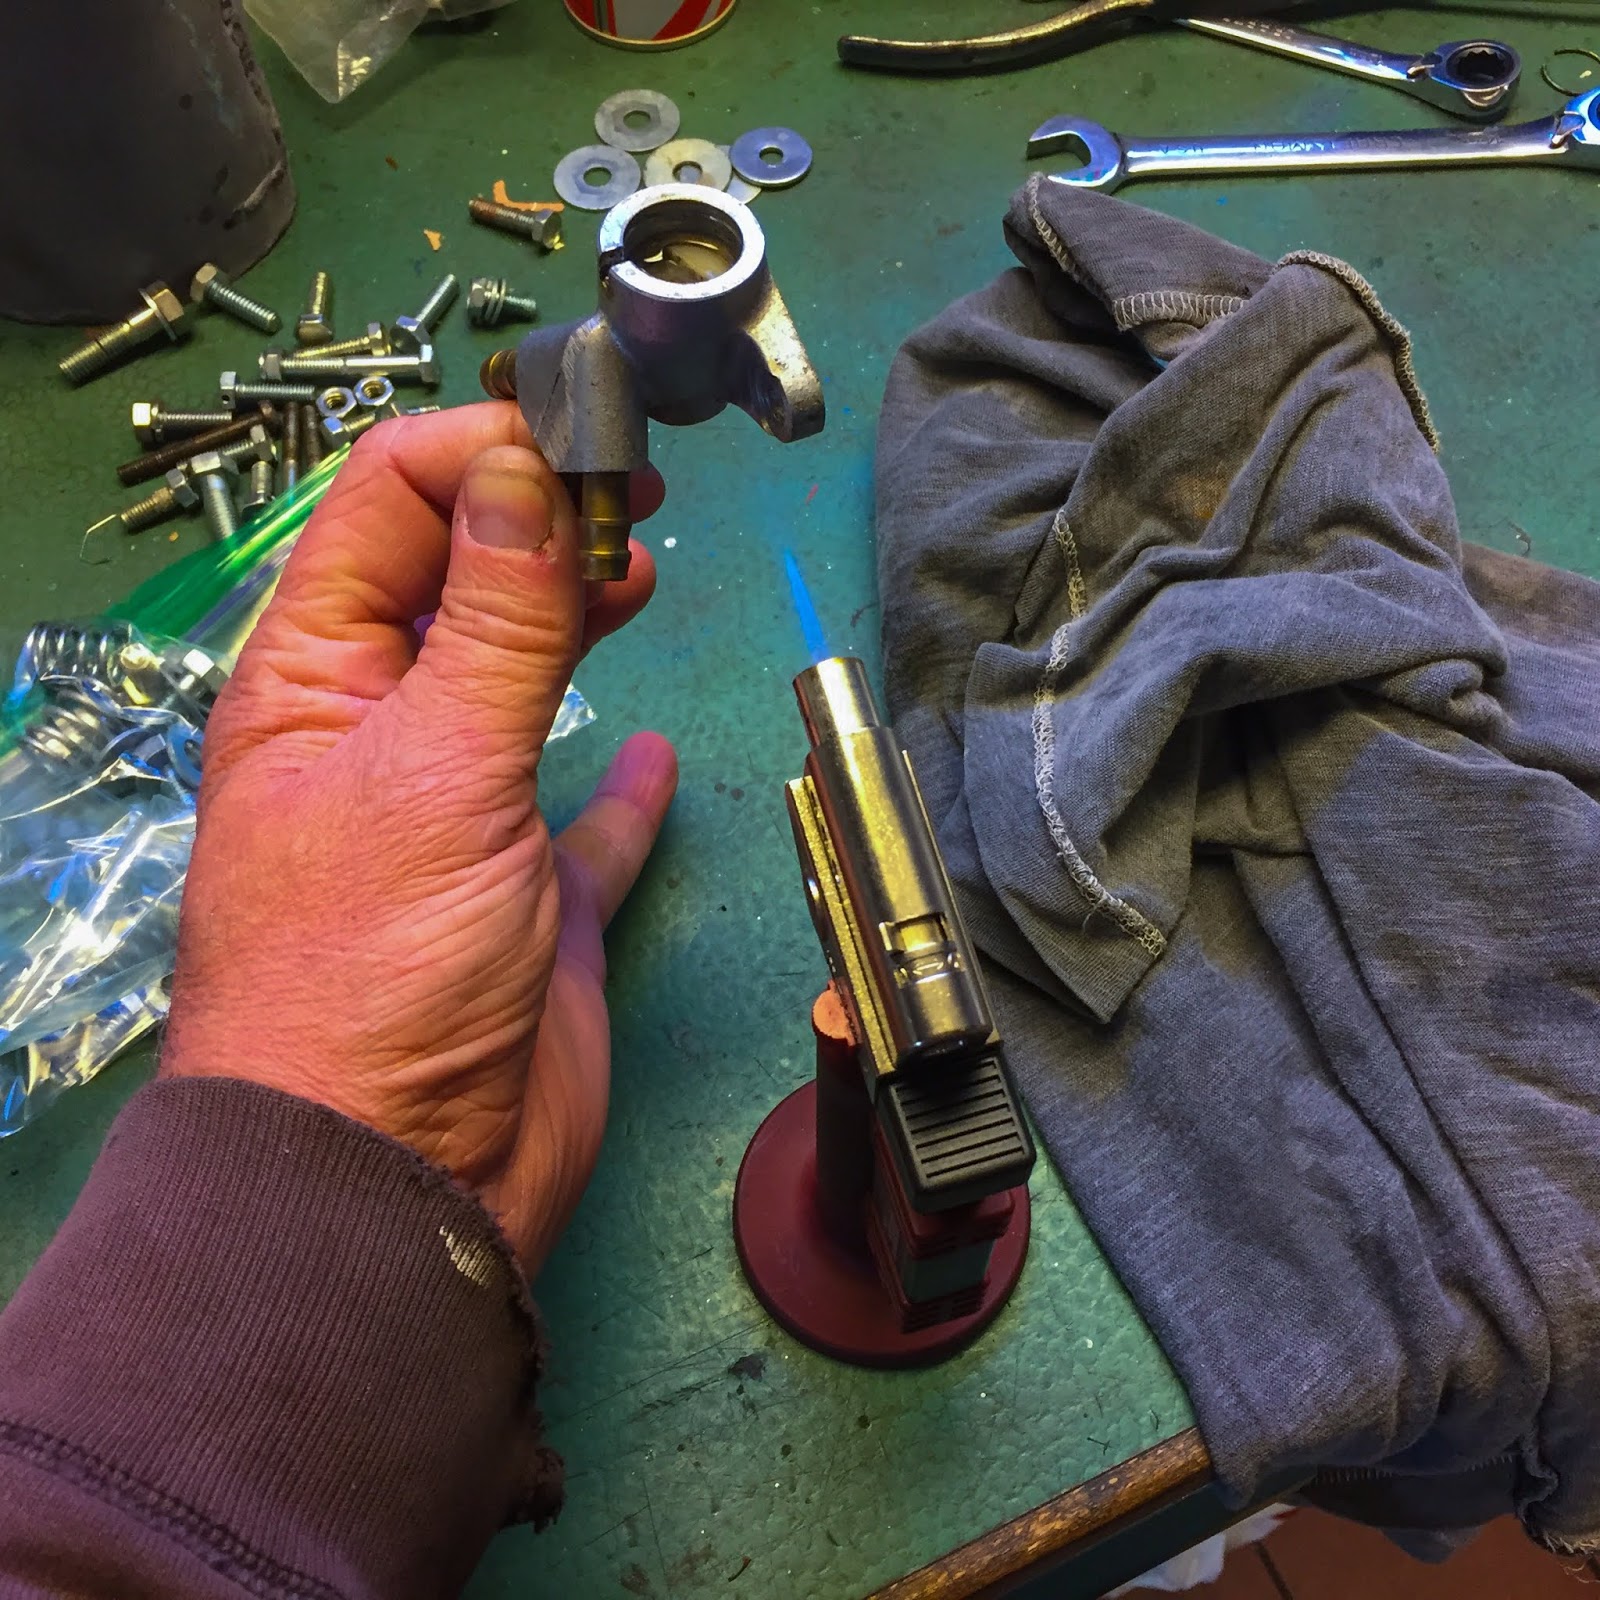
Actual cautious utility of warmth everywhere in the petcock housing and by no means heating immediately on the nylon half. 5-56 within the gap and letting it sit for some time did the trick.
My largest screwdriver match properly within the slot within the nylon bushing and all of a sudden it turned. Free finally!
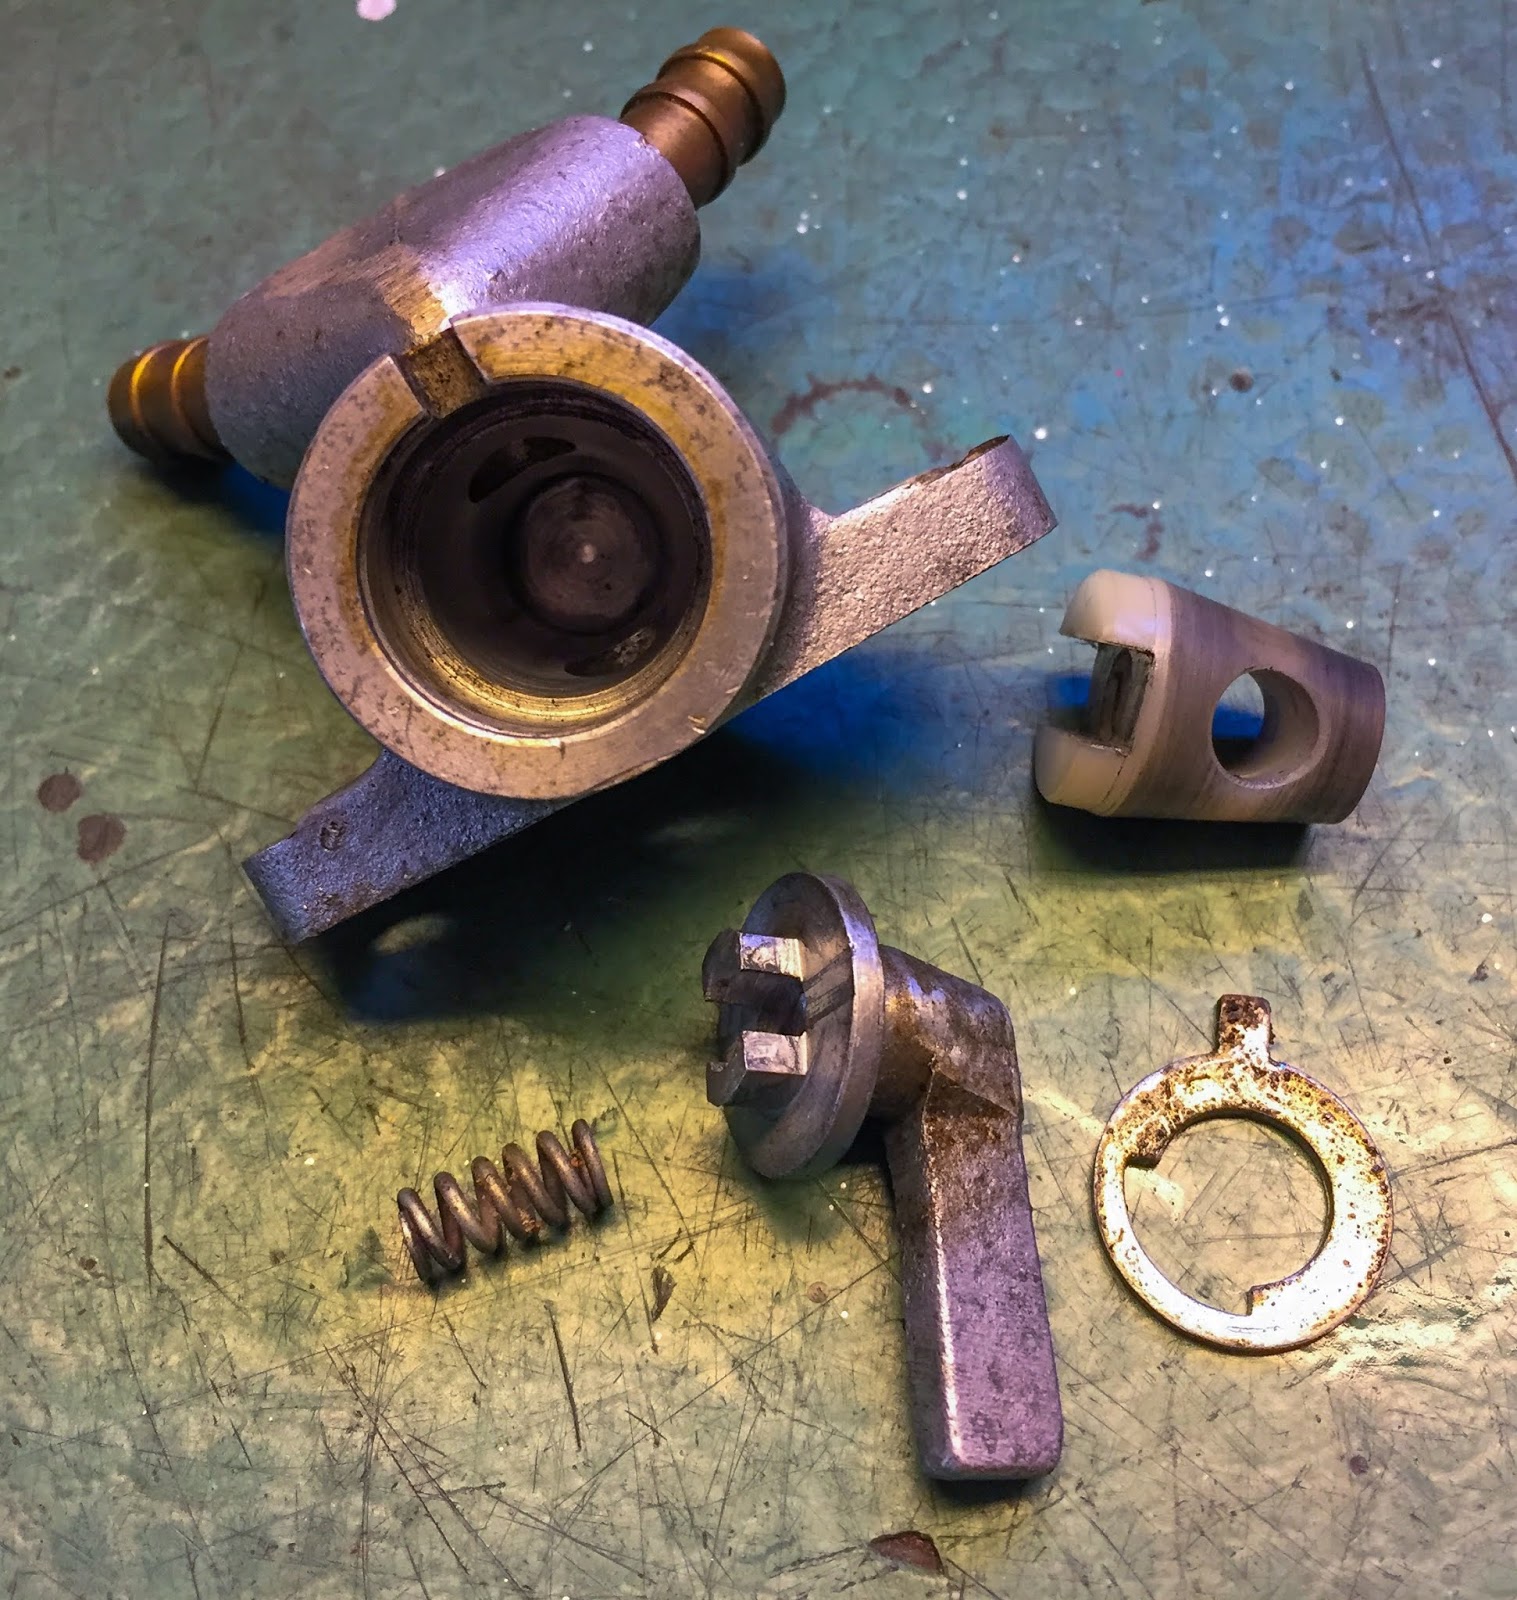
Listed here are the elements that make up the gas petcock. Housing, lever, spring (pushes the cone nylon bushing inwards), washer and the precise sealing cone. Subsequent was getting the elements cleaned and polished for reassembly. Good fettling for a change. Not too time consuming both because the elements are small and in general excellent situation.
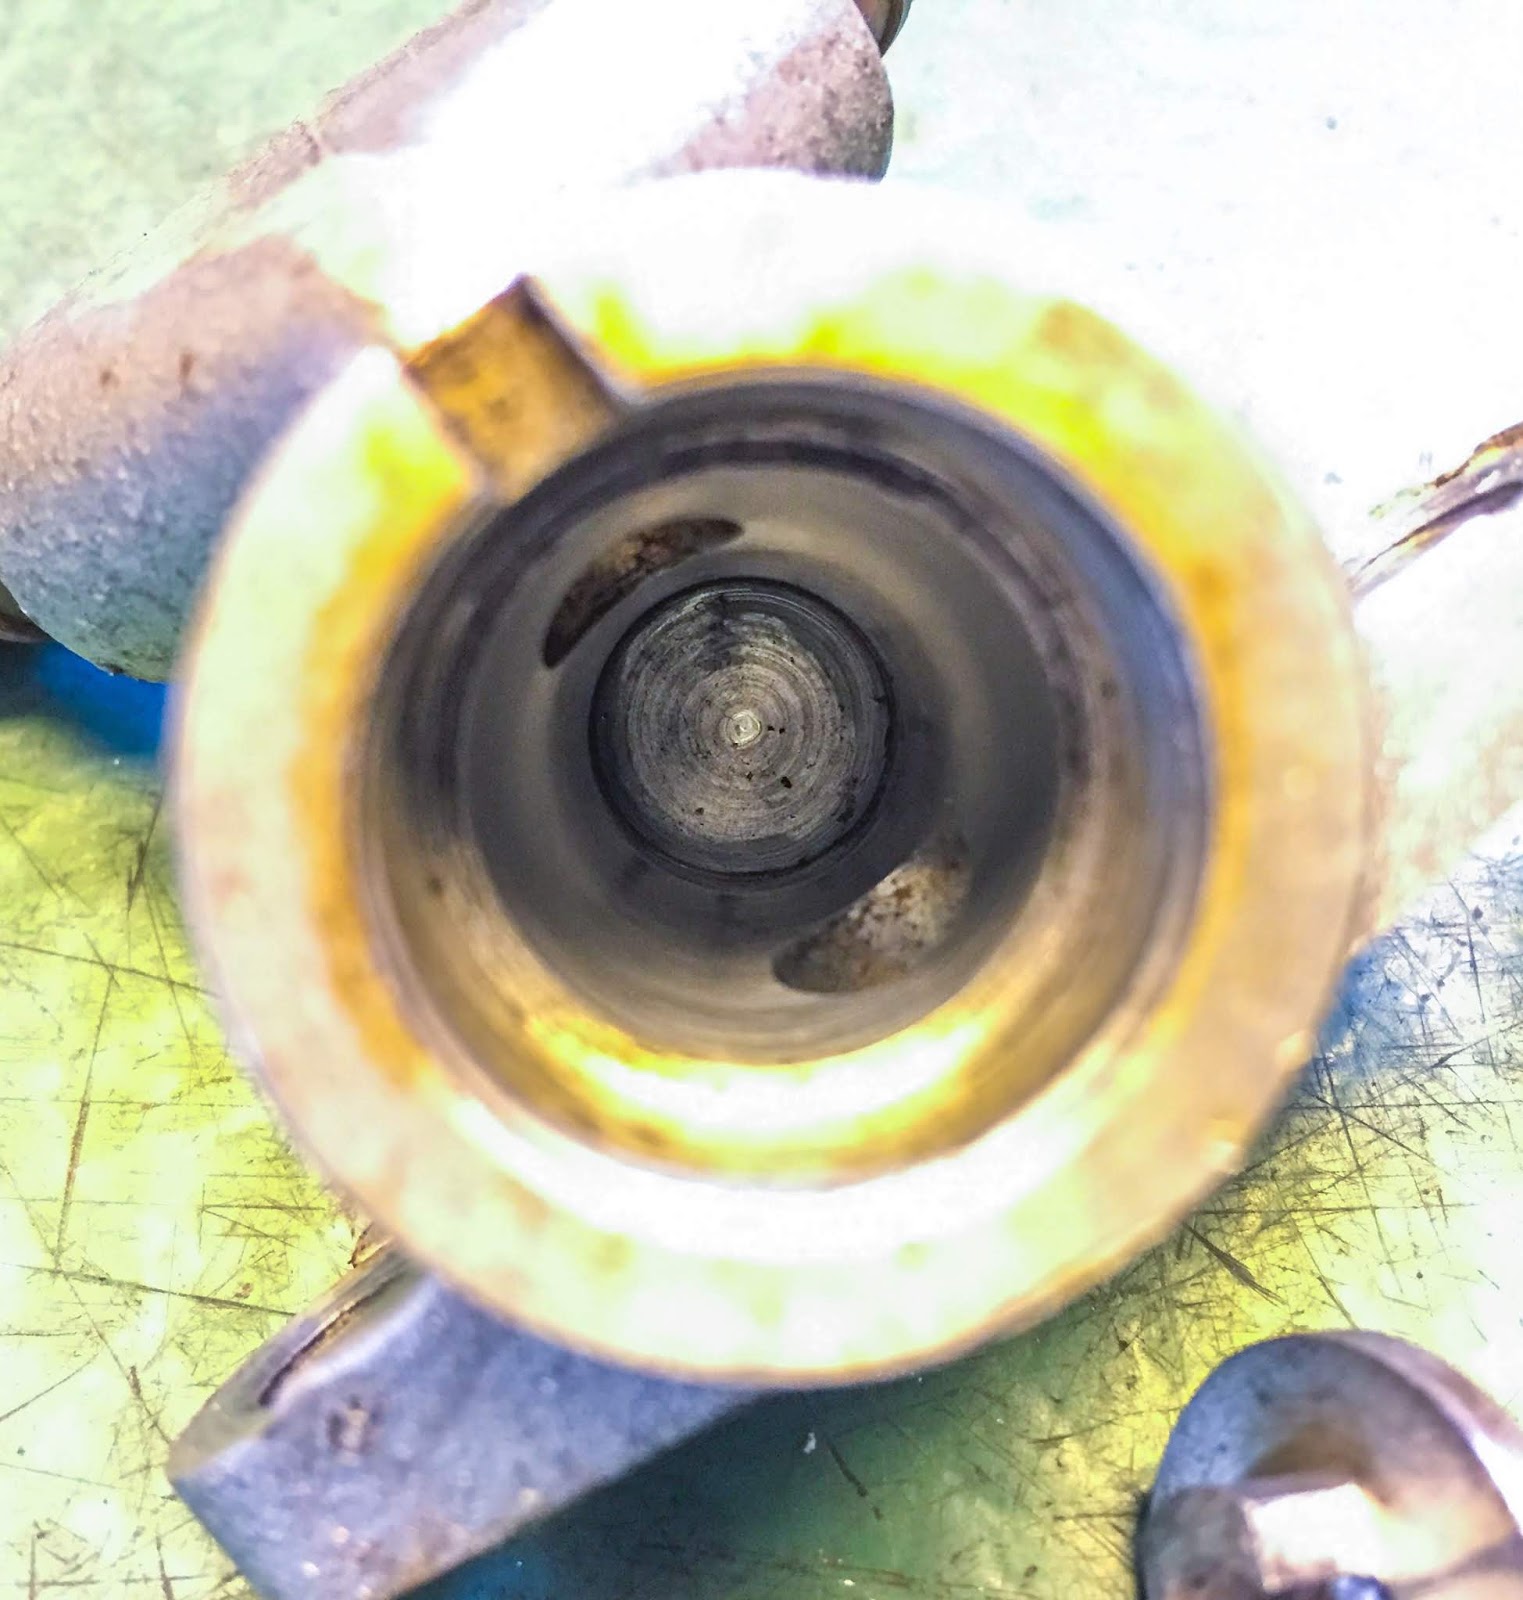
A peek contained in the physique. You may see the cone-shaped inside floor with its two holes. Cleanliness is a requirement to be able to get this gas faucet leak proof. A radical cleansing and light-weight lubrication with automotive rubber grease was so as right here. I certain hope I´ll be extra fortunate restoring this one in comparison with the road ones!

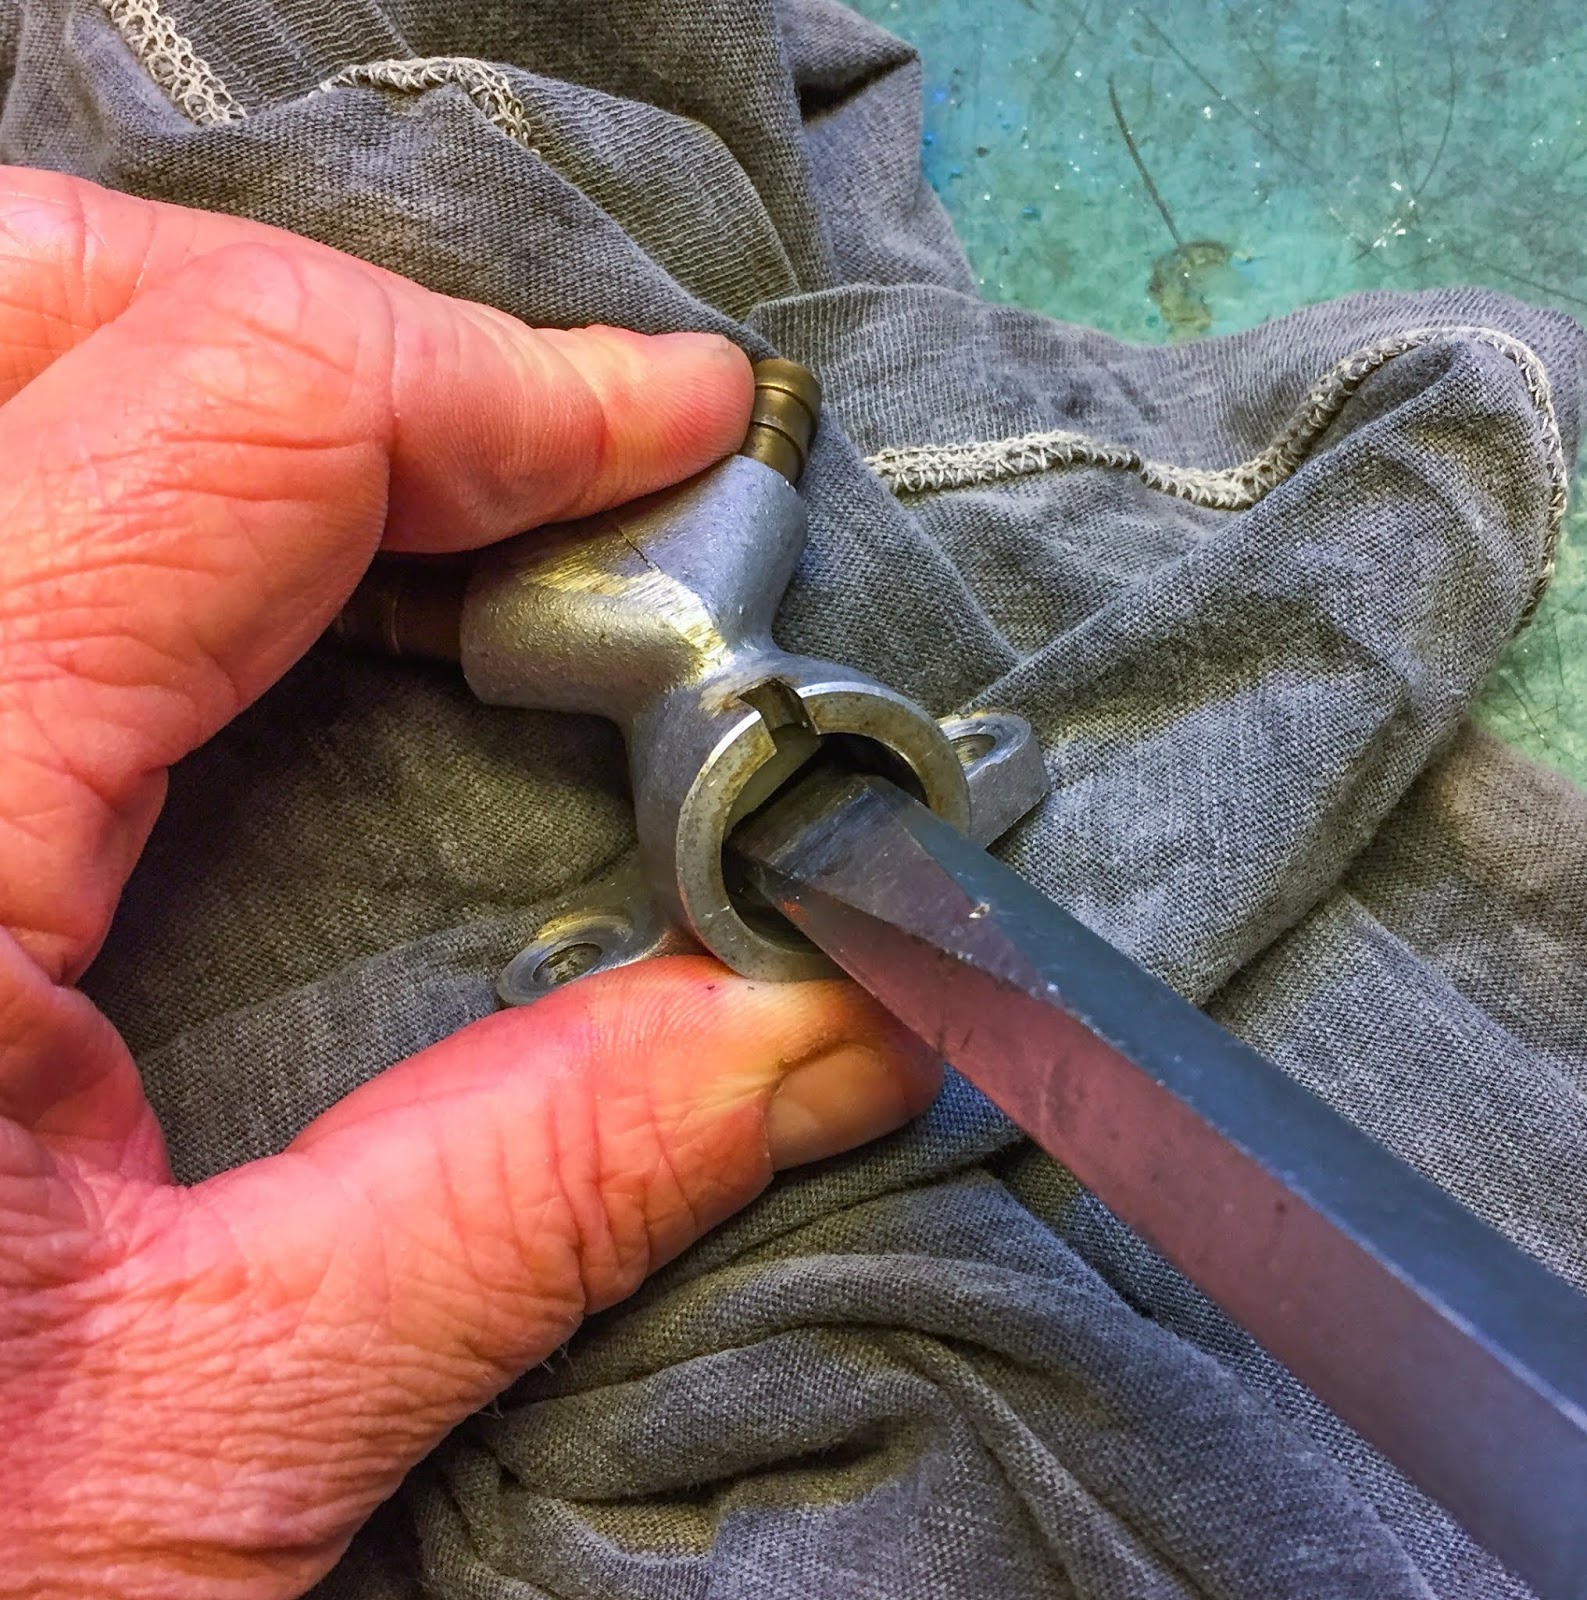
Reassembly was fairly straight-forward. Getting the elements contained in the physique in reverse order was simple sufficient. The tough half was getting the circlip again in place. The spring pushed the entire thing outwards so I needed to safe it with my largest, strongest clamp to maintain the spring from pushing the elements out. Tough stuff to get the clip in place with out loosing the grip of the clamp.

Lastly I bought it proper. The gas petcock is again in working order and hopefully not leaking…. The motion on the lever is easy and it appears to be working OK
A light-weight polish by hand bought the muck and filth off it.Now it is able to be put again on the tank as quickly because it will get again house. I might say that is now a 1200$ gas petcock!
One much less factor to fret about! They’re getting fairly few as of late, truly. The issues I fear about. Feels excellent!
It took solely 3 days… “Leffe” known as me again on Saturday (I left the pipes with him on Wednesday…) and stated they have been performed! Wow! 3 days as a substitute of 1,5 week. I went there once more final Sunday and picked them up.
What an exquisite job he did on these pipes! I’m more than pleased with the look of those infants. Precisely the appropriate satin, semi-gloss black paint I used to be on the lookout for. 3000:- SEK, approx 320 $ US is greater than a good worth for this therapy. I can hereby strongly suggest “Bizarre Efficiency and coatings” east of Stockholm on the Värmdö island. Not solely does Leffe present glorious workmanship quicky and at an inexpensive worth, you additionally get a pleasant drive out into the Stockholm archipelago!

After a break in engaged on the bike, working in actual life, My subsequent mission was to get these restored pipes again on the racer.
Earlier than doing that I needed to drill and security wire all of the engine bolts. The nuts have been already drilled, however I modified the lengthy retaining bolts for brand new ones. Those on the bike on the time of buy have been of very completely different manufacture. A few them have been even merely threaded iron bars.
So, I ruined a few drills within the course of. One broke and two have been dulled from my hand drilling.
Keep in mind I attempted to study the noble artwork of safe-tying some time again? Properly, I nonetheless want lots of coaching!
It certain bought lots simpler due to my oldest good friend from childhood, Finn, who noticed my futile tries earlier than and despatched me knowledgeable security wiring plier/software. Everybody is aware of {that a} good software will get half the job performed without delay. The opposite half comes from coaching and information. Now I’ve the proper software….
My wirings are getting higher every time I strive. A few weeks doing nothing however security wiring along with some tuition would possibly enhance my sport right here significantly.
On the appropriate is one in every of my first on the engine bolts. previous footage from the racing pits throughout the seventies I imagine that is near what they regarded like from manufacturing unit.

Placing the wiring across the body tubes appears to be means excessive, however I imagine that´s what they did. The wiring can also be speculated to “pull” within the appropriate path, i.e tightening the bolt/nut. Form of like I nearly bought it right here on the left. At the very least it received´t loosen and that´s what counts.
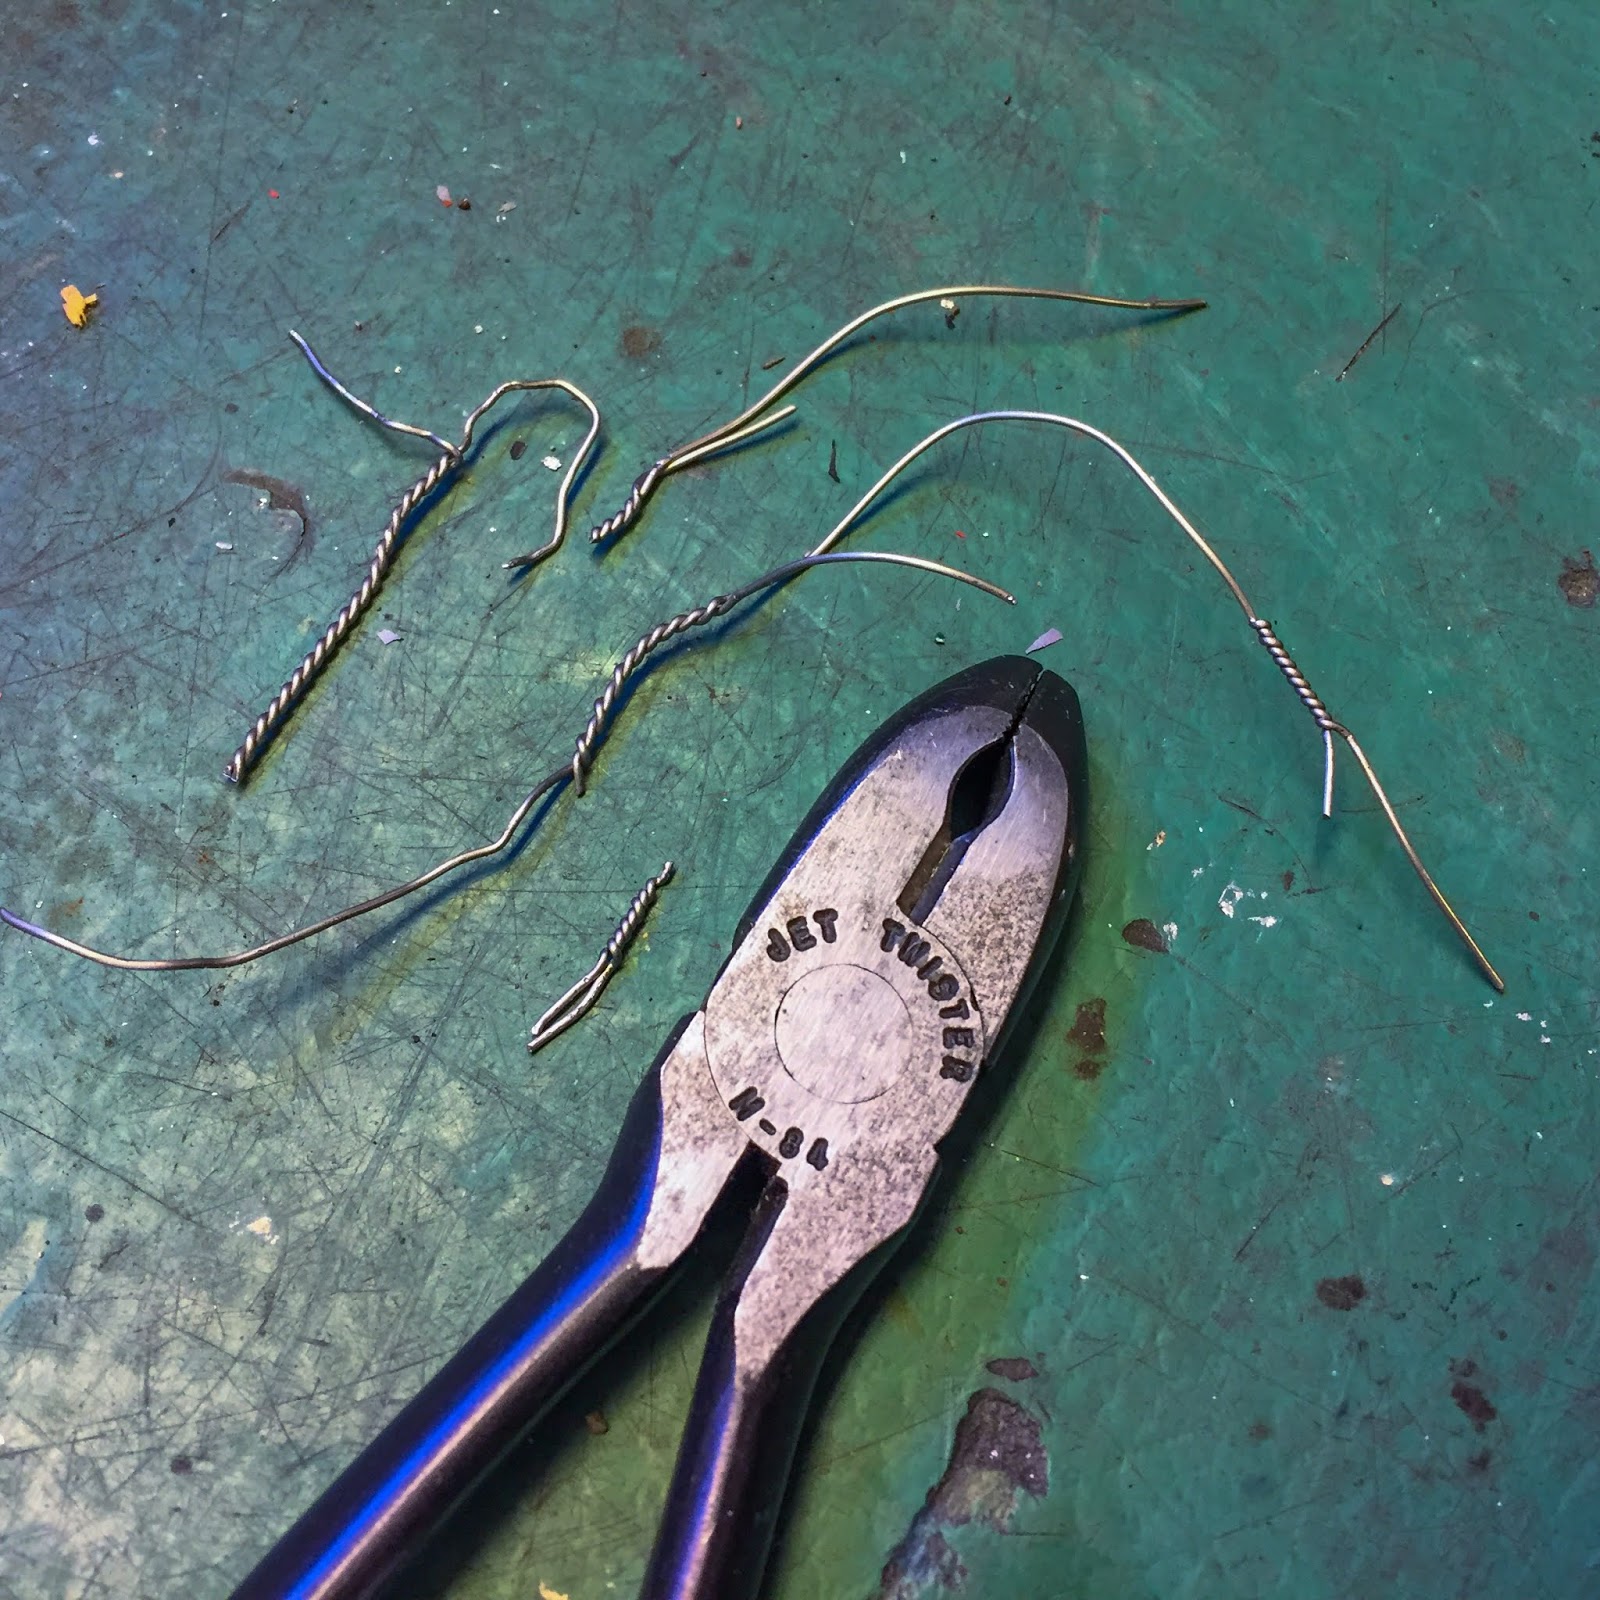
The software is completely great to work with.
It makes attractive windings on the wire and pulls it actual tight and good to the bolts and nuts until you pull it too exhausting in your ambition to get it good.
That is what occurred greater than as soon as. I broke the wire and needed to do all of it once more. At the very least 4 occasions.
Properly, with coaching, coaching and extra coaching I’d lastly get it proper.
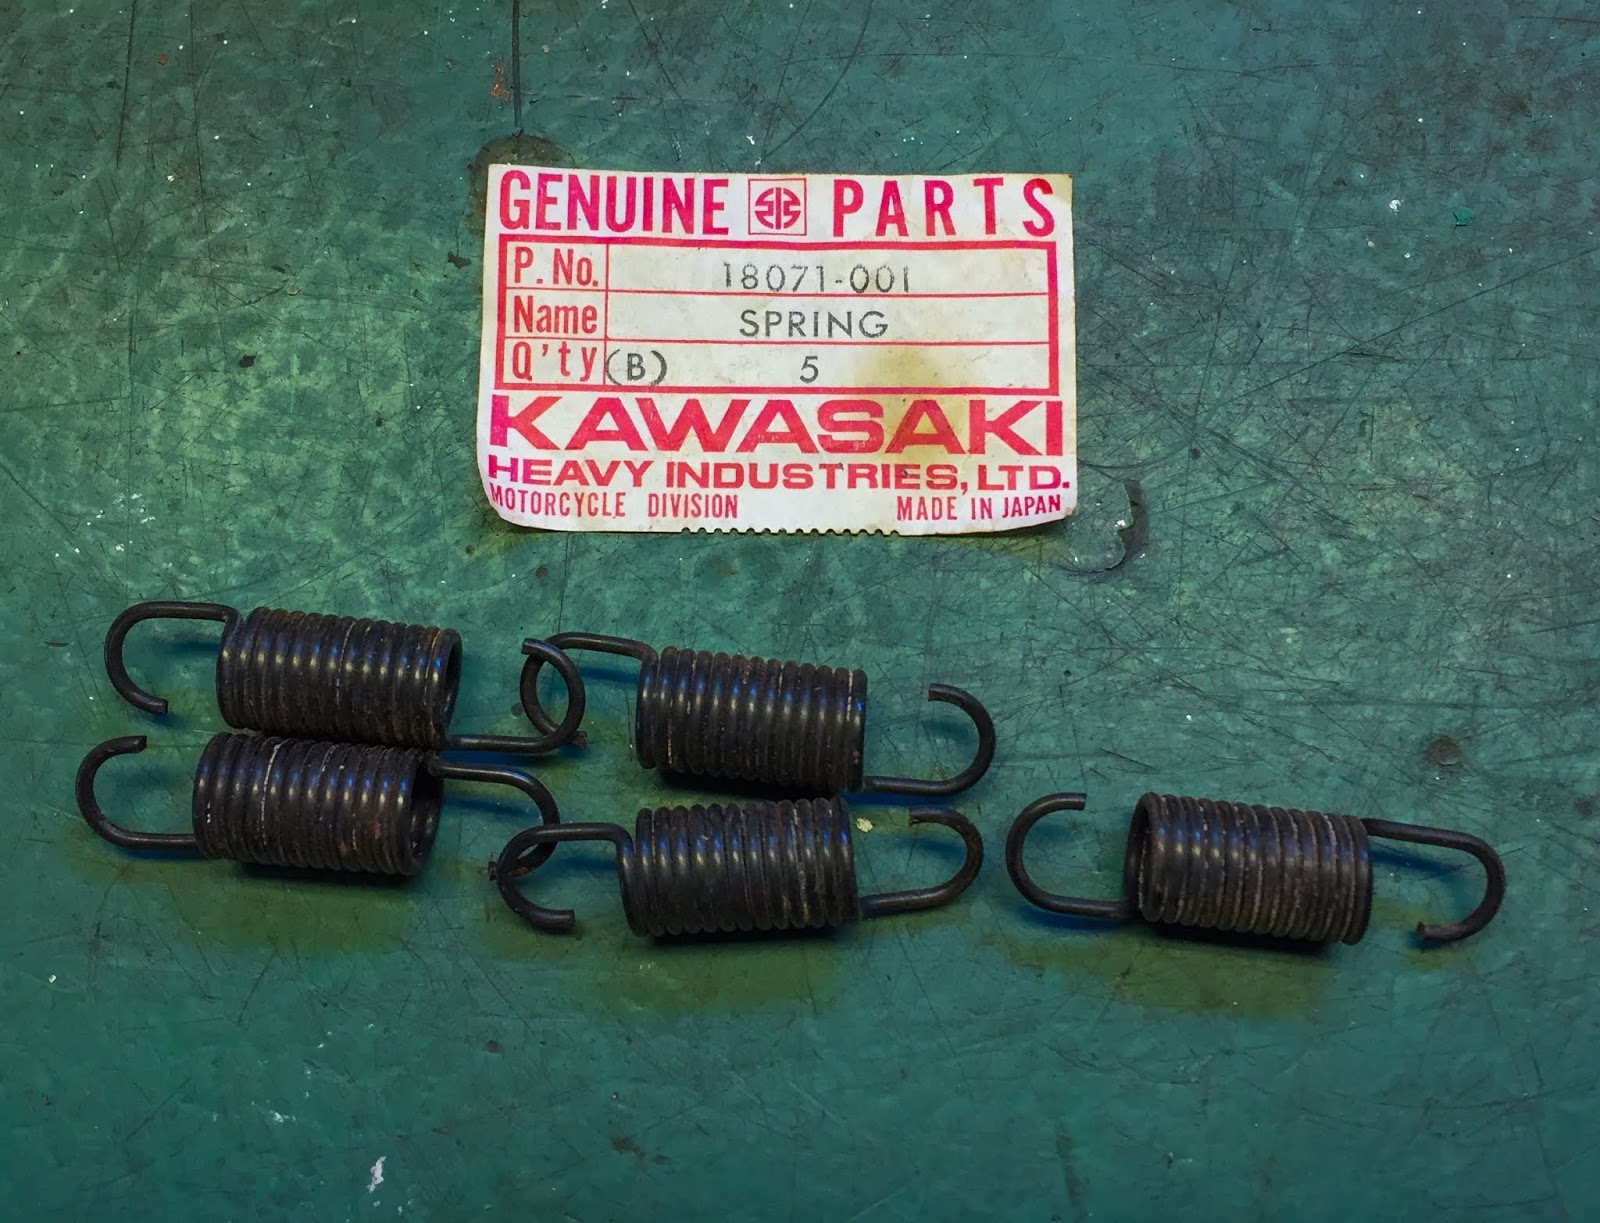
Because the engine bought safe-tied to the body I started on the lookout for the elements wanted to connect the exhaust system to the engine. I do know I’ve all six of the springs wanted someplace, however may solely discover 5 proper now. No huge deal, once I find the sixth it´ll be a simple set up. NOS elements are all the time NOS elements. And I like it!

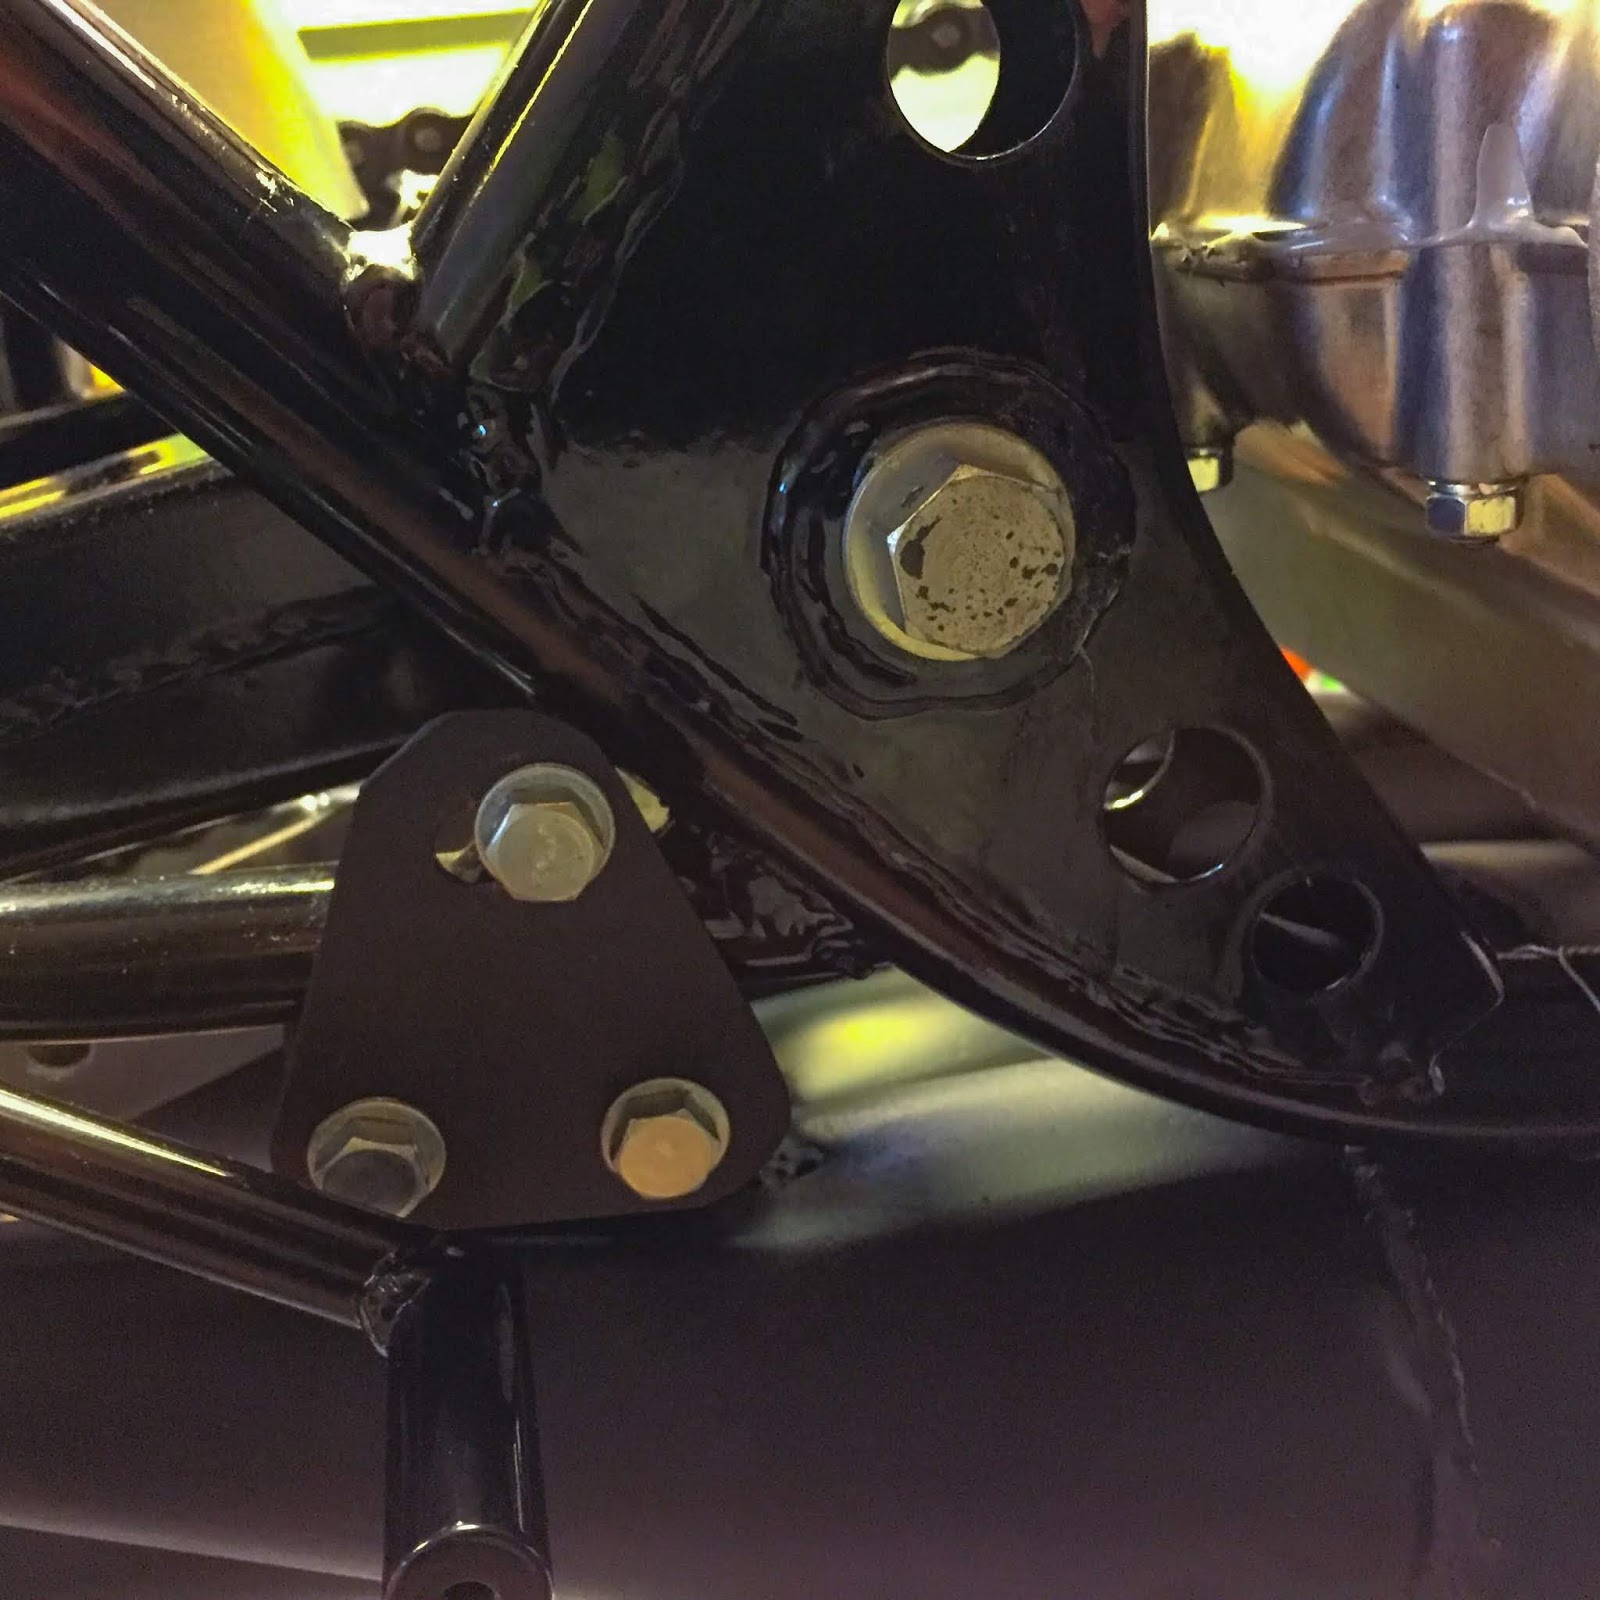
The brackets, springs, washers and bolts bought again on their mounts. Fairly neat development, truly, the place there´s an adjustment risk by tightening the screws and thus shifting the pipe outwards in relation to the body. Would possibly show to be vital in a while, I assume.

A greater view of the bracket and the opposite elements. All in accordance the elements guide, in fact. This time I turned it round for a greater fitment of the bolt to the body.
The left aspect muffler is best to get in place, so I began out with that one. Right here´s an image of the bracket on that aspect.
You may see how neatly the chamber leaves house for the drive chain and the gear change pedal strikes simply outdoors the mounting bolts. These will, in fact, be safe-tied in a while as properly.

Up entrance there´s two springs on every pipe holding it in place contained in the cylinder spigot.
Right here I may flip every spring two methods and, in fact, I needed to do it twice. This was the better-looking means. Not that it issues one bit, however my aesthetics advised me to have it this manner.
The very first pipe in place on the bike. Lastly some actual progress!
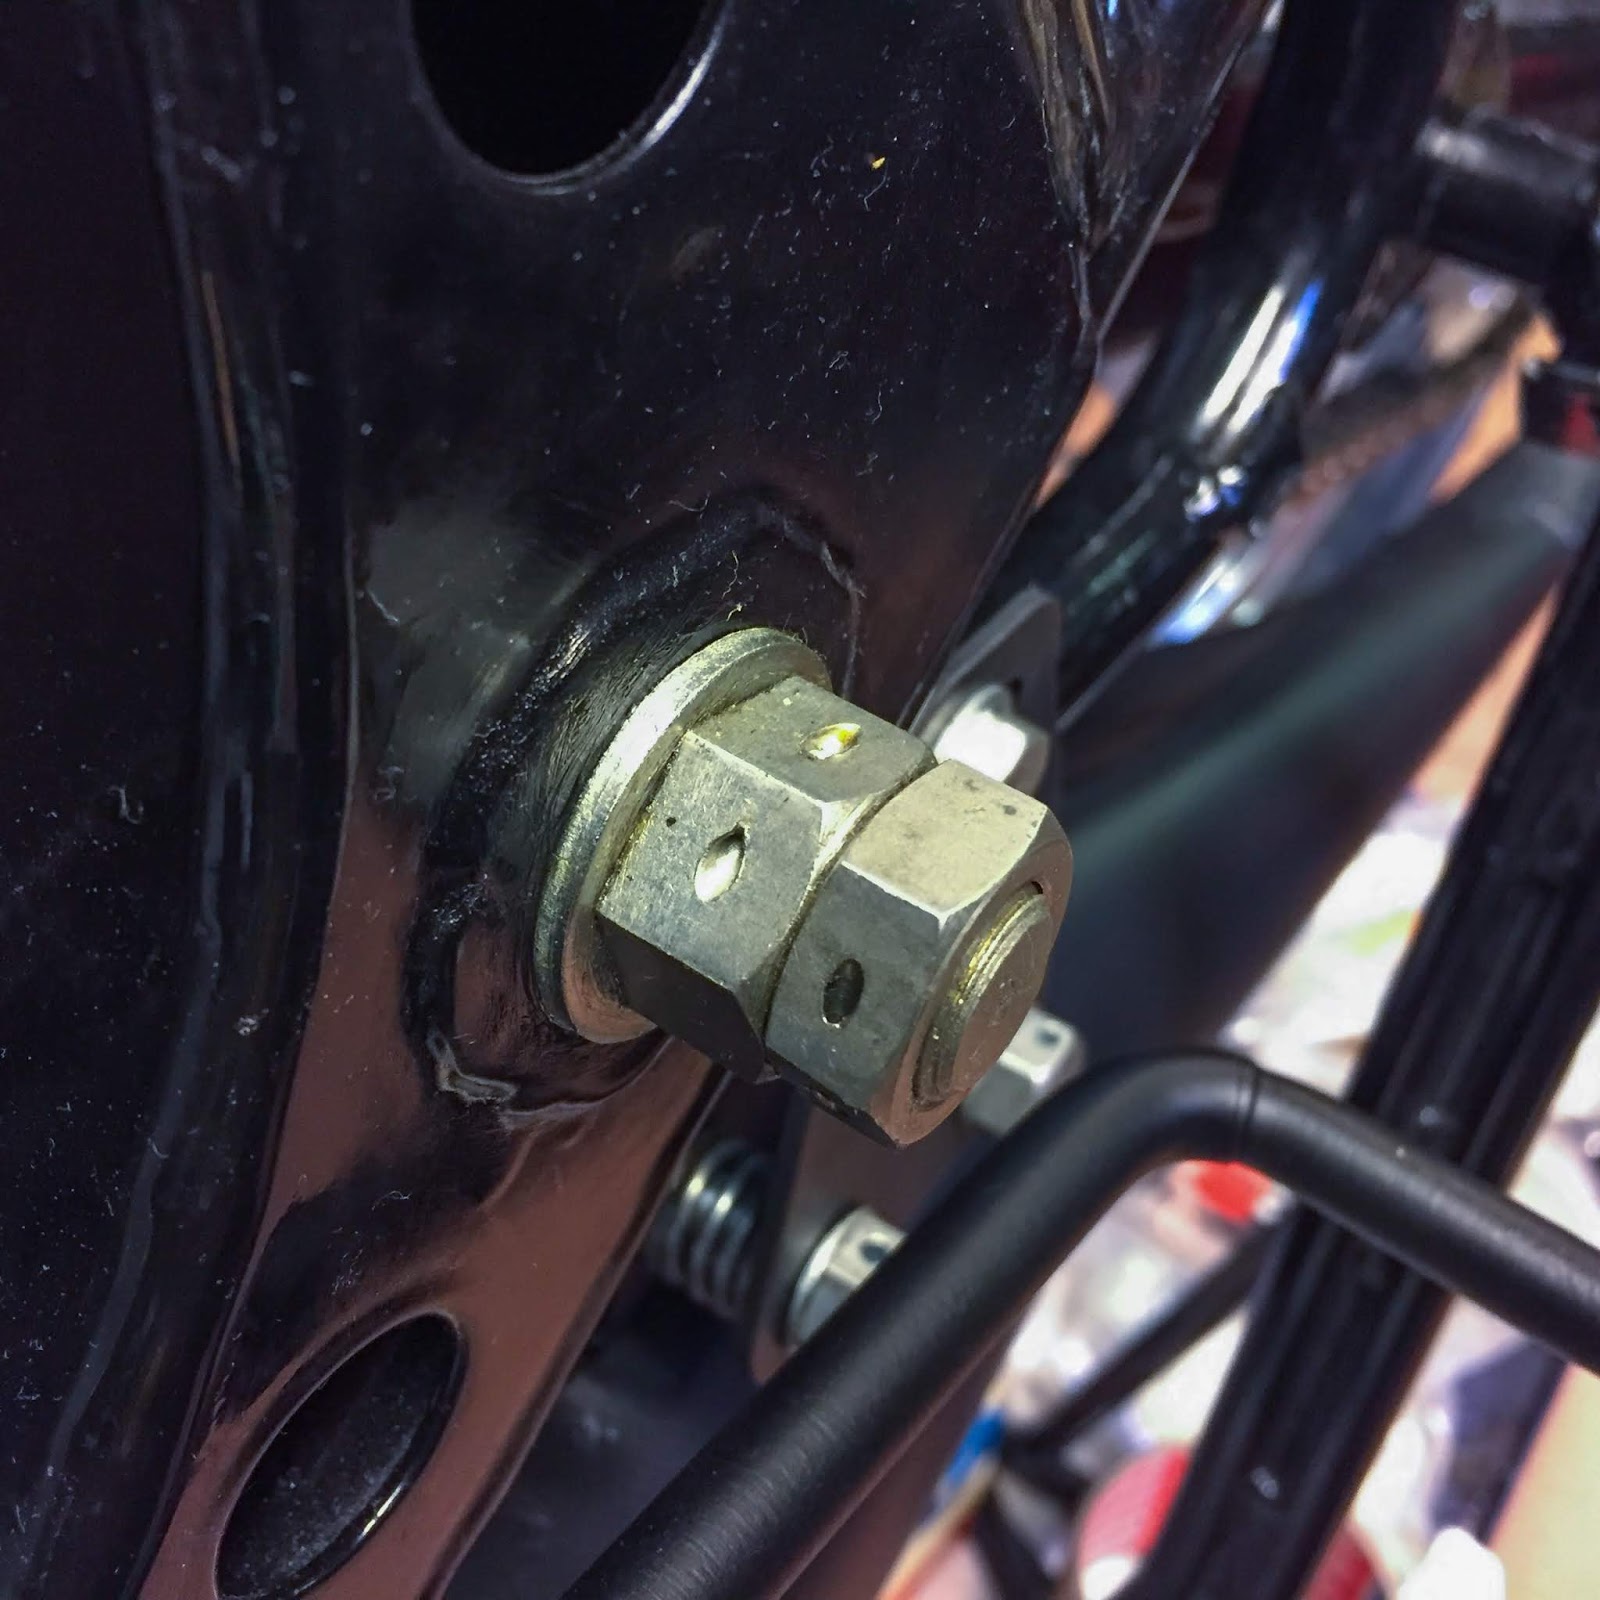
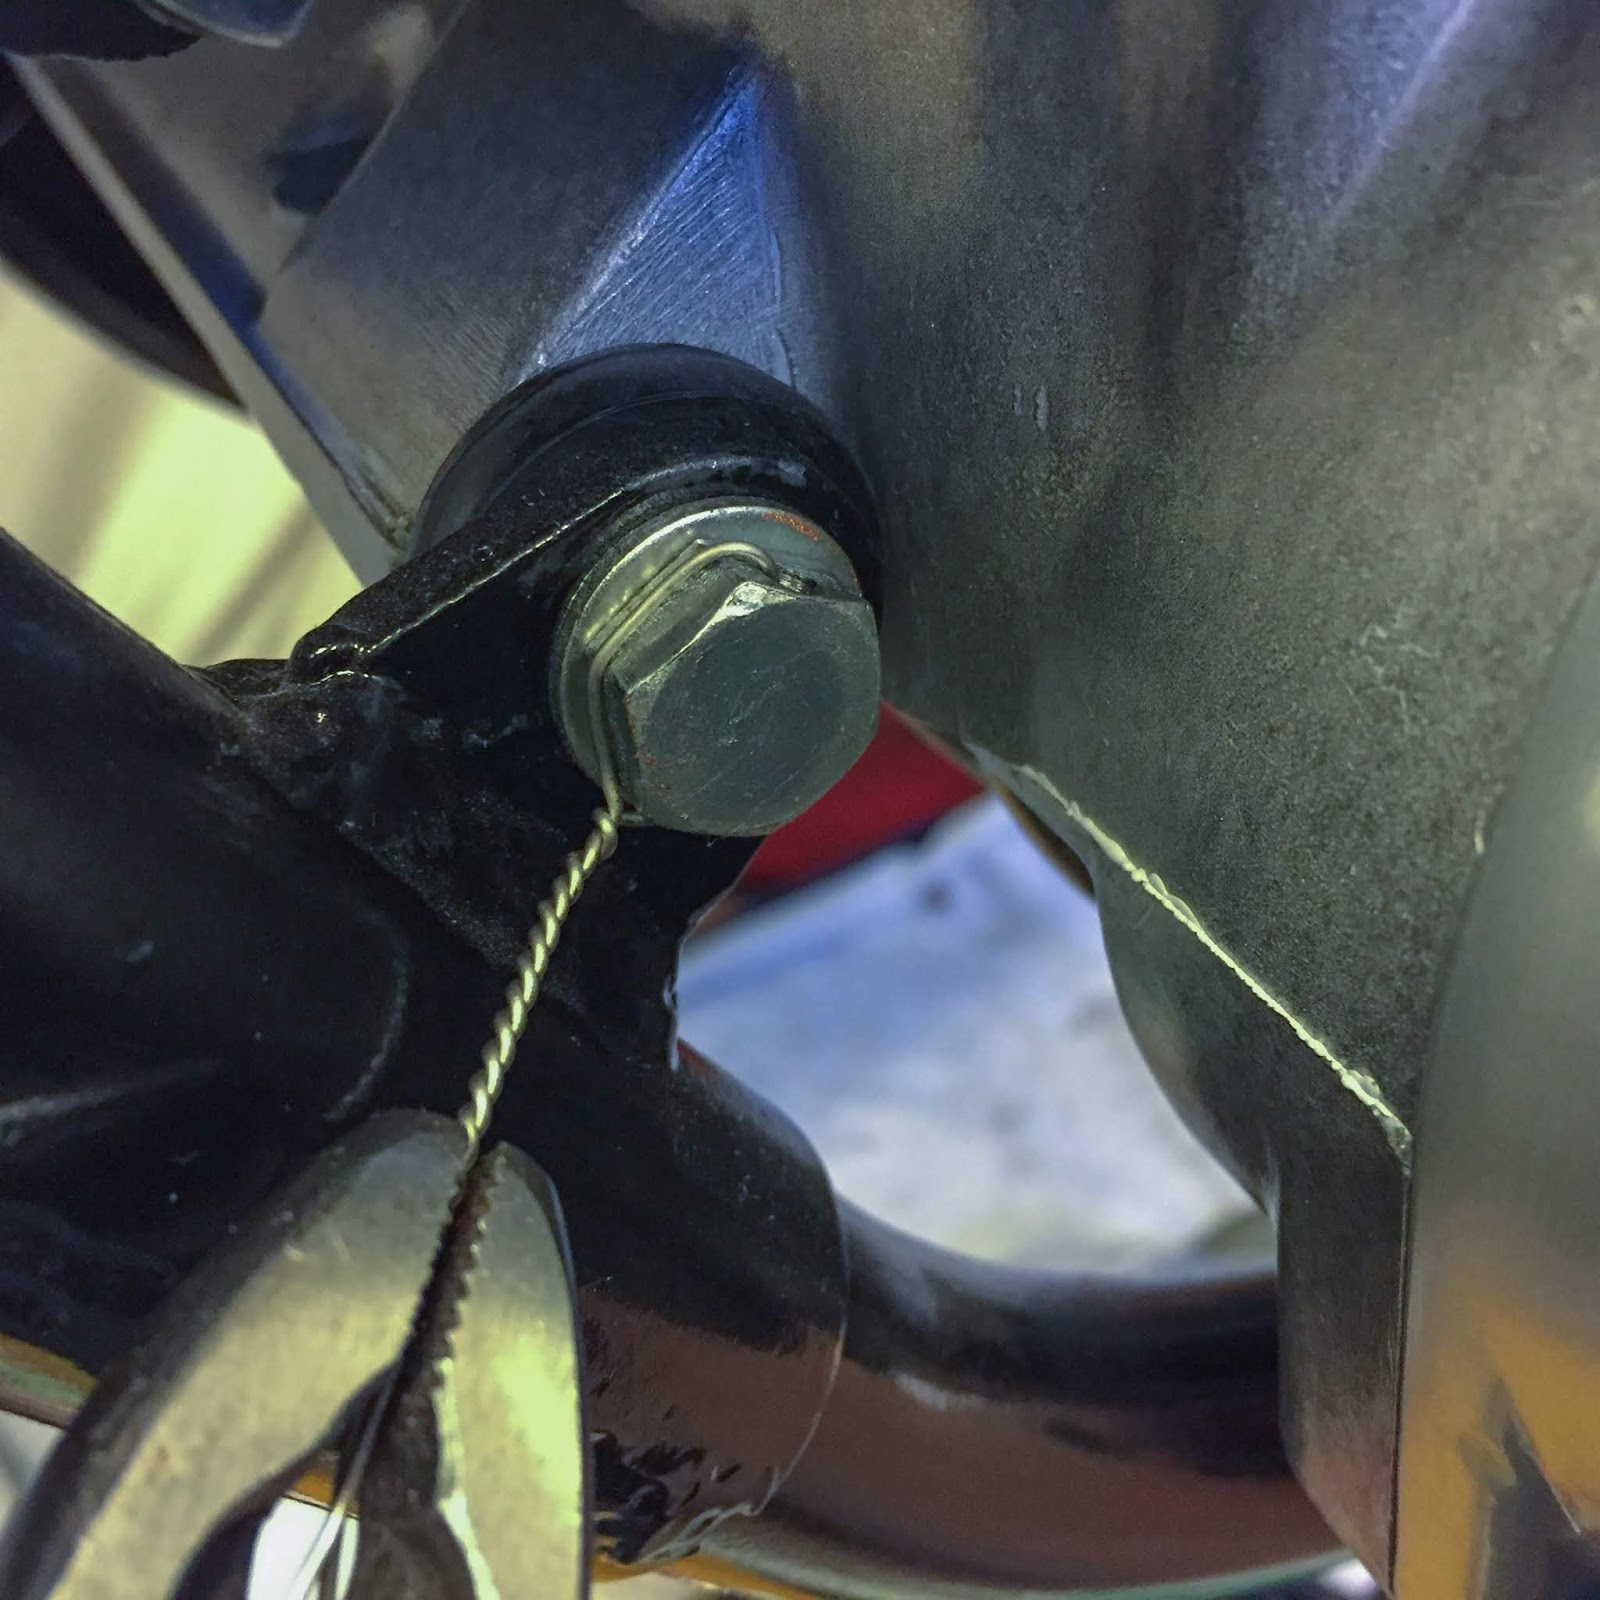
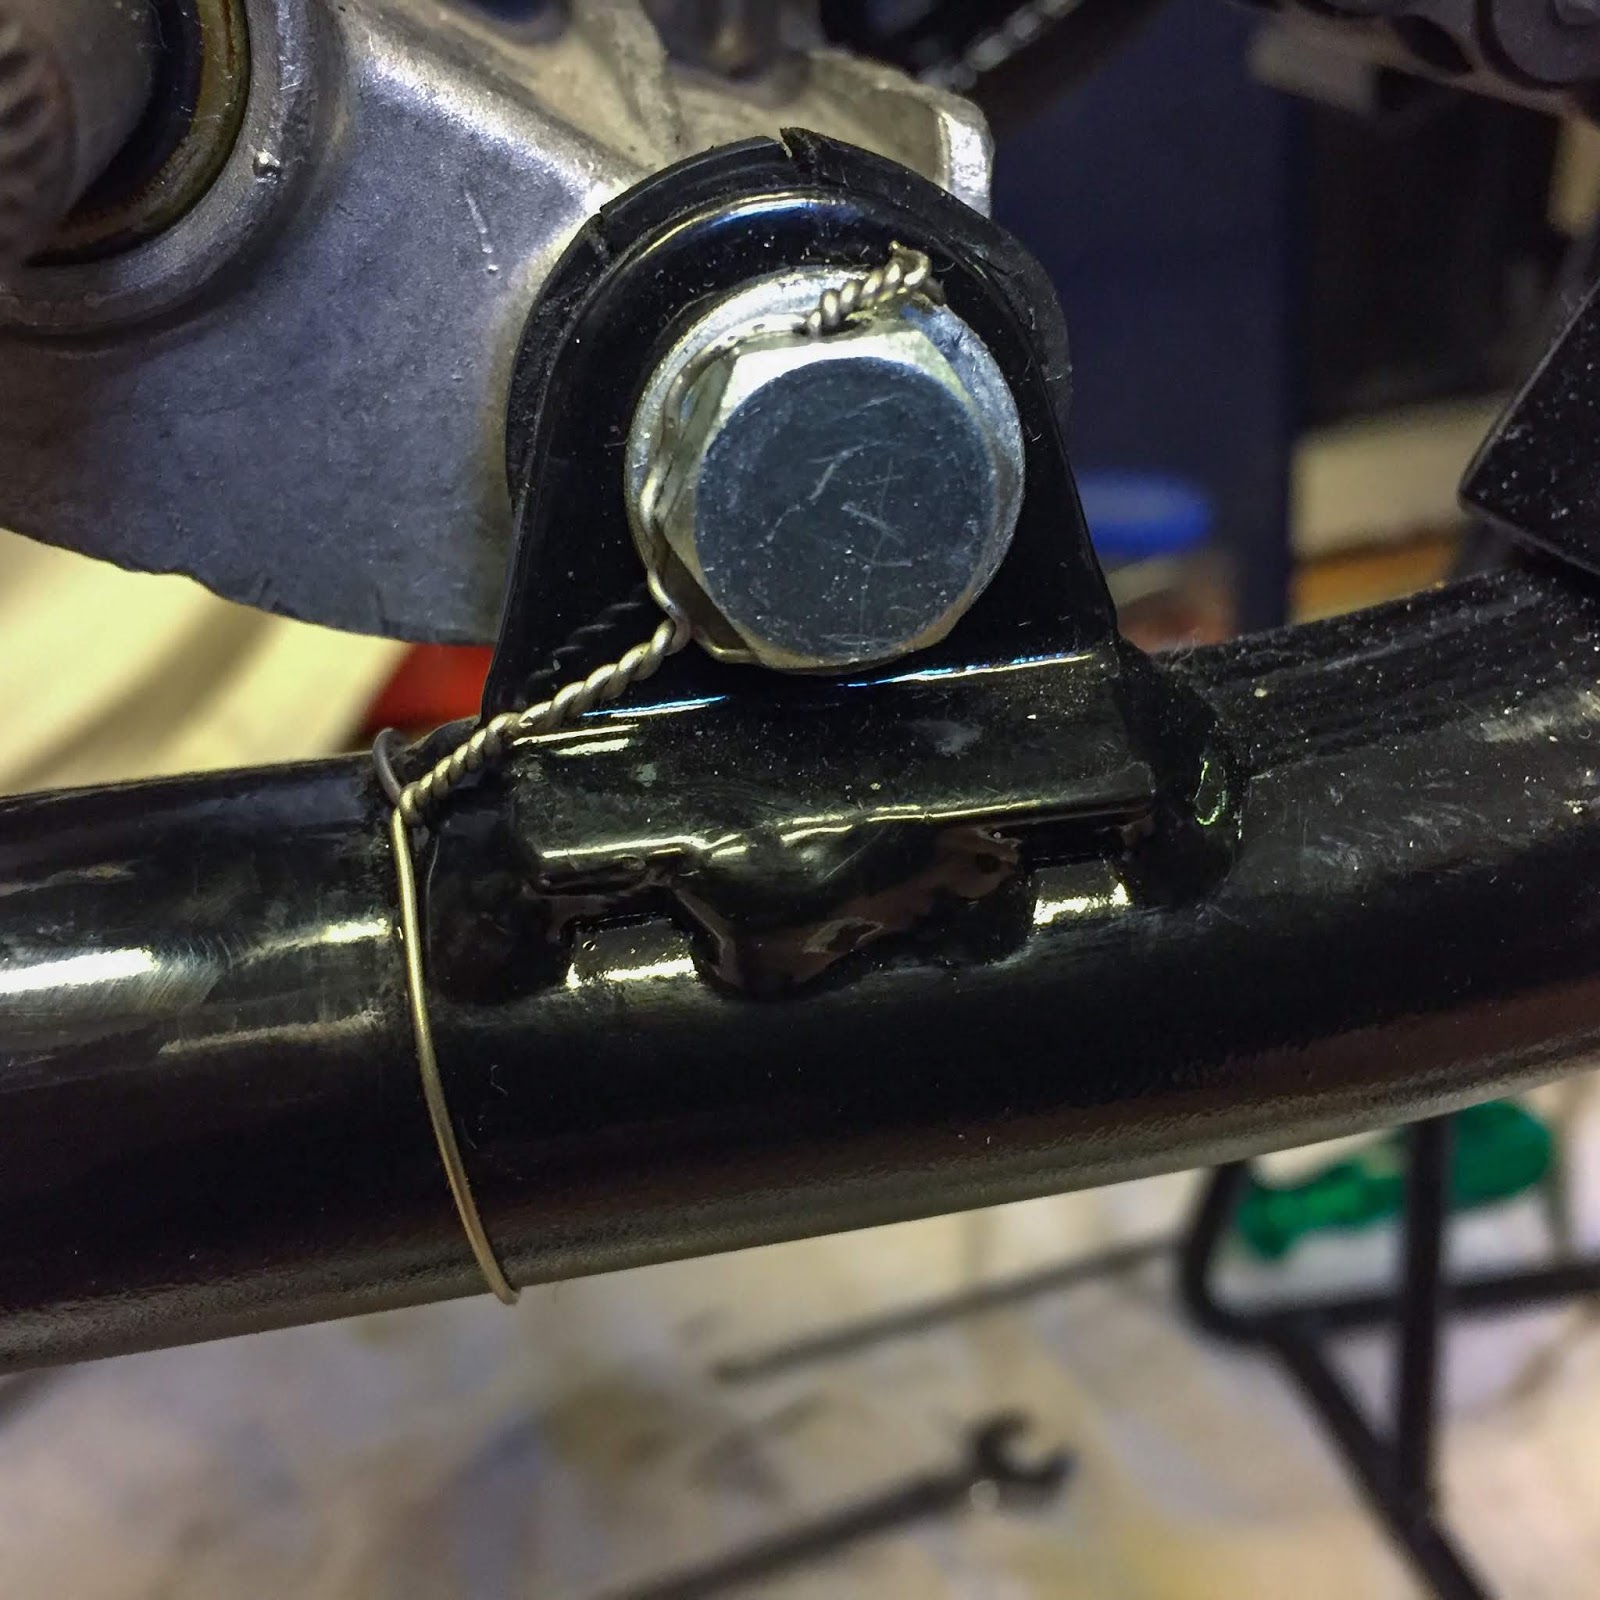
Why not take the chance to safe-tie the swing bolt and nuts whereas I´m at it…?
For some purpose they determined to go along with the double-nut-safety-technique on this one. I assume, and that´s additionally the best way I used it when tightening the swing arm, they needed a sure torque on the nut. The one option to correctly safe it with out pulling it tremendous tight to the body is to “lock” it with one other nut outdoors. They used the identical method on the rear fender nuts, bear in mind?

I´m fairly pleased with this one!
Secure-tie of double nuts to the body by use of just one string of wire.
First I secured the outer nut to the inside one, within the appropriate path and with adequate rigidity. After that I approximated the quantity of wire wanted for the lengthy spiral and bought it “Bang On”. The trick is to estimate how a lot shorter the spiral might be compared to the unwinded wires earlier than beginning to pull the software. And it’s worthwhile to have sufficient wire to go across the body and make one other winding to safe it.
Anyway, So proud of this one!

On the left right here you’ll be able to see I believed it via earlier than doing it. At the very least that´s what I want to assume.
I saved the safety-wire for the mounting bolt to the body for later. I KNOW I´ll must take away the pipe no less than two extra occasions earlier than I´m performed with it so higher not safe-tie it simply but. Over precautious? Possibly, perhaps not…
Two in place! I´m actually getting there now… Another to go. Probably the most troublesome.

The 2 pipes on the appropriate hand aspect of the bike grasp collectively in a fairly flimsy means. The left pipe, crossing over the opposite two, sits furthest to the appropriate on the bike and still have the bracket for the body welded to it. The inside (proper pipe on the cylinders) is barely connected to the cylinder and the retaining bracket on the stinger pipes on the rear.
I needed to grasp it quickly on the foot relaxation earlier than mounting the final pipe.
Prepared up entrance!
Fairly an ideal match right here. They’re freed from one another and fix properly to the cylinders. The final spring might be simple sufficient to suit once I discover it!
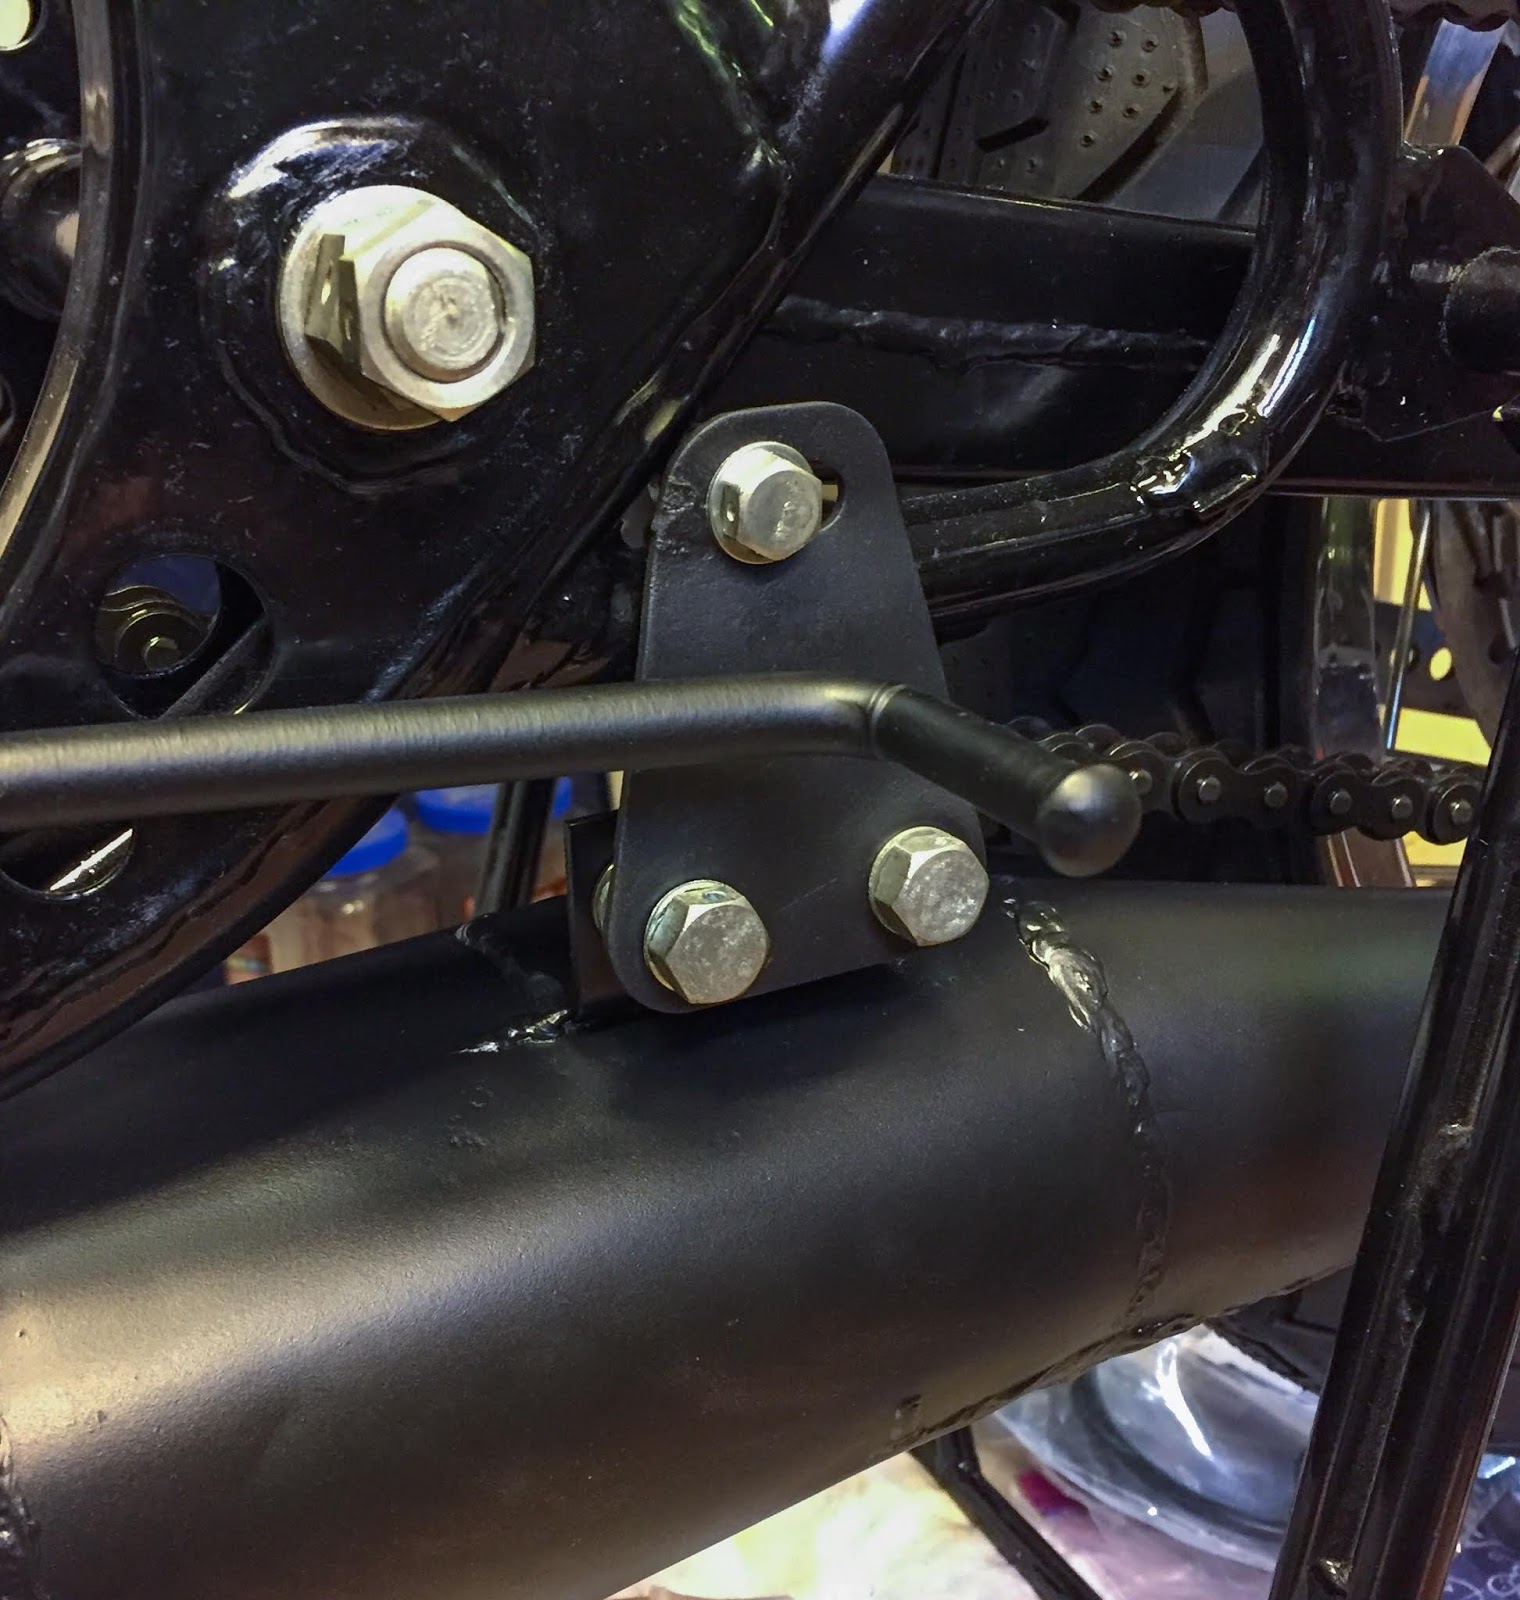
A considerably tighter match on the rear brake pedal and the appropriate muffler mounting bracket.
Turning that bracket round was good! Now the bolt may enter the body mounting simply sufficient with out pushing the pipe out of the spigot up entrance.

Right here on the rear is the likelihood to regulate the place of the inside pipe in relation to the outer ones. Relying on the way you twist the bracket you progress the center pipe in-, or outwards. This can be very troublesome to suit these “fats” pipes with out having them contact one another in any respect beneath the engione. We´ll see how properly I succeeded when it’s time to begin it up.

At the very least they’re again on. Instantly it appears to be like much more like a racing bike.
I´m tremendous blissful the pipes have been there in any respect. And now, as I see them again on right here, all of the efforts in restoring them have been value it!
I believe they give the impression of being the half right here. May have been used for a few races, bought cleaned up and remounted on the bike. A small, however important victory.
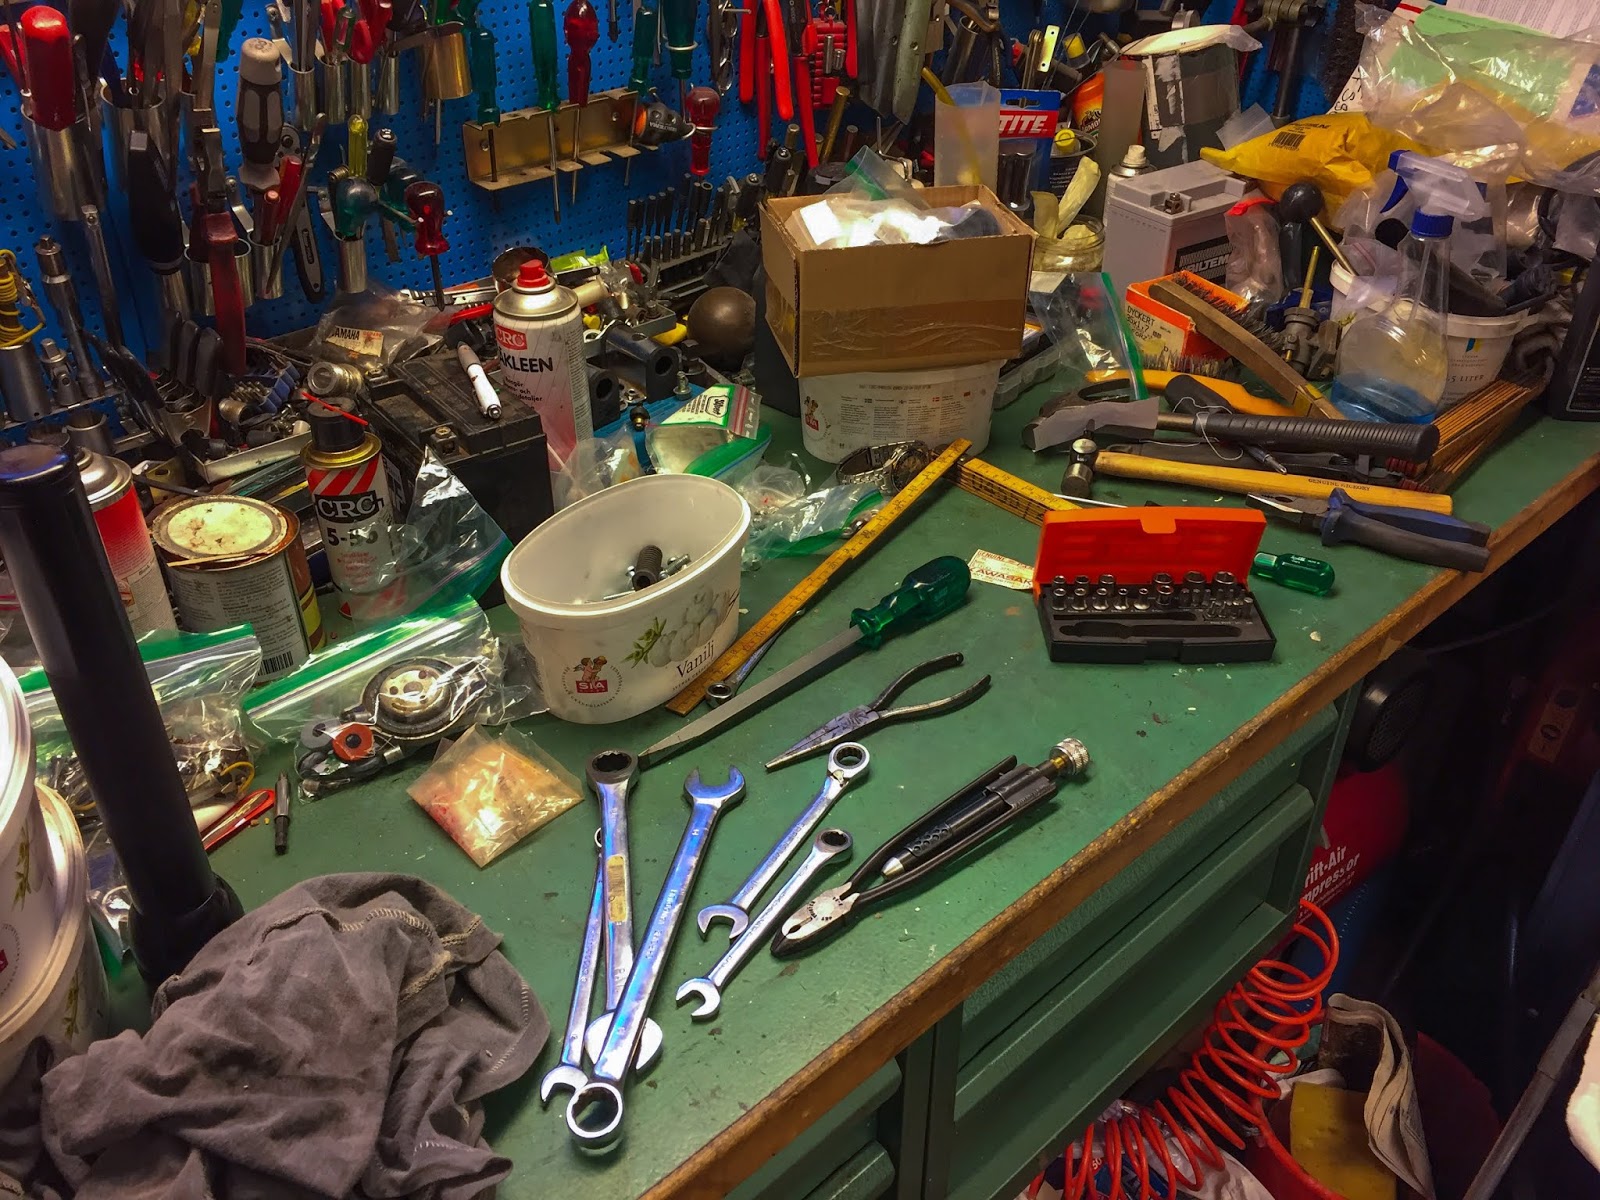
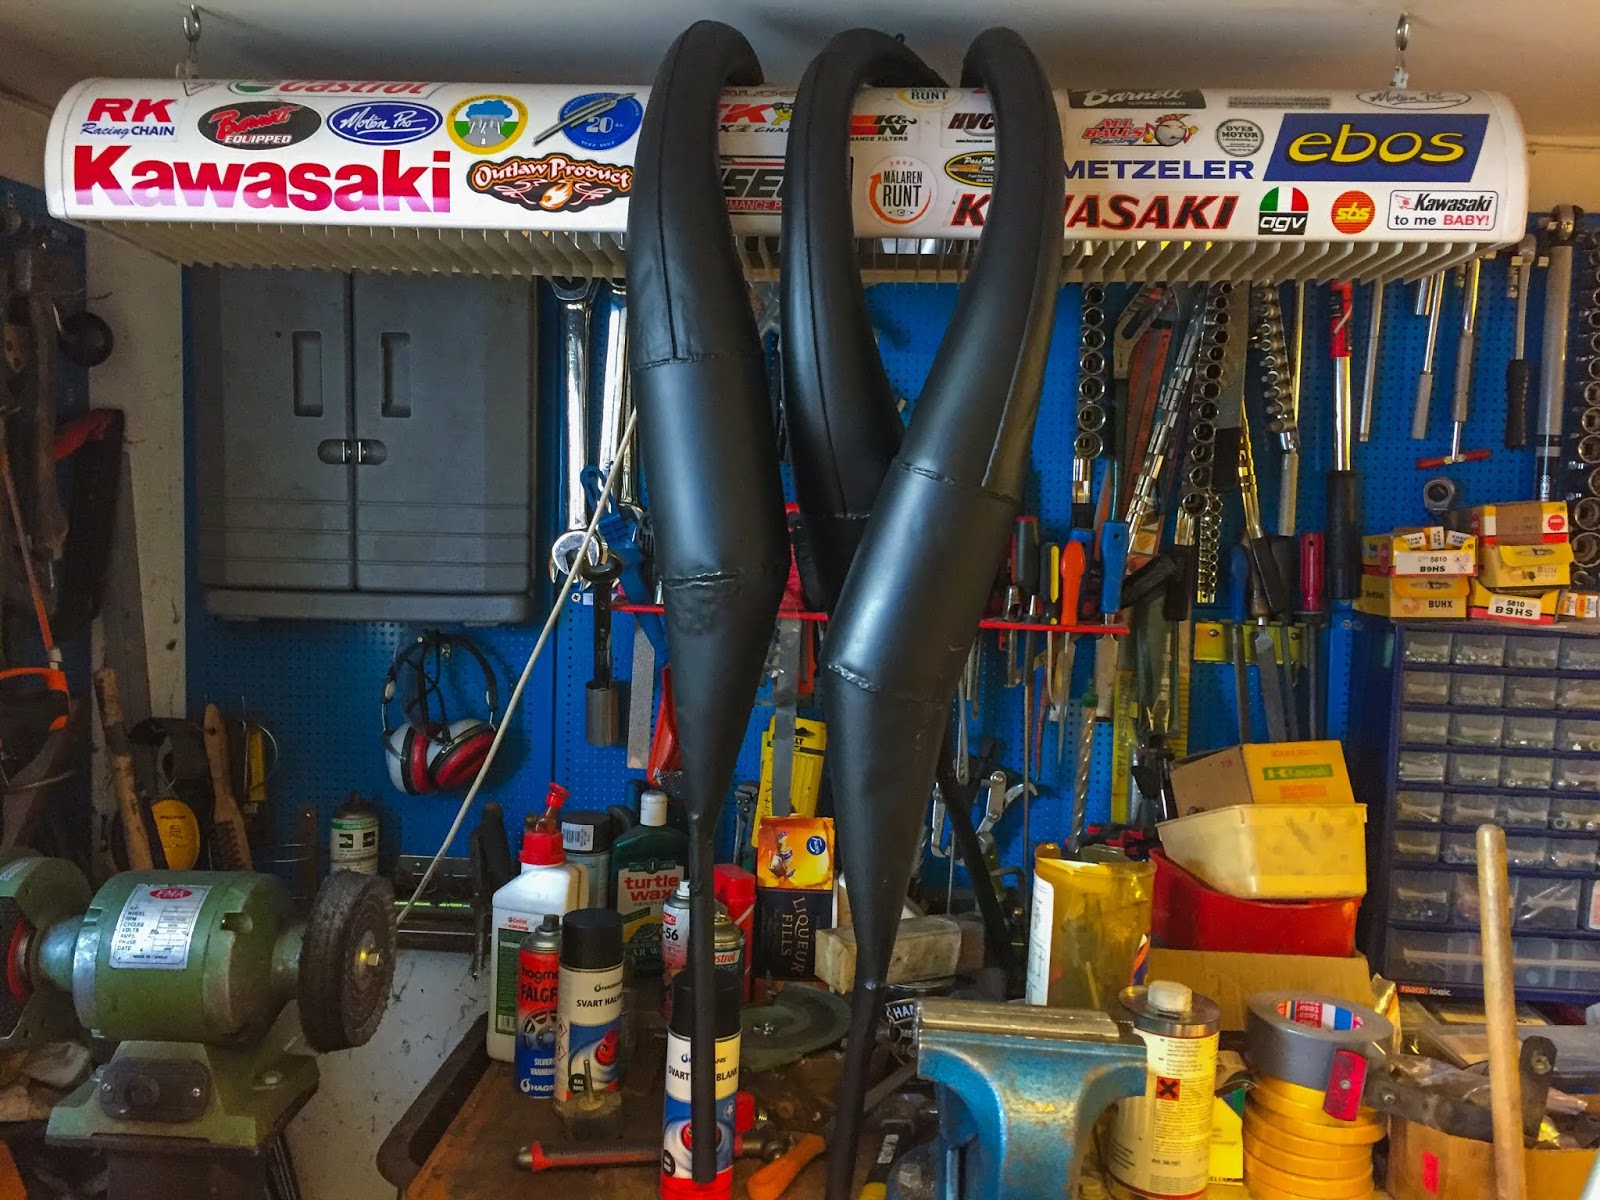
Working this intensely on the bike makes my very properly cleaned and very properly geared up storage (properly, perhaps not so….) seem like a conflict zone. Imagine it or not, however issues ARE organized in some mysterious means. I do know through which of the plastic bowls to search out screws and many others and the piles are made in some type of chronological order. The longer time that has handed since having one thing in my hand, the additional down I’ve to look…
That great safe-tying software is true on the fringe of the bench. A brand new favourite!
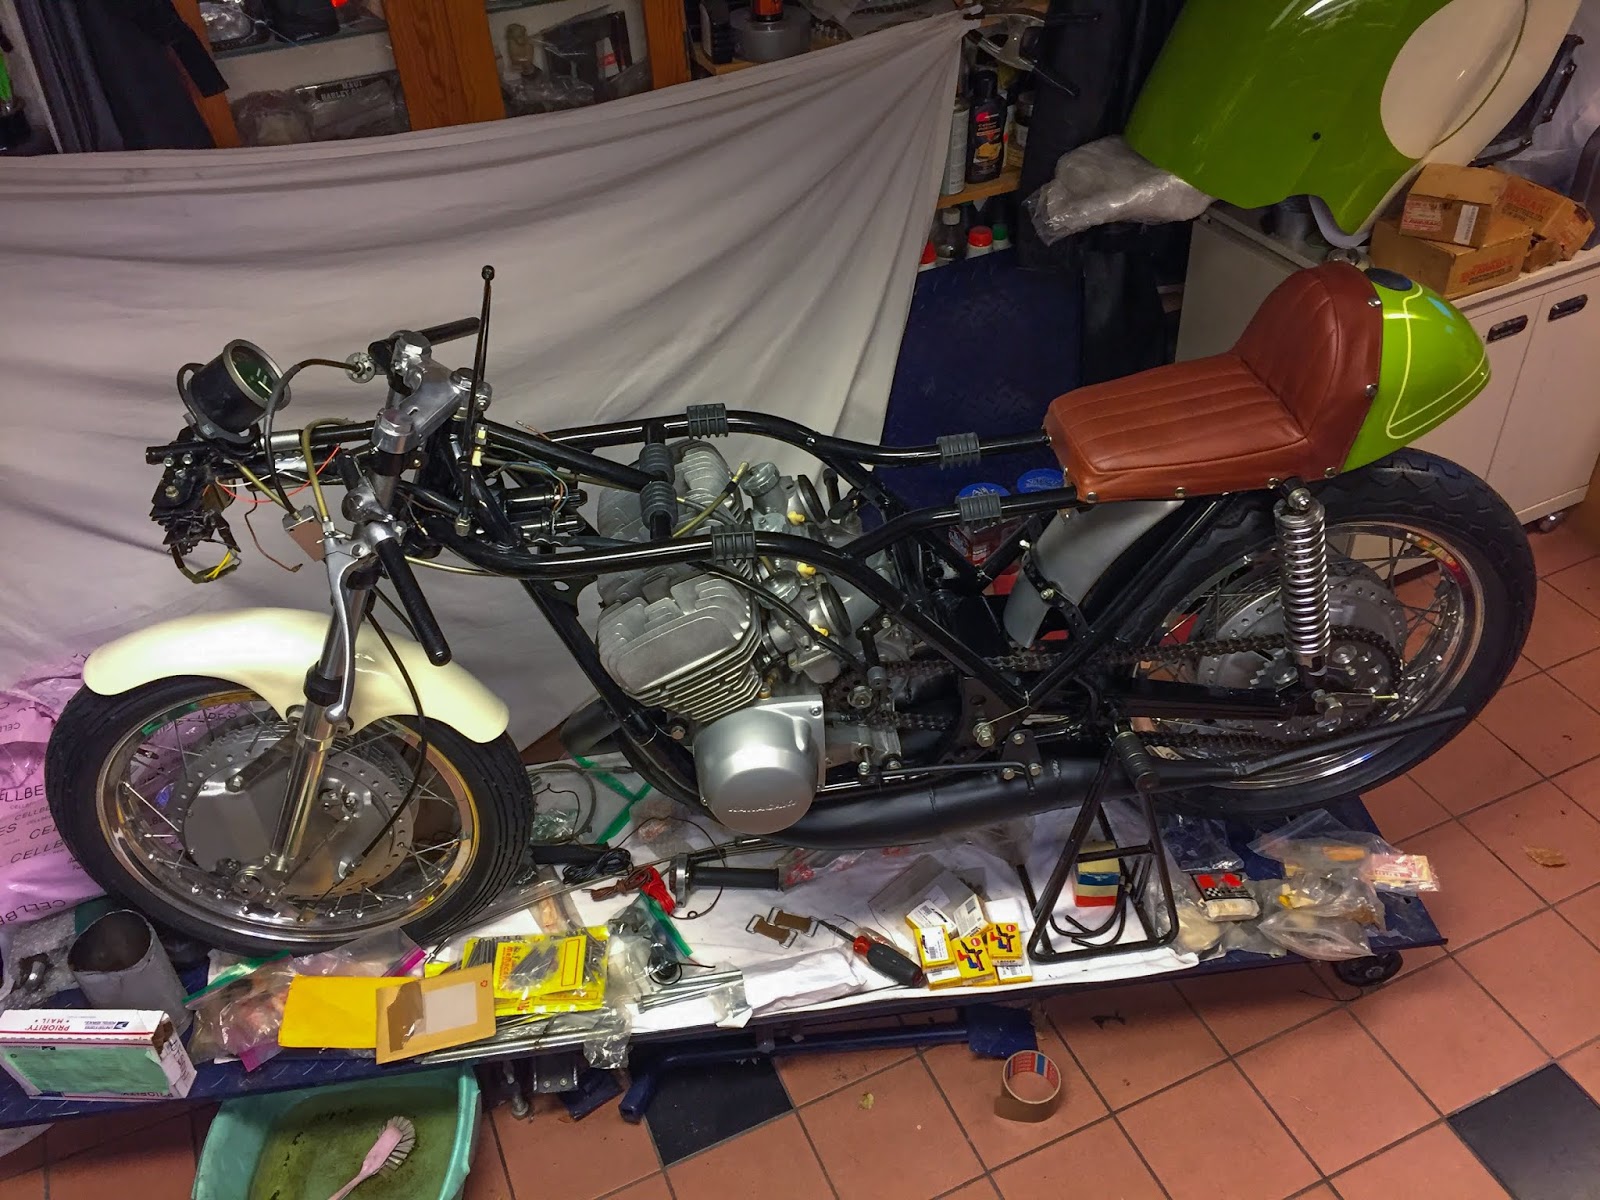
The final image for immediately exhibits the bike and its situation proper now. Getting there!
Subsequent up is the restoration of {the electrical} system and getting the cables again on. I ought to have performed that way back, however getting the pipes restored impressed me to get them again on the bike.
Electrics is one thing I´m nervous to do. Make a mistake and you may simply burn a element or two within the course of. That’s one thing that simply can´t occur! Higher be very cautious and double examine every thing time and again.
Extra about that subsequent time….
Tada!
/Per
[ad_2]