
[ad_1]
It’s my fiftieth put up within the weblog!
Due to you all for studying and I certain hope this one will probably be as fascinating because the older ones.
Get pleasure from!
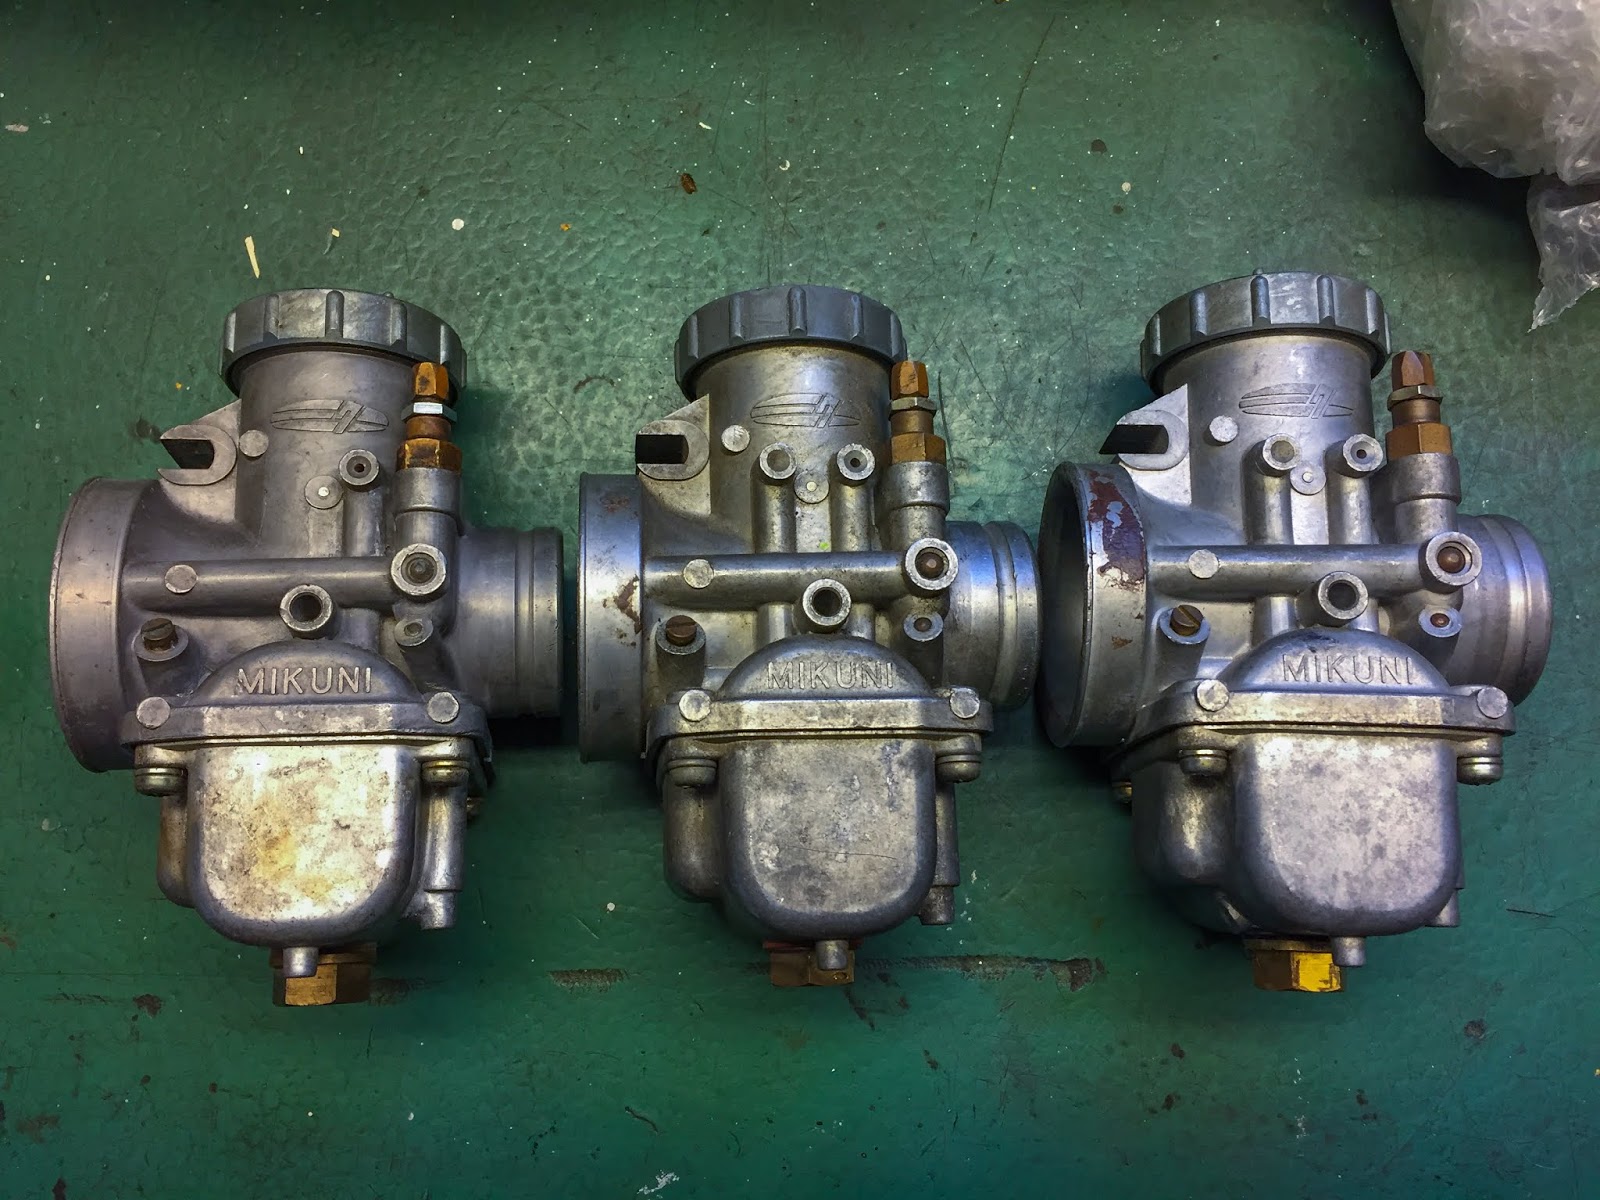
I lastly had the power to get right down to enterprise with the carburetors and getting them cleaned up and refurbished and on to the bike. I did a halfhearted attempt to clear certainly one of them some time in the past however the best way the engine appears now made that effort very inadequate. I needed to do all of it once more, way more totally, and do it to all three this time.
I´m having issues with the bike getting too good… I need it to look used and raced with. OK, the carbs received´t get that ruined after 4-5 races, however a couple of stains and a few imperfections simply add to the authenticity of my restoration. Tough selections when you will get every little thing trying model, spanking new, simpler and with much less effort!
Keep in mind I rushed forward and acquired an additional set of carbs? Yeah, too anticipating my very own good at occasions. Anyway, they arrived, however not as secure as I’d have appreciated…

However first, as I promised final time… An image of my stash of POL sharpening compound. Yeah it´ll final for some time. 7 tubes and 2-3 odd Autosol polish tubes as properly. I ought to handle. 🙂
And right here´s the set of carbs from my pal in Belgium.
I received´t be needing these in any case, and that’s really fairly good, since they aren´t an entire set and certainly one of them obtained broken throughout transportation.
The originals are stamped R, L, and C on the floor of the air consumption with the intention to inform them aside. My originals are certainly one of every, these weren’t, 2 L:s and one R I believe. In addition they lack the cable adjusters on high of the lids, not an enormous deal since they’re available on eBay.
Too unhealthy, certainly one of them obtained broken and suffered a damaged gas inlet within the field throughout delivery. I´ll attempt to repair that over time, however for now they’re tucked away…

Lets begin engaged on those I will probably be utilizing. Time to get soiled!
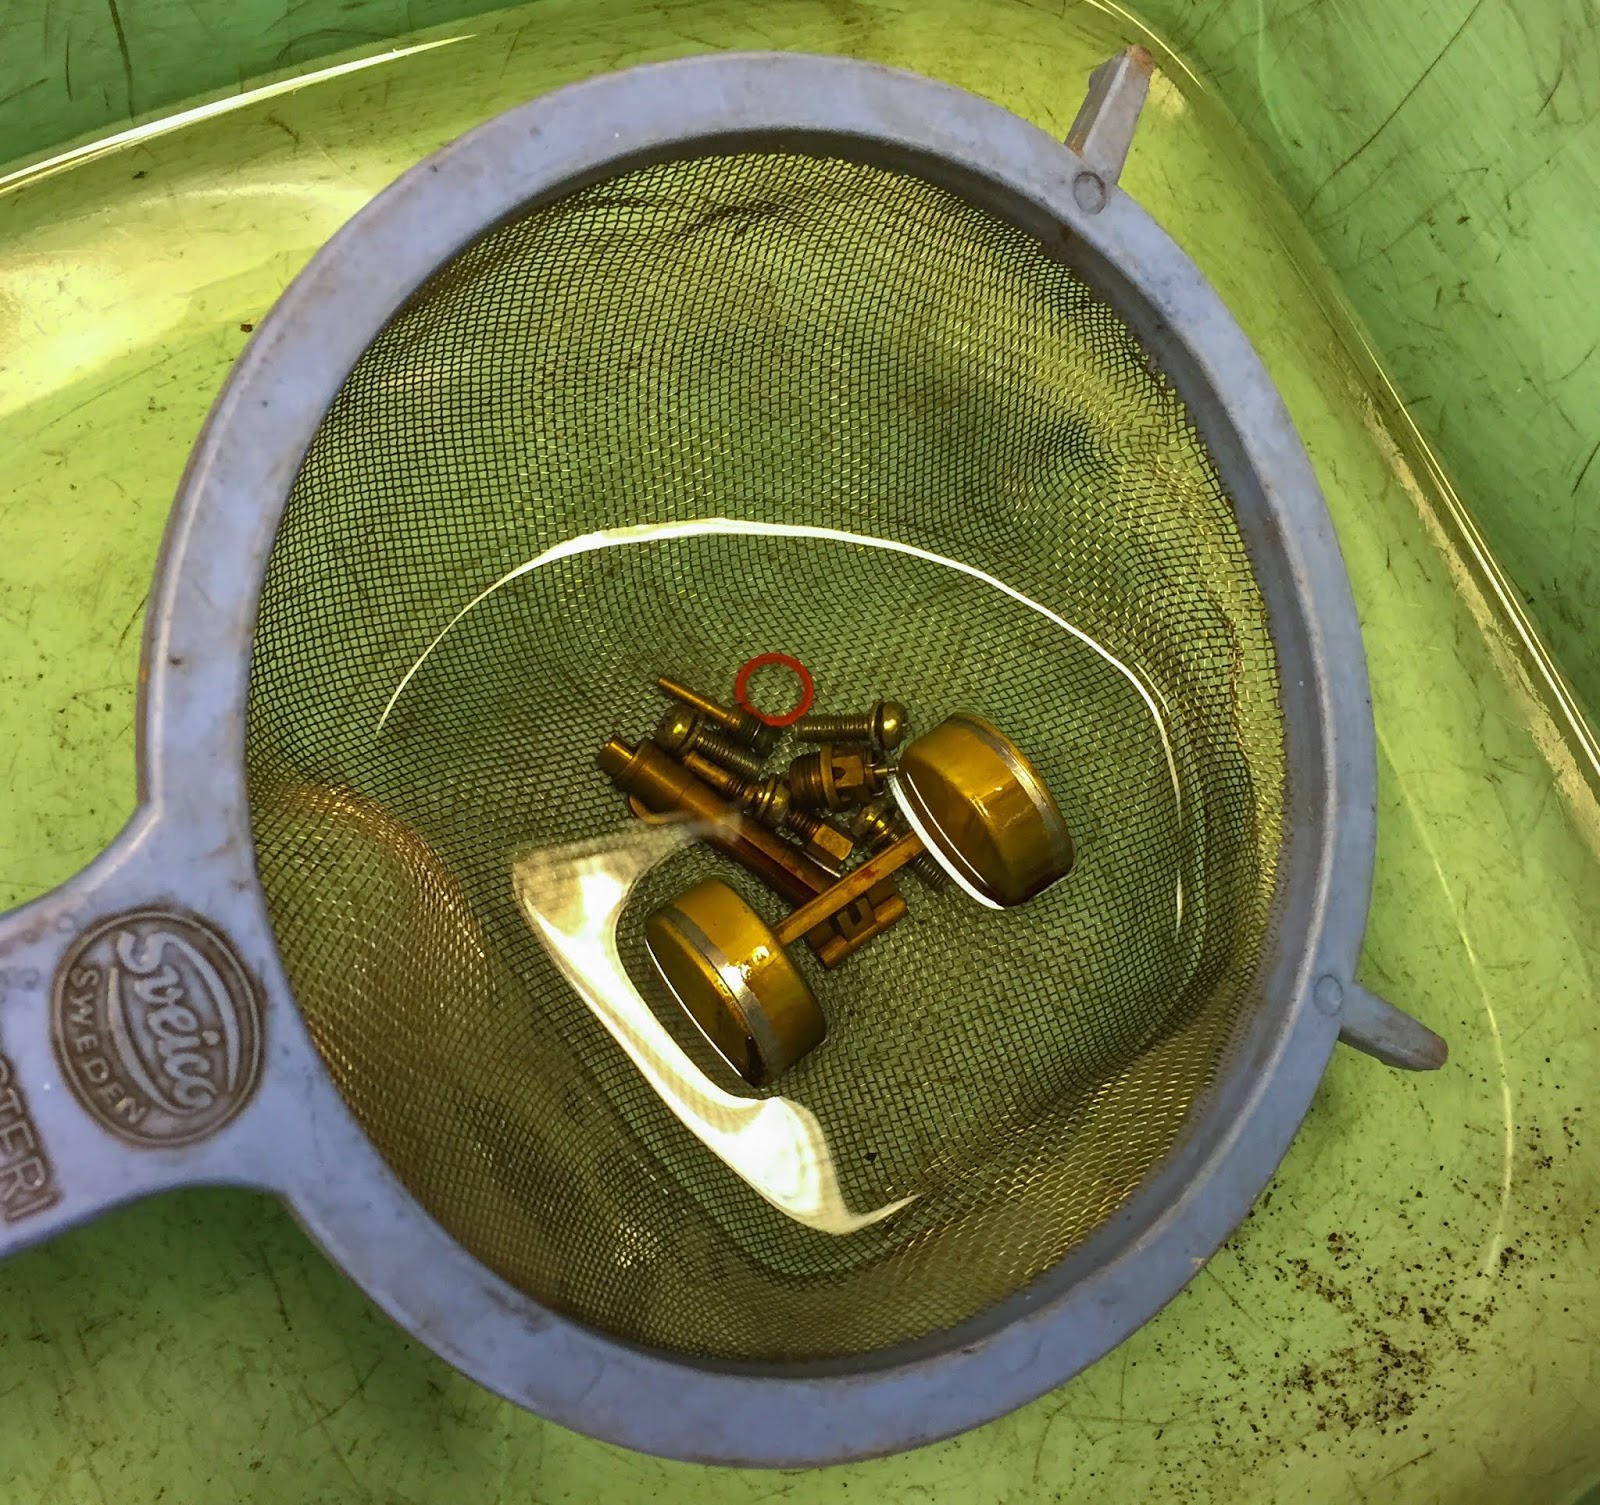
I disassembled all three of them and saved each carb in its personal plastic jar. I wished to maintain them collectively so all components belonging to a selected carburetor will get again to exactly that one. Most necessary with the throttle slides which may have developed some put on that might make them not match completely in one other carb physique. I Could be superstitious, however I choose to not take any probabilities.
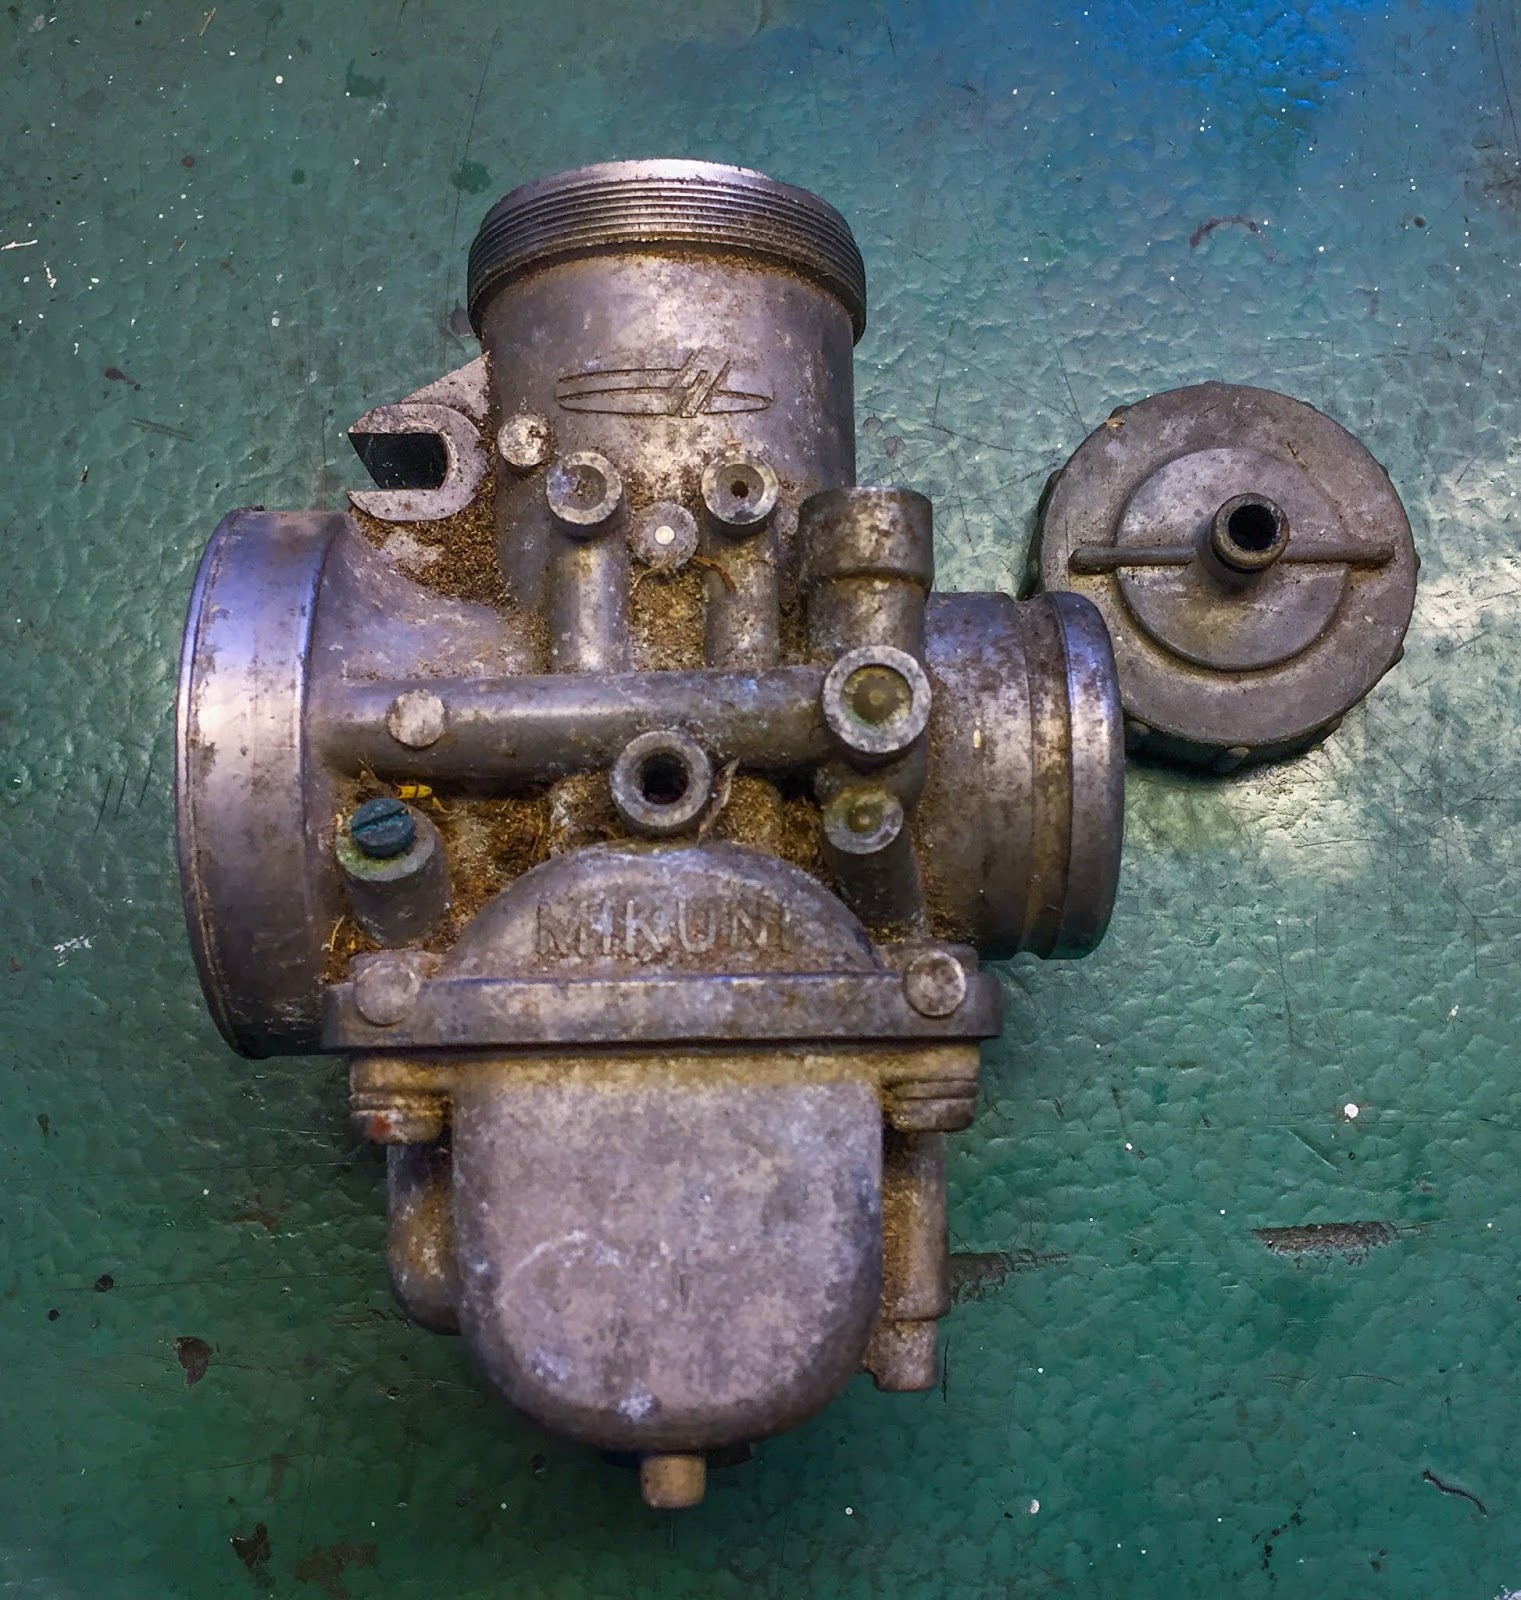
Numerous grime and filth on the surface and much more on the within. Take a look at the colour of that air screw. Fairly greenish. I consider it´s referred to as “verdigris” in English. The colour copper and brass get when uncovered to the weather. It appears good, however not right here on my racing carb…
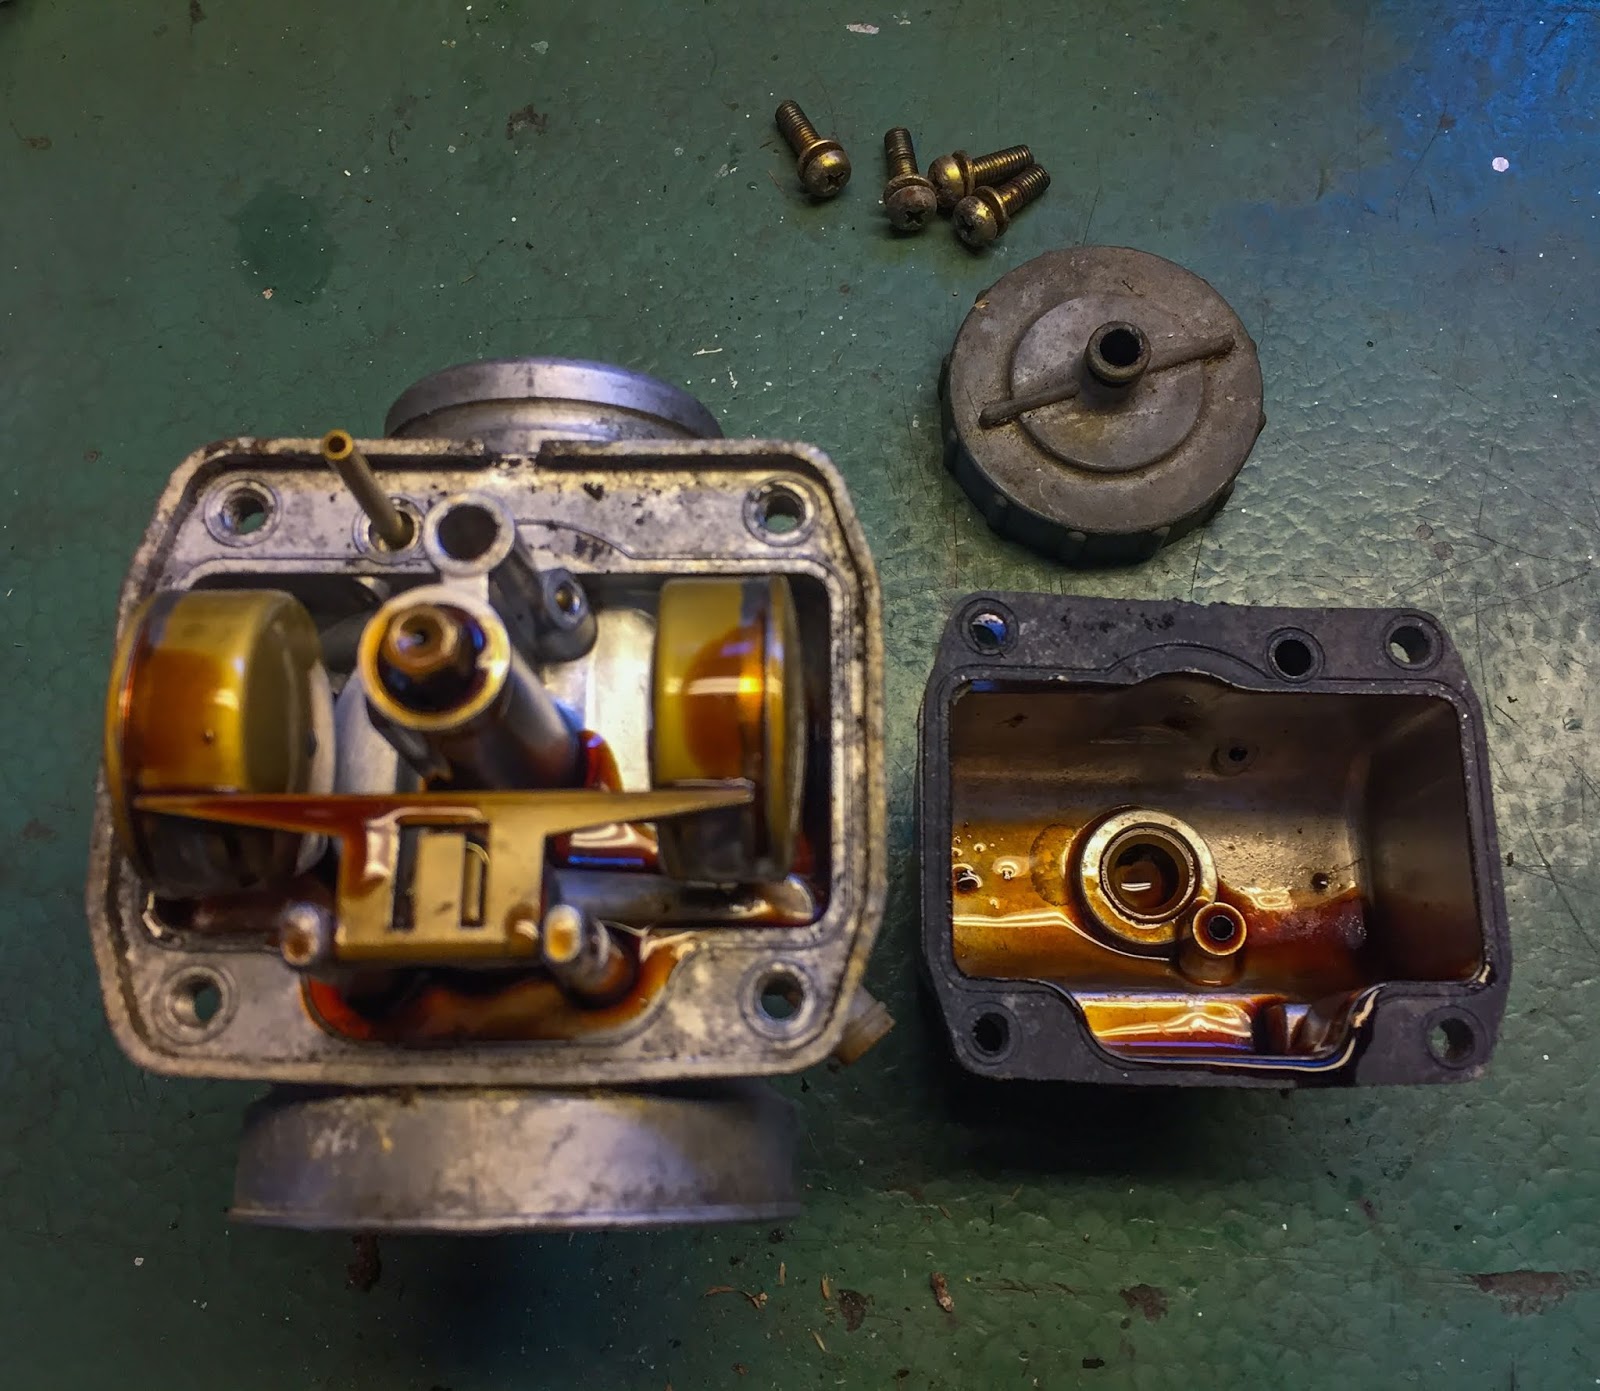
And this wasn´t too unhealthy, actually. Nonetheless oily and sticky. Much better than crystallized gas and actually gummy two stroke oil. This was really a straightforward clear. Yay!
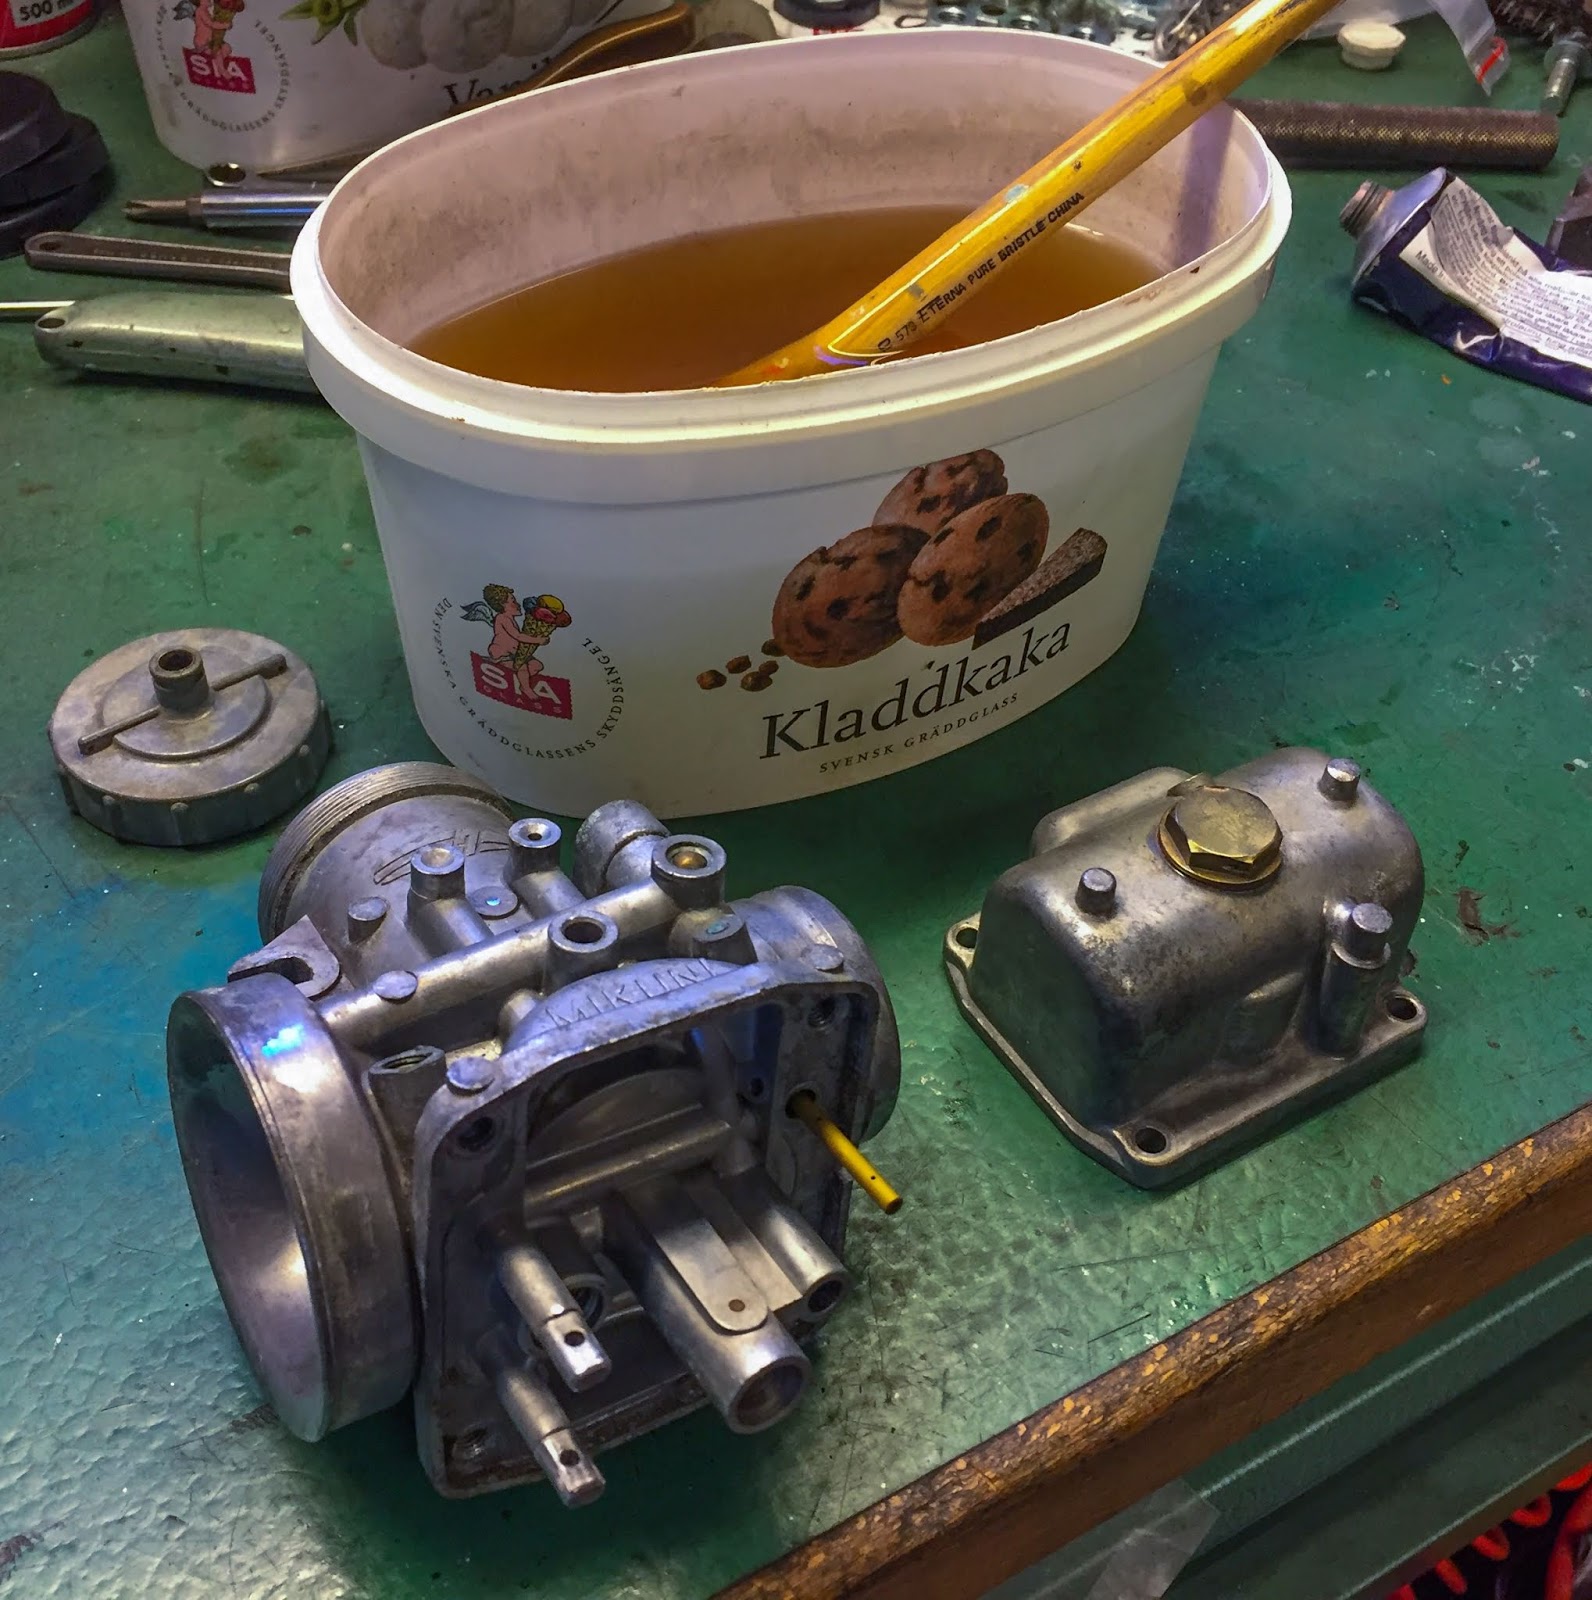
I may additionally save a few the gaskets. They’ll enter my spare components field, since I obtained new ones to place within the carbs when that point comes. I additionally thought it was actual unusual to see totally different sizes of major jets in all of the carbs. Odd, however the resolution to that thriller turned up later…
The primary a part of the cleansing course of is eliminating all grease, filth and small particles on all components and surfaces.
white spirit, Lacknafta, in Swedish, does the trick simply nice. I simply let the components soak in it for some time, use a tender brush to scrub filth and grease off after which rinse in a number of actually sizzling water.

The larger components get to put within the solvent in a single day. Watch out to not put rubber components in it! They have a tendency to get enlarged and ruined if left too lengthy in white spirit. Rubber components are cleaned with cleaning soap and sizzling water after which handled both with rubber grease or my different favourite, Armour All.
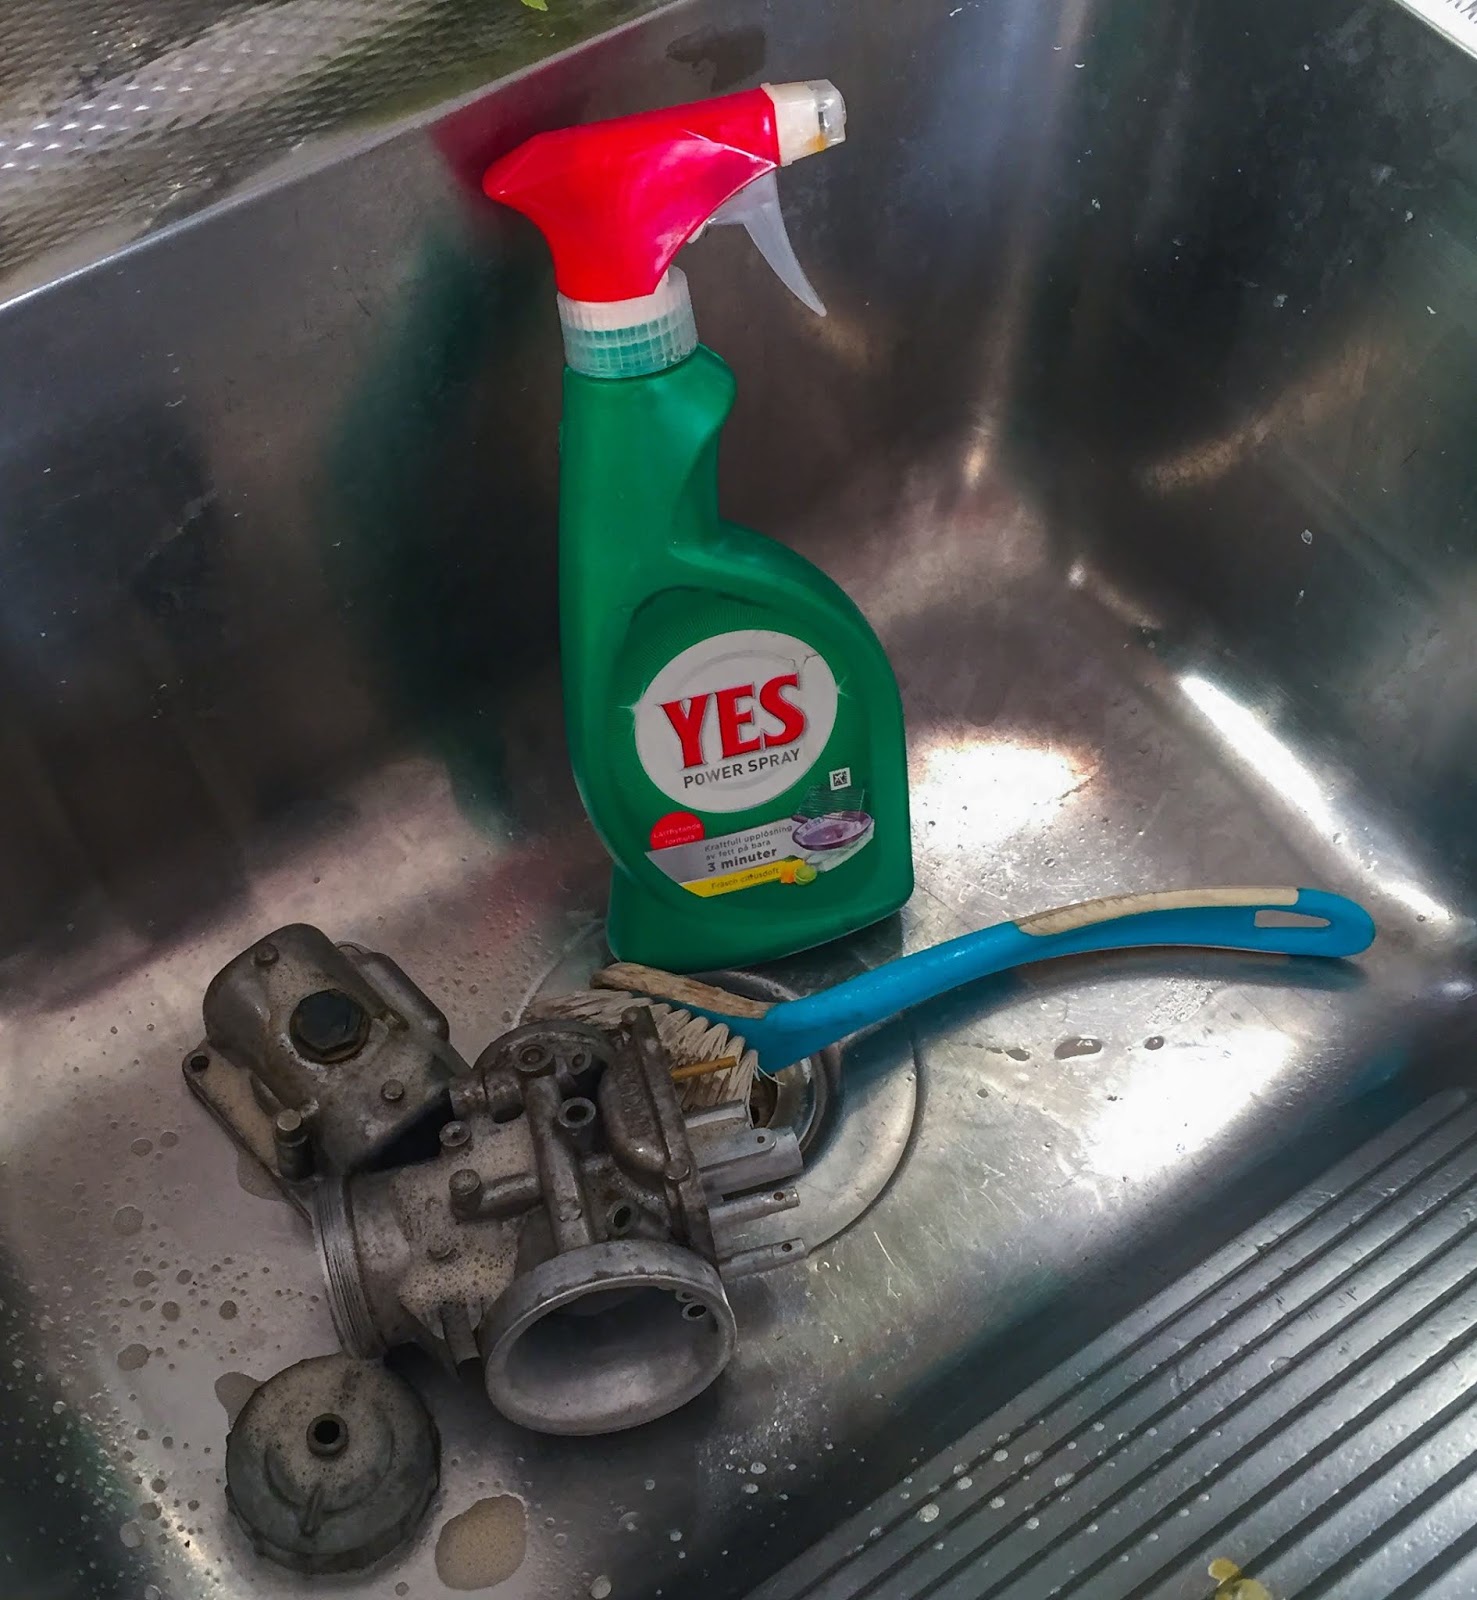
As a result of the subsequent step within the cleansing course of could be very delicate to grease of any type on the components I choose an additional stage right here. Sure Powerspray is a robust solvent utilized in each family right here in Sweden to scrub pans and skillets. Tremendous robust additionally on white spirit and different grease left overs. It leaves a floor clear of oil and grease AND the white spirit. That´s wanted for the subsequent step. I´m Fortunate I can do this type of cleansing when my darling spouse is at work. That is a part of our laundry room within the basement of our home. Yeah, I cleaned it totally when i used to be finished!

And when all three are pre cleaned this fashion and sit of their respective jar it’s time to transfer on to the heavy responsibility stuff.

I do know it’s dangerous and a bit harmful, however the outcomes are well worth the threat. I exploit an answer of 30% Phosphoric acid and sizzling water to get the floor of my components as new. The acid removes corrosion and pigmentation adjustments within the aluminium and likewise penetrates deep inside all channels, crevices, nooks and crannies of the carb our bodies and components.
It’s of important significance to maintain transferring the components on a regular basis within the acid tub. 30 sec of laying nonetheless can produce black marks within the floor which are very arduous to take away. I let the components lay within the acid for a most of 2-3 minutes and consistently transfer them round within the acid. In the event you depart them longer the chance for hydrogen embrittlement will increase drastically and also you don´t need that in your treasured carbs. I´ve been planning to get an extremely sonic cleansing machine for ages, however have by no means gotten round to do it. This technique works as properly, simply means an entire lot extra guide work.
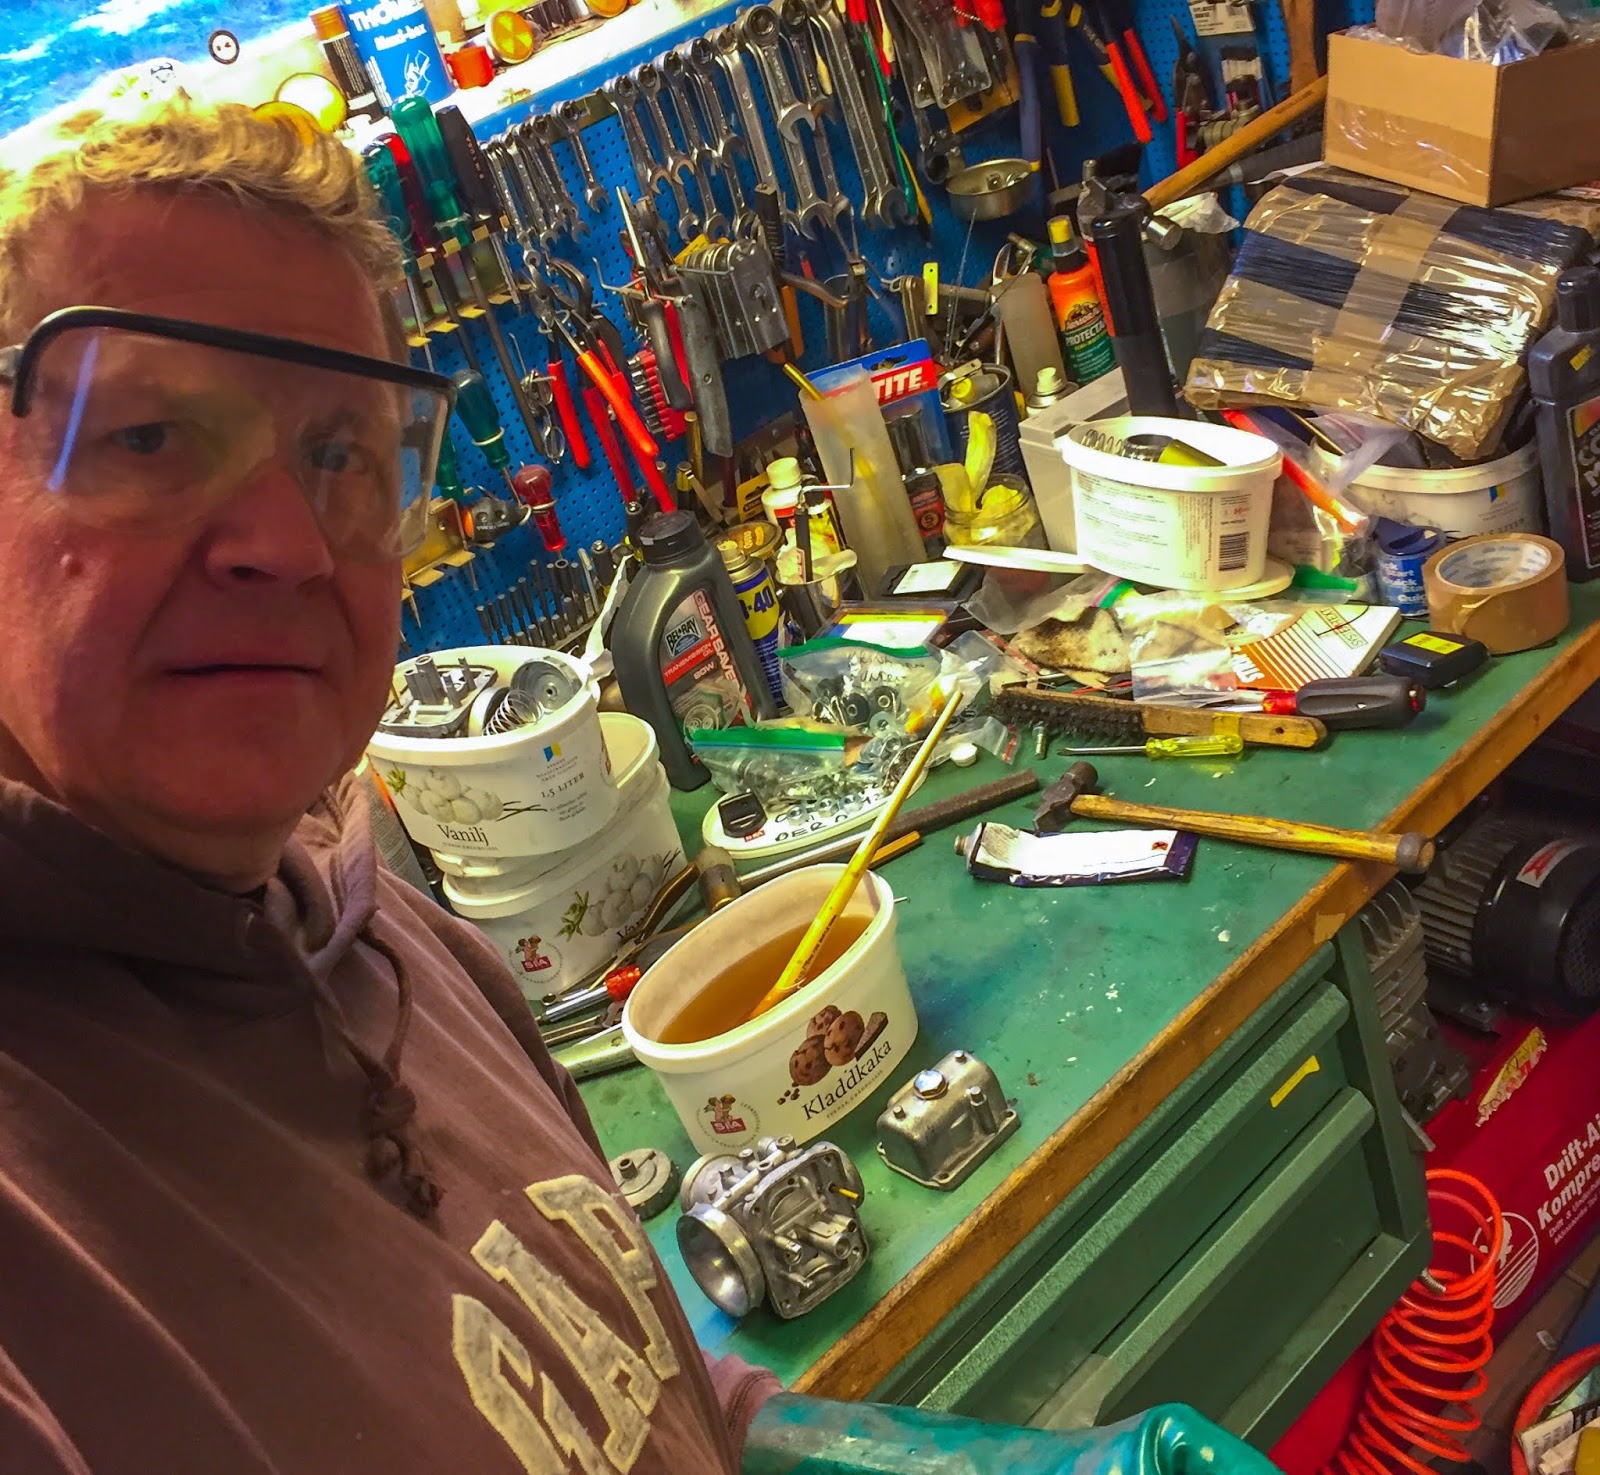
Acid is acid, even at a somewhat weak focus so I exploit security goggles and acid proof gloves throughout this course of. Not my finest selfie, however right here you go!
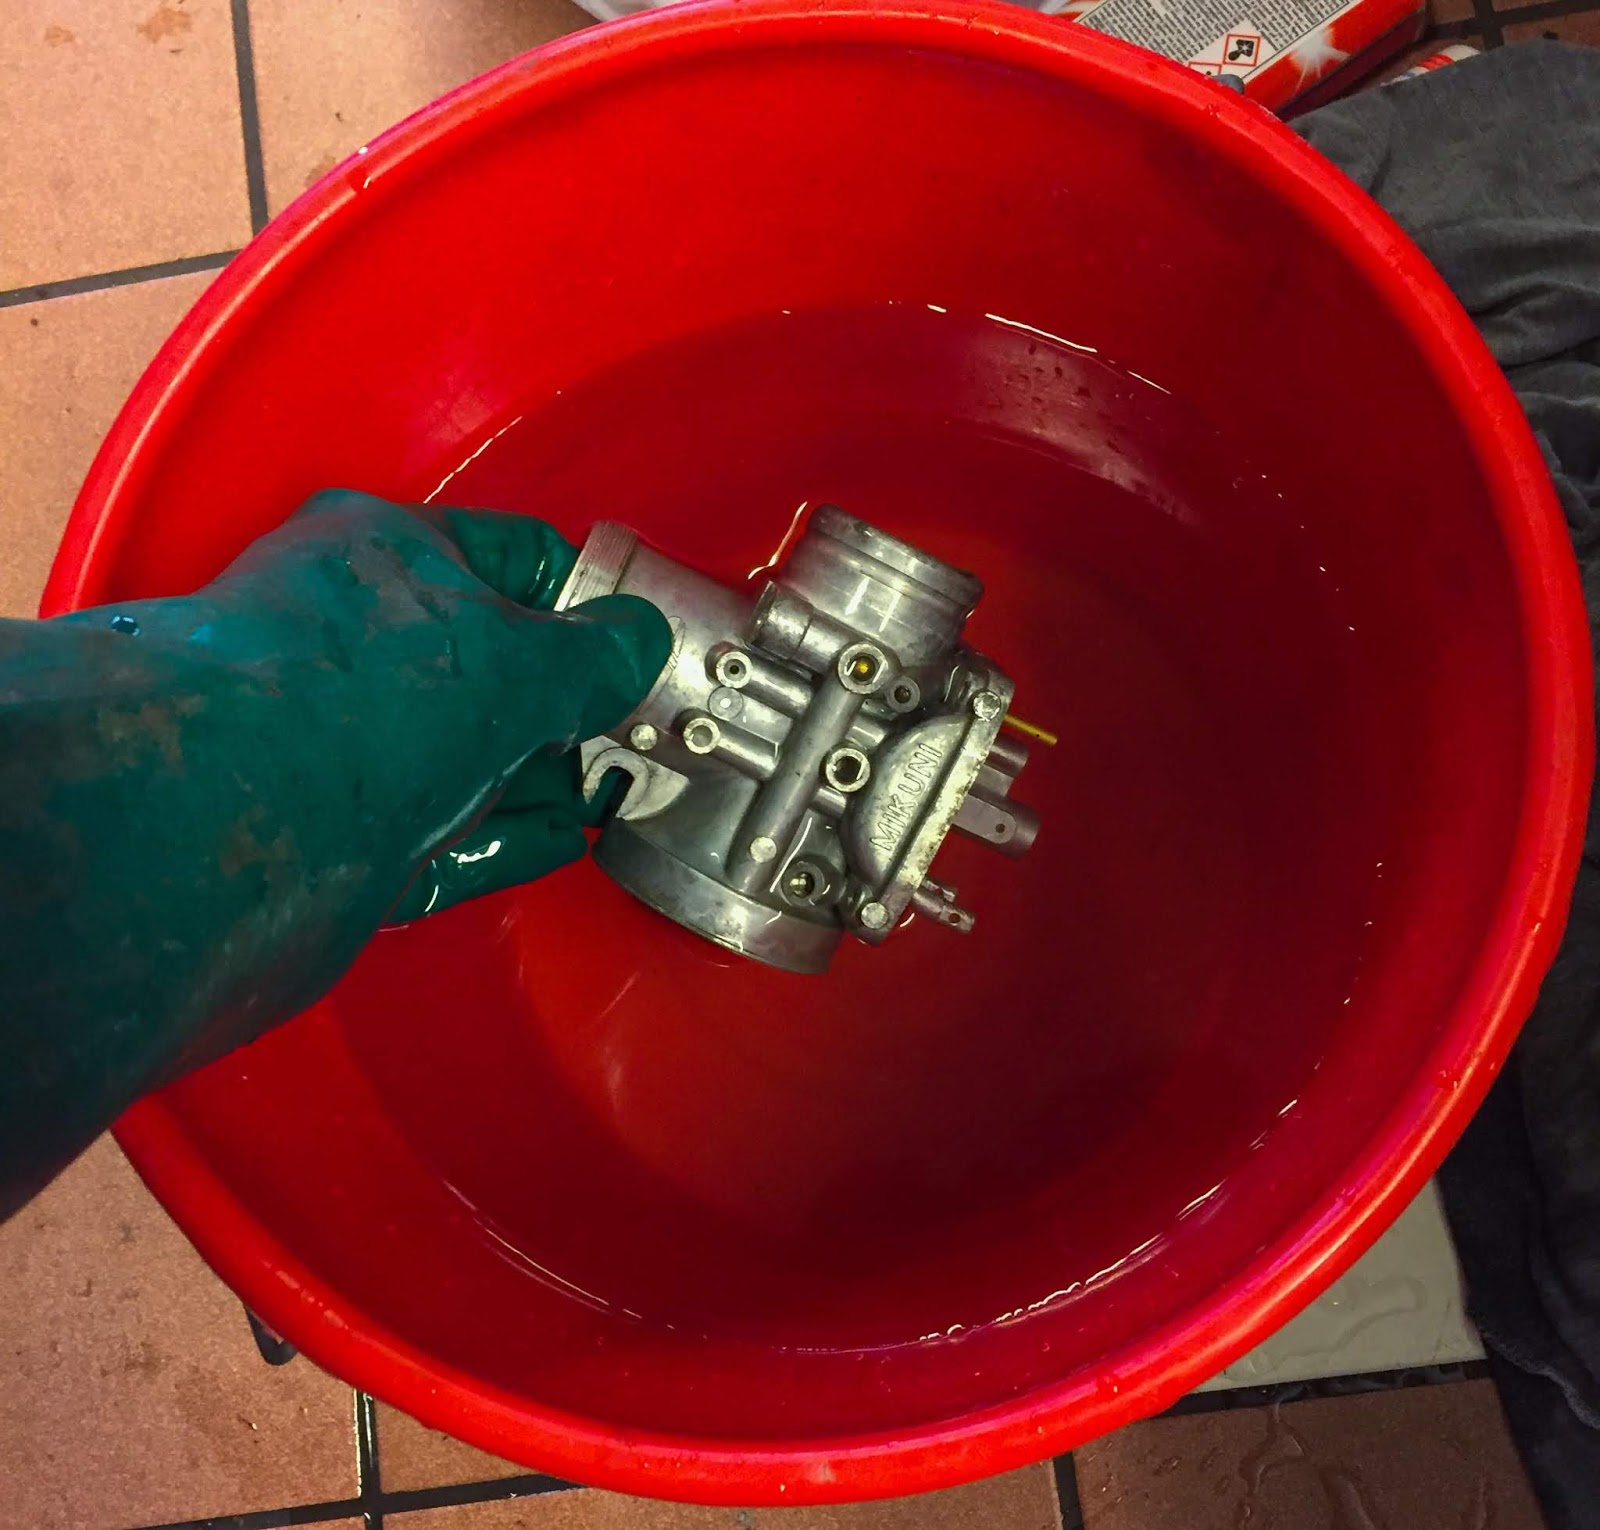
An enormous bucket of sizzling water is ideal for rinsing off the acid and getting the etching course of stopped earlier than rinsing it below sizzling operating water. You may see how gleaming clear the components get from utilizing the acid. You should definitely take care in the event you determine to attempt it, although.

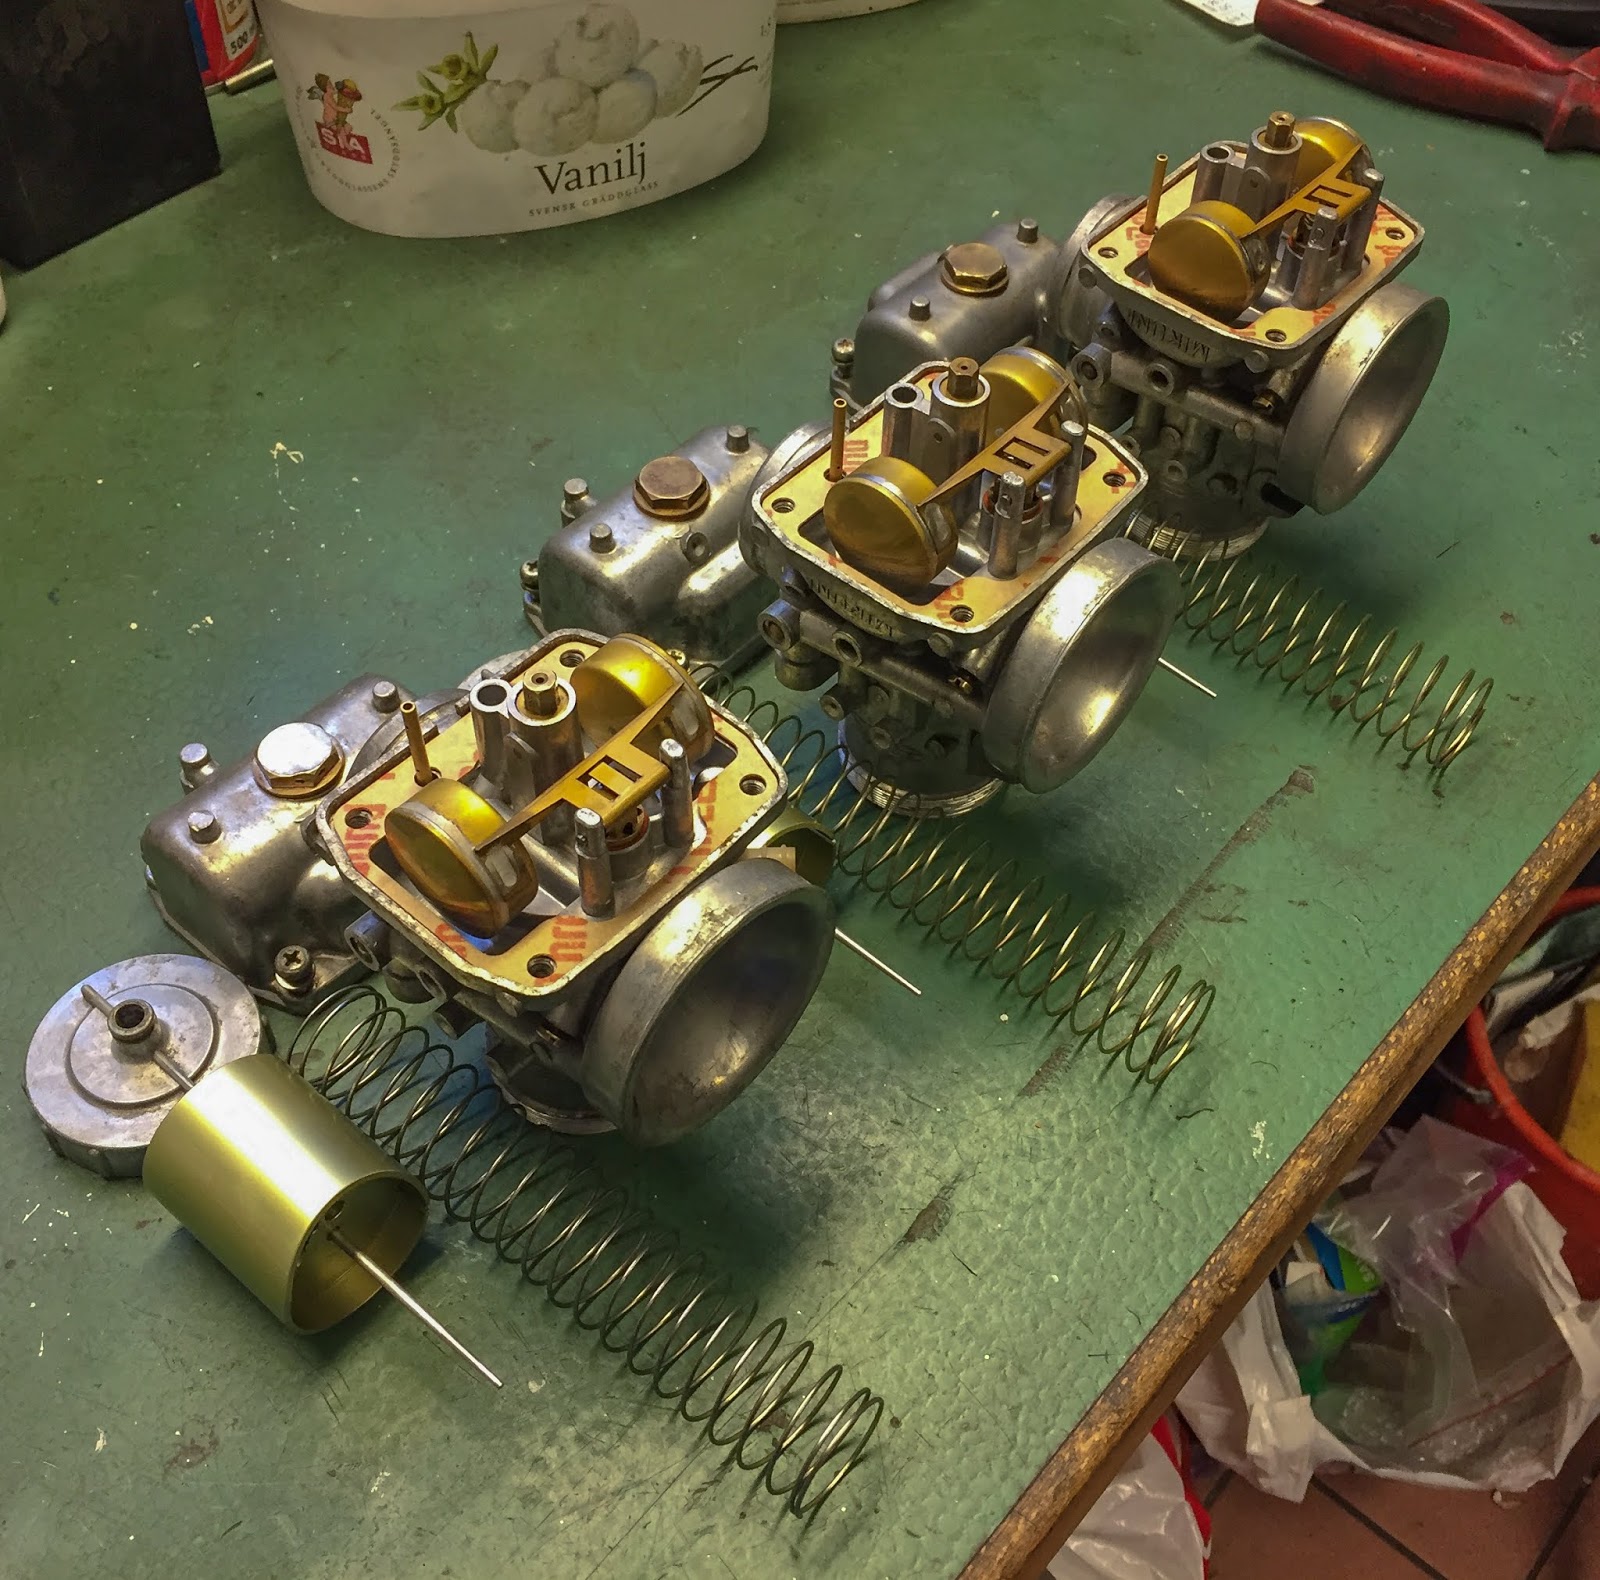
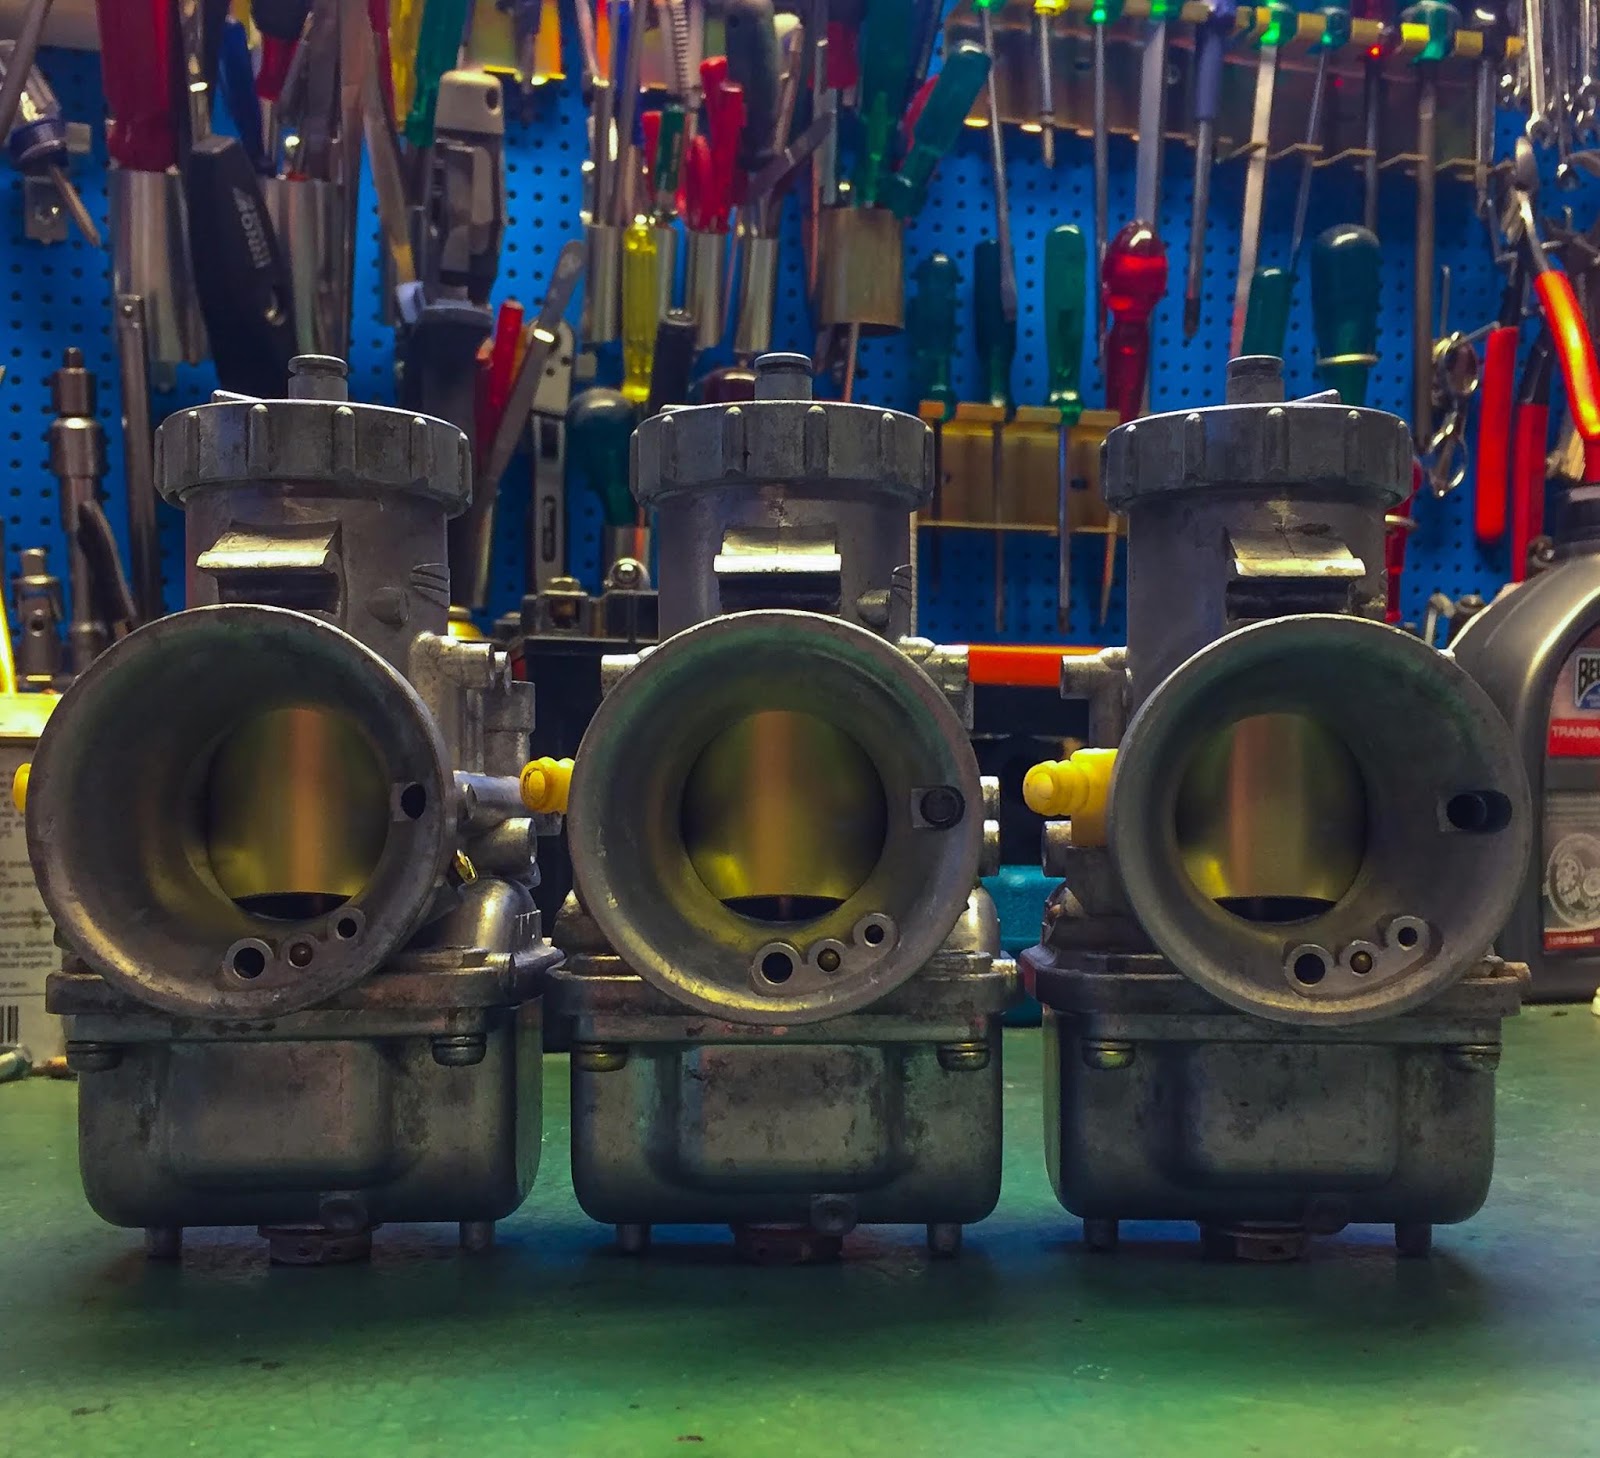
And right here they’re. Three H1R carbs of their respective ice-cream bins able to be assembled and mounted on to the bike. Soiled, smelly and never so enjoyable work, however now it’s lastly finished! I´ve been dragging this lengthy sufficient. Now it’s time for the enjoyable to start!
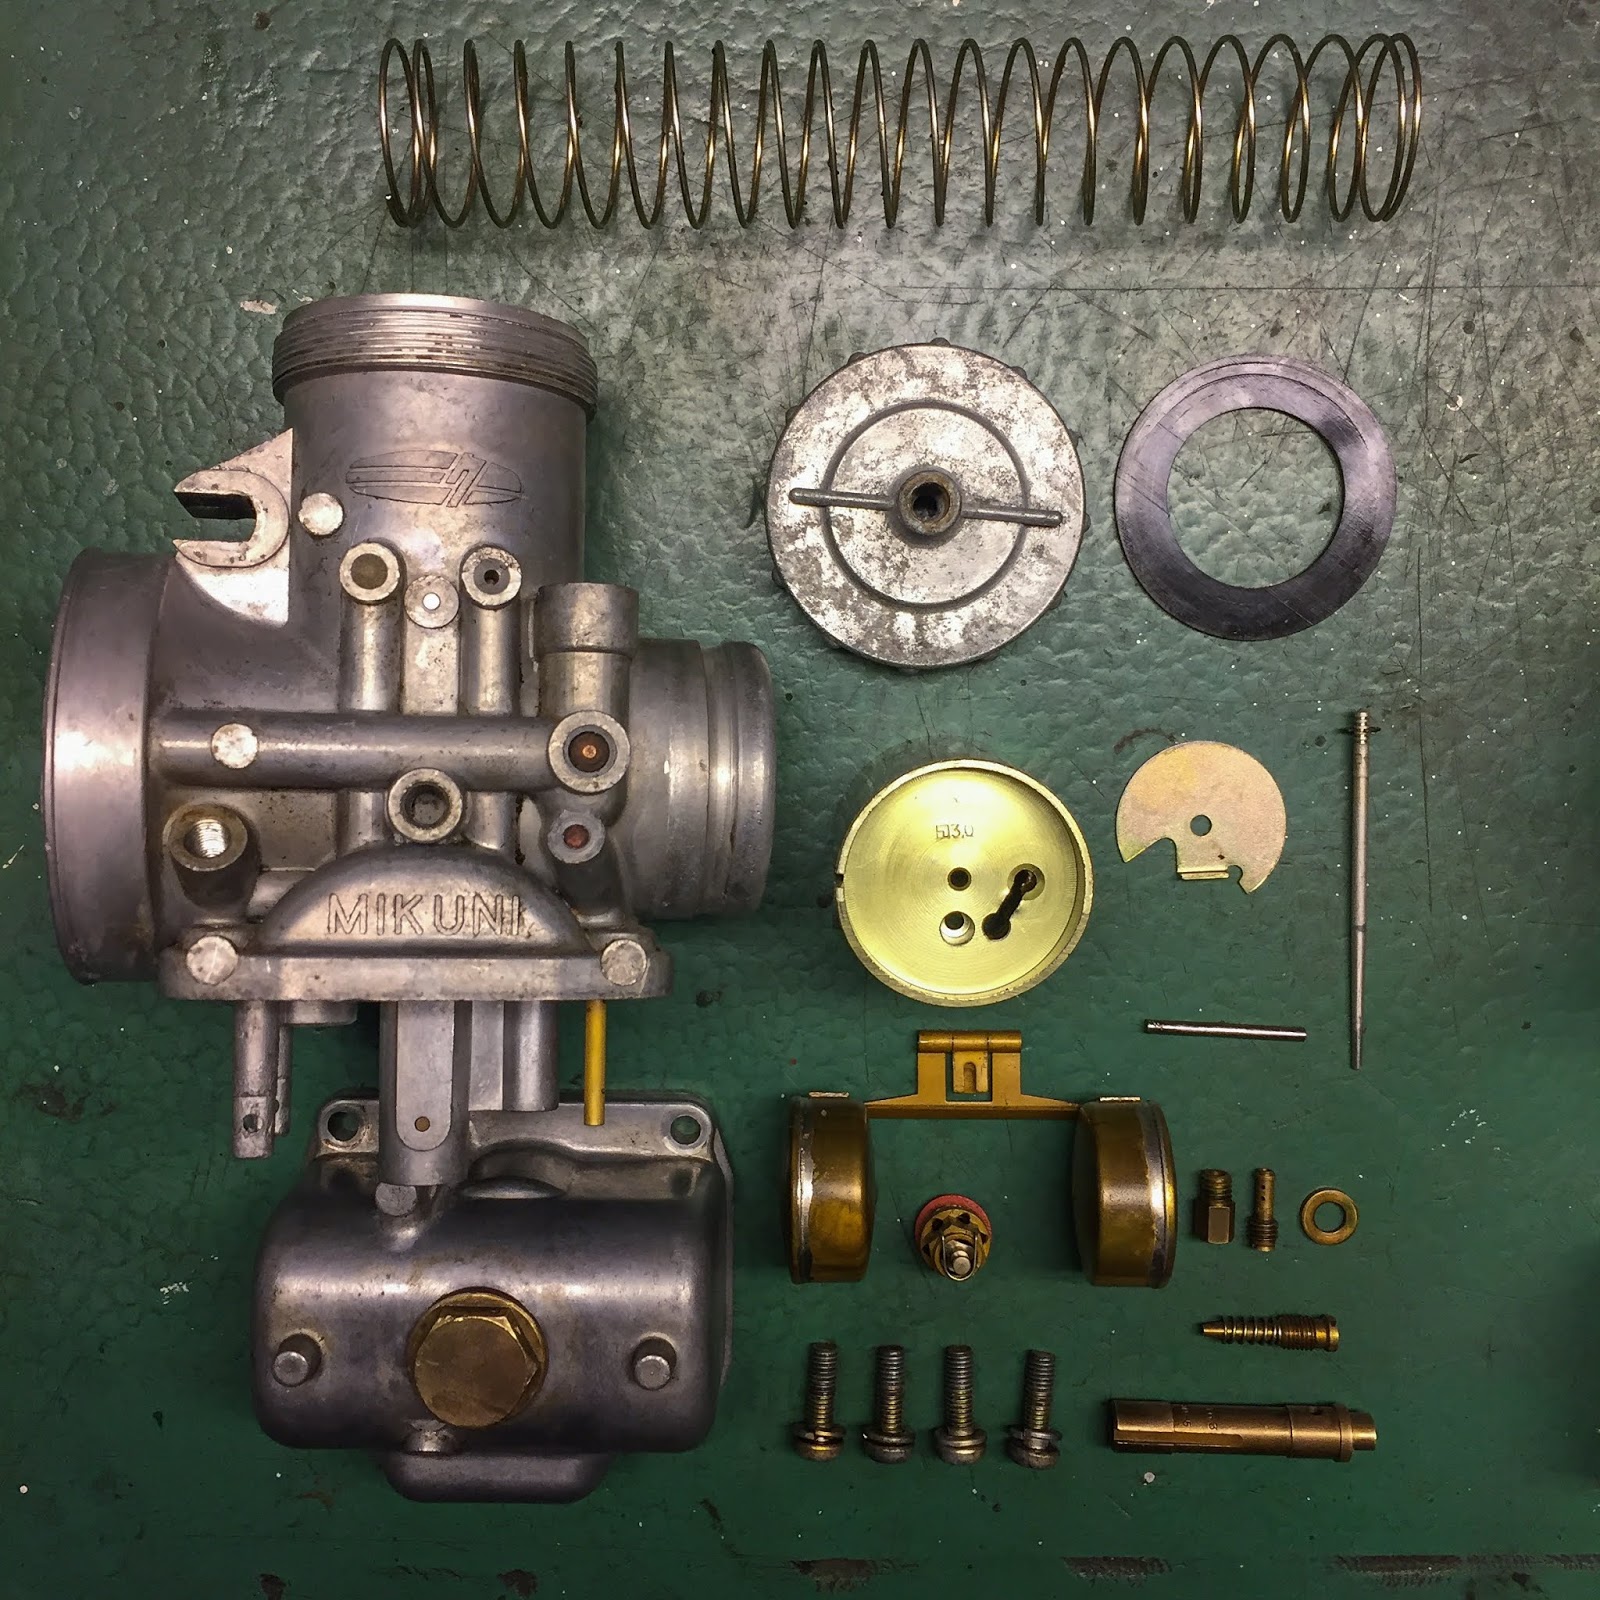
And that is certainly one of them and all its components laid up for inspection, and an excellent image…
I did get new gaskets for the carburetors some time again and figured I ought to have the ability to re use all different unique components in them. All of them appears to be in good situation and totally usable. Thank God!
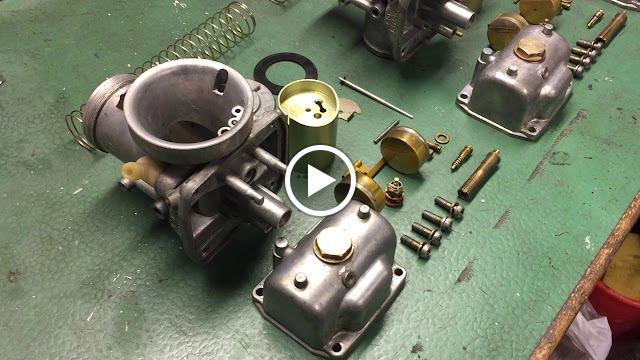
Beneath is a foolish little video I made to indicate what they appear like earlier than coming collectively once more. Not a lot, only for enjoyable….
We do have a really previous and real Mikuni agent right here in Stockholm. They’re even referred to as “StiBo motor, Mikuniagenten” and have been round since 1967… That´s greater than 50 years, guys! And the identical two gents nonetheless run it.
That is what I name a real setting. They dont´t use creditcards,
don´t have a money register or these trendy digital cost strategies like swish, swipp or no matter they´re referred to as.
In right here “Money is King” so to talk. You do get a hand written receipt in your purchases, similar to within the sixties. No computer systems, not even a micro fiche reader. Catalogs on paper and previous, elsewhere completely forgotten, paper sorting machines for his or her publications and advertising wants. These previous geezers are each very previous, a bit grumpy, however very charming in the event you deal with them with some respect.
I went there with certainly one of my carbs to see what components they may provide for an H1R. It’s really totally attainable they bought stuff for this bike within the seventies. Perhaps even to “Esso” or Björn.
They do get quite a lot of criticism on the web for being impolite and ignorant.
Yeah, a 25 year-old race biker or motocross man won’t have the ability to handle these guys. I discover them extraordinarily charming and their enterprise properly value a go to. Greatest is to name prematurely to verify they’re on location and able to see you. In the event you ask humble questions and take heed to what they are saying as an alternative of argue your personal opinion you’ll get excellent service and good unique Mikuni components at an affordable prize. After all you will discover stuff cheaper through the online, however then you definately wouldn´t get to satisfy them, would you?
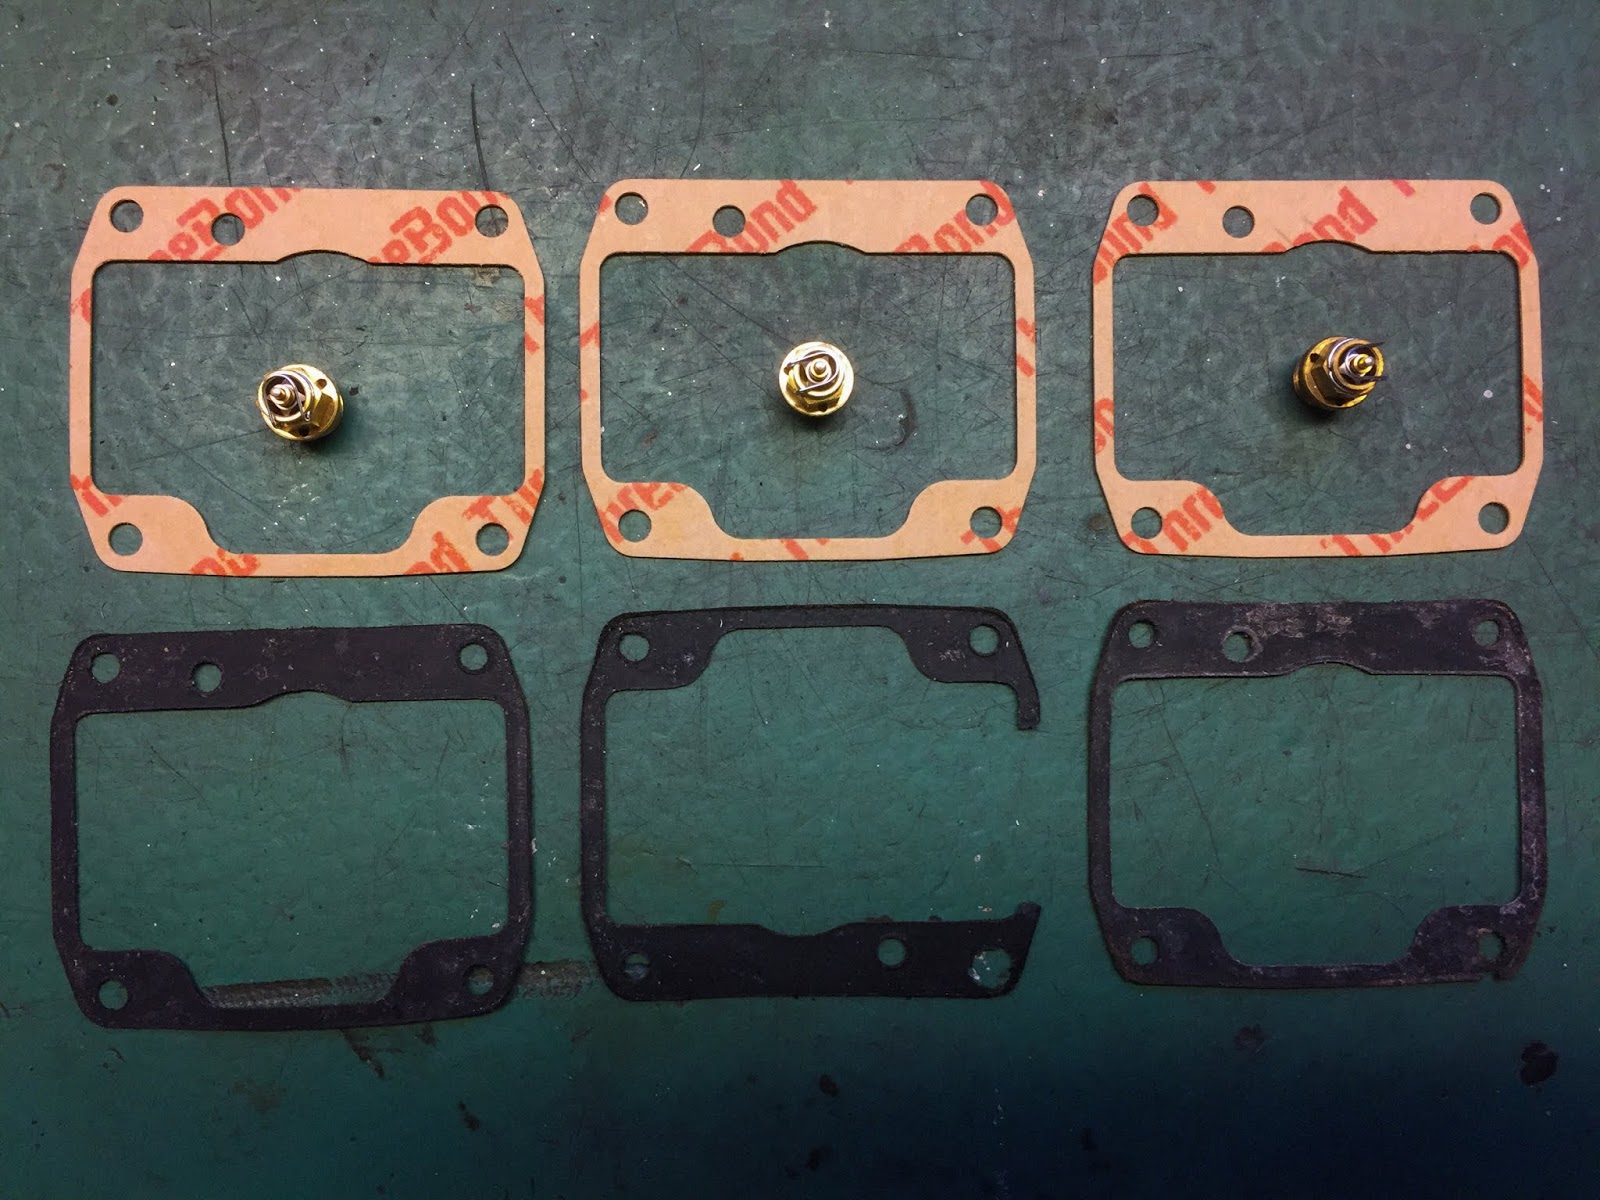
Right here´s thefind of the day. 3 extra gaskets and likewise 3 float valves. We mentioned what sort of valve would match. I informed them the Kawasaki half quantity and we in contrast what I had in my carbs to what they’d in accordance with their lists. The gaskets are all good and can match completely. The float valves….? Not so certain, however what the heck, I purchased a set simply the identical. Would possibly come in useful at some point!
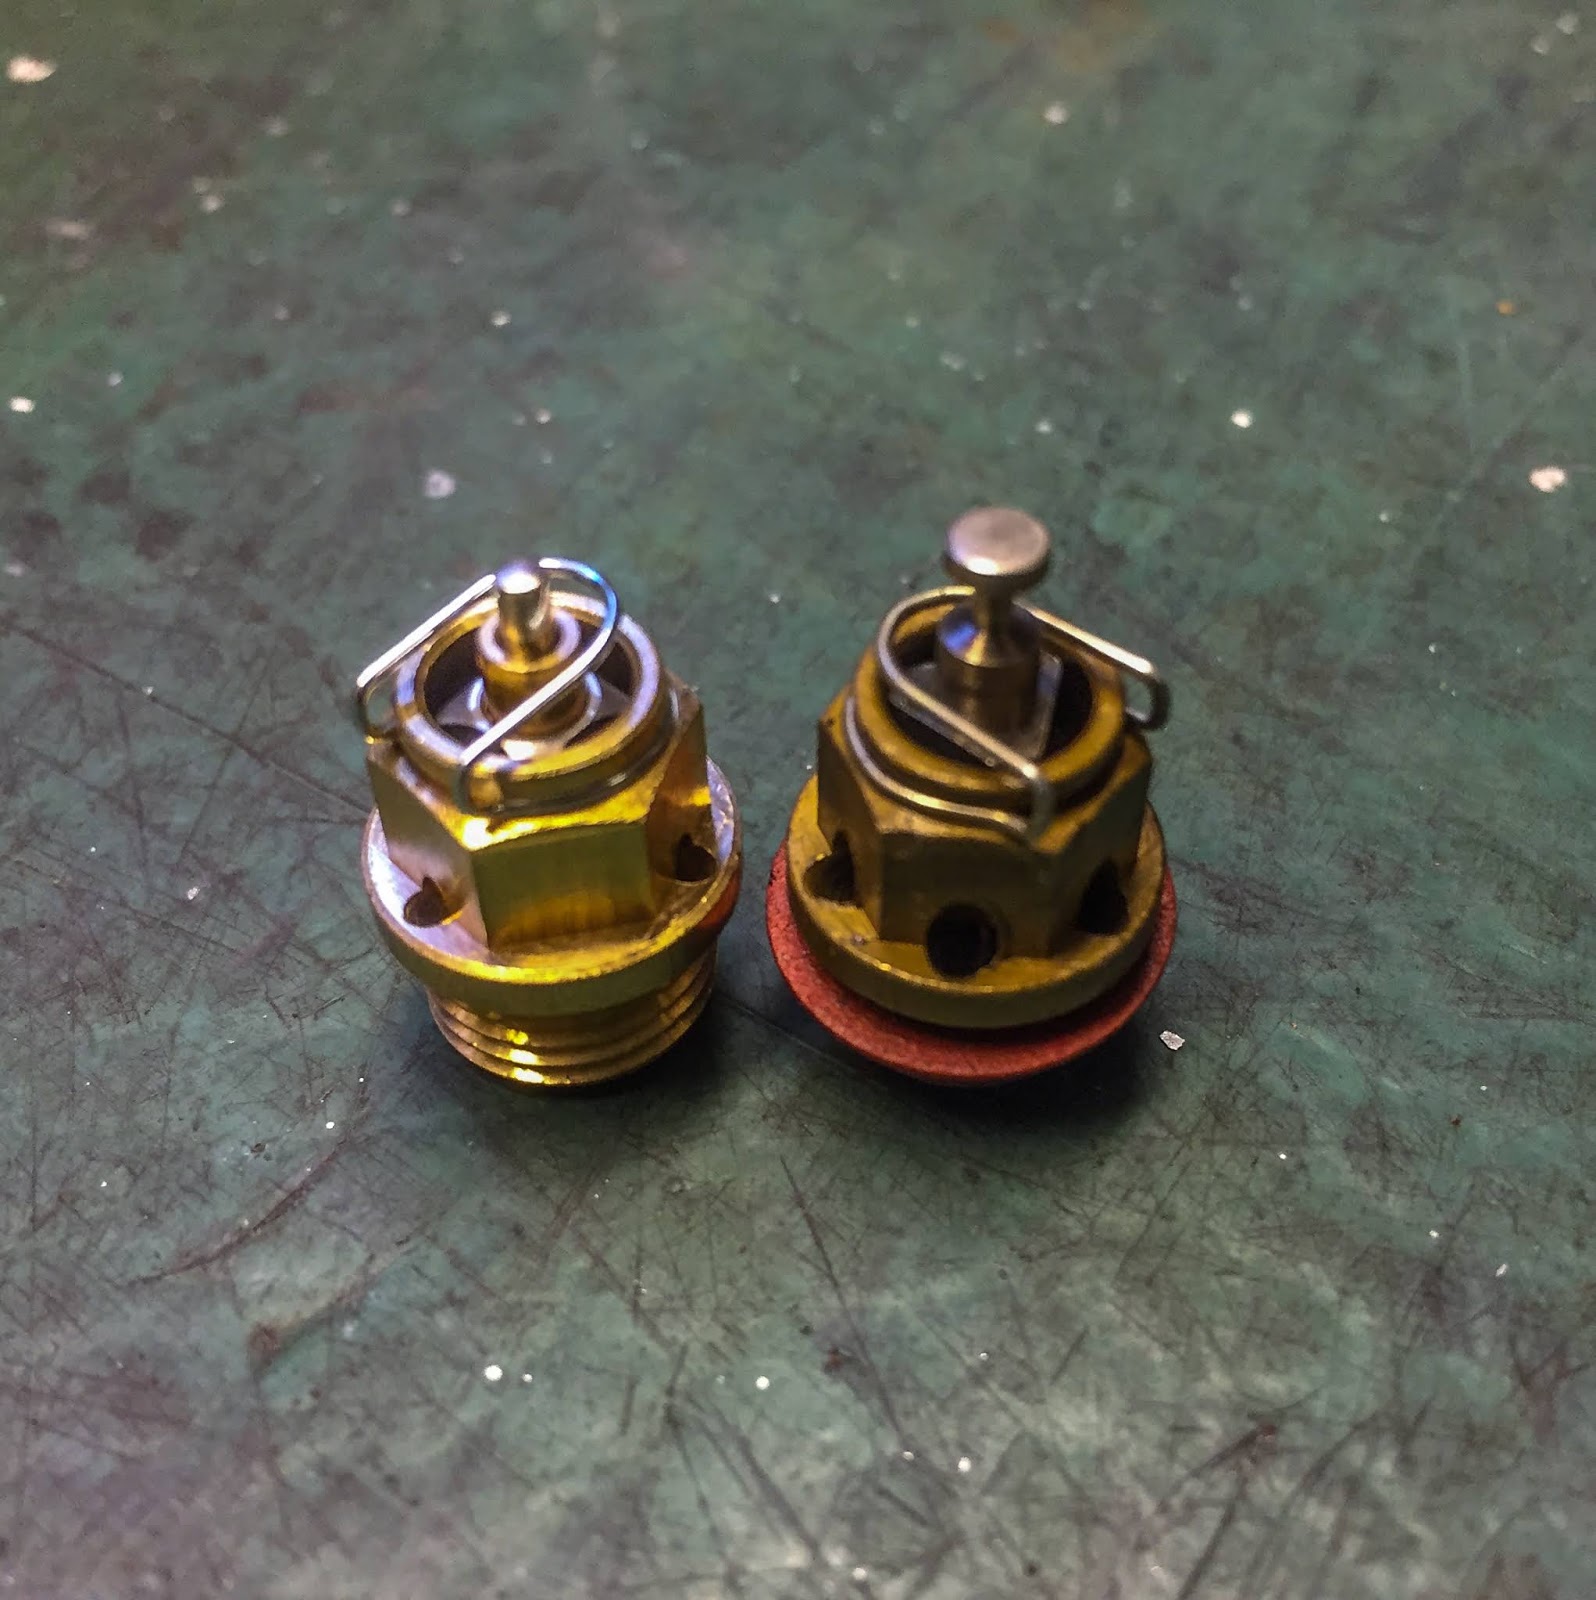
To the proper right here you’ll be able to see why I´m not so certain concerning the fitment of their generic Mikuni float valve. The H1R one (Kawasaki numbered) on the proper. Two apparent variations.
The scale of the float valve itself and likewise the variety of holes, and measurement, within the brass physique. I´m certain you’ll be able to think about the distinction in gas movement between the one on the left and the one on the proper. Yeah, The H1R doesn´t use petrol, IT DESTRUCTS IT! The proof is obvious right here…
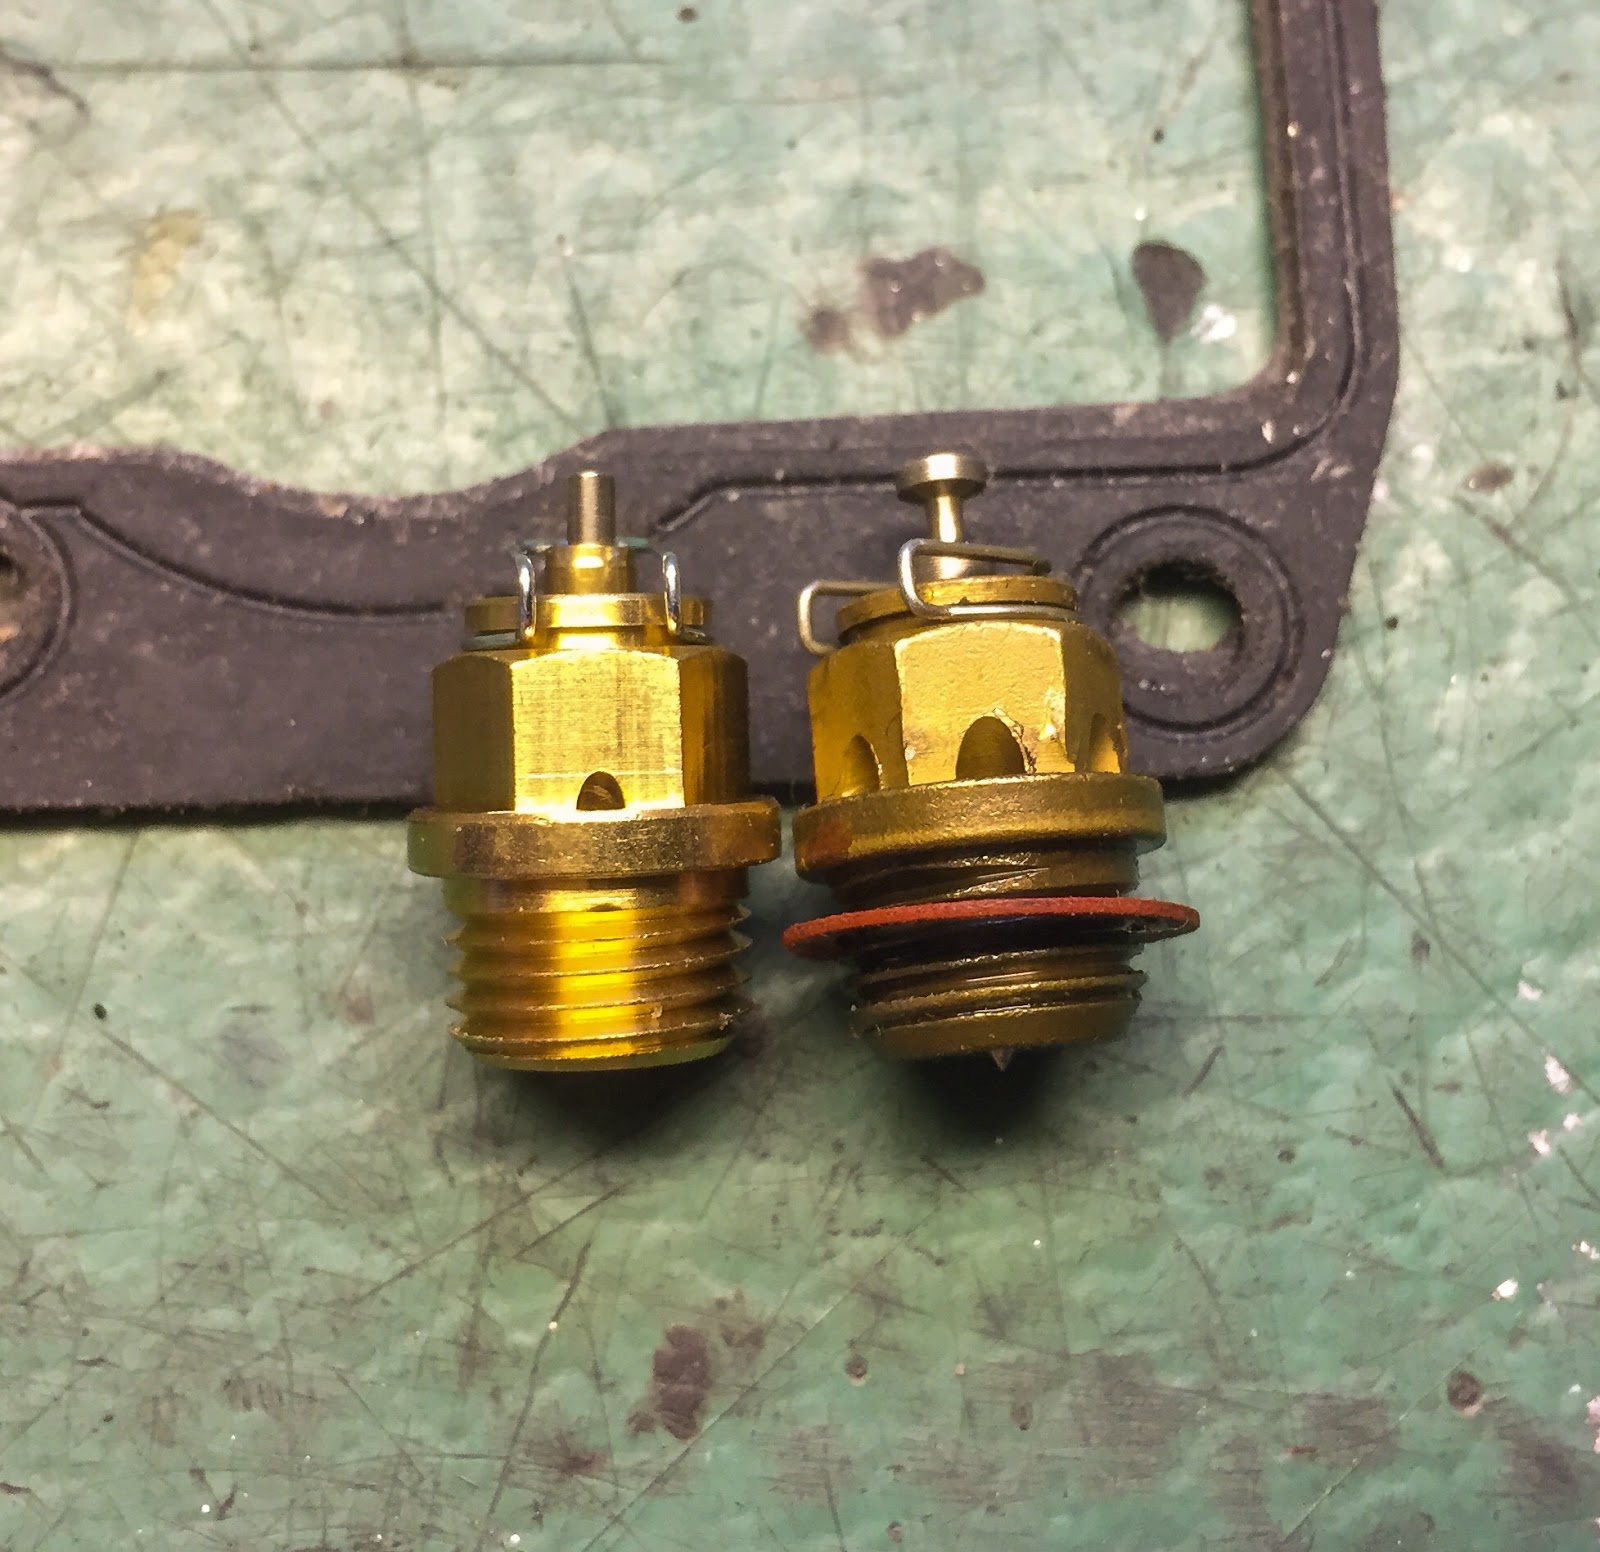
From one other angle we are able to see the distinction extra clearly. The generic Mikuni one will likely match simply nice because the measurements appears roughly an identical relating to threads and peak of the physique and placement of the float needle.

One other fascinating view. The 2 float valves in contrast aspect by aspect. The H1R on the proper… I critically hope the previous, unique ones, will work nice. I believe they do feel and look fairly alright so I suppose they may. They’re definitively going again within the carbs.
So, I ended up spending 150$ US or so on these components. A bit steep, however I additionally obtained to satisfy the previous guys and focus on previous occasions with them. That´s value an entire lot, to me! The spare float valves will keep in inventory. They’re the identical on trendy Mikuni 34mm carbs and attainable additionally then 36:s. One by no means is aware of when one would possibly want one thing like that, proper?
Lets´transfer on to jetting of the carbs. I mentioned earlier there’s a thriller regarding the principle jet measurement of those carbs.
There have been fairly a couple of jets included within the sale of the bike and to be trustworthy I hadn´t seemed too intently at them simply but. Now I needed to discover out what to make use of and if I had it in my inventory. If not, I may need to return to the 2 grumpy previous males additionally for some extra major jets.
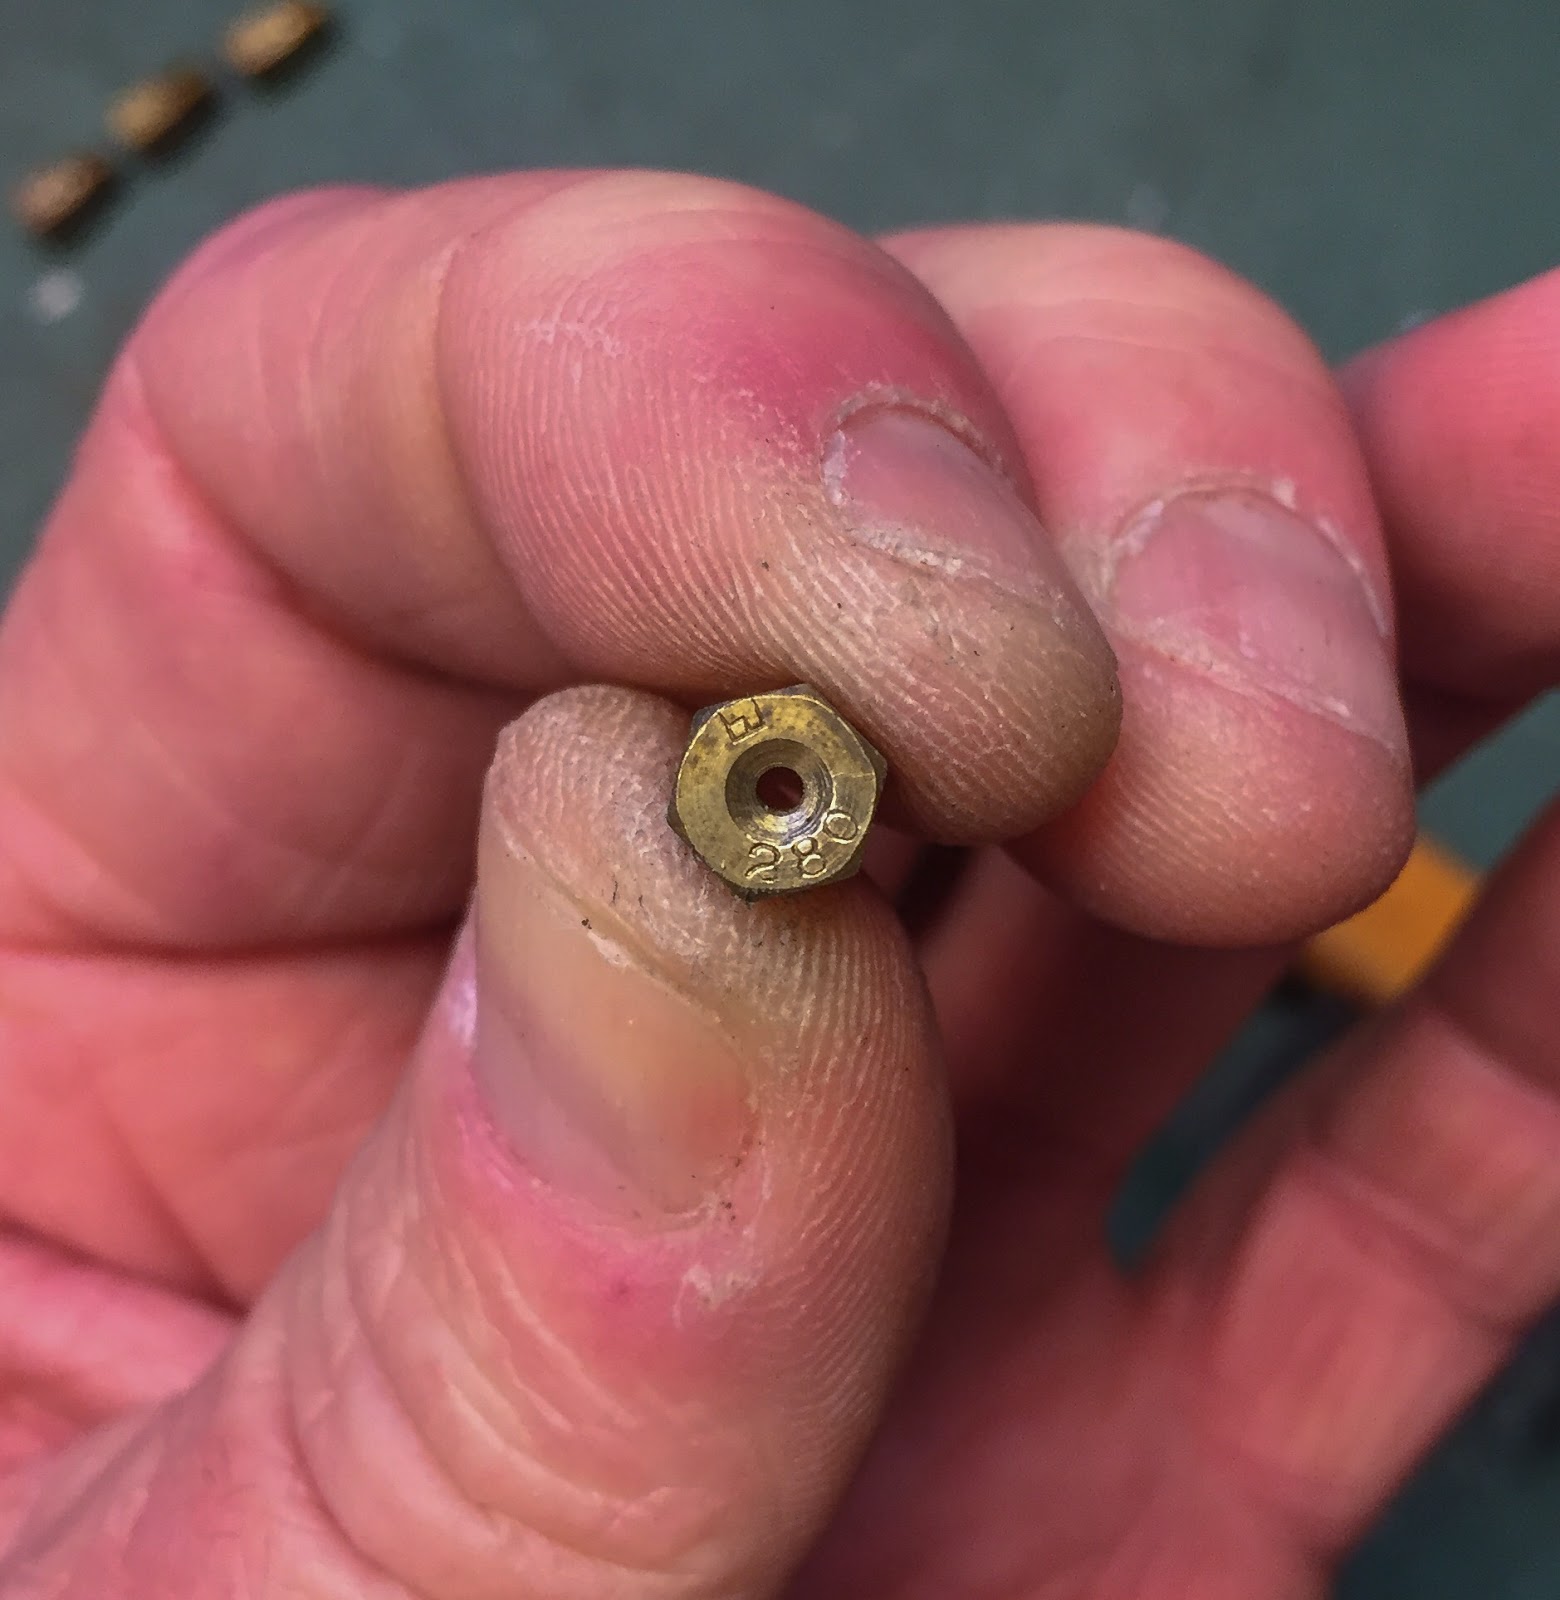
I attempted to scrub my previous jets nearly as good as I may to seek out out what i had. The image on the proper is how I needed to do it. The stamps have been so small I couldn´t learn them, not even with my studying glasses. I used my cell phone, took photos of them and zoomed in… Voila!

I I I I Ii14 jets in all. The humorous factor is, they’re all totally different sizes! Not one set of three in the identical measurement… Makes me surprise.
Perhaps there was imagined to be two extra units like this within the sale of the bike? Did we miss one thing within the barn?
Not an enormous downside. These jets ARE the identical sizes used on Mikuni 34mm carbs and I had simply been jetting each my very own and a associates H2 with these carbs. I’ve loads of totally different sizes in inventory and they’re simply purchased at Mikuniagenten or over the web.

Anyway… Right here´s one other fascinating a part of the puzzle. The components guide really says that the totally different carbs on the bike takes totally different sizes of major jets?!
#310 for the Middle cylinder.
#320 for the Left hand cylinder.
#330 for the Proper hand cylinder.
I can´t work out why… If there was any form of logic on this mess, the left one is furthest away from the pump and may (possibly) have the larger jet? And placing the smallest one within the Middle cylinder? Effectively, beats me!
I do have a plan, although. A great one! Keep in mind I’ve “Esso´s” racing diary? Yeah, there´s the reply to my downside. I´ll simply put in what he utilized in Anderstorp when he received the Swedish GP on this bike again in July, 1970. Good plan, Eh?
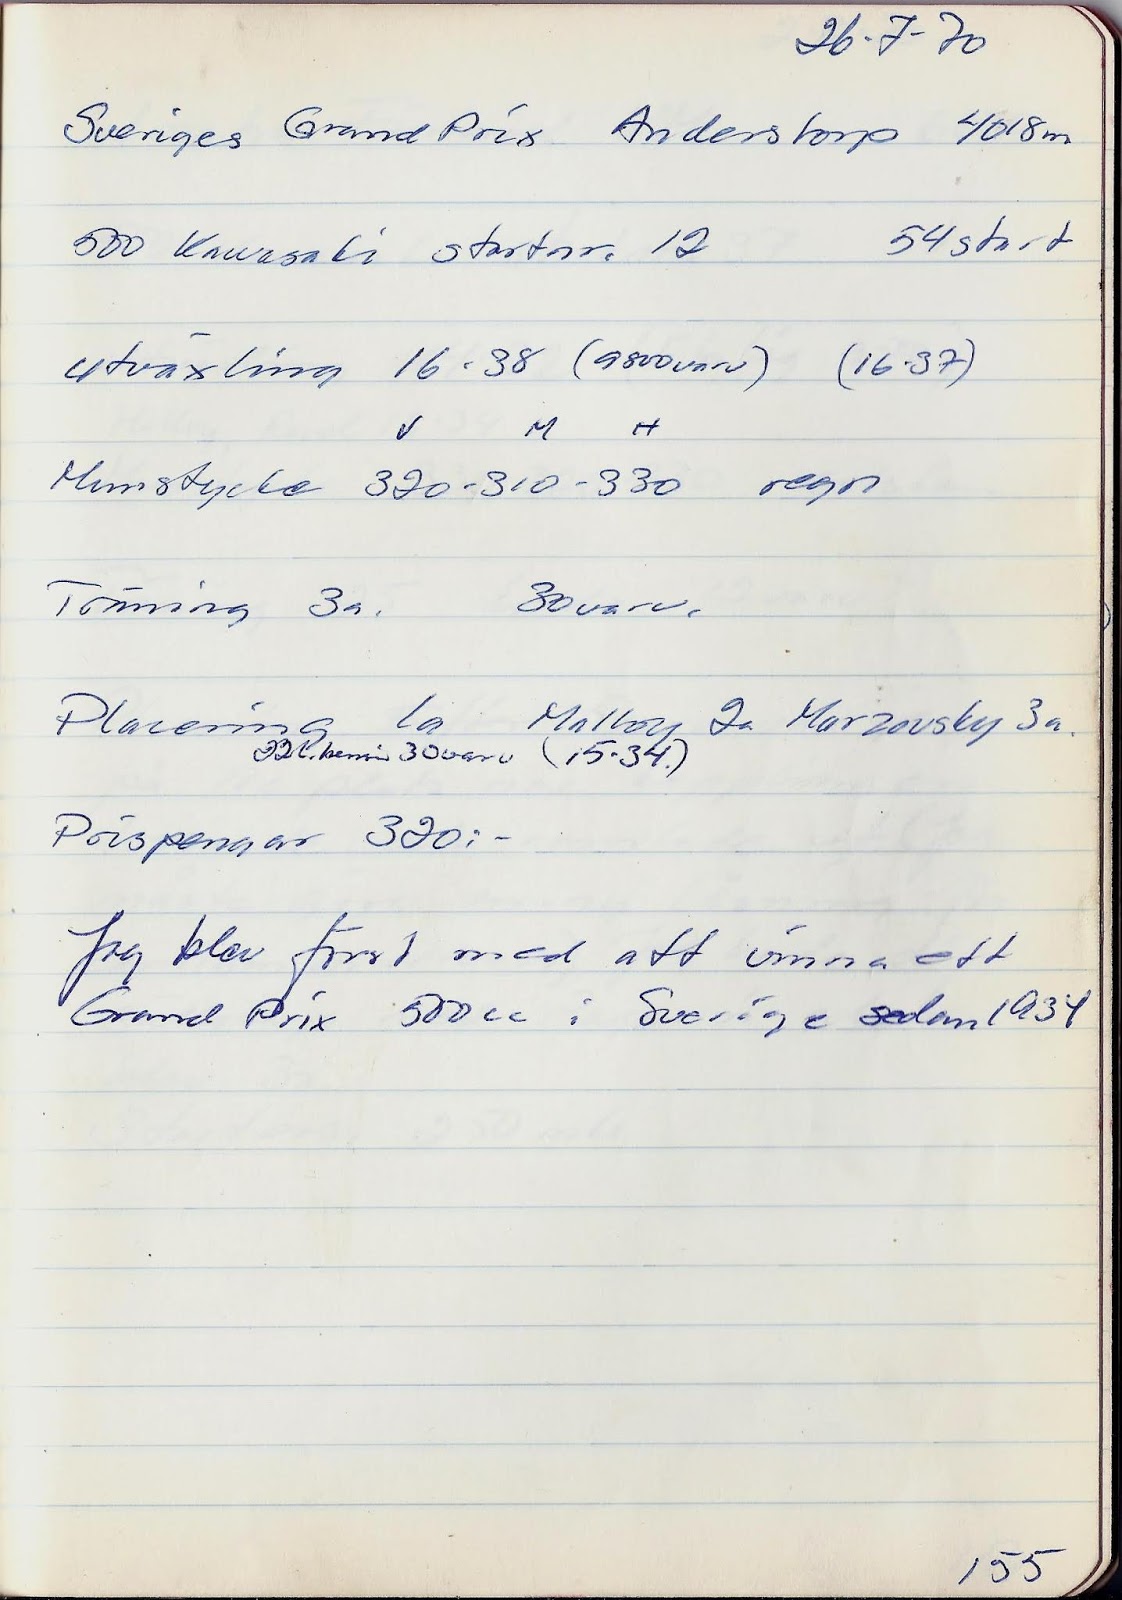
And right here it’s… Similar to within the components guide.
Left: #320
Middle: #310
Proper: #330
Now that I’ve it up right here lets look nearer at it. The ultimate notice of this entry within the diary says:
“I used to be the primary to win a Grand Prix 500cc in Sweden since 1934”
We will additionally see he obtained 300 SEK for profitable the race… and that he beat Ginger Molloy, 2nd and Marzovsky, third whereas destructing 32 liters of gasoline throughout 30 laps. I can certainly see why these giant float valves have been wanted!
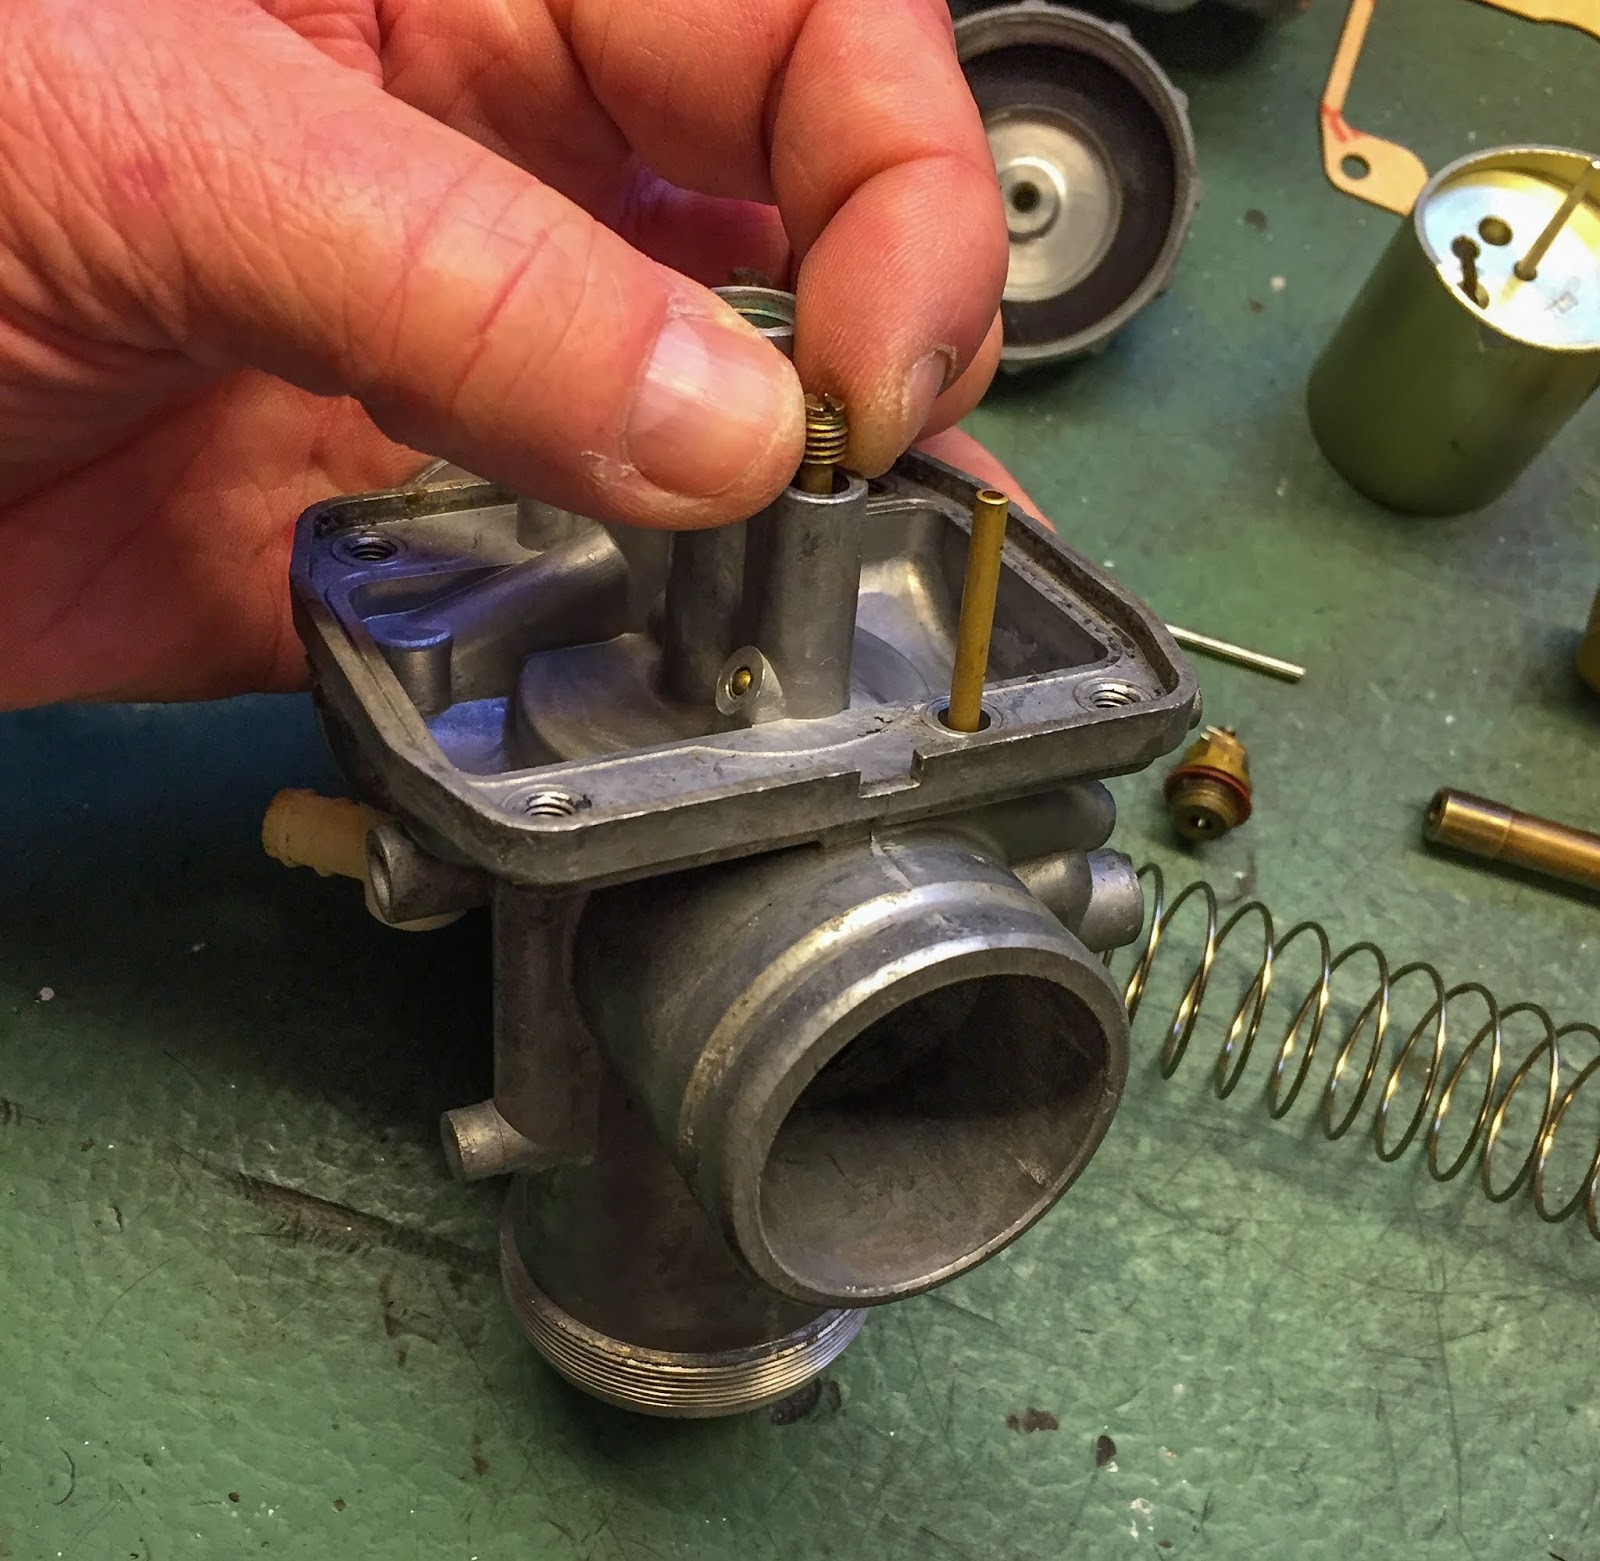
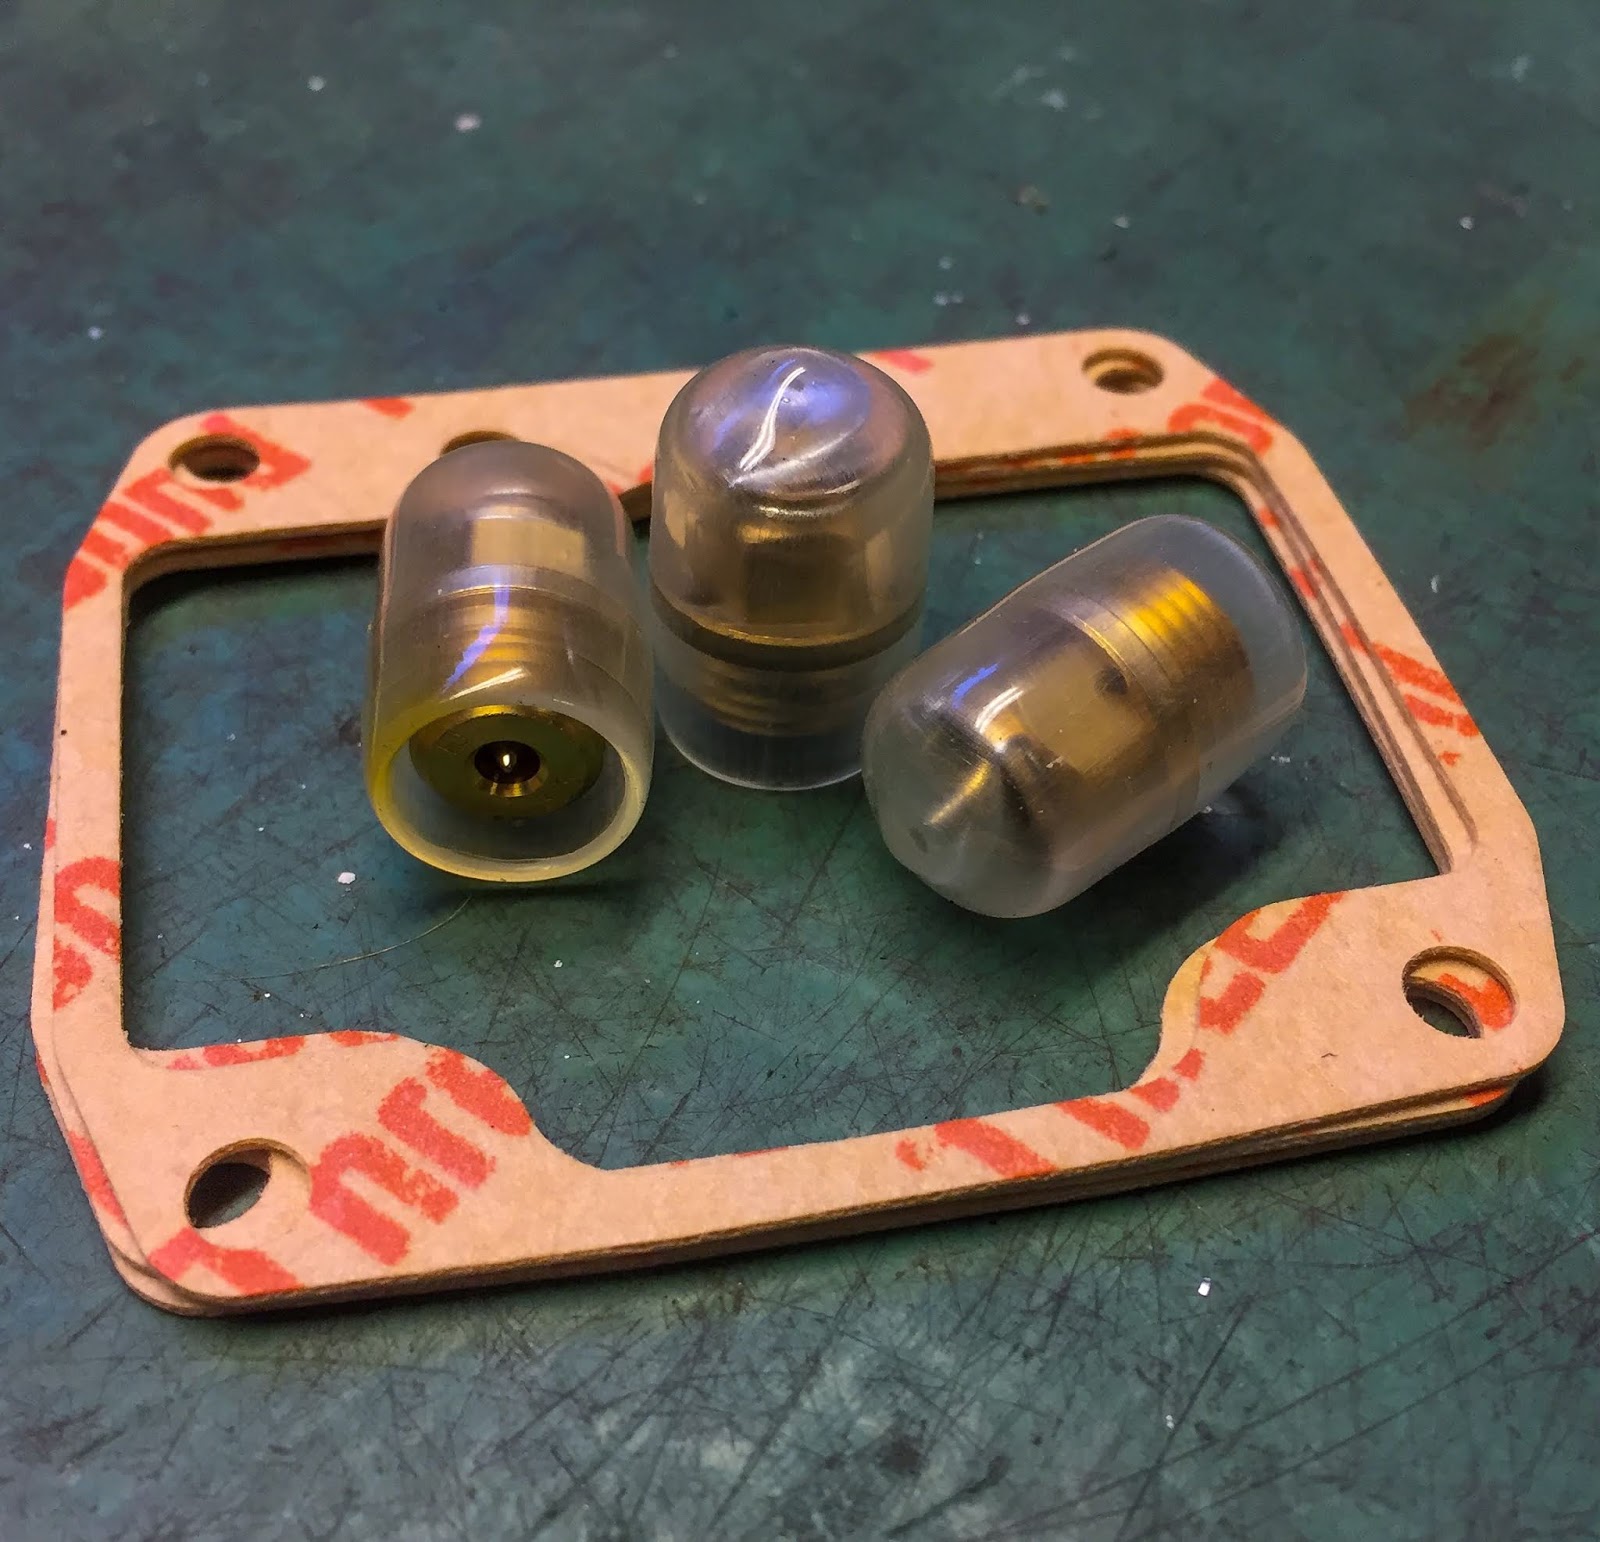
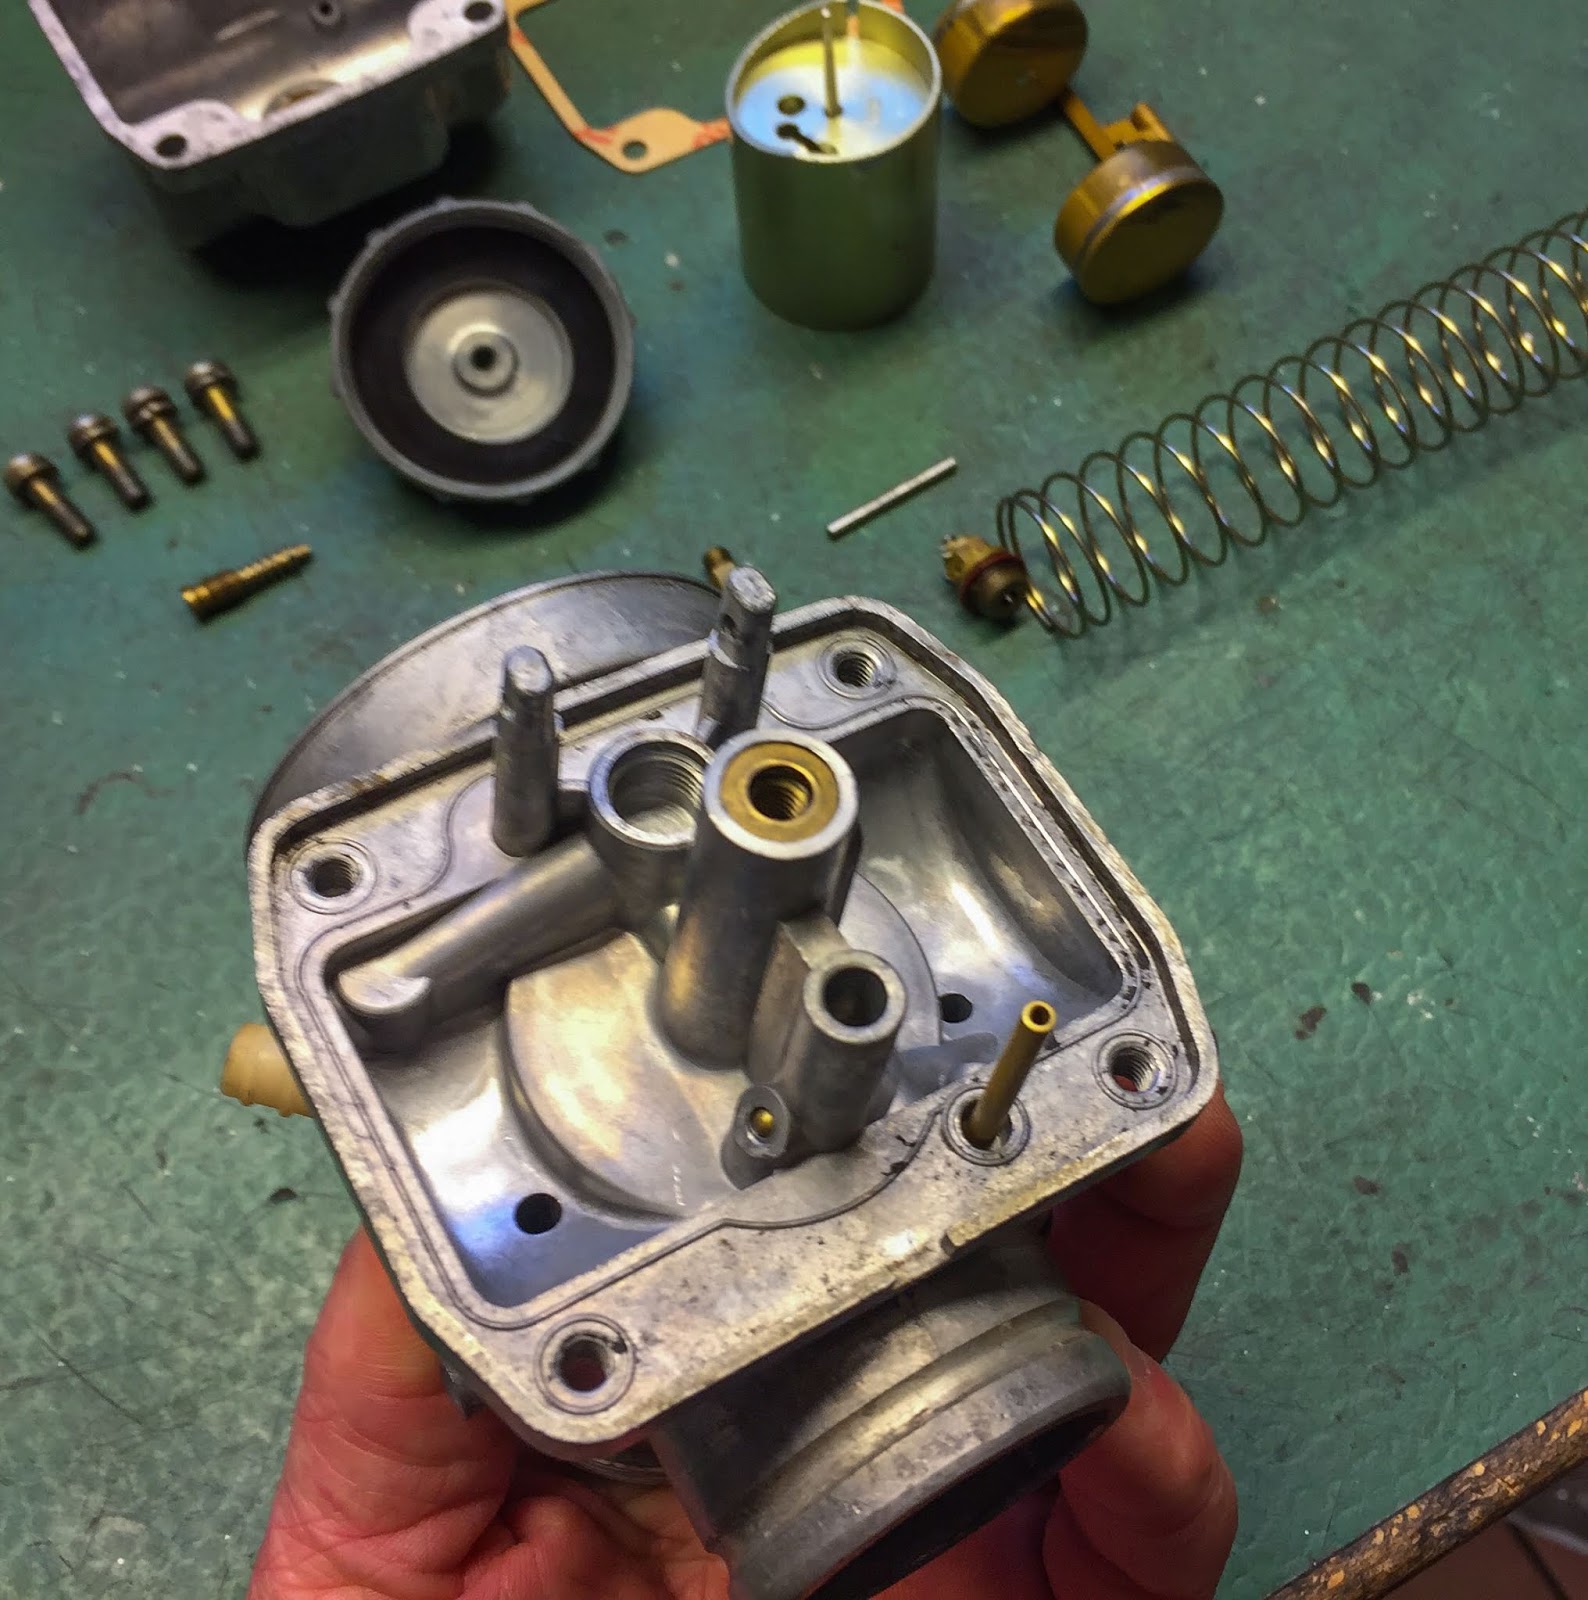
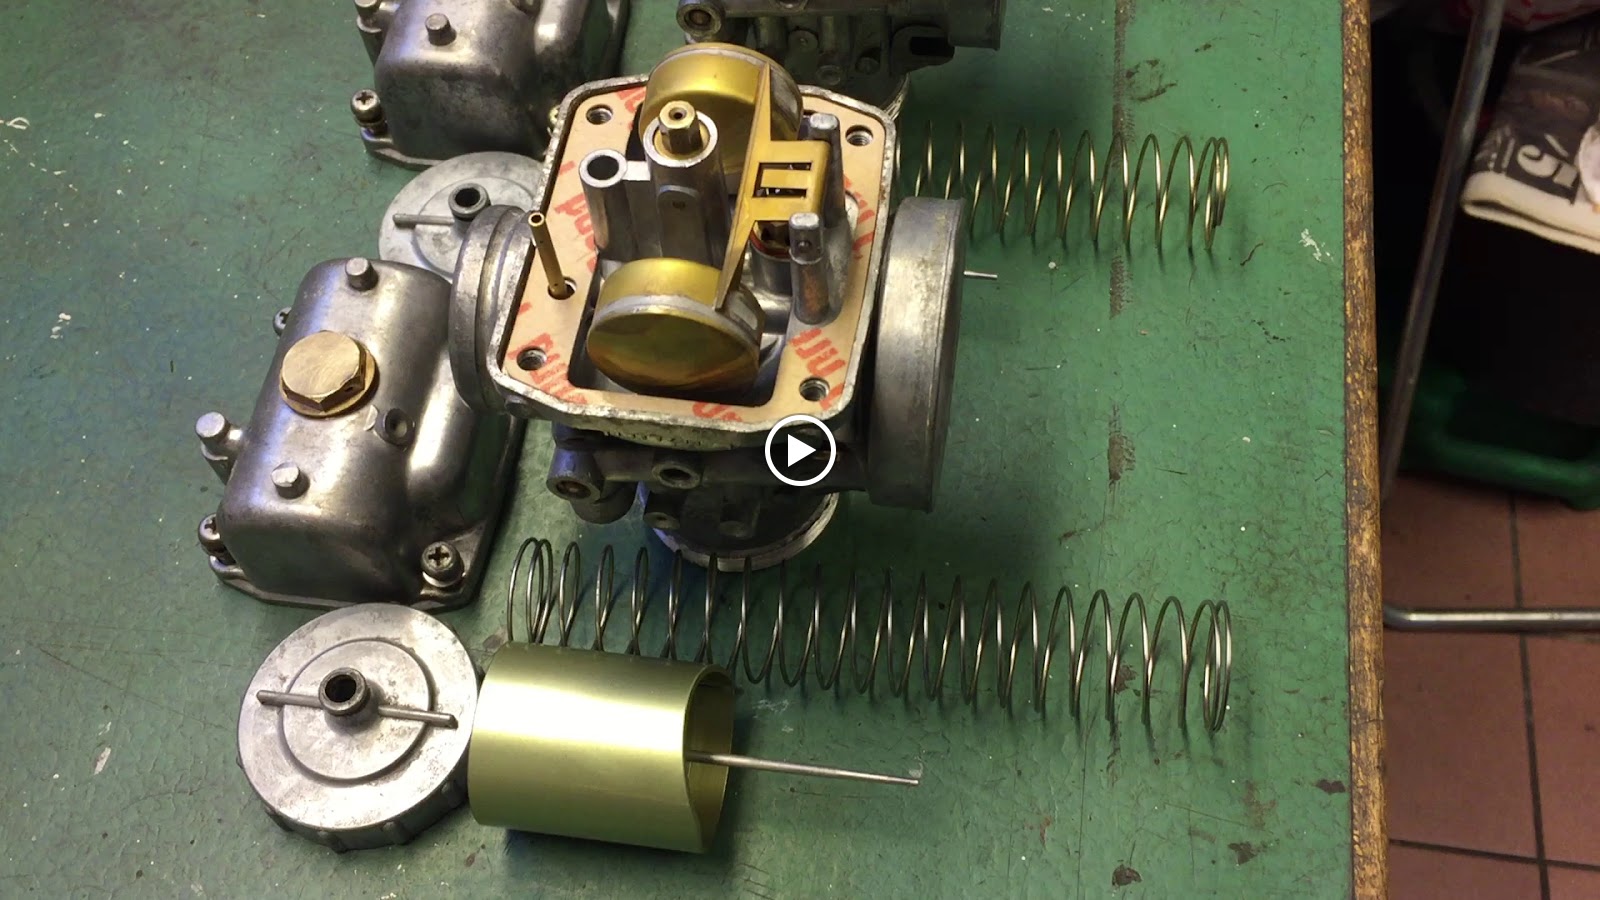
Effectively now… The whole lot is all set for meeting of the carburetors. Lets simply do it! Very first thing to go in there’s the pilot jet. This little bugger provides the engine with simply sufficient gas to maintain it operating on idle with the throttle slides closed, or nearly closed. Air is routed by means of the carb physique beside the throttle slide and mixes with the gas from the pilot jet simply in entrance of the needle jet in the course of the venturi. The scale of the pilot jets are #60, to be in contrast with the 200:s and 300:s on the principle jets.
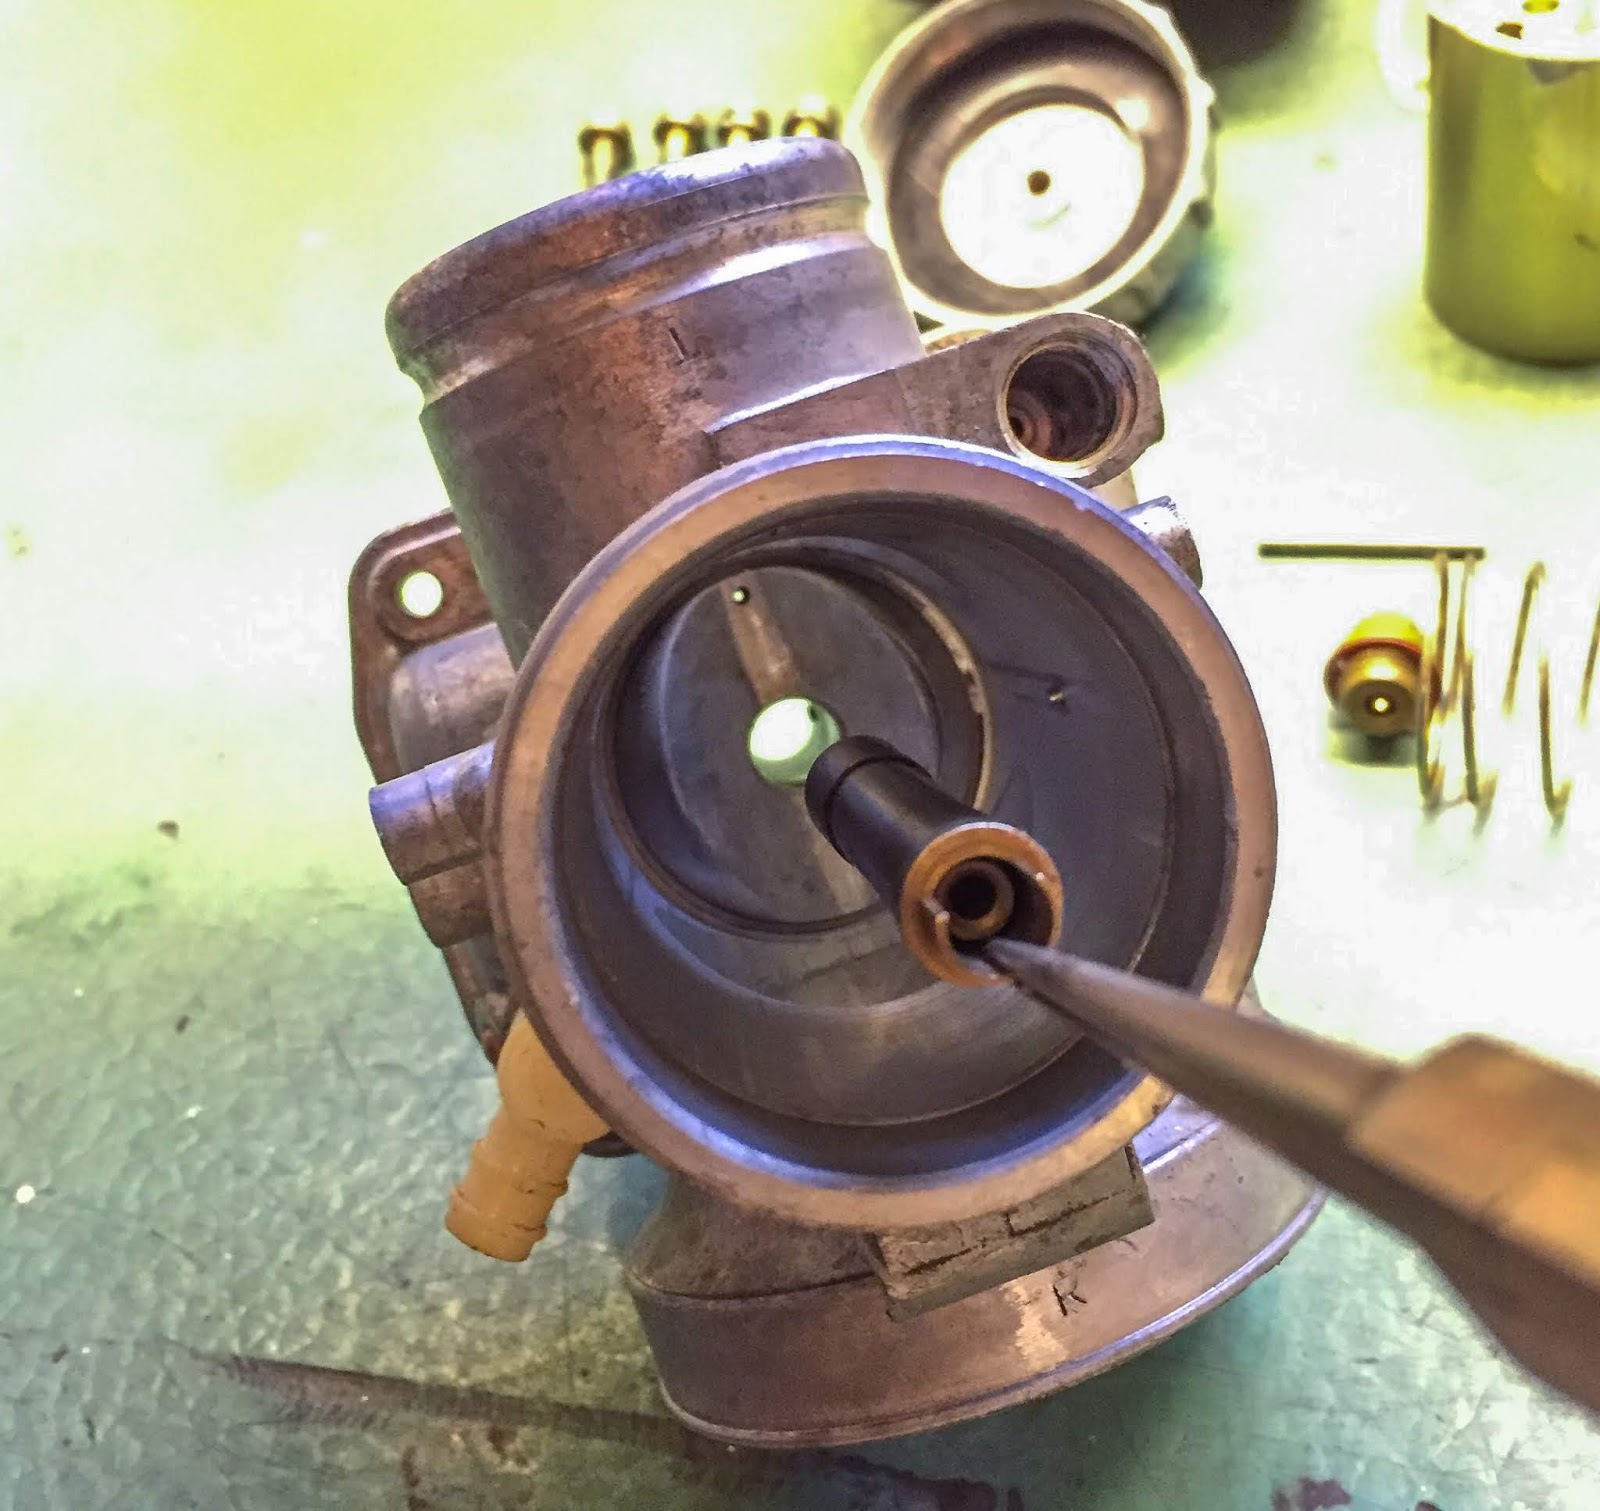
Subsequent is the needle jet, the brass tube that receives the needle from above and homes the principle jet on the backside. It’s on this half the quantity of gas getting into to the engine is decided whereas on 1/5 to 4/5 of throttle opening (approx). There´s a small slit within the jet needle that matches on to a small tab additional down within the tube. Simple does it when placing these components in place.
The needle jet now in place and the small, now very clear, pilot jet gas canal clearly seen simply in entrance of the needle jet seat. It’s simple to grasp how simply these small crevices clog up.
Whereas holding the needle jet in place I can put the small washer in place beneath the principle jet.
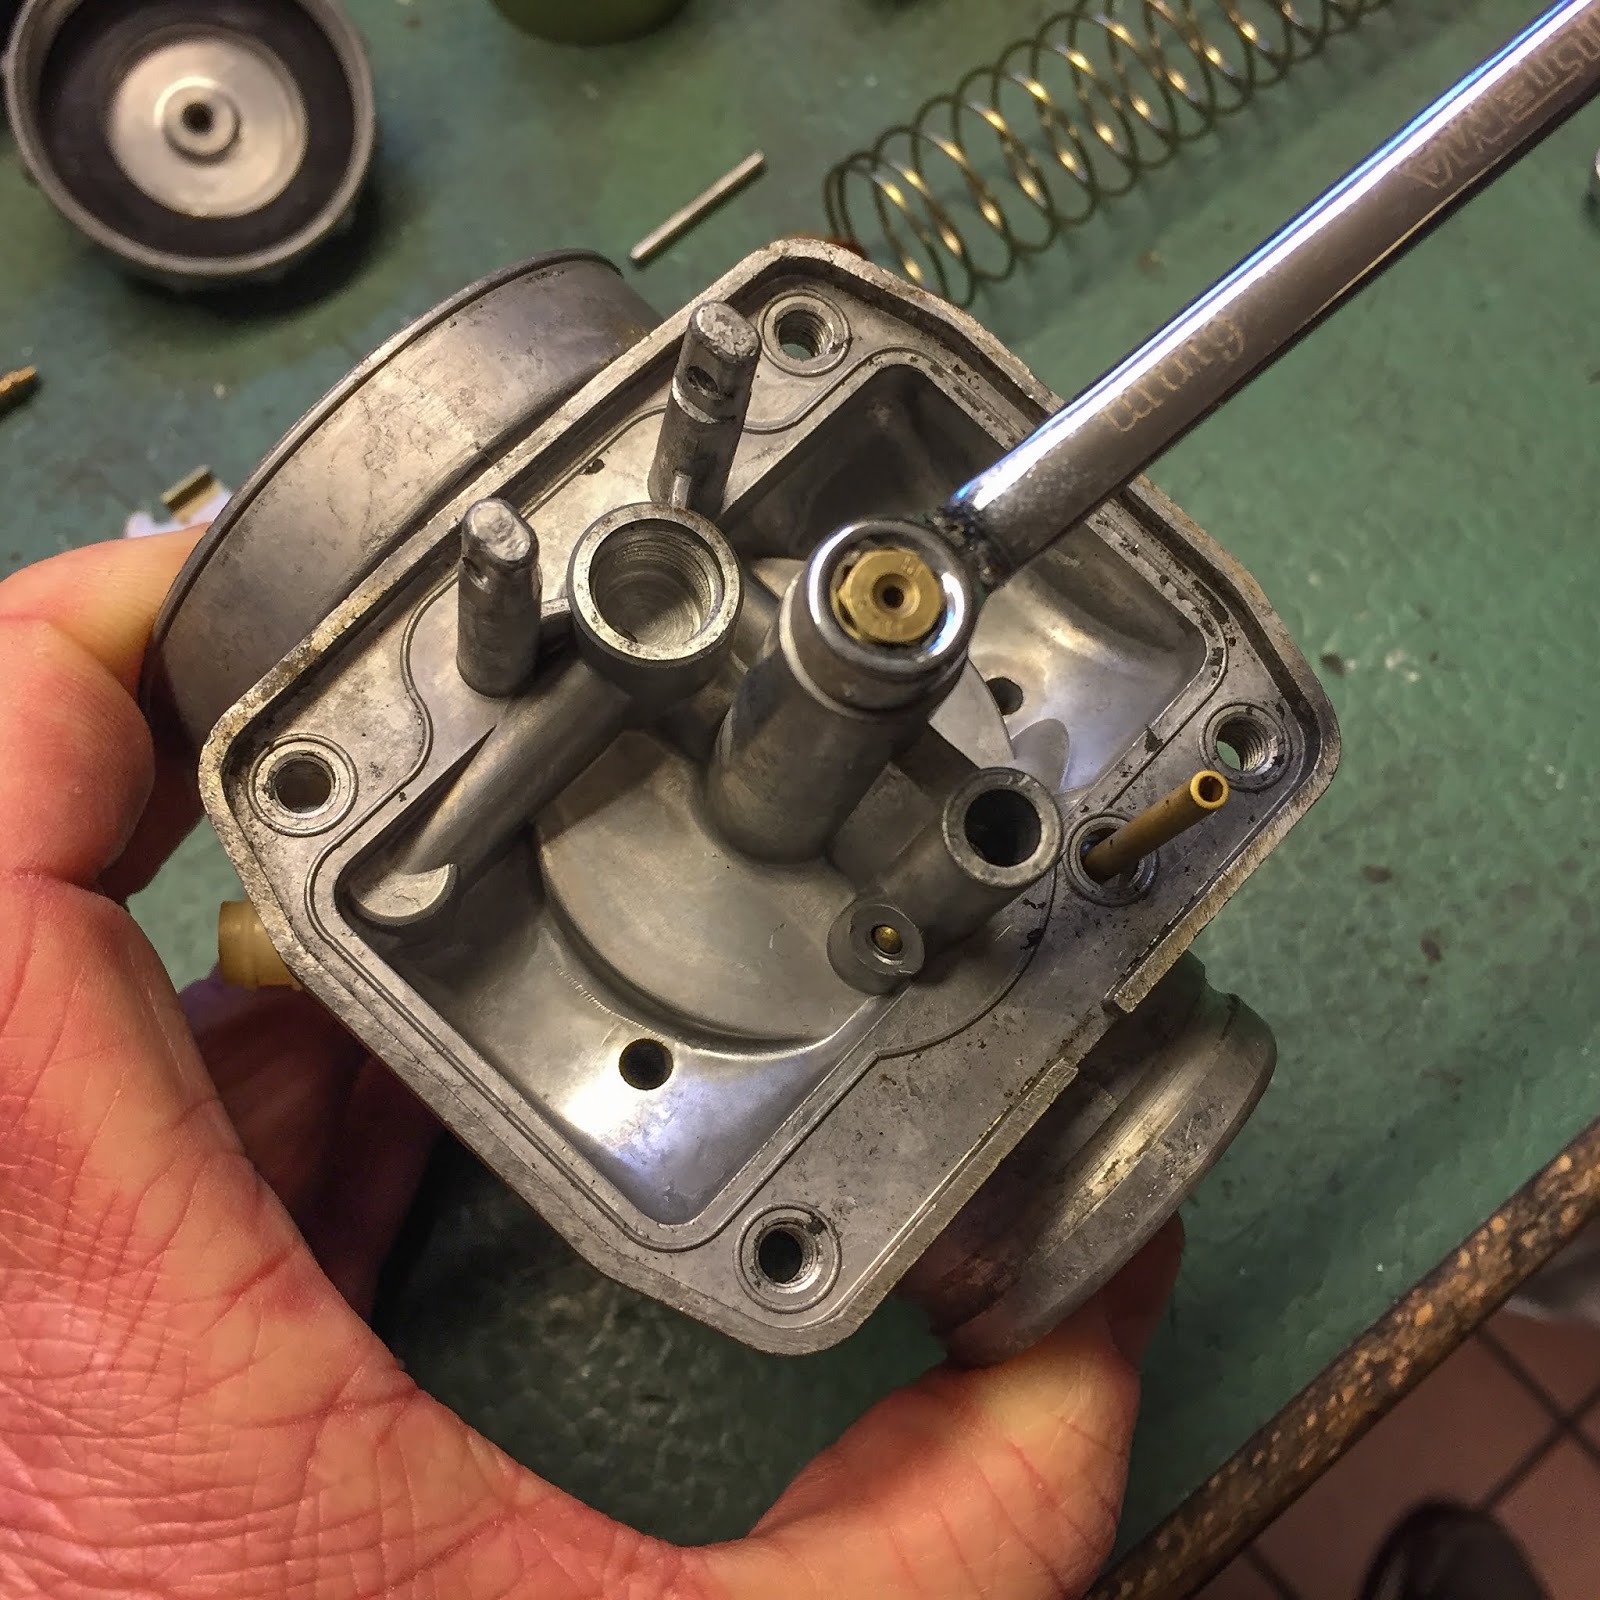
The principle jet is lastly secured with a hard and fast wrench within the right measurement. The jet is pulled tight, however not too tight. Brass and aluminium are each tender metals and require a little bit of carefulness.

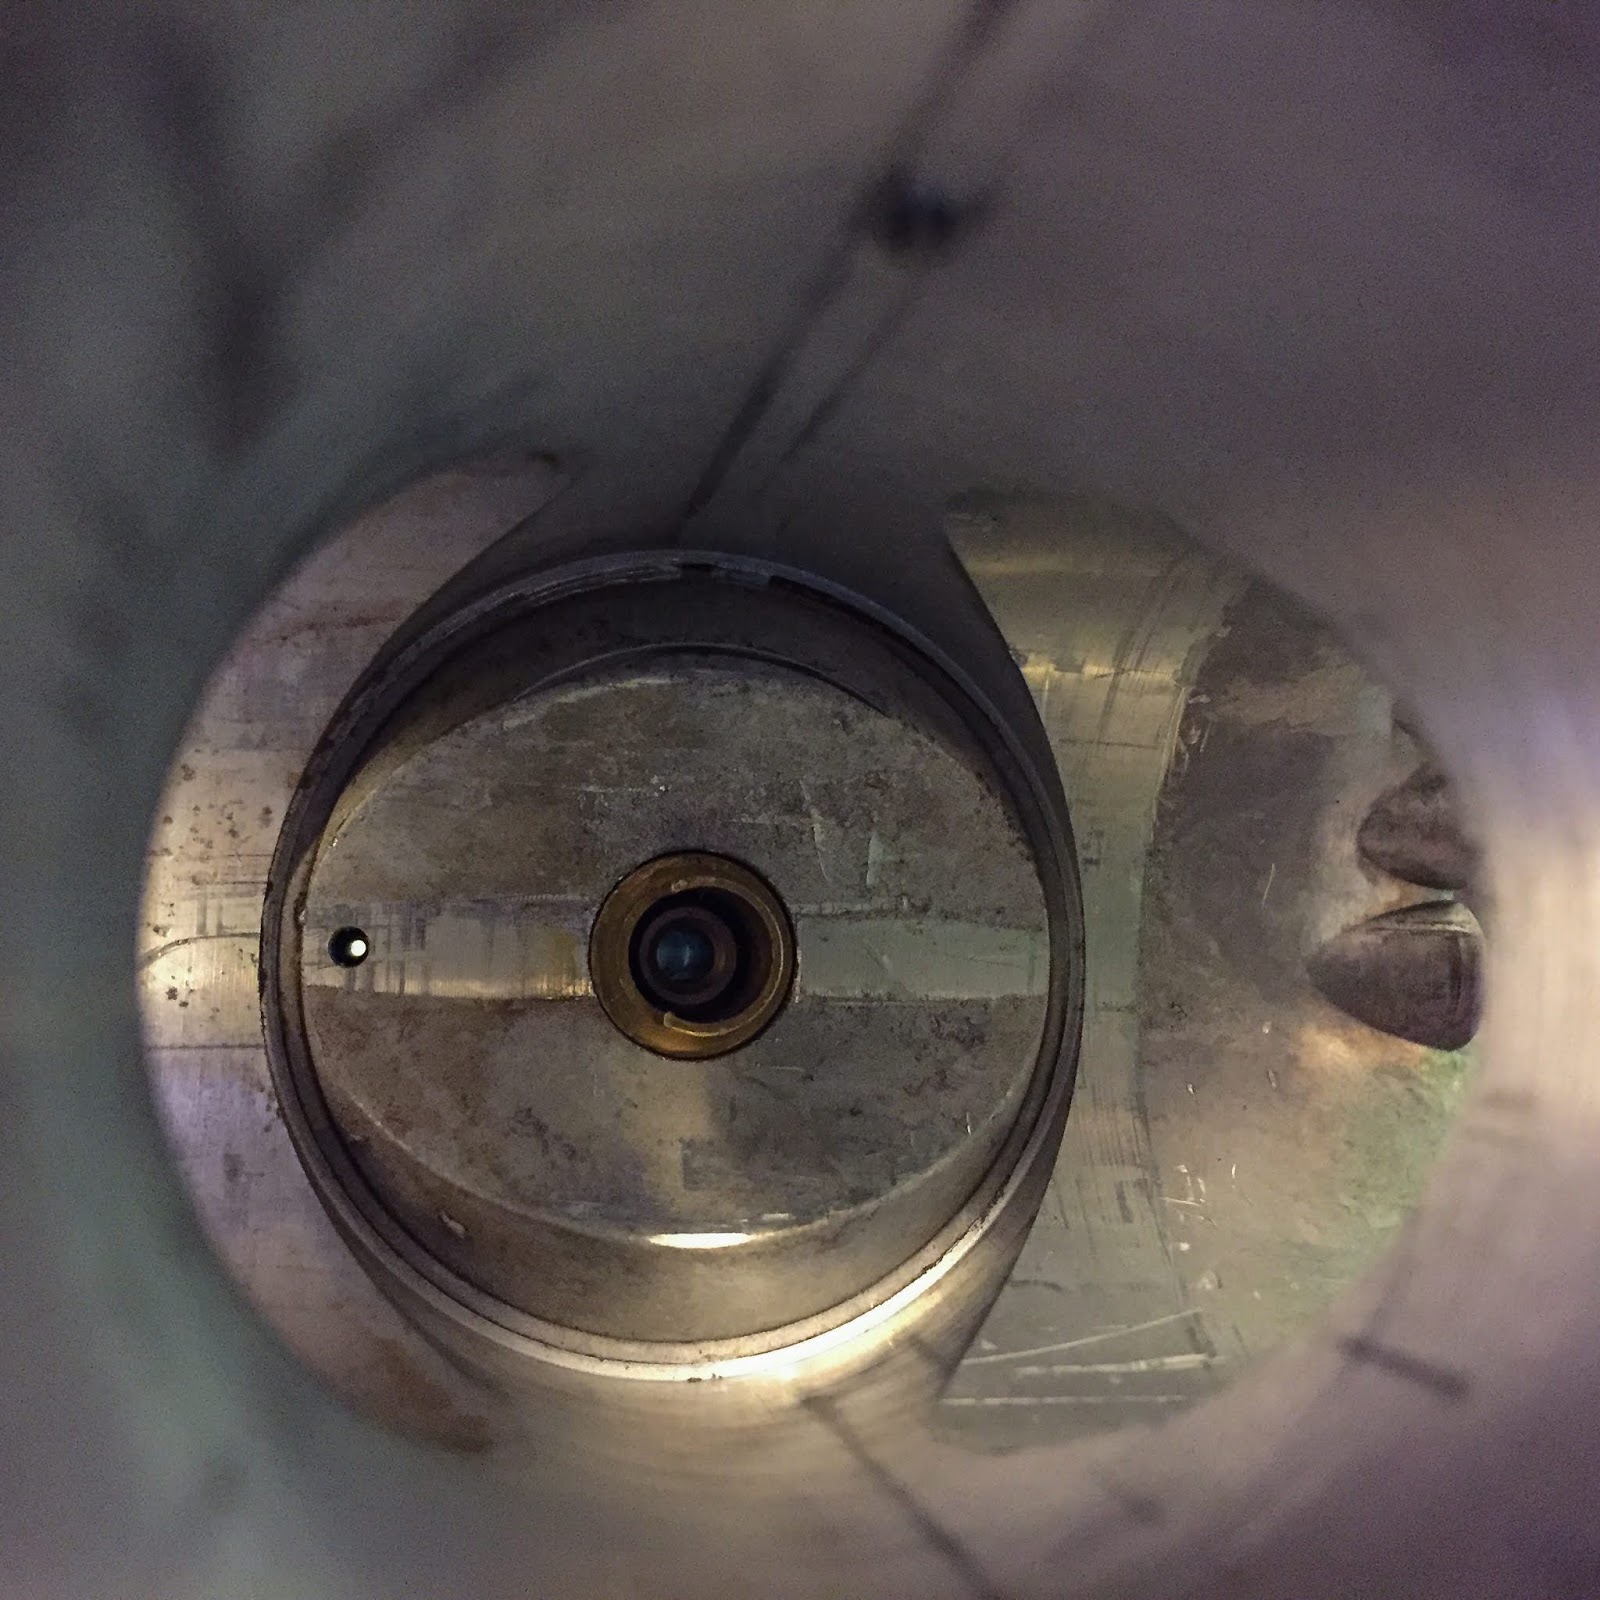
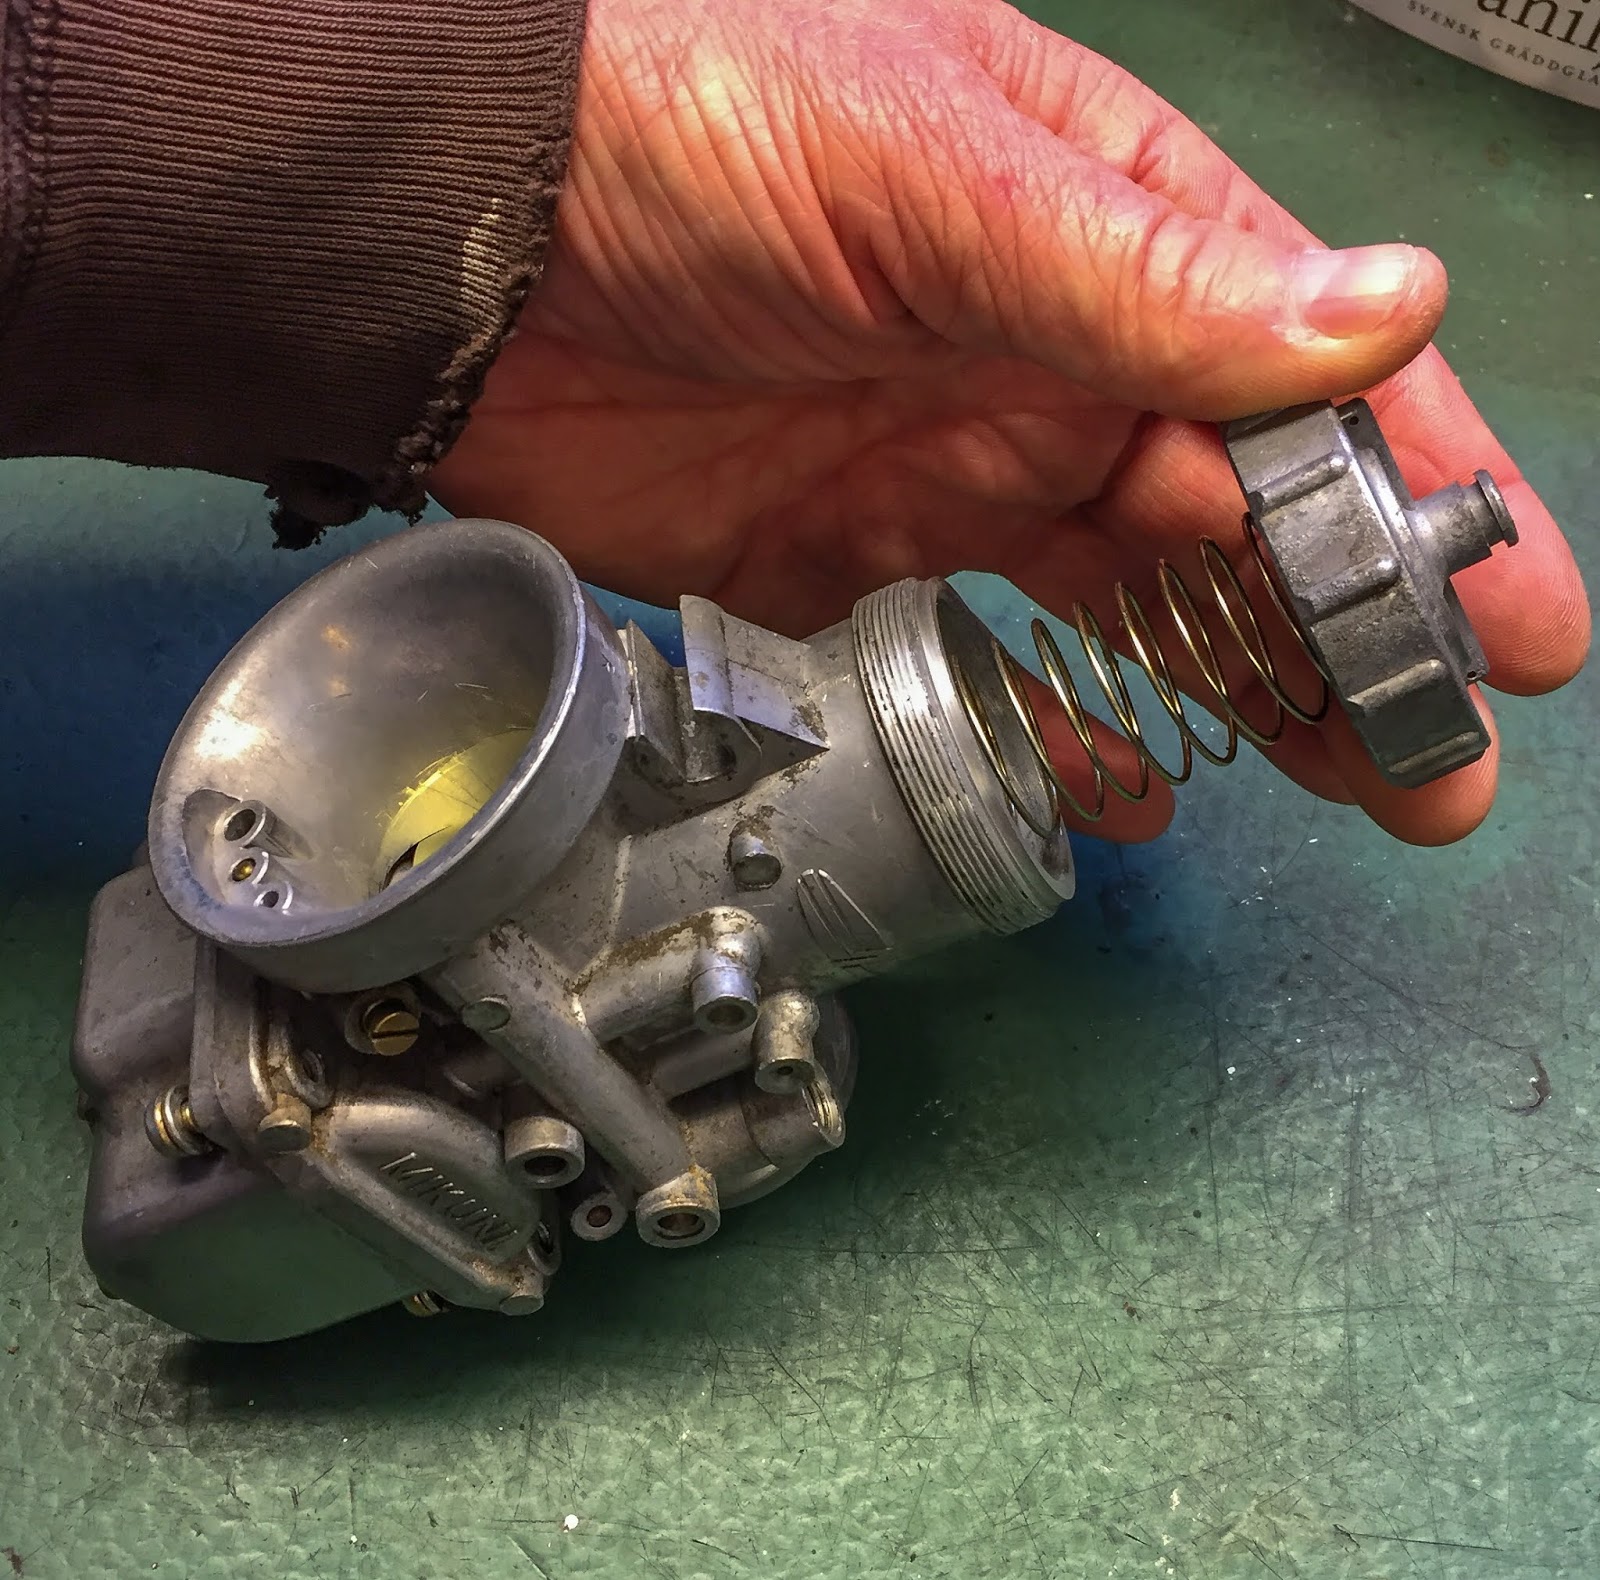
Subsequent is that fantastic, unique, float valve with its retaining spring and fiber gasket. Similar right here. Brass and aluminum and a fiber gasket on high of that. Not too tight, however tight sufficient to maintain it in place!
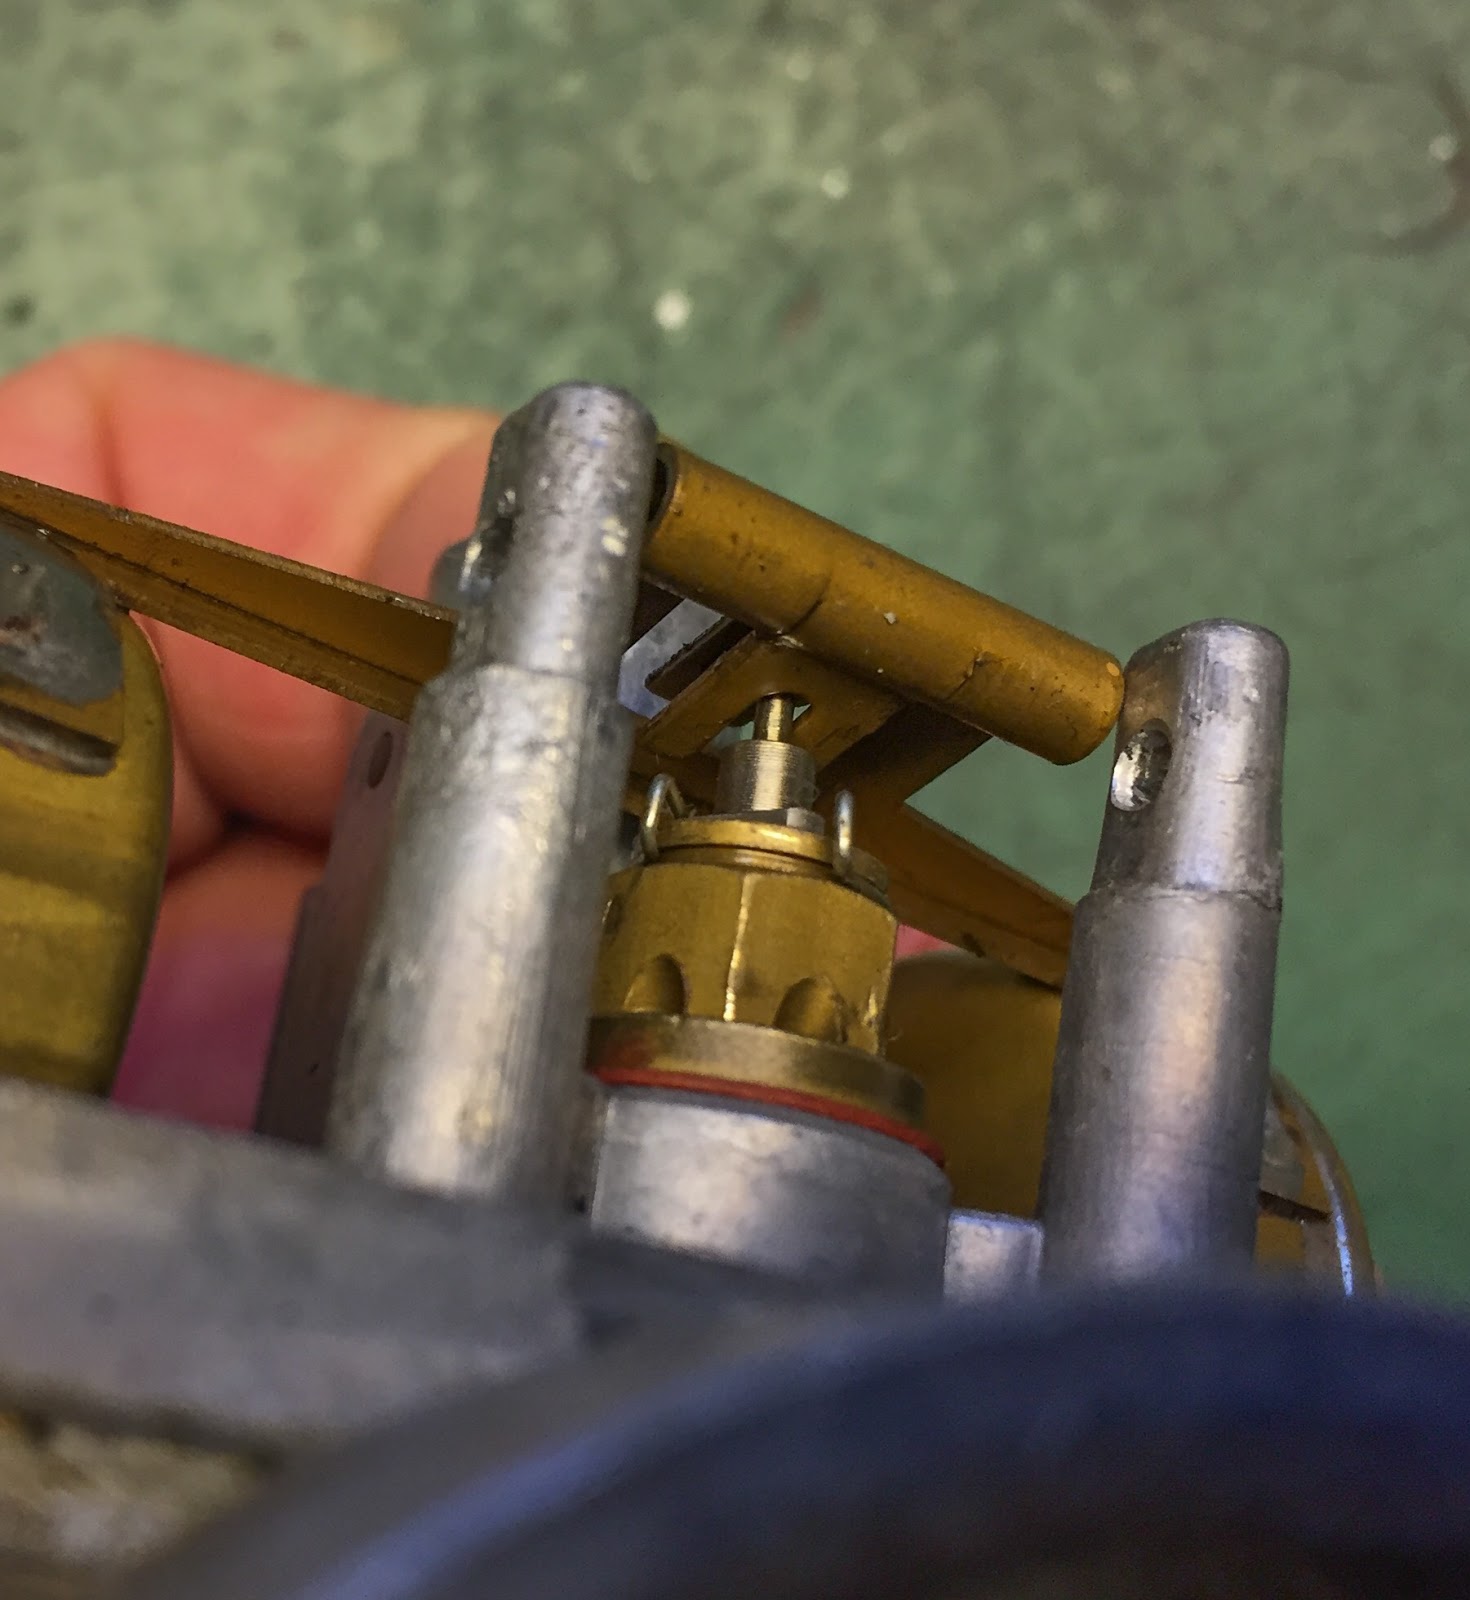
Getting the float in place, appropriately attaching to the float valve is difficult. Road bikes have a less complicated method to do that. Simply put it on high of the float valve and also you´re good. Right here it’s way more securely hooked up by an additional brass piece on the float gripping the float valve.

The float is secured to the carb physique by the float pin. This little factor is pushed by means of holes within the two small “towers” on the carb physique subsequent to the float. It creates a “hinge” for the float to maneuver round and do its job. It may be very difficult to take away a caught float pin and likewise very difficult to get it in place if the holes are ever so flippantly deformed in any method. By no means, ever use a hammer to beat on the pin and directing the pressure on to those towers… They WILL brake! And that carb physique is kind of prepared for the bin. Simple does it right here!

Right here´s how I do it. Fastidiously squeeze the pin in place by making use of pressure on the pin and the receiving “tower”. The pin normally will get caught in certainly one of them so put it by means of the opposite one first after which pressure it in to the tight one.

Now could be the time to additionally verify the float degree. In accordance the guide it´s imagined to be 34,5 +/- 1mm from “entrance bore heart”. I suppose that’s one thing they need me to verify in direction of the precise gas degree within the float chamber. I can´t do this now, nor will I ever do it that method both.
IF I’d discover the necessity to get it THAT actual I’d do it in a see-through bowl and rig a bottle of gas to the gas inlet of the carb, have the carb sit on the backside of the bowl with out the float bowl hooked up and easily fill the carb, and the glass bowl, till the float valve stops the gas from operating into the carb. I’ll by then clearly see the float degree within the bowl…. Yeah, I do know, it sounds very theoretical, nevertheless it works!
For now the floats find yourself the place they have been. Roughly with the retaining a part of the floats parallel to the gasket floor. That normally works simply nice!
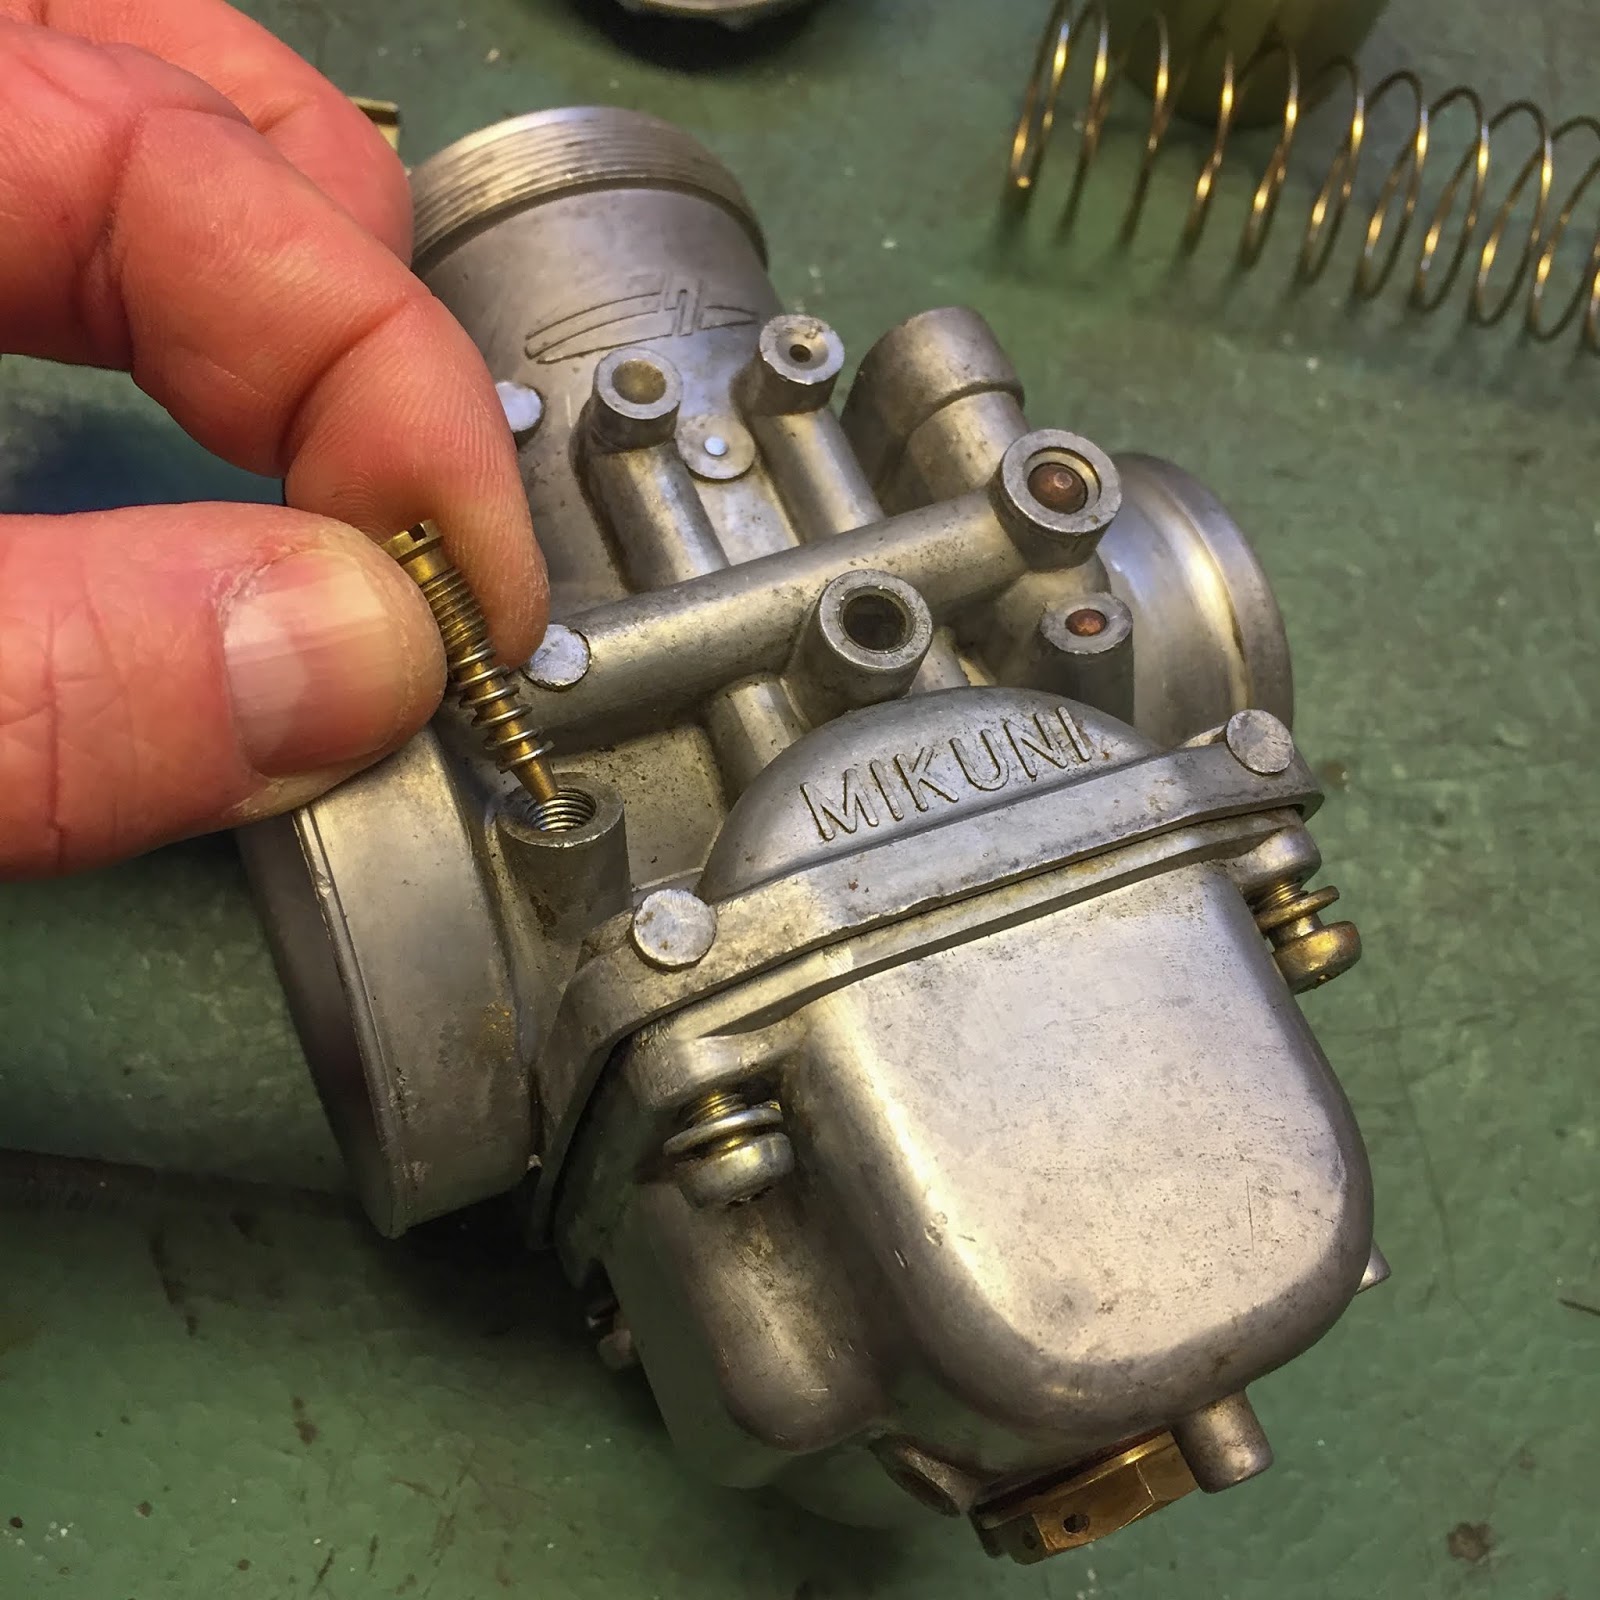
The air screw is subsequent. Cleaned and with its retaining spring. This one is screwed all the best way in after which opened 1/2 flip. That sounds a bit too little in my ears, however I´ll attempt it for now. The road bikes use 1 1/4 – 1 1/2 seems. We´ll see how that performs out after I begin her up!
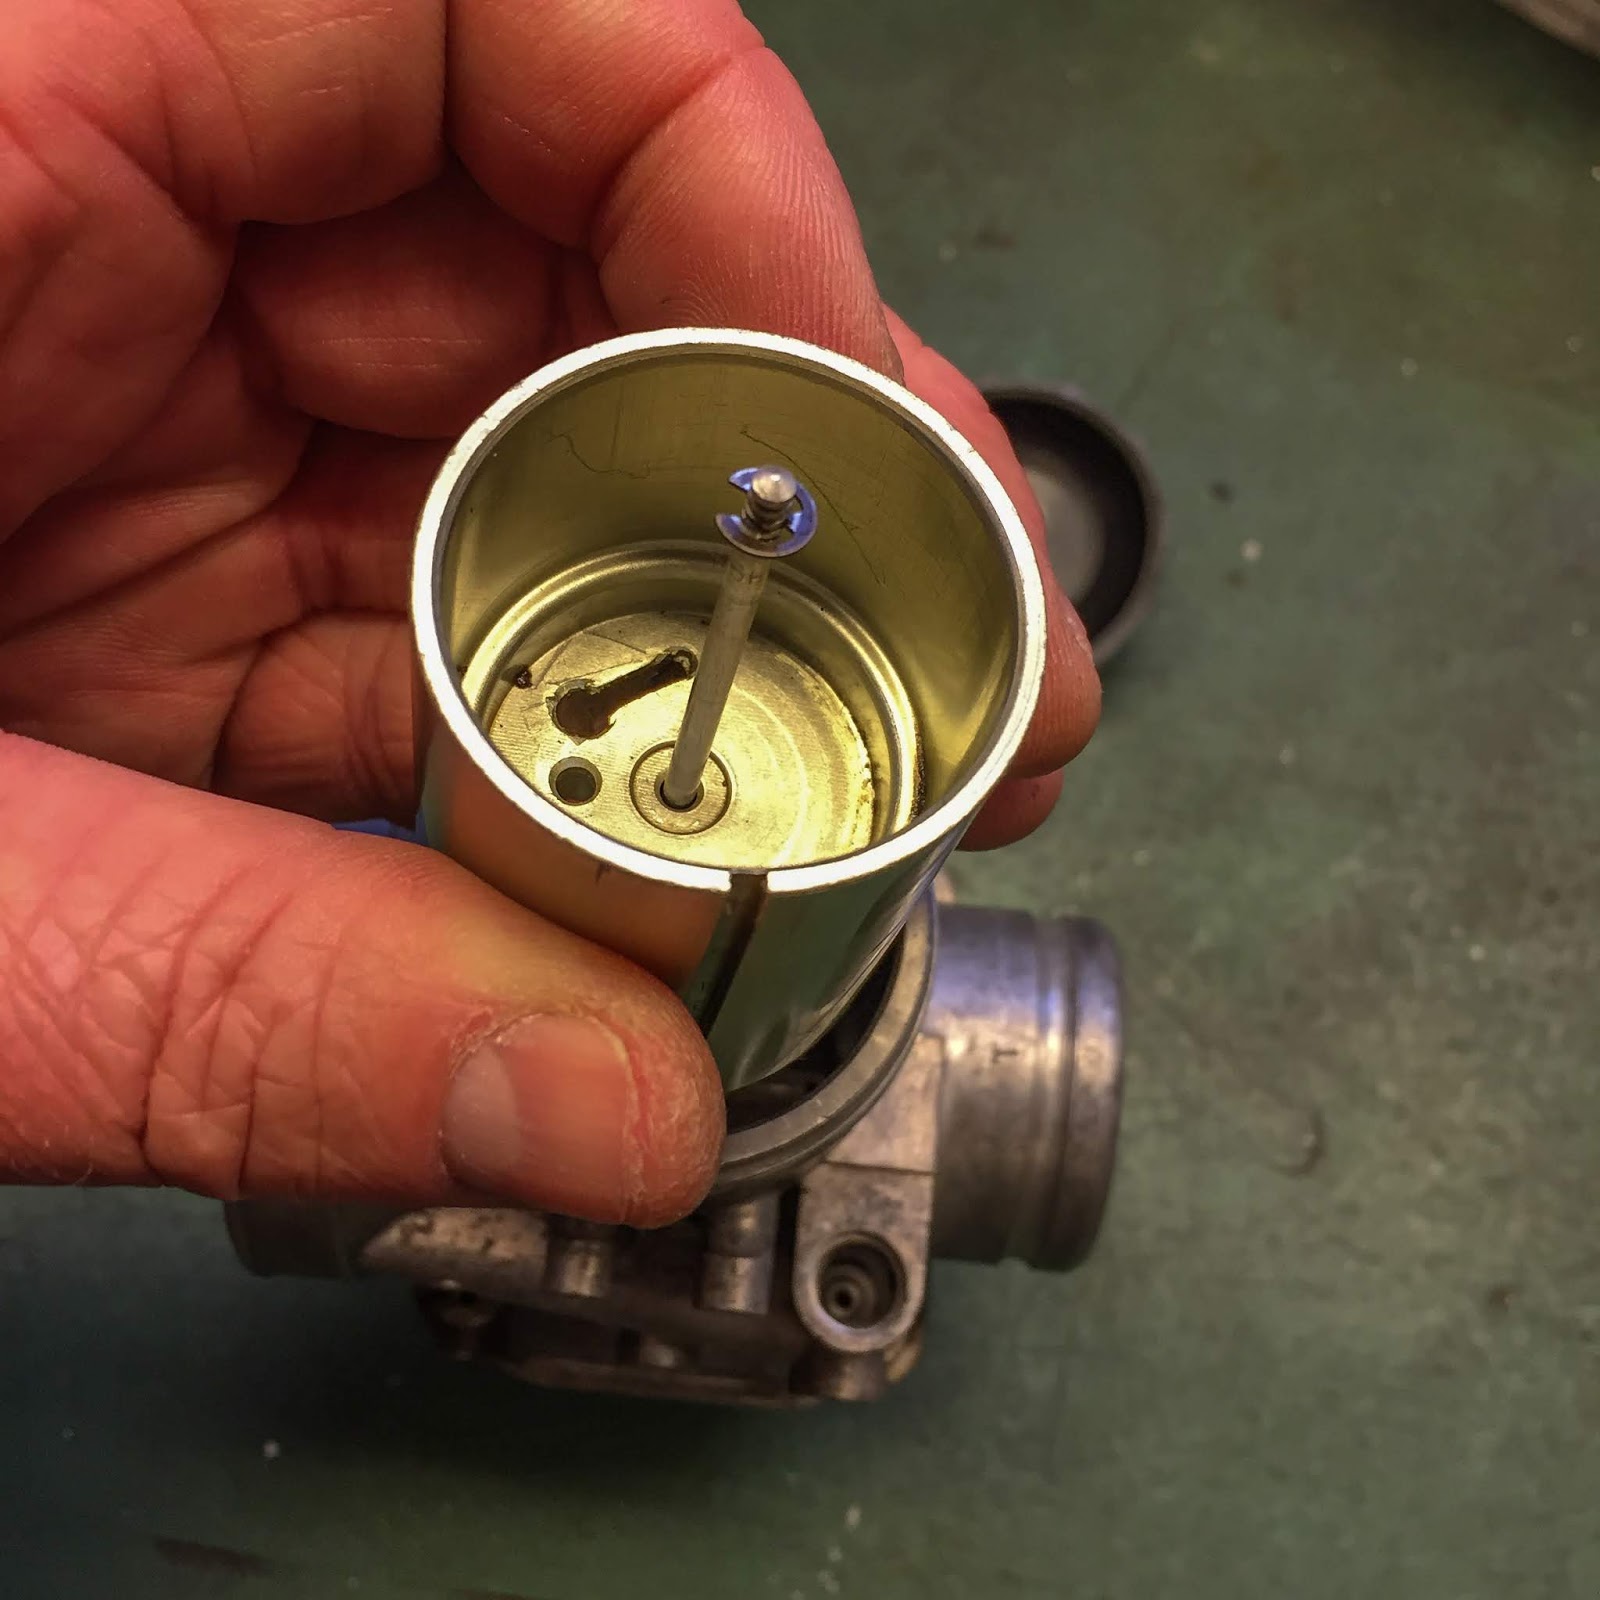
Time to maneuver up on the planet. Some of the necessary items within the carb is the throttle slide. It holds the jet needle and that in flip is adjusted in peak by a small circlip that holds the needle at a exact peak within the slide. I exploit the usual setting of the center groove of the 5 obtainable. third groove from the highest and backside!

The needle in flip is held in place by the throttle valve spring seat. A washer with a gap and a tab that secures the needle in place when the big slide spring places stress on it. It additionally locks the throttle cable in place by blocking the trail for it to the bigger launch gap. Fairly ingenious really!
The spring is somewhat giant and slinky, as you’ll be able to see right here. The slide additionally makes use of a small slit and tab to be appropriately positioned within the physique. It is usually very important to verify the needle enters the needle jet on the backside of the venturi when putting in the slide and the spring.
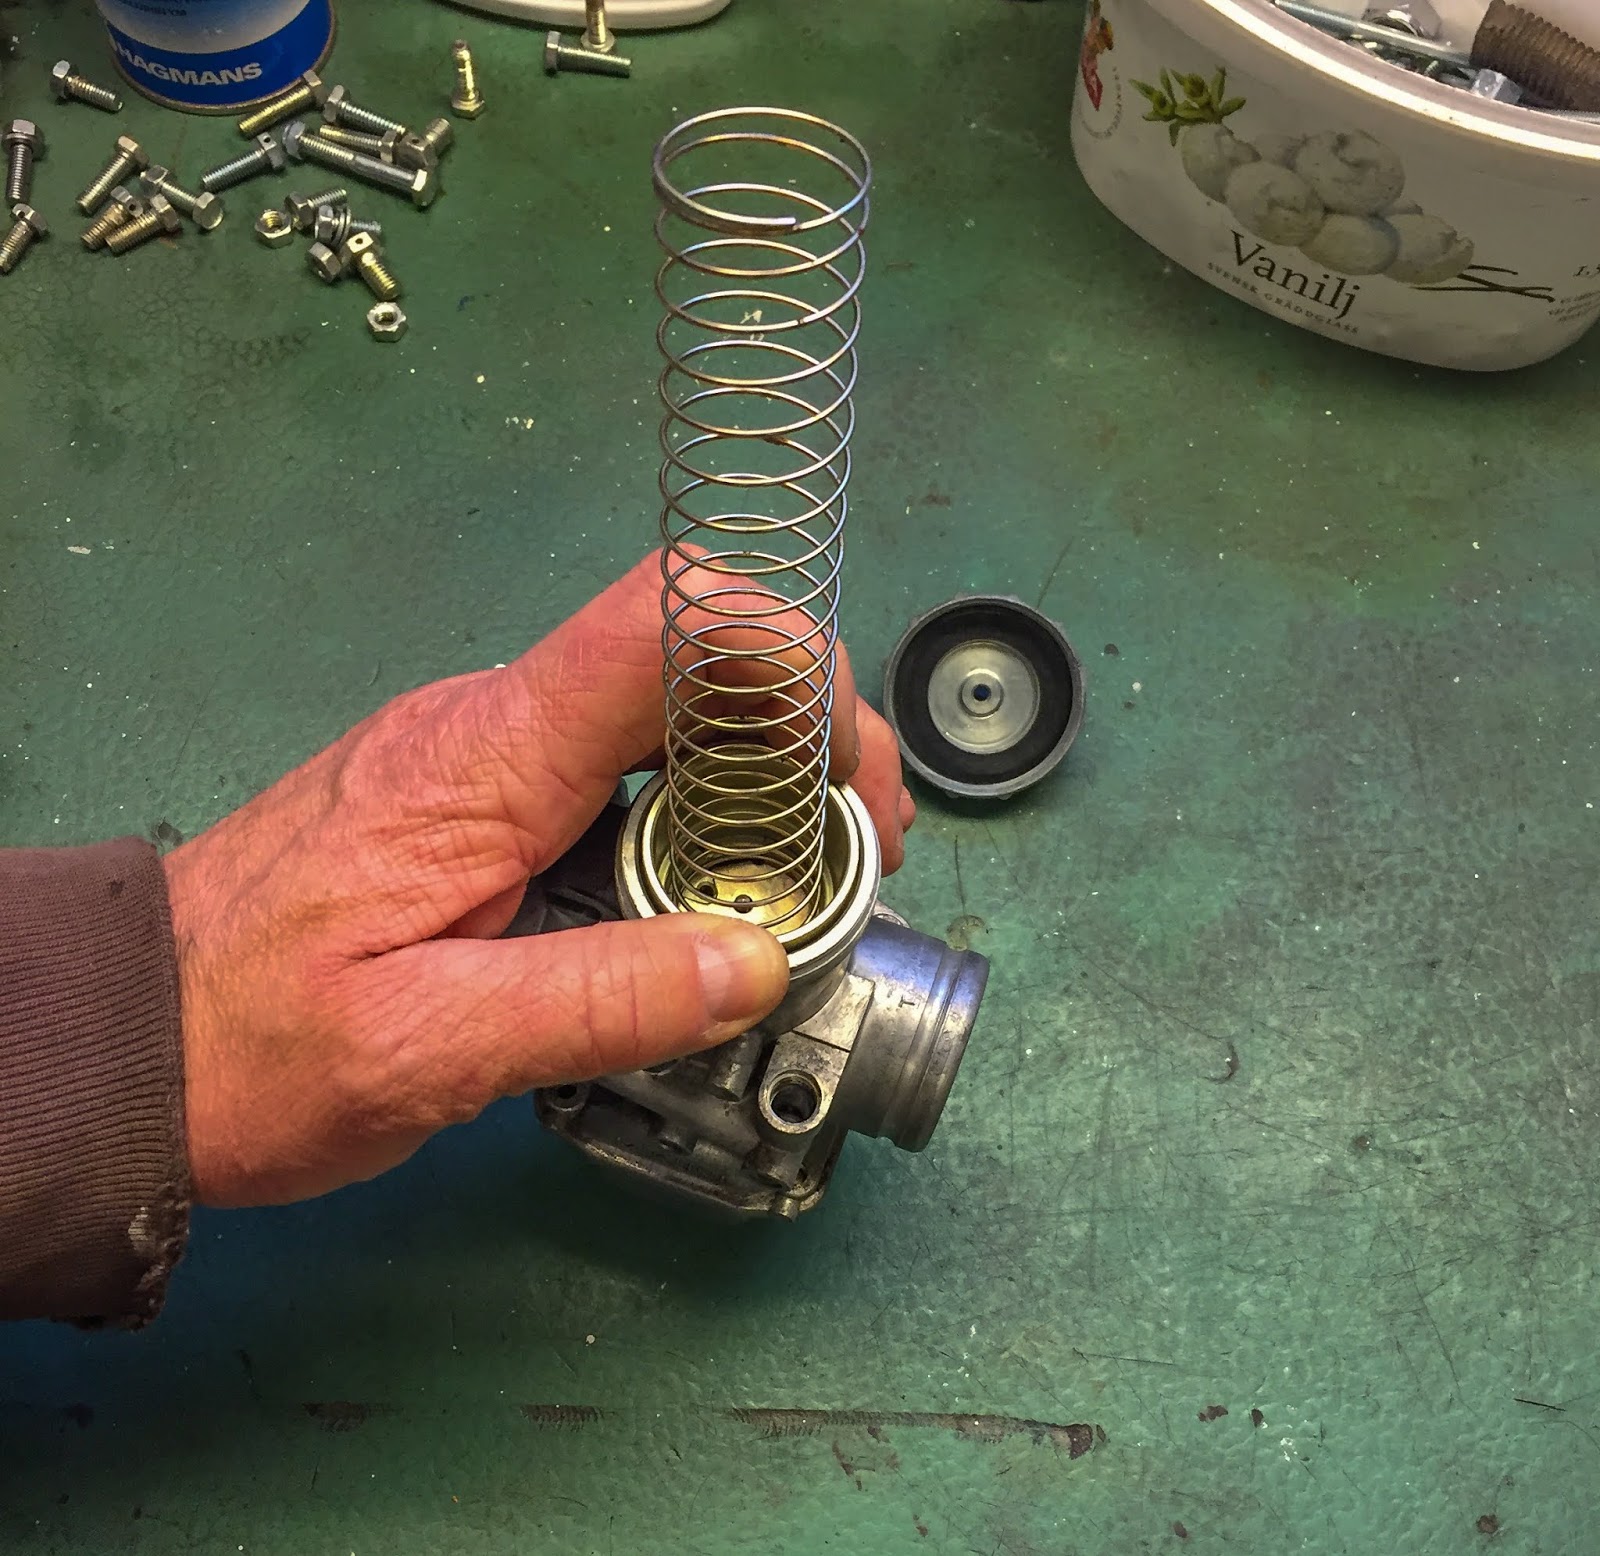
The ultimate contact is placing the carb physique high lid on and screw it to the physique. OK, that´s one down, two extra to go! Good, clear and tremendous simple job as soon as every little thing is clear and neat.

Now, I wouldn´t be me with out a few “nonetheless leben” photos of the components I´ve simply labored on, would I?
Right here we go… Properly cleaned and refurbished carbs for the H1R racer.
And from one other angle. I consider these will work simply nice. Let´s preserve our fingers crossed for the float valves to be leak proof! The whole lot else on these carbs will work completely, I´m certain.
I made one other quick video… And once more, only for enjoyable.
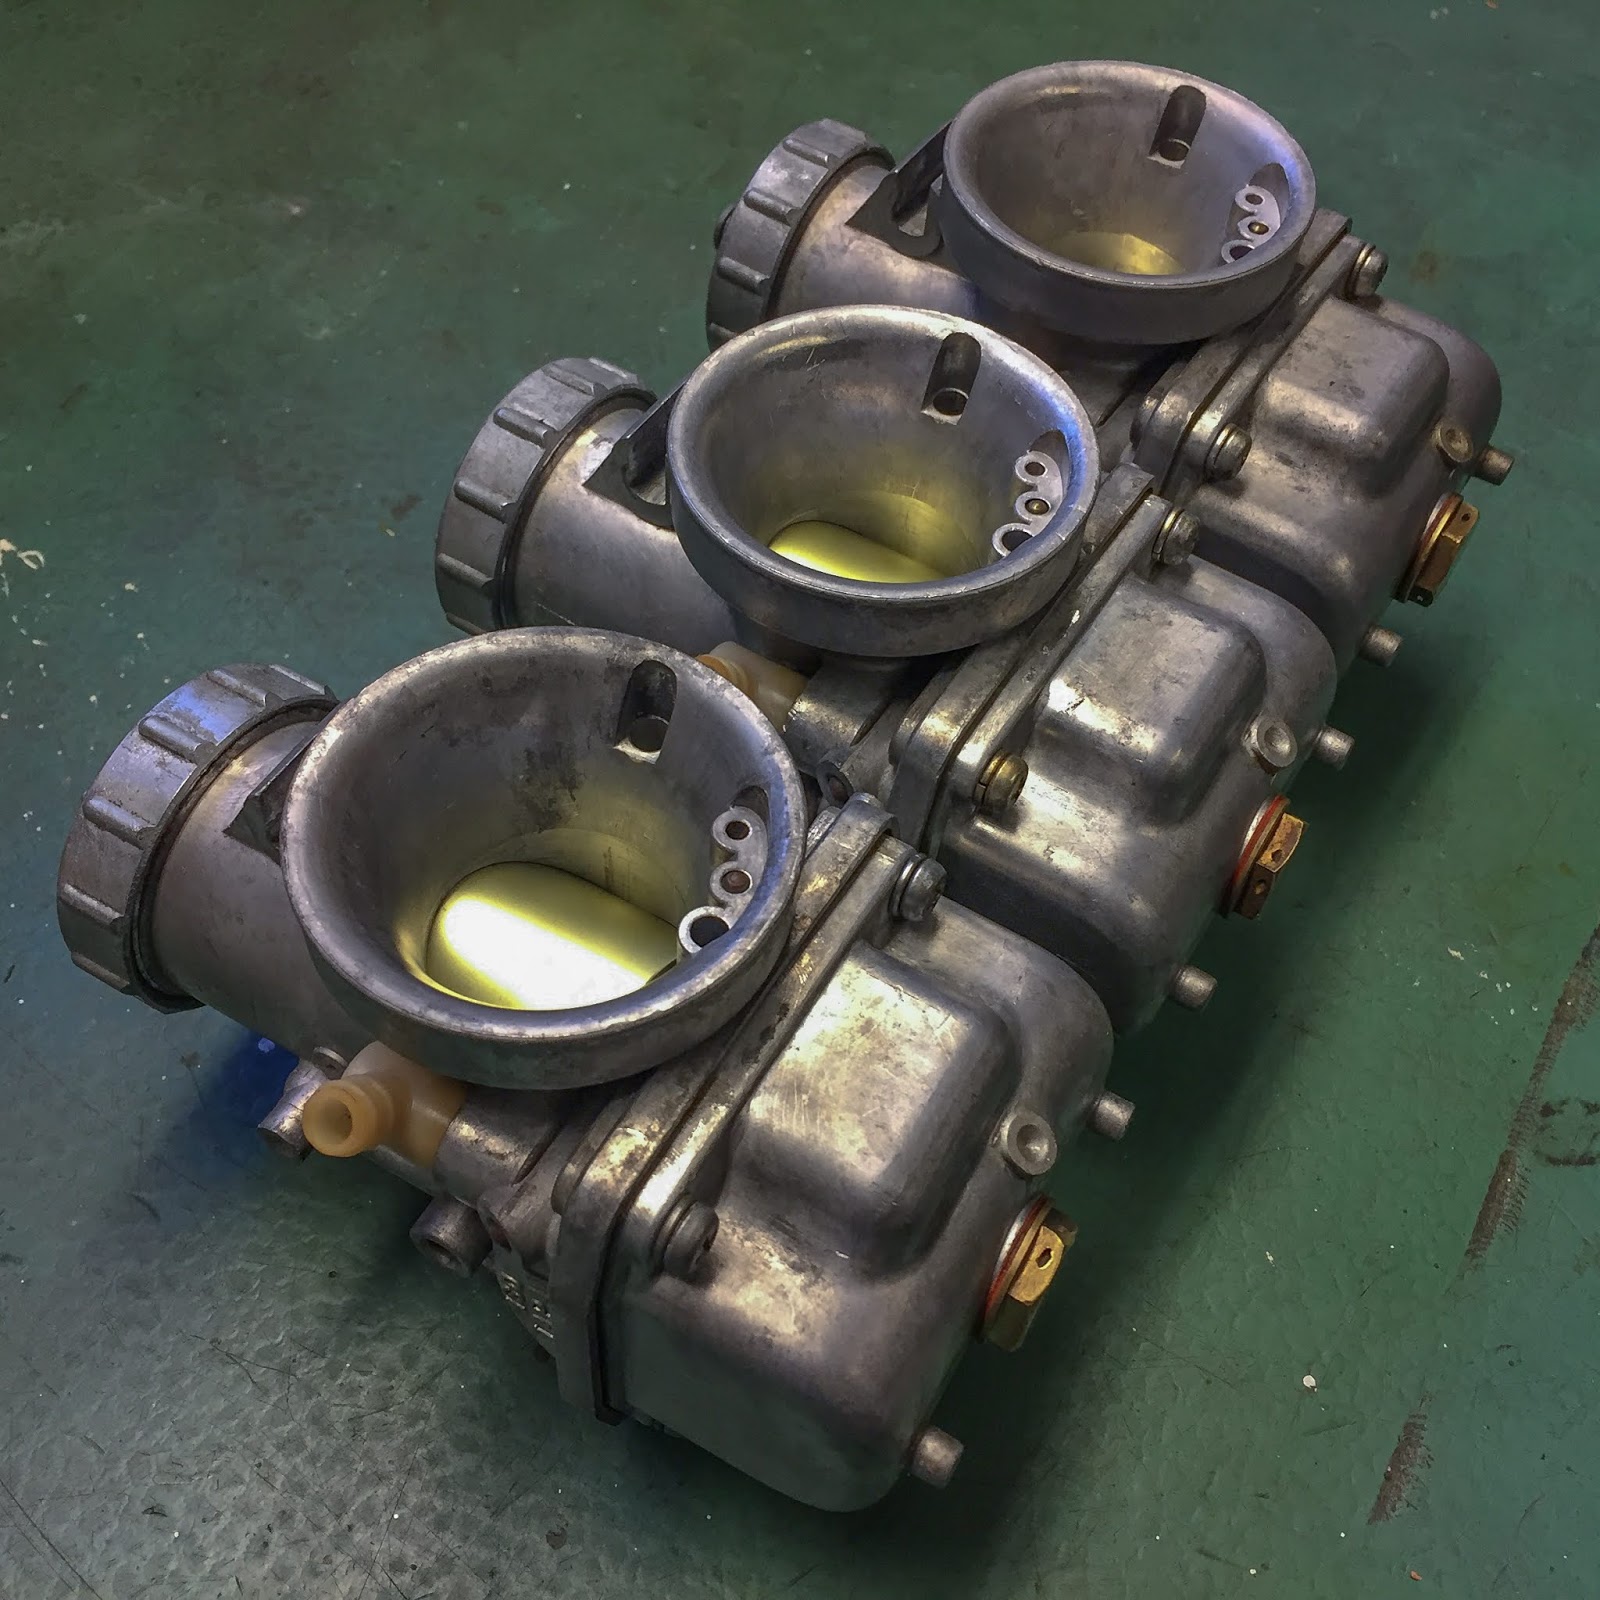
On the point of go on the cylinders. This can be a fantastic set of carbs. I spent many hours cleansing, engaged on and at last assembling them to this nice situation. I´m very proud of the end result up to now.
Another, simply to indicate how massive these air inlets are. One of many slides have some small marks and exhibits a bit of put on, however I hope
it´ll work out.

That is the place all of them go, afterward. The whole lot is ready at this finish for the carbs. The cables are routed out of the best way for them and the protecting blocking of the intakes eliminated. It’s also possible to see how the clutch cable has no adjustment obtainable as the road bikes do. There was a injury on the sheath which I repaired with some black shrink tubing. Appears OK, however completely not good. It´ll do for now.
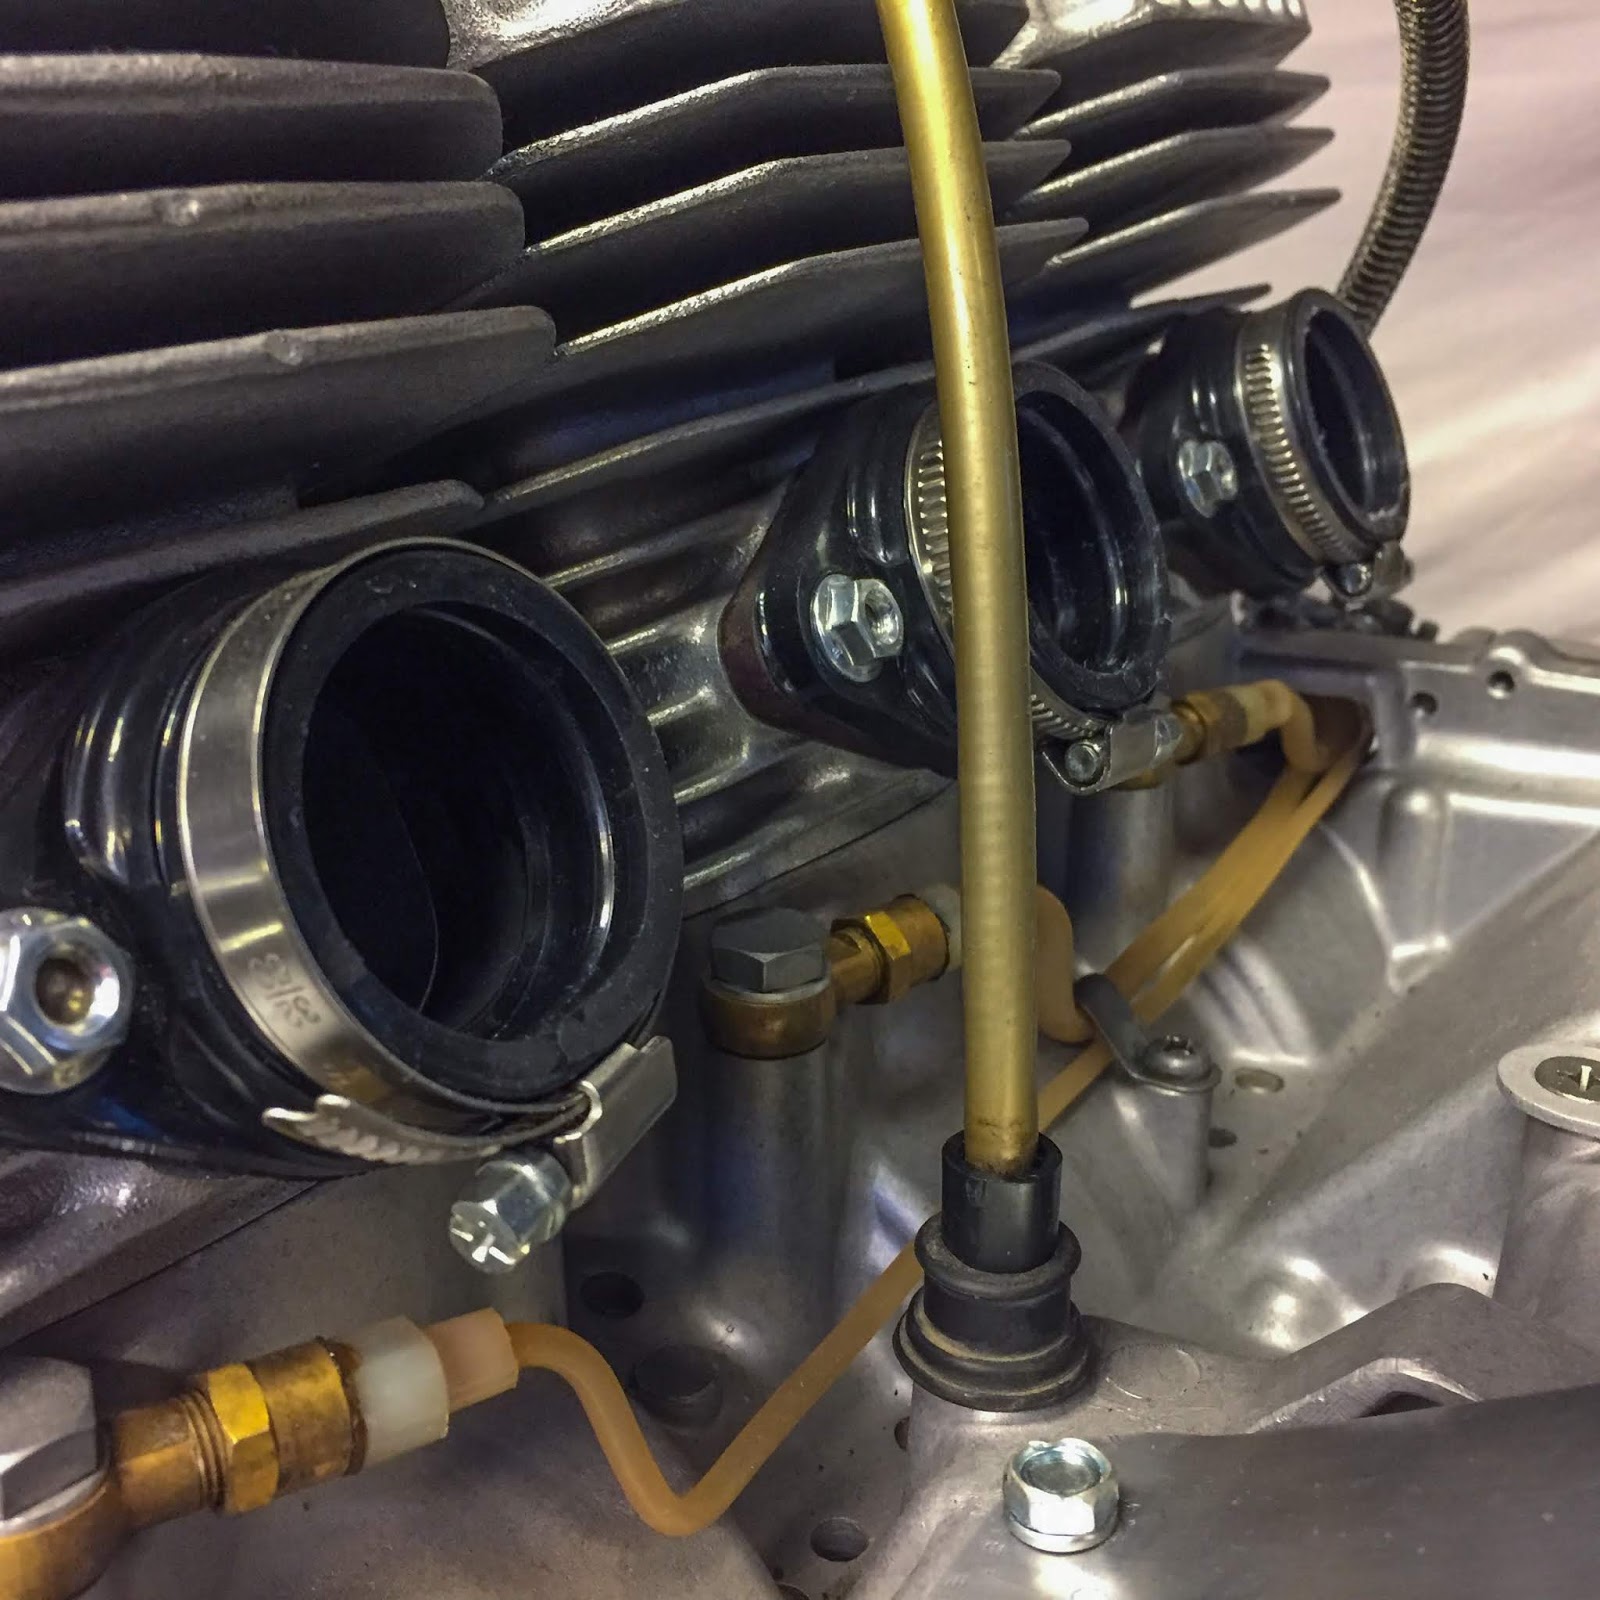
Aspect view of the air consumption rubbers and their clamps. I do know these aren´t unique Kawasaki, however I don´t thoughts. They have been obtainable and so they look the half! Even clamps are OK in my world.
The oil strains with their one-way-valves, verify valves, are additionally clearly seen right here. These will probably be among the many objects to be examined throughout the first begin up. It’s vitally necessary that oil flows in all three strains at a good tempo. If a kind of verify valves doesn´t work correctly, the oil received´t movement to that cylinder, OR solely movement there. They should preserve the very same stress in all three with the intention to operate completely. Extra about that later.

Right here´s one other certainly one of my small methods. I exploit a meals grease in a sprig can as lubricant when mounting tight rubber components. It’s, since it’s permitted for meals, completely innocent to rubber components. It’s tempting to make use of automotive grease, however that can break many rubber components. There are different merchandise on the market, however I actually like this “Tarant” factor…
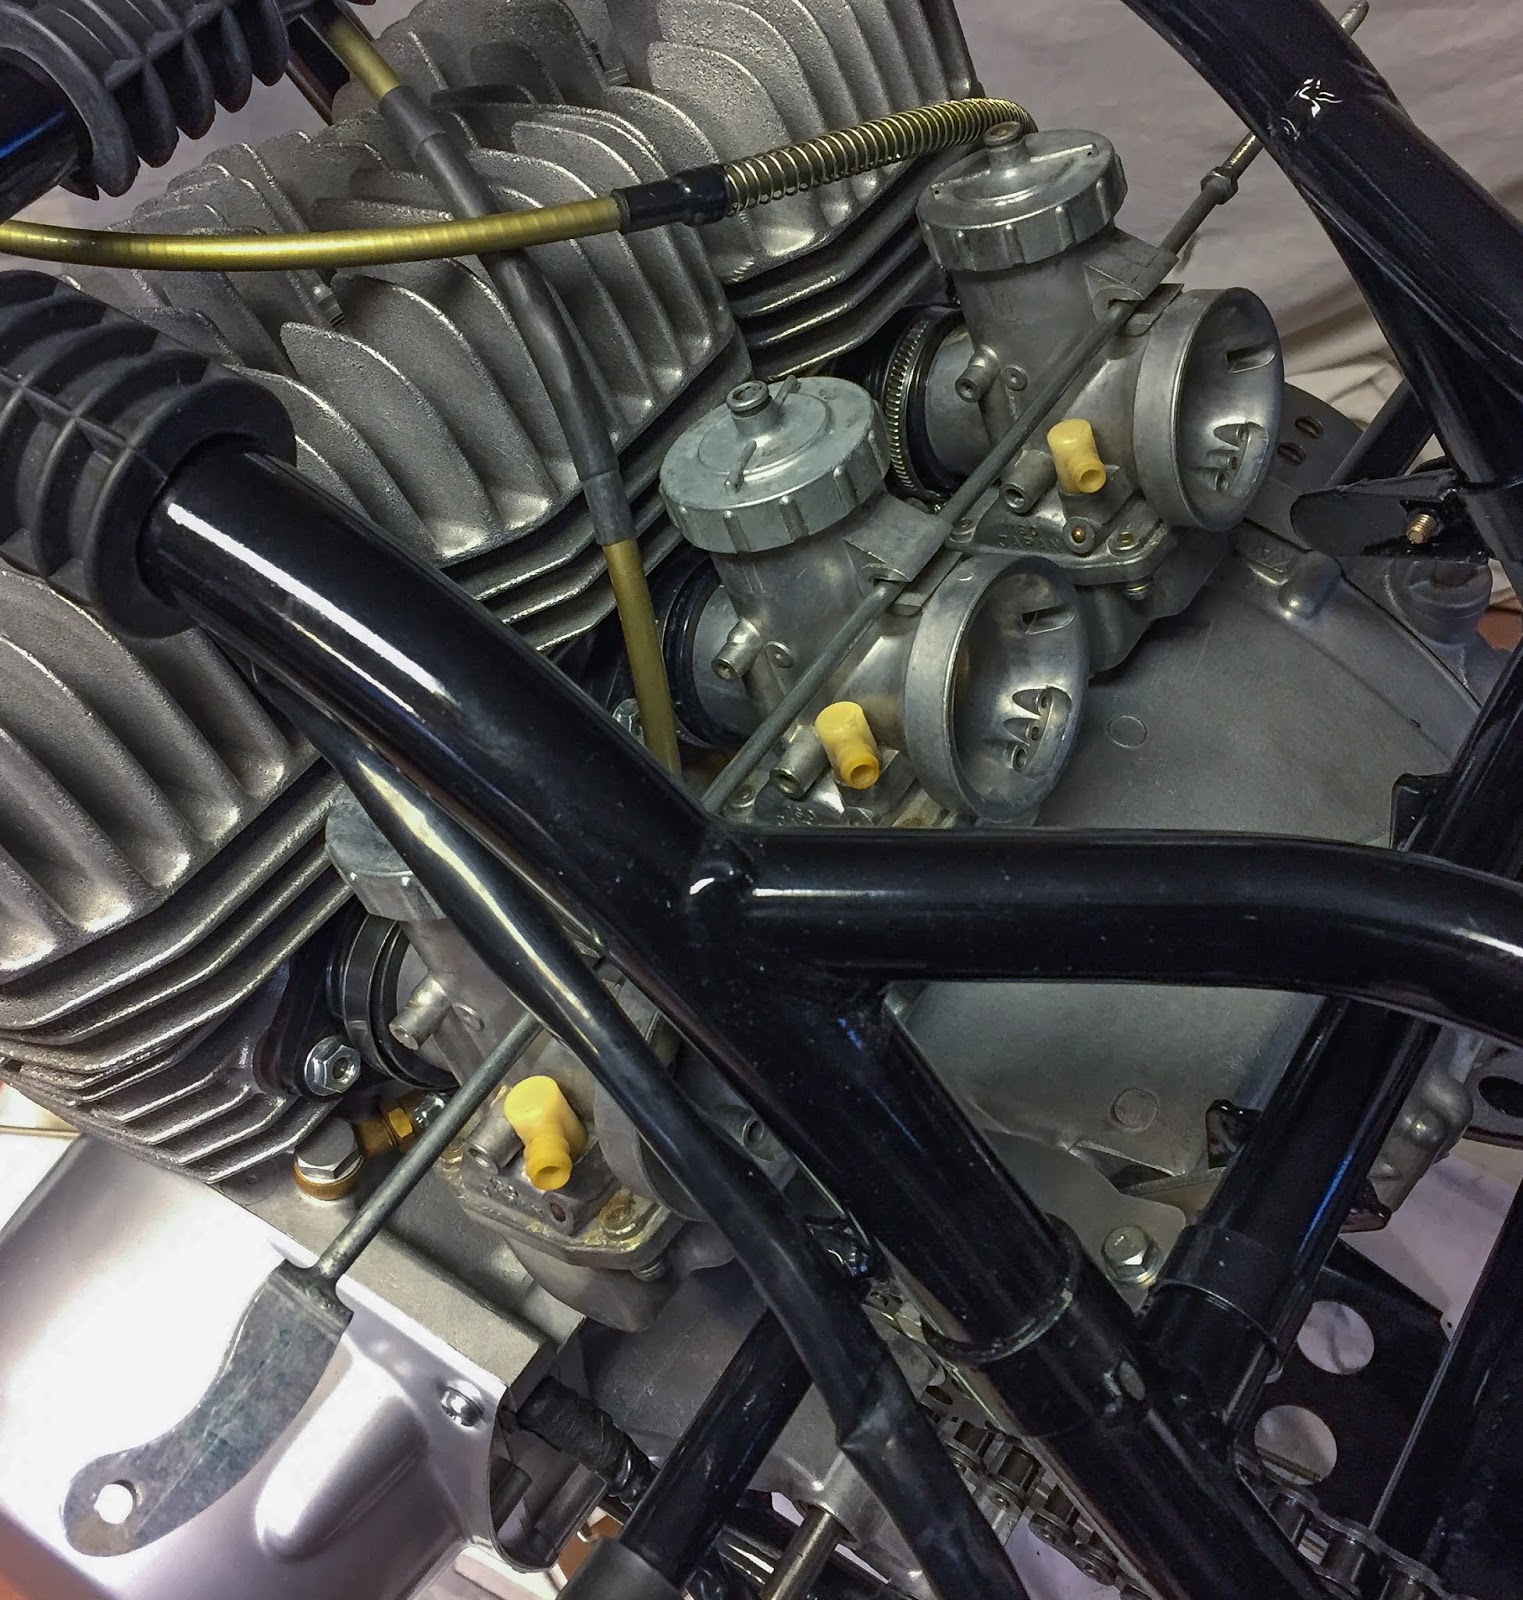
All three in place. A bit tight to get them in there, particularly in direction of the engine casing. Not a lot clearance there! The H1R carbs have these “hooks” above the air consumption half. They’re for adjusting their place within the consumption rubber. You need all carbs to be mounted appropriately each vertically and horizontally. These Are used for that.

A rear brake rod from an H2/H1 match snugly within the hooks and made it simple to regulate the carbs appropriately earlier than tightening the clamps and mounting them completely to the engine. Subsequent up with the carbs are the cables. Throttle and choke. That´ll have to attend for some time….
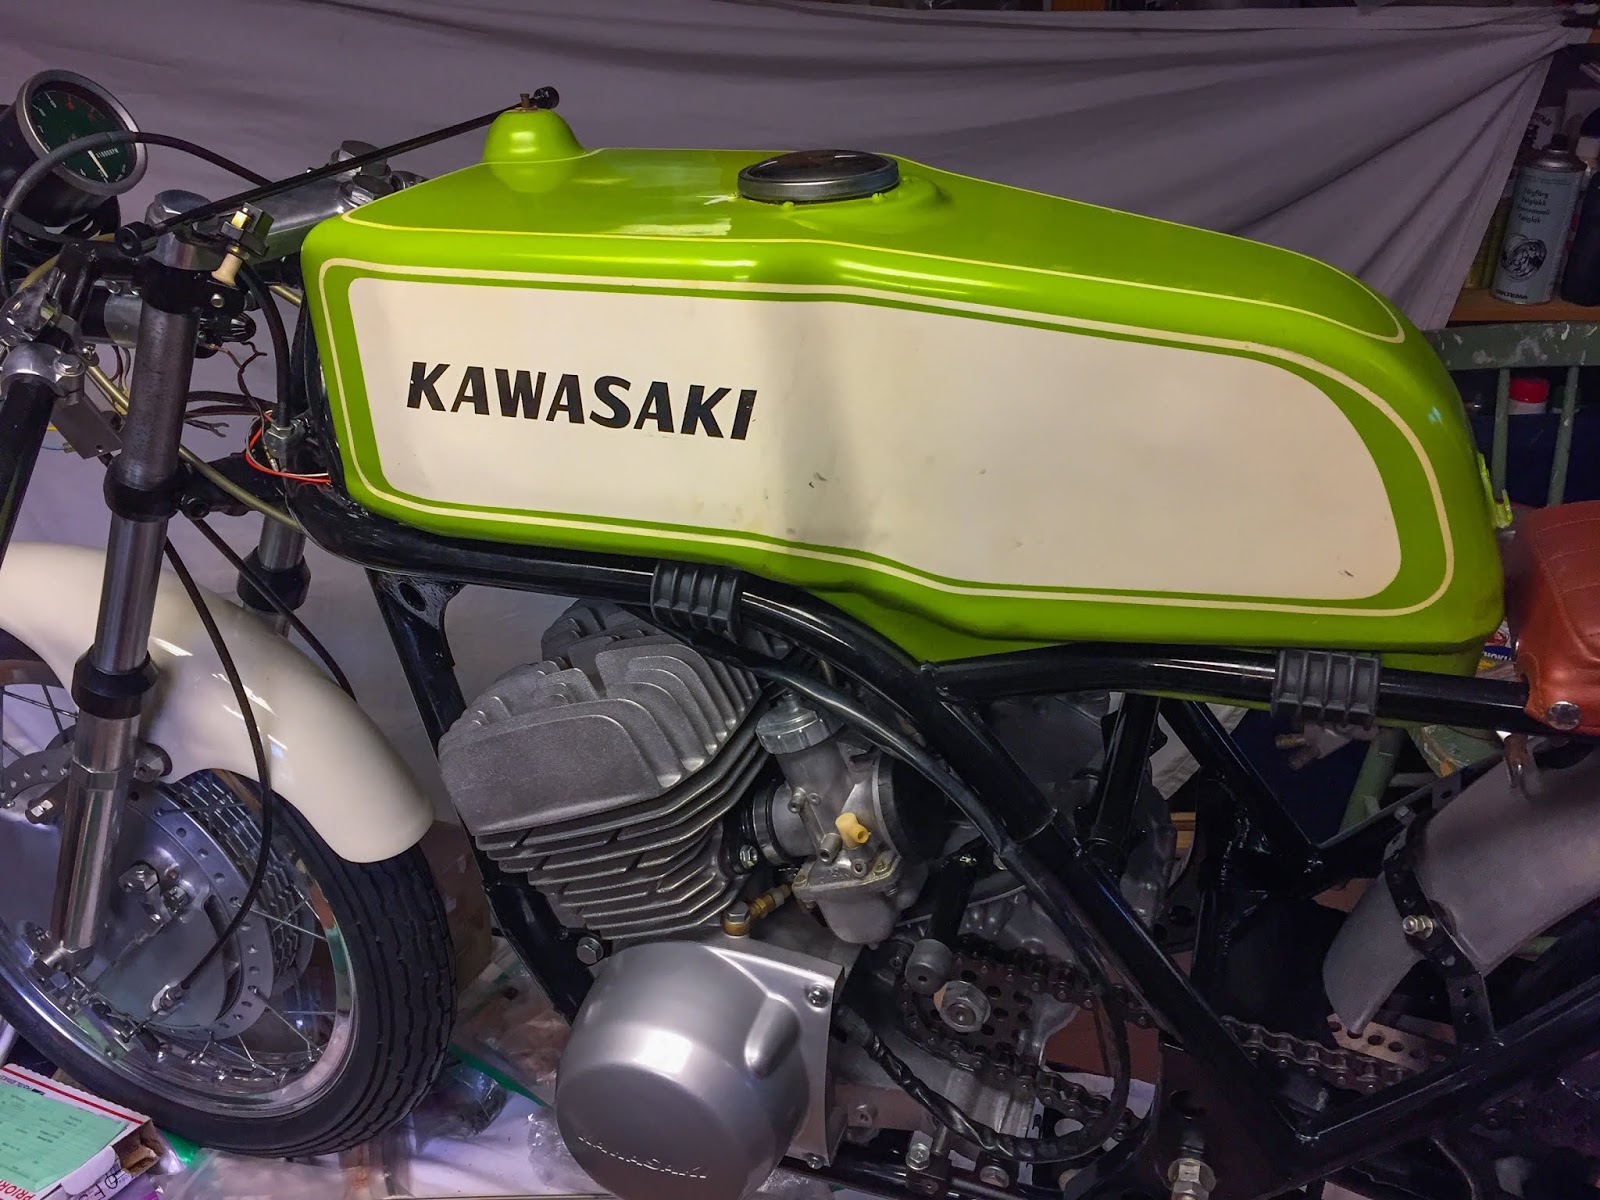
I requested you in my final put up about somebody that might copy my gas tank. Effectively, I obtained a solution!
A form reader tipped me a couple of enterprise not too removed from Stockholm which may have the ability to assist me. Thanks rather a lot!!
I wrote to him through his homepage and he referred to as me proper again and we mentioned what I wanted and what he may do.
So, earlier than persevering with on one thing else, I began making ready for a fast journey to this man.
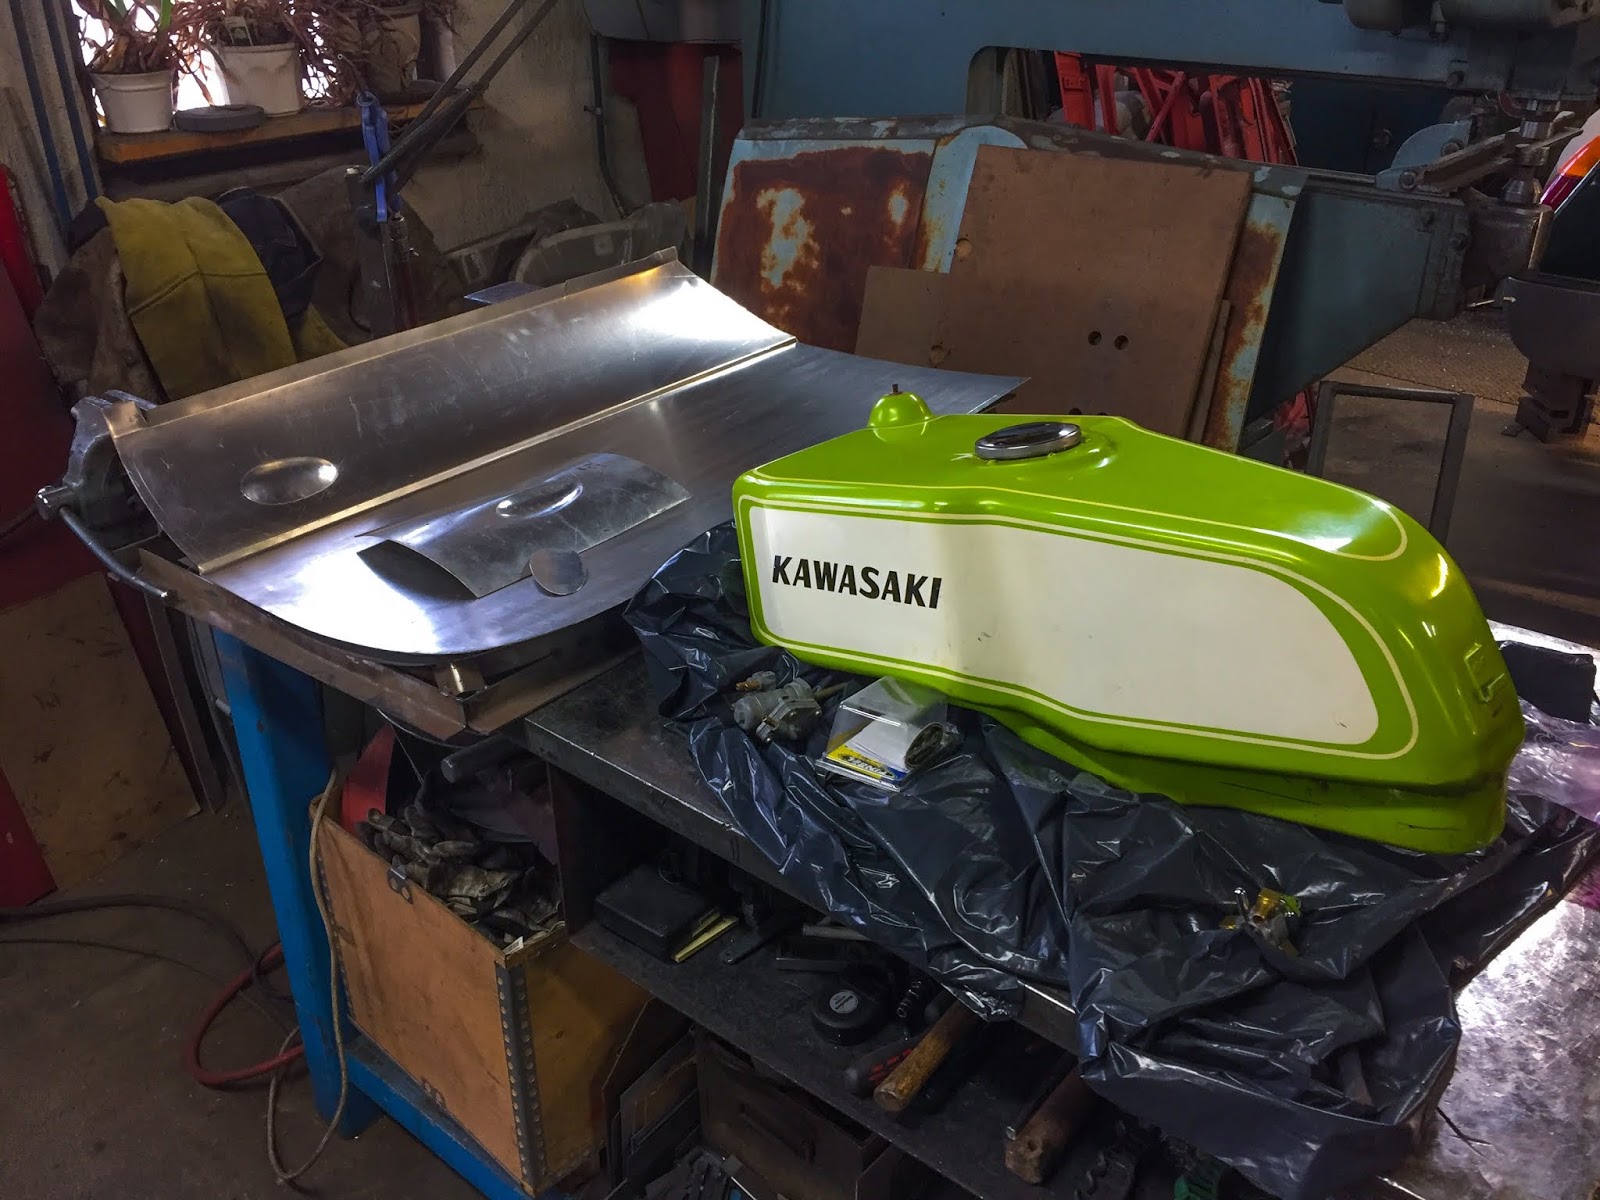
He’s going to make me a duplicate of the tank in aluminium! The identify of his enterprise is “Alucars” and that sounds good to me. He resides in Hällestad simply west of the town of Norrköping approx 200 km south of Stockholm.
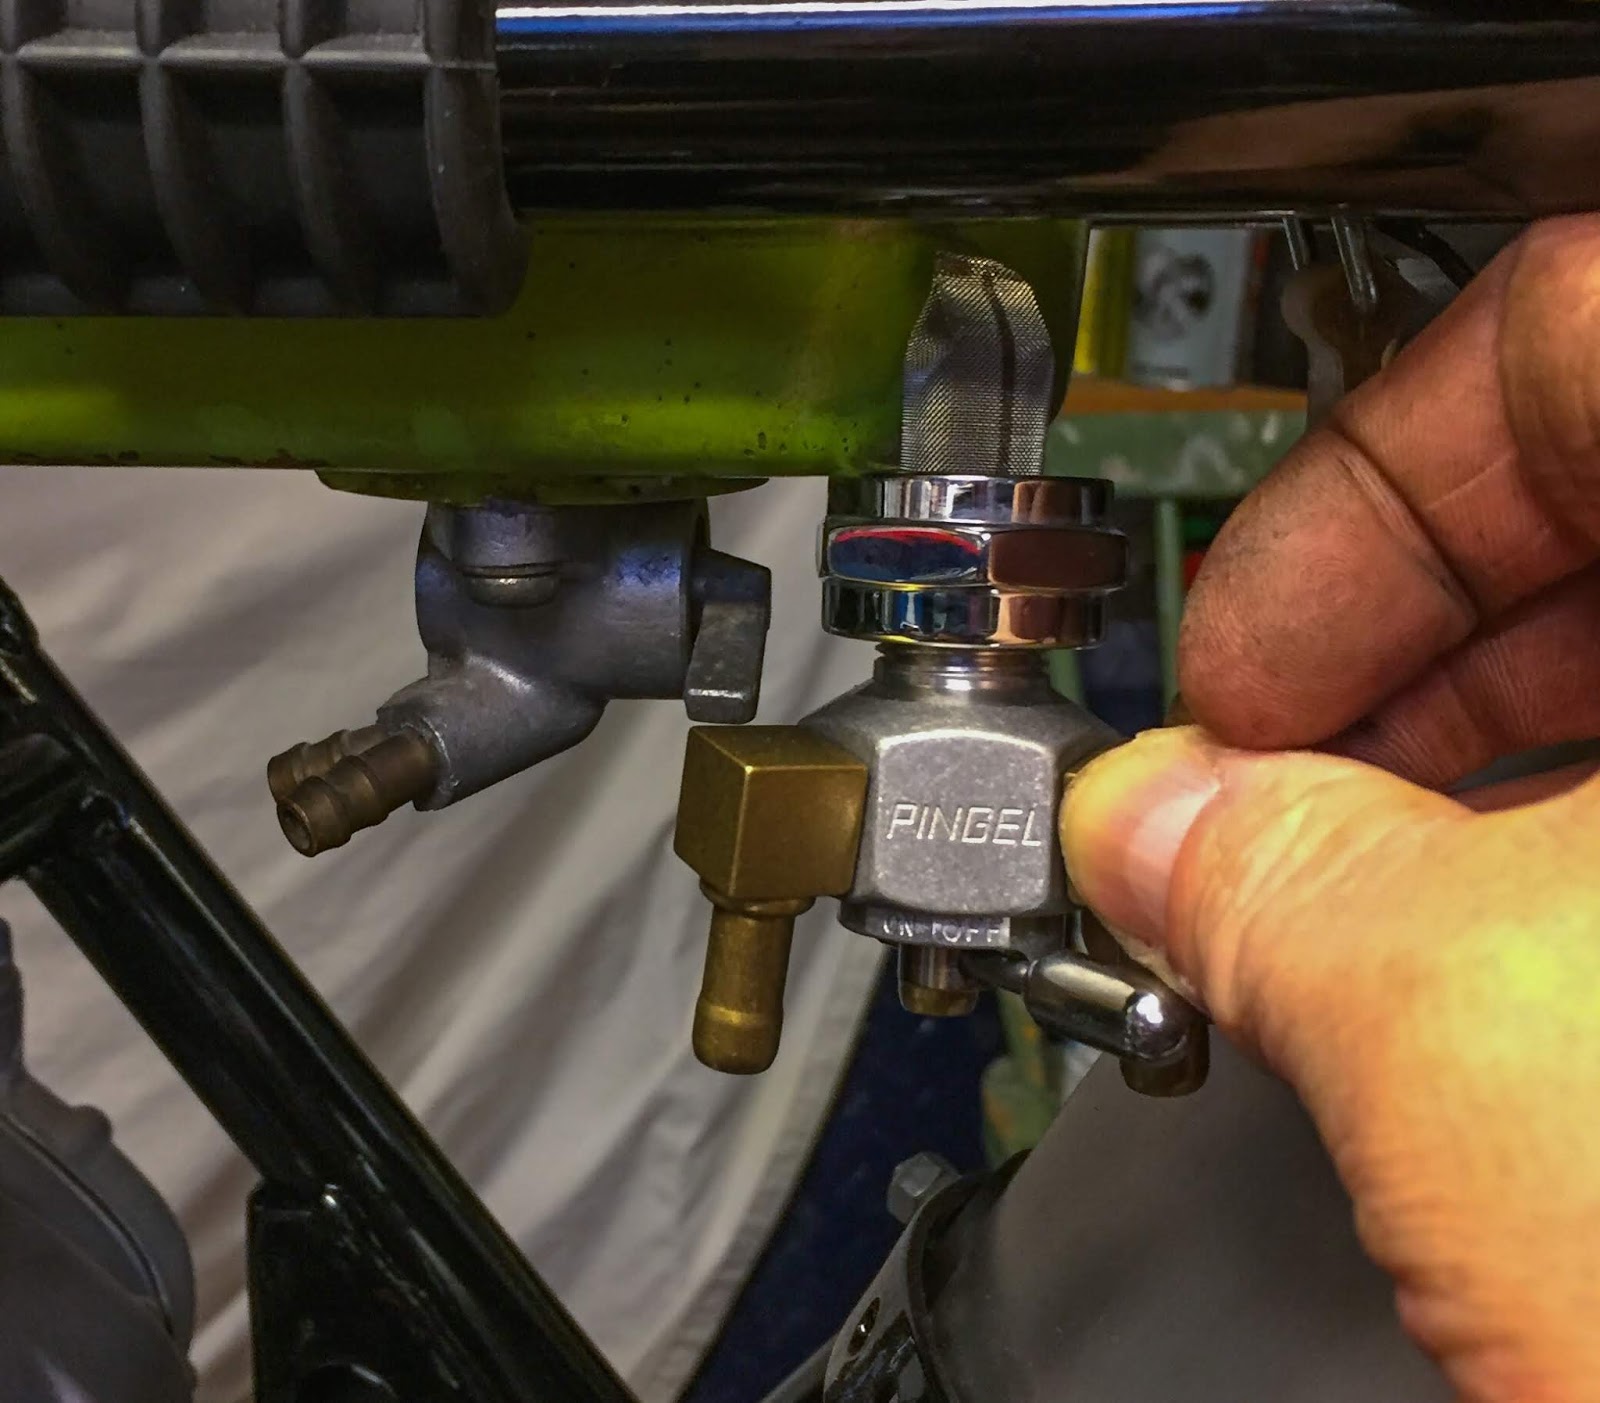
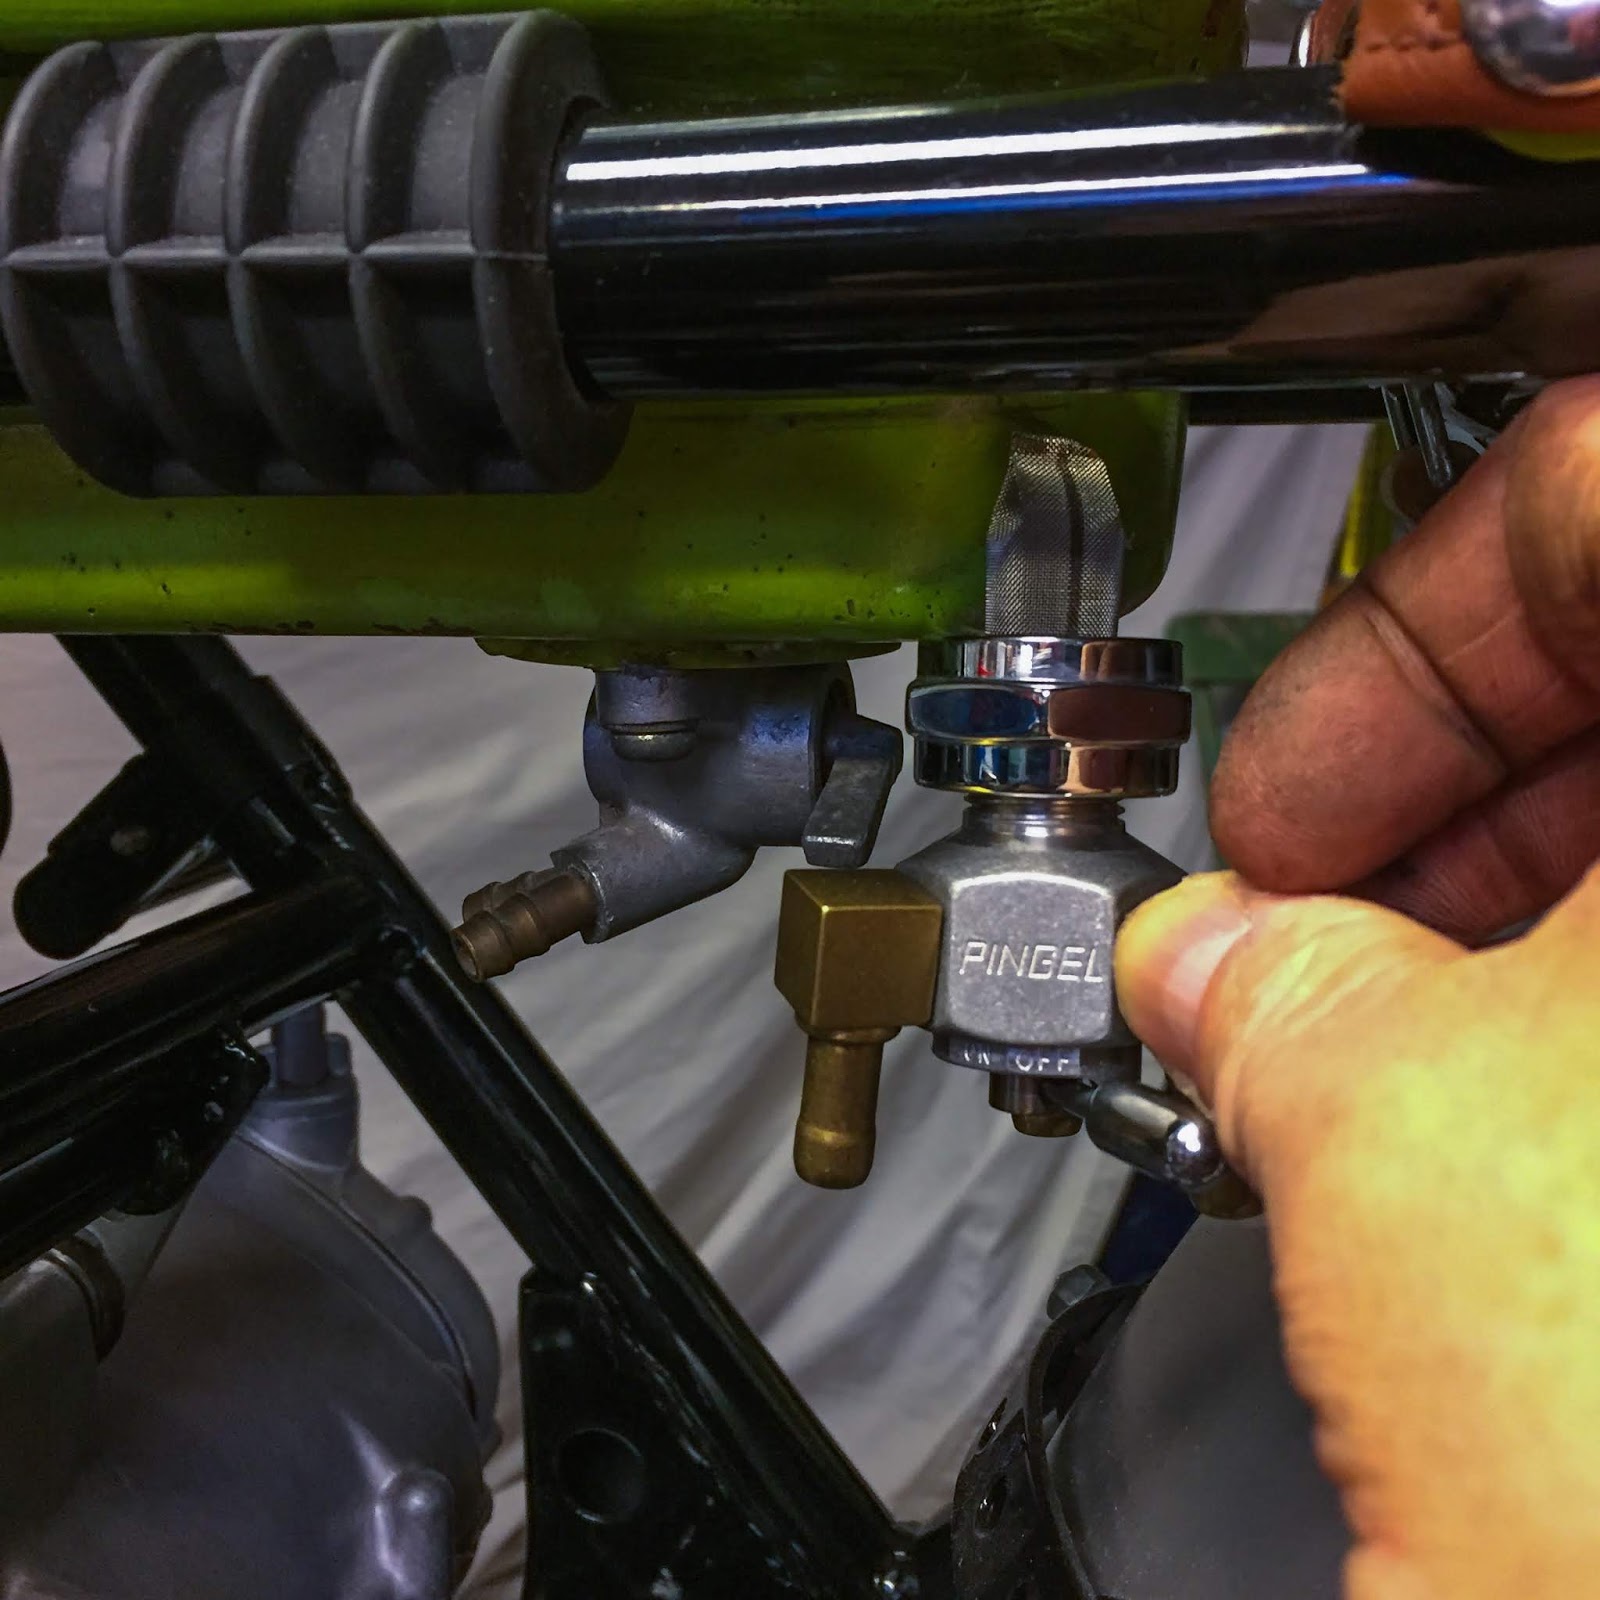
What I´m doing right here is planning for a Pingel high-flow gas petcock on the aluminium tank. As you’ll be able to see the Pingel will probably be barely bigger (larger) than the unique one and drop the gas retailers a bit decrease in comparison with the inventory gas faucet. My plan right here is to lift the underside of the copied surge tank about an inch in order that the underside of the tank will probably be flush with the decrease finish of the body tube. This manner the gas retailers will probably be on the identical peak in comparison with the carbs. You may see my pencil markings on the tank.
I´m actually blissful to have discovered this man, Bert Svensson, is his identify, by the best way. He´s the form of man that appear to have the ability to repair most something. A gas tank completely was no downside. The simplest and finest method to do that was to get the tank to him ASAP. These photos have been taken to indicate him how simple, or tough, it could be to repeat the factor.
– ” Nah, that´s no massive deal. You want that indentation to bolster the highest of the tank”
That’s what he mentioned after I advised he may transfer the gas cap additional up entrance and depart the topside of the tank clean. That´s what you wish to hear! Which means he´s a intestine that is aware of his enterprise. I certain did sit up for meet Bert and focus on this job.
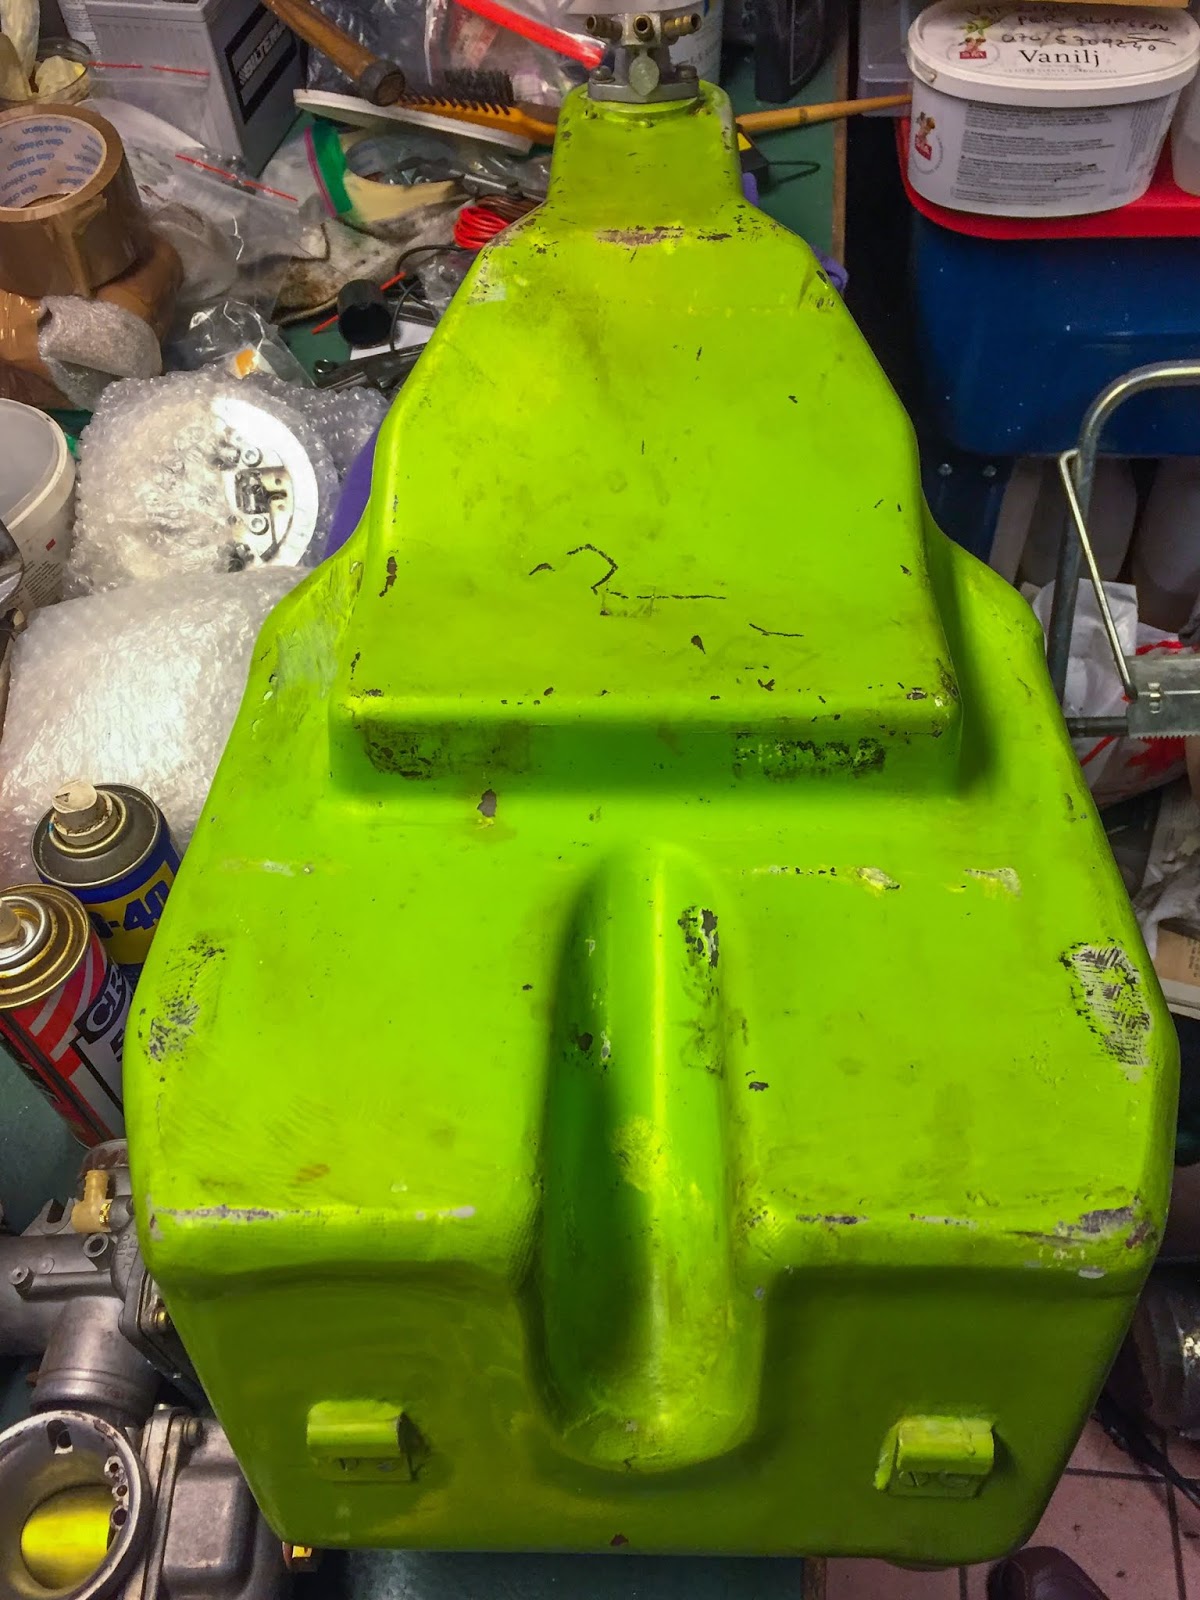
The underside of the tank. He´ll copy it precisely and likewise make small reinforcements to lock the hooks for the rubber fasteners each up entrance and on the rear finish of the tank.The one distinction would be the small surge tank the place the gas faucet is situated.
It´ll be a bit extra shallow.
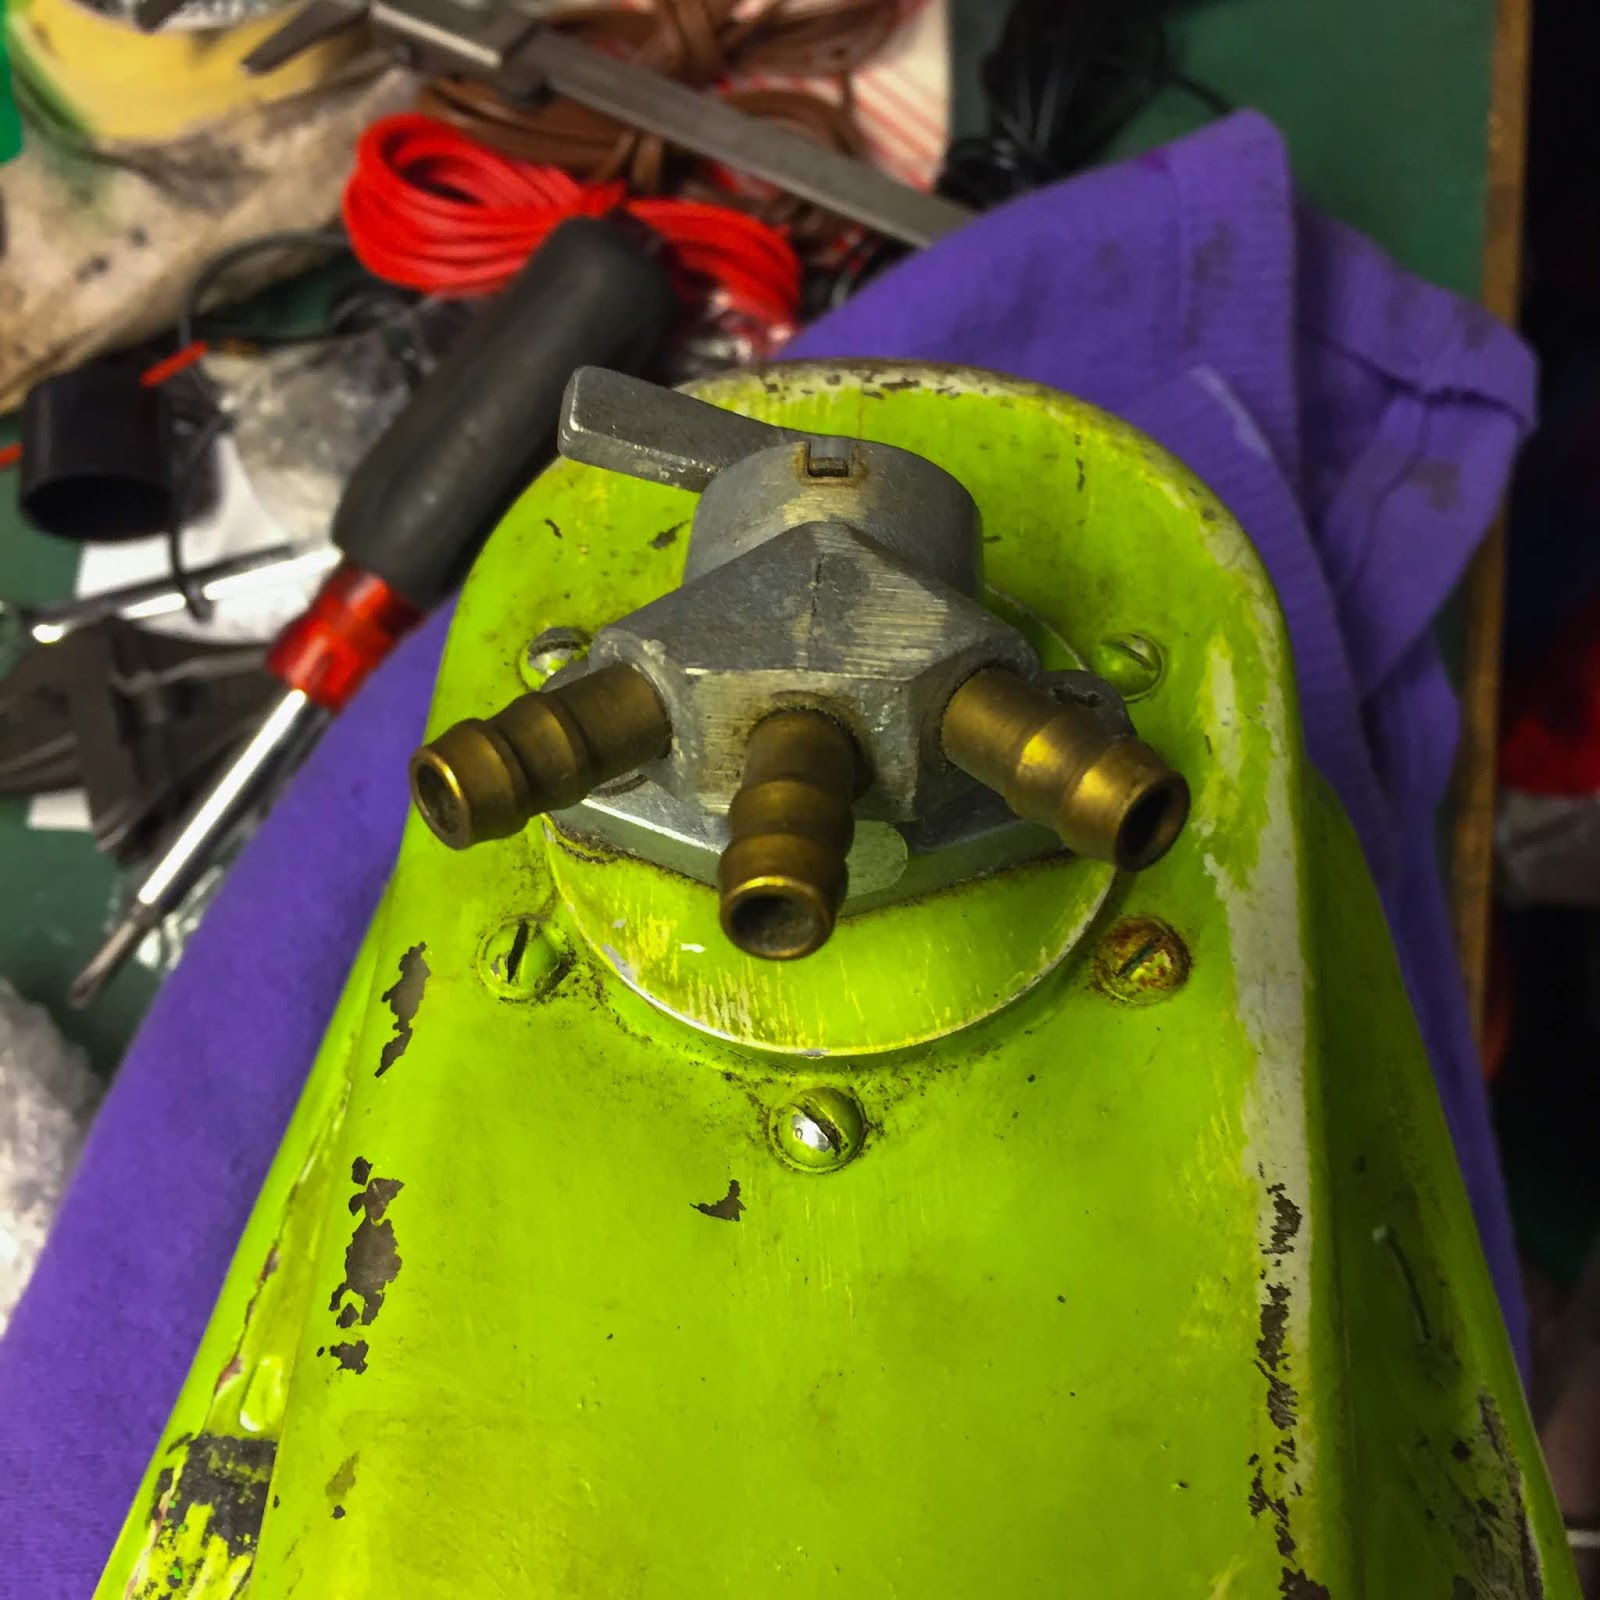
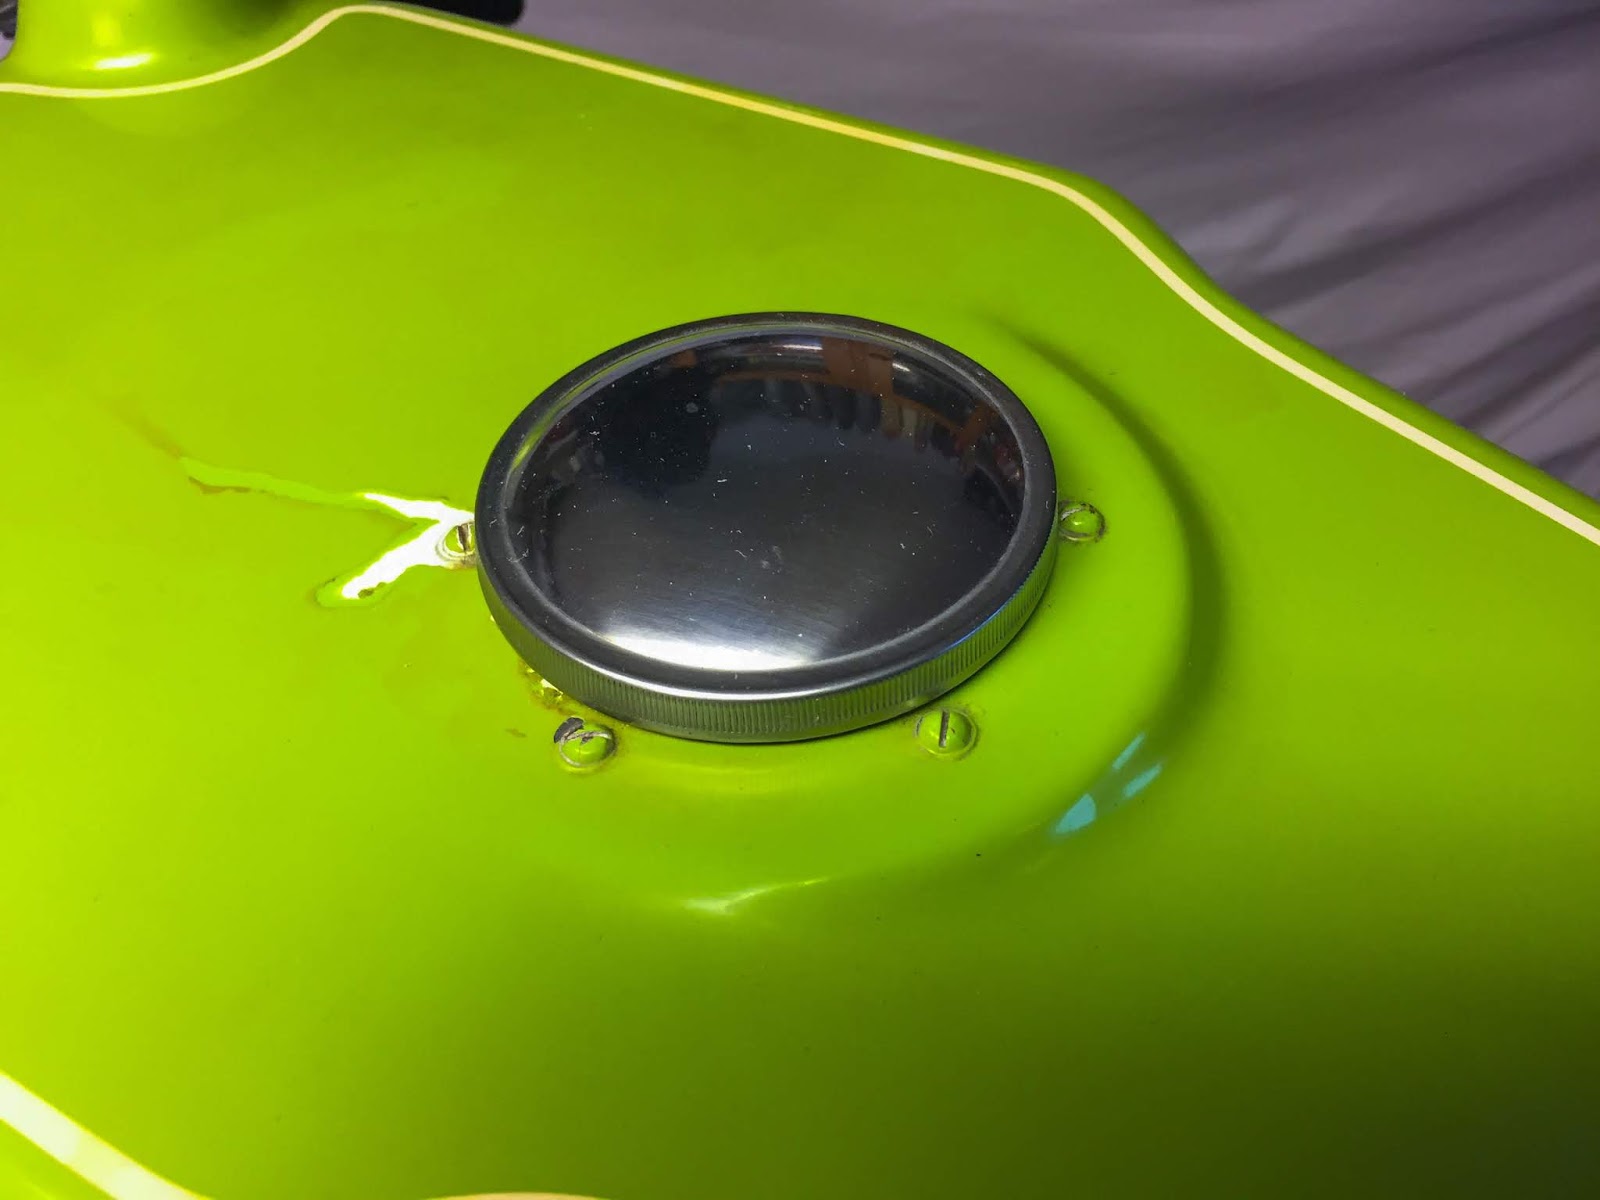
Bert can have no use of the inventory petcock in any respect so I´ll simply take away it and preserve it at house. That method I can work on it. It’s, in fact, caught…. Does anybody of you, my expensive readers, know if there´s a rubber seal in this stuff or is it a steel to steel seal in it?

Gasoline petcock off the tank. This gasket will probably be simple sufficient to repeat when the time comes. Right here we are able to additionally notice that this petcock bracket has been changed or not less than eliminated a while. These straight screws are NOT unique H1R… I certain wish to know if my tank is an unique Kawasaki merchandise or if it’s a copy made throughout its racing days…
Earlier than I went to Hällestad I requested him if he may assist me with my growth chambers as properly… He certain may!
– “Carry them and I´ll take a look”
So, a few days in the past, I took the journey south and left my treasured tank and two of my chambers within the fingers of Bert. I need to admit, I´m a bit nervous, however I have to belief folks on this course of.
I believe all of us can agree that the tank is in good fingers contemplating the door panels he was engaged on in entrance of the tank on this image. Now all I can do is wait… I hope these components will probably be finished in an affordable period of time. Not that I´m in any hurry, however I have to proceed engaged on the bike and with out the exhaust system and the tank it’s tough to start out engaged on the fairings.
Effectively, there´s a number of different stuff to do, for certain! I can begin by placing cables on it, fixing the electrics, getting some good excessive stress cords and spark plug caps and many others, and many others.
Keep tuned for extra. Perhaps not as continuously because the final 3-4 weeks, however I´m at it once more. The bike and the restoration course of is on my thoughts most every single day now, so progress will proceed. I promise!
Thanks for studying.
/Per
[ad_2]