
[ad_1]
As soon as the cables are on and dealing I will probably be additionally have the ability to get the grips on and, type of, get the “cockpit” roughly prepared for beginning up.
Placing cables on additionally means adjusting their perform and ensuring every part works because it was as soon as supposed. Let´s begin with the choke cable.

I had saved the choke cable full with the plungers and is derived on on the decrease ends
The very first thing to fret about was the routing of the cable. Half in relation to the body elements and half in relation to different cables on the bike or cables approaching later.
As soon as that was found out it was extra a matter of fettling in cramped areas getting the plunger housings appropriately aligned and screwed in to the carbs.
When all three have been in place of their respective carb physique I greased the choke lever and its housing up on the deal with bar.
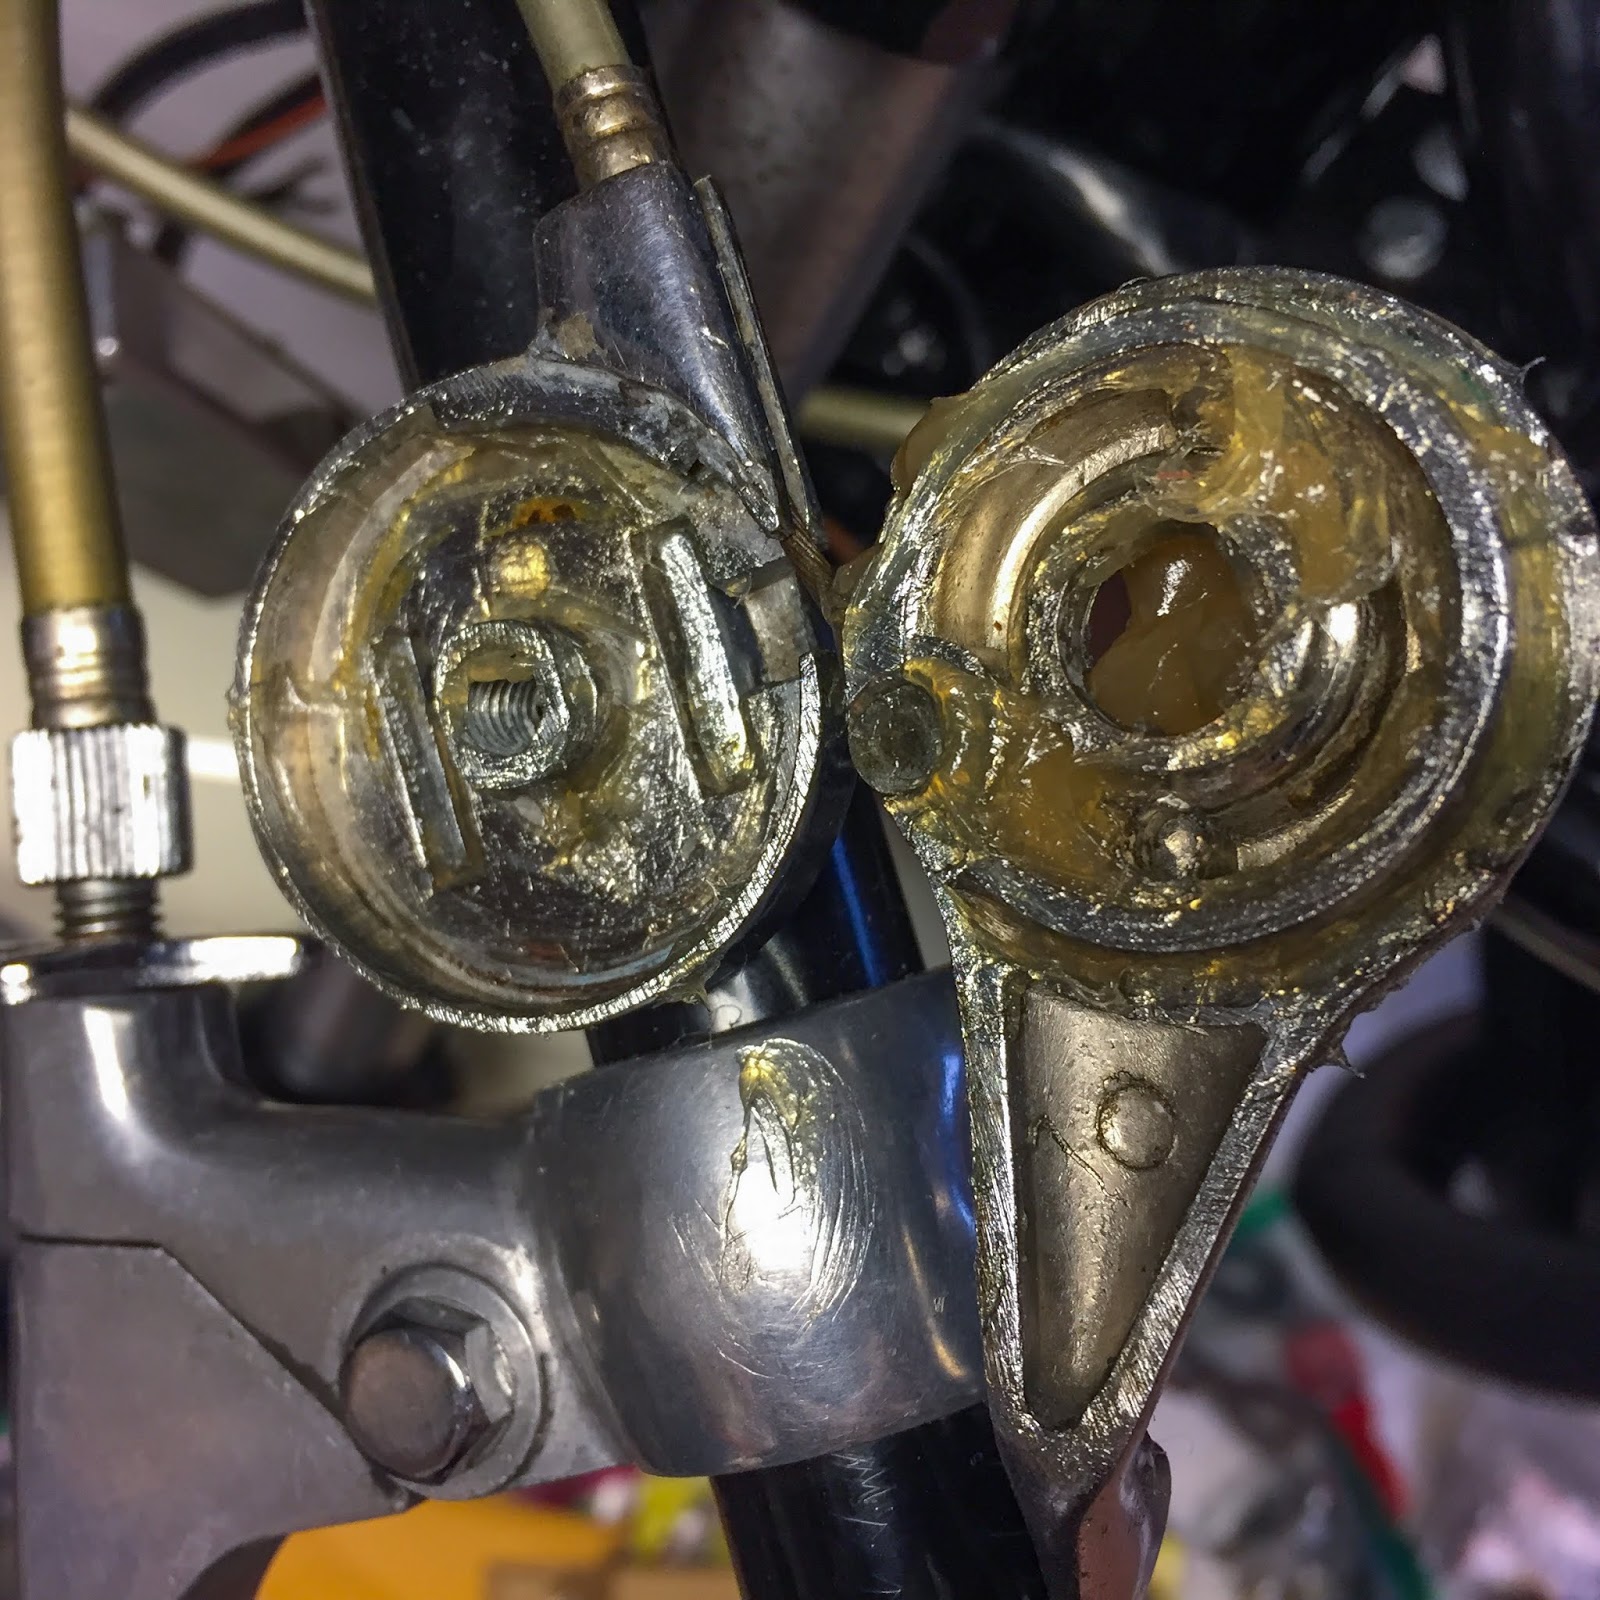
On the best right here the elements are able to smack again collectively. The cable is fitted to the transferring half and the sheath is in place on the housing, prime of the image.
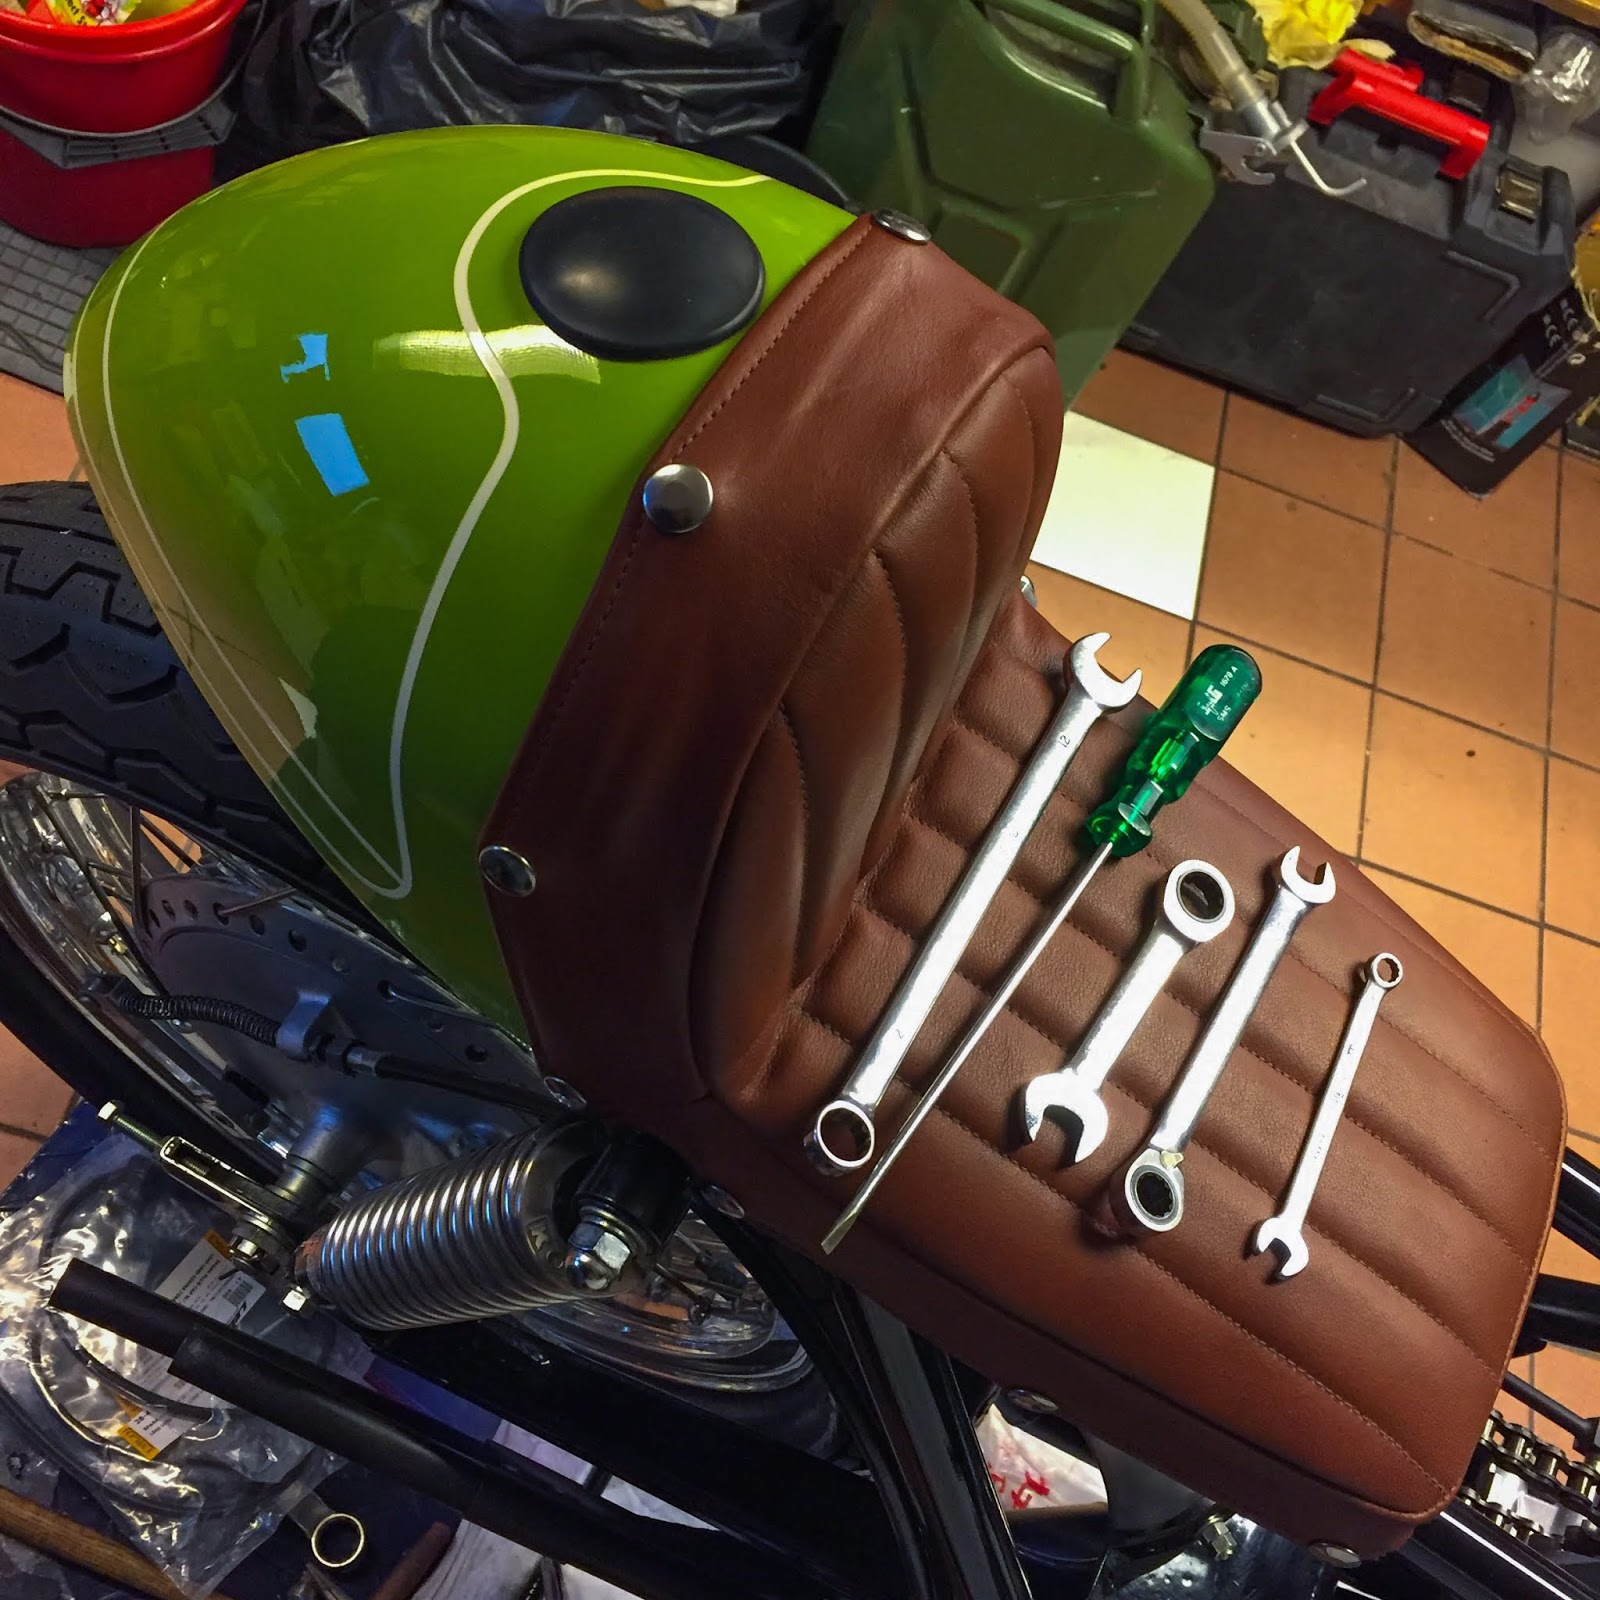
On the left is a nonetheless leben image of the software tray whereas working with the cables…
It seems like a miracle each time I take into consideration what I´m doing right here and what I´m truly engaged on.
I feel “surreal”is one of the best phrase that involves thoughts.

Now that the cables have been mounted at each ends it was time to regulate it for correct performance.
The choke plungers enrich the combination of gasoline given to the engine when lifted from the underside of their place of their seats. The extra you elevate the plungers, the richer the combination. That´s the explanation why they need to elevate fairly concurrently when pulling the lever.
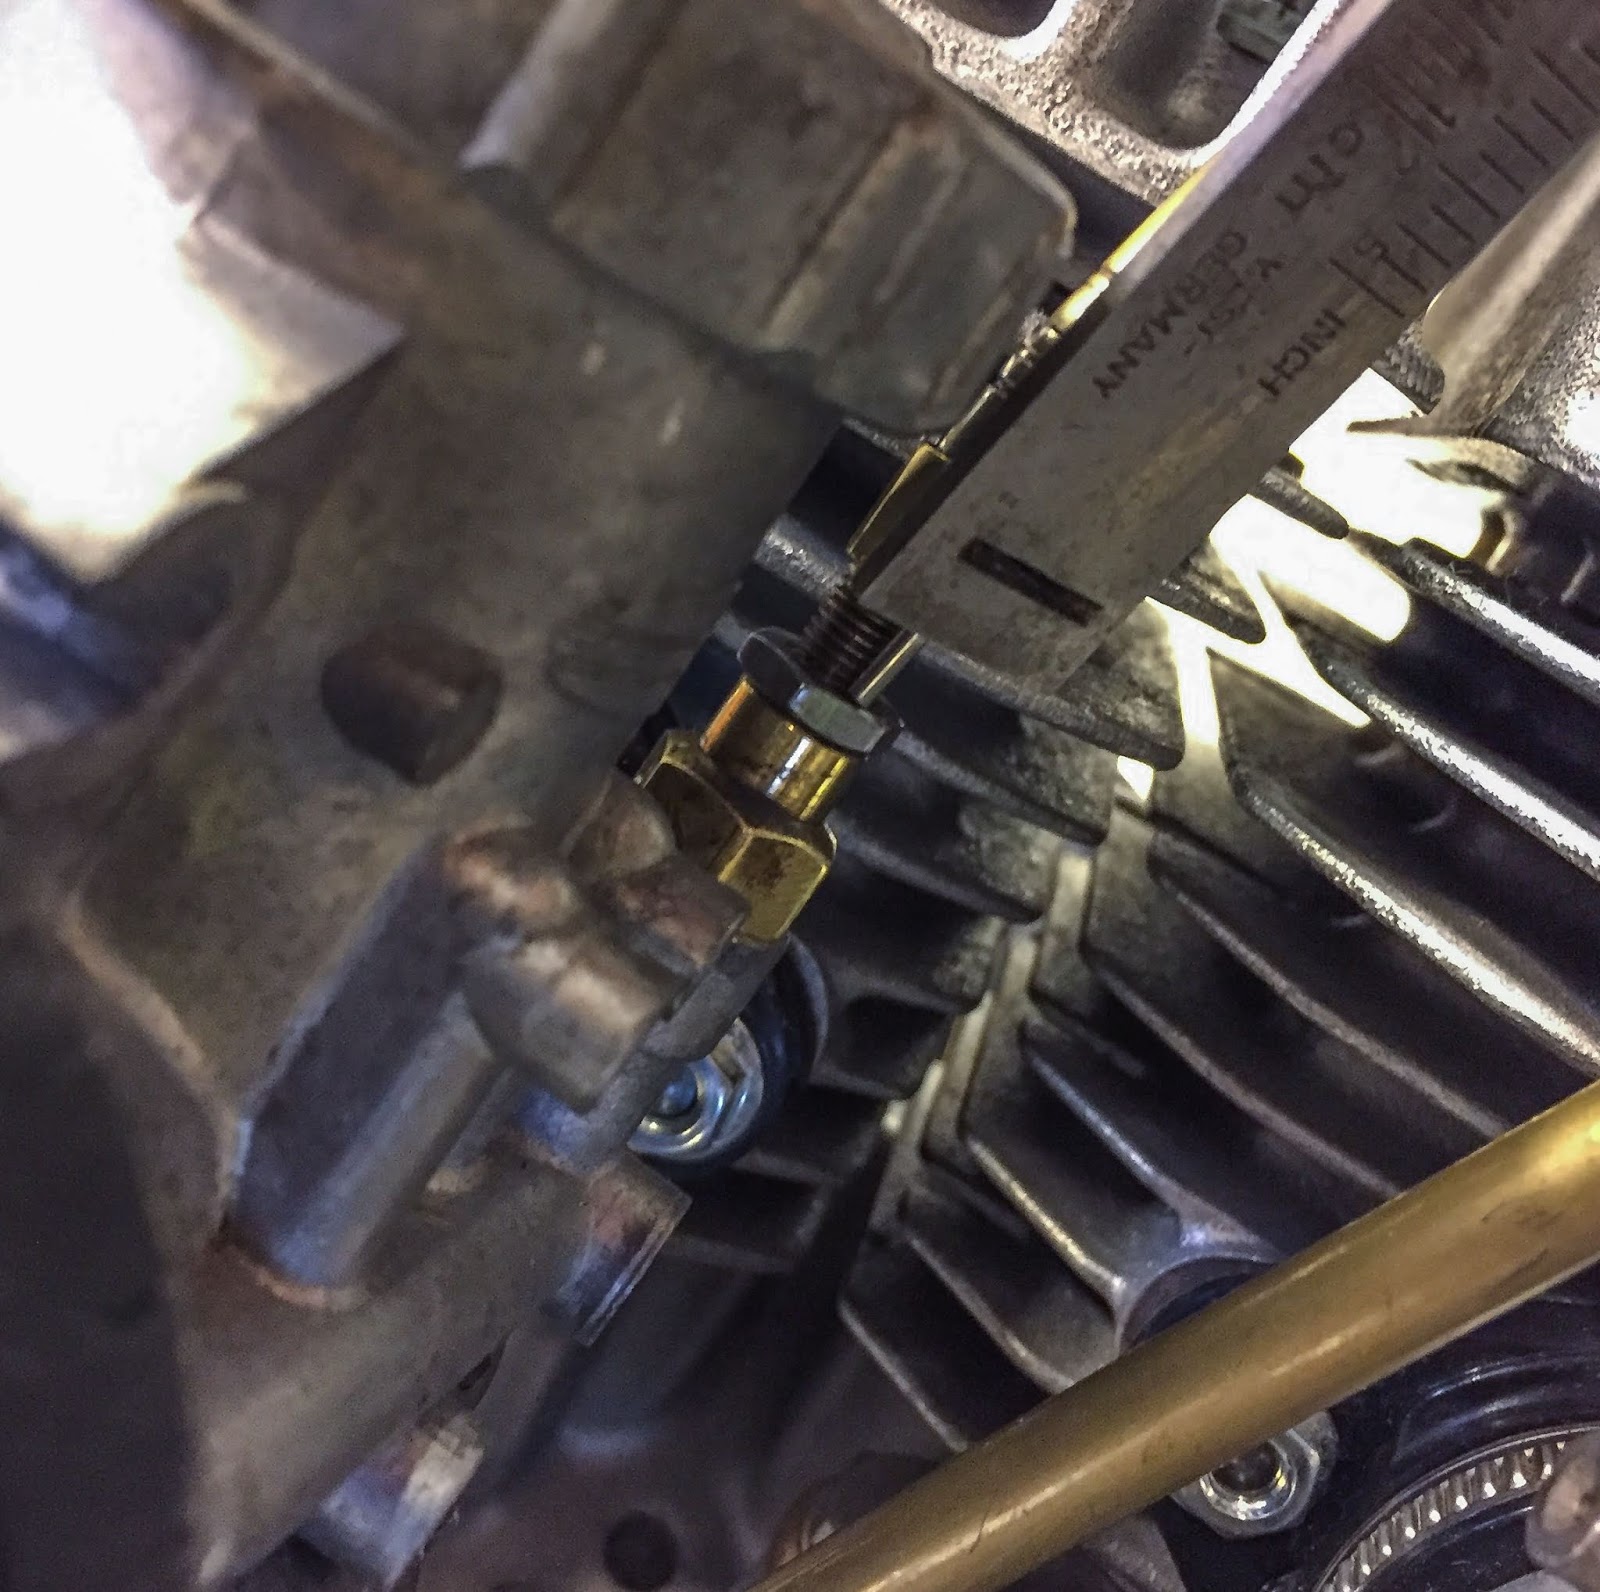
The best technique to to that’s to regulate the adjusters so the elevate of every choke plunger is roughly the identical when the lever is pulled.
Right here´s one technique to begin. Screw the adjusters out an analogous quantity and measure the approximate size screwed out to be equal, or near, on all three adjusters. That could be a good start line.
The wonderful tuning is finished by measuring the precise free play on the cable by lifting the cable sheath from the adjusters. The chokes aren´t that delicate, however if you’re thorough right here, you gained´t have any points with idling on a might engine in a while.
Usually there´s additionally an adjuster up on the lever the place you may wonderful tune the stress of the cable for all three plungers at one level.
No such factor right here on the racer. I assume they figured you’d heat up the engine within the pit after which by no means use the choke throughout racing. Meaning there´s fairly a big slack on the lever and I assume I´ll need to stay with it or shorten the cable some.
Nah, gained´t occur….
One of many good moments…
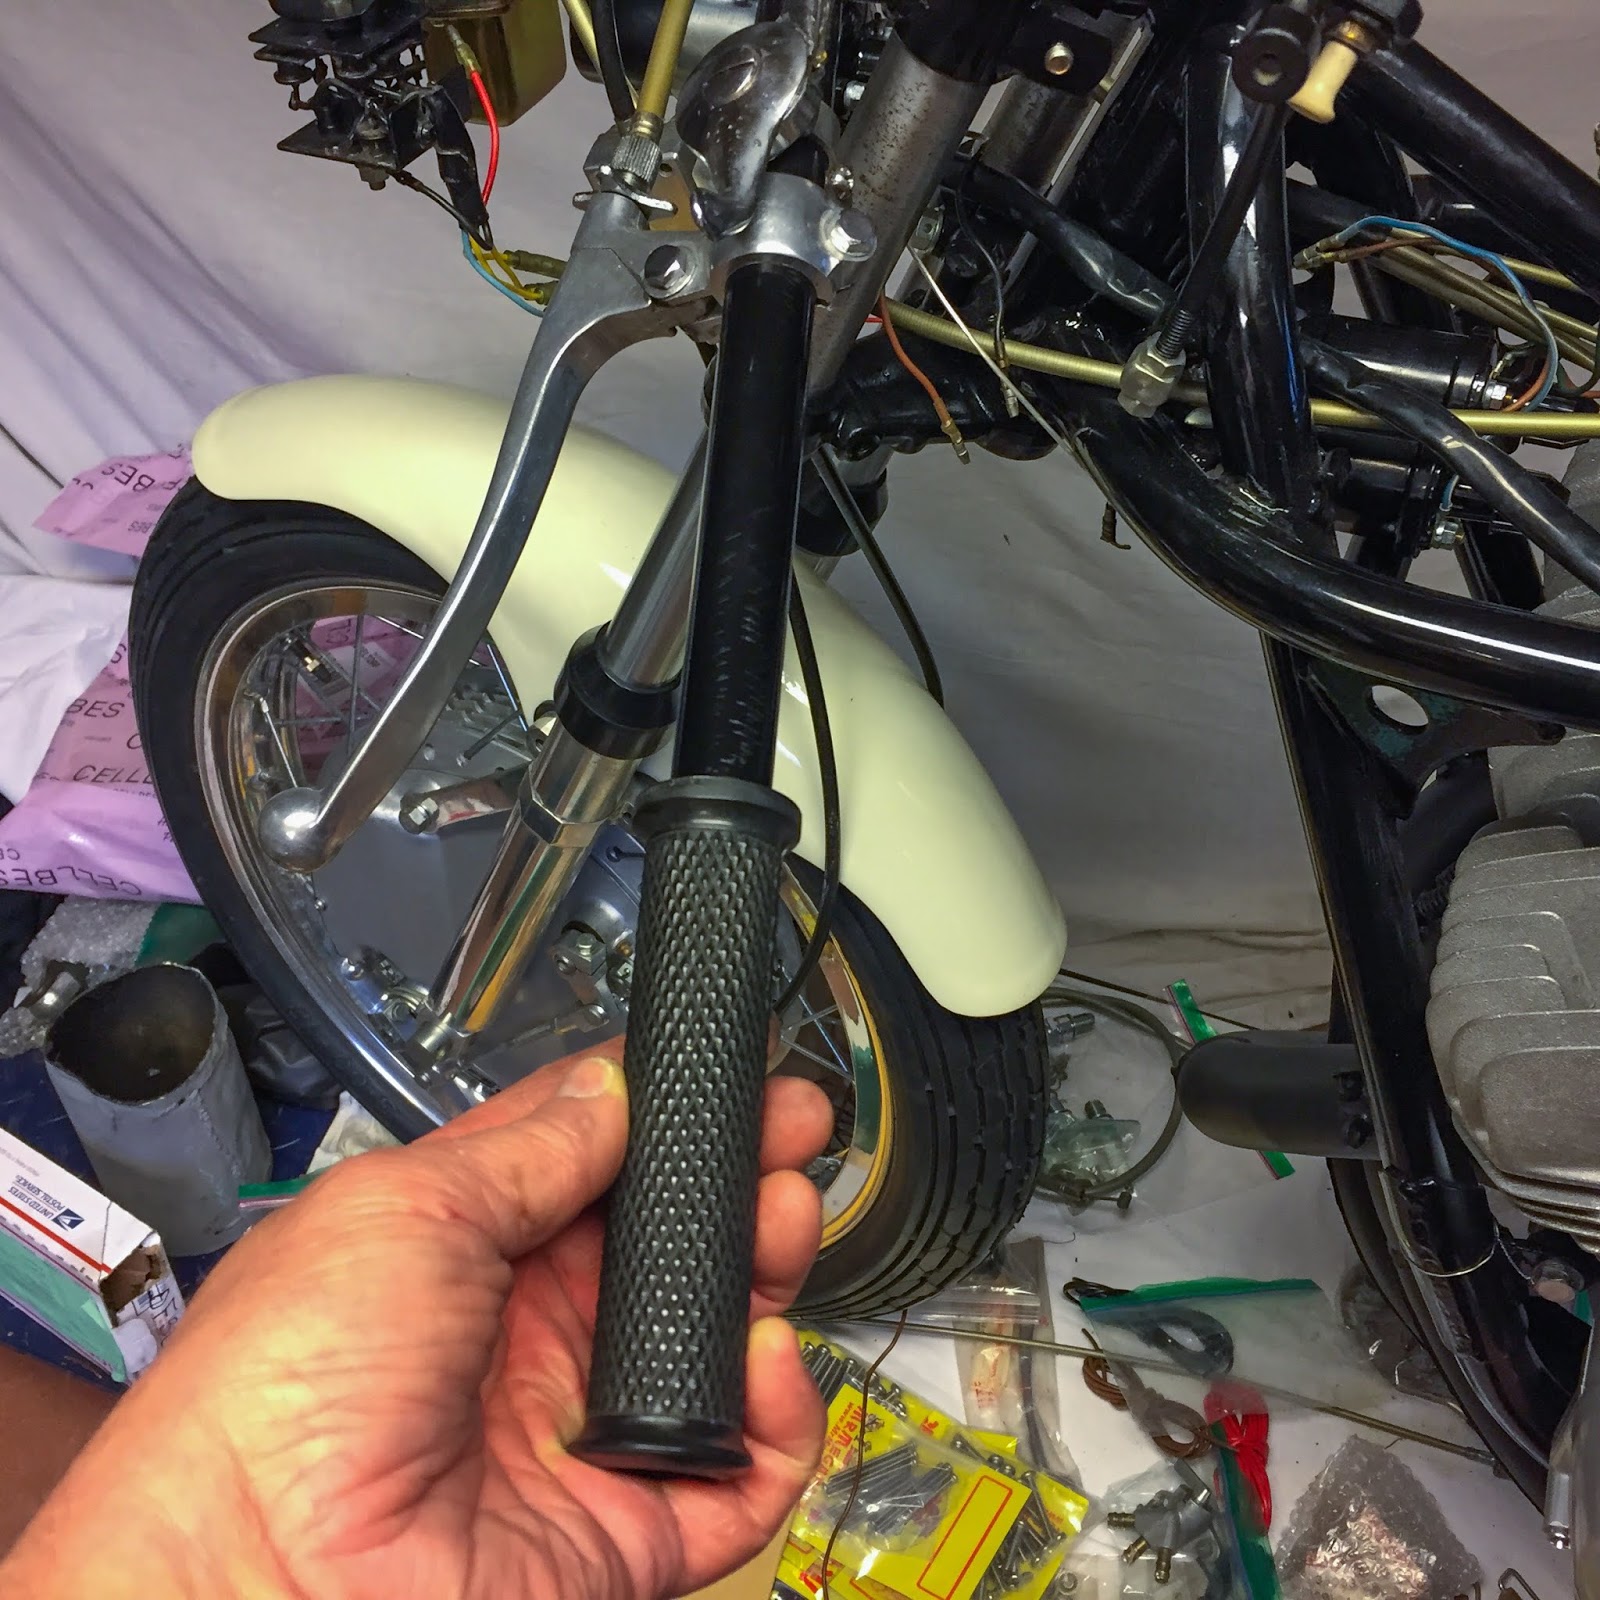
Placing the left hand rubber grip again on the deal with bar! The exact same grip I rigorously eliminated shut to 3 years in the past.
The left facet is now achieved. Working clutch lever, choke lever and the grip in place. Good.

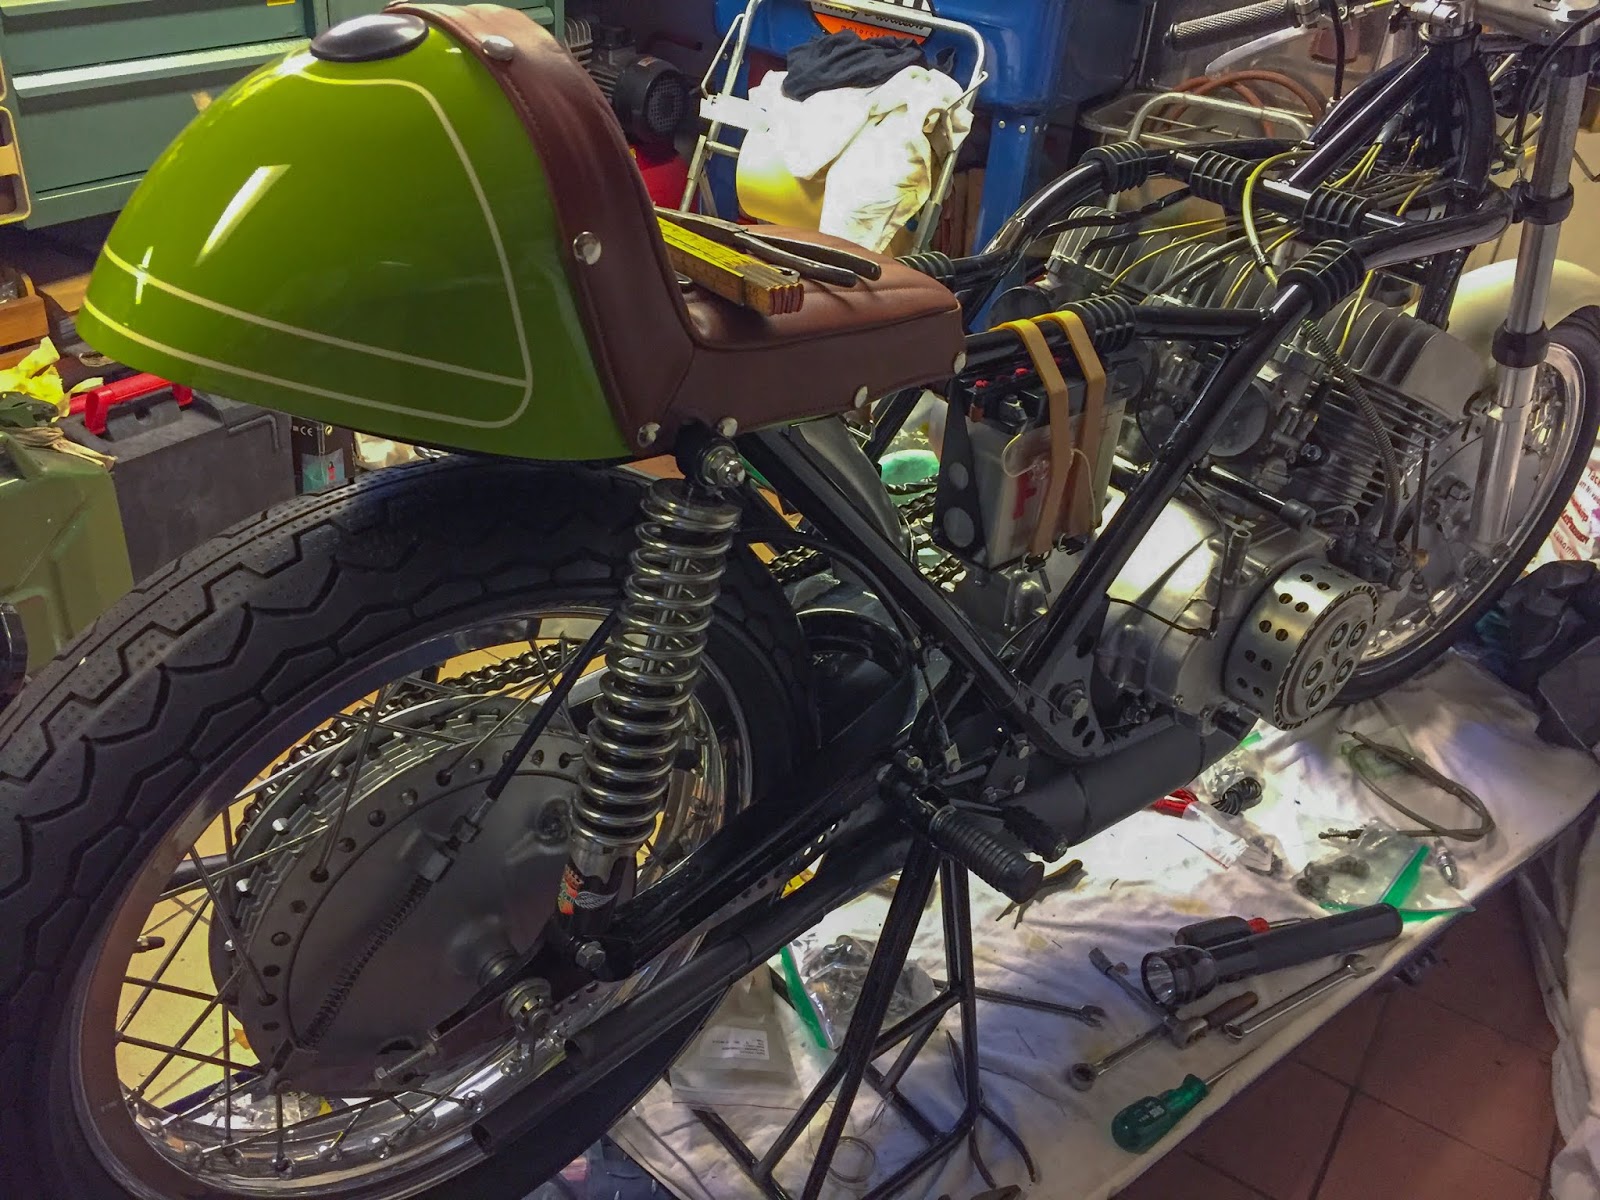
This is likely one of the greatest footage to date, I feel. You’ll be able to see it’s getting increasingly more full.
Okay, Lets transfer on to the throttle cable.
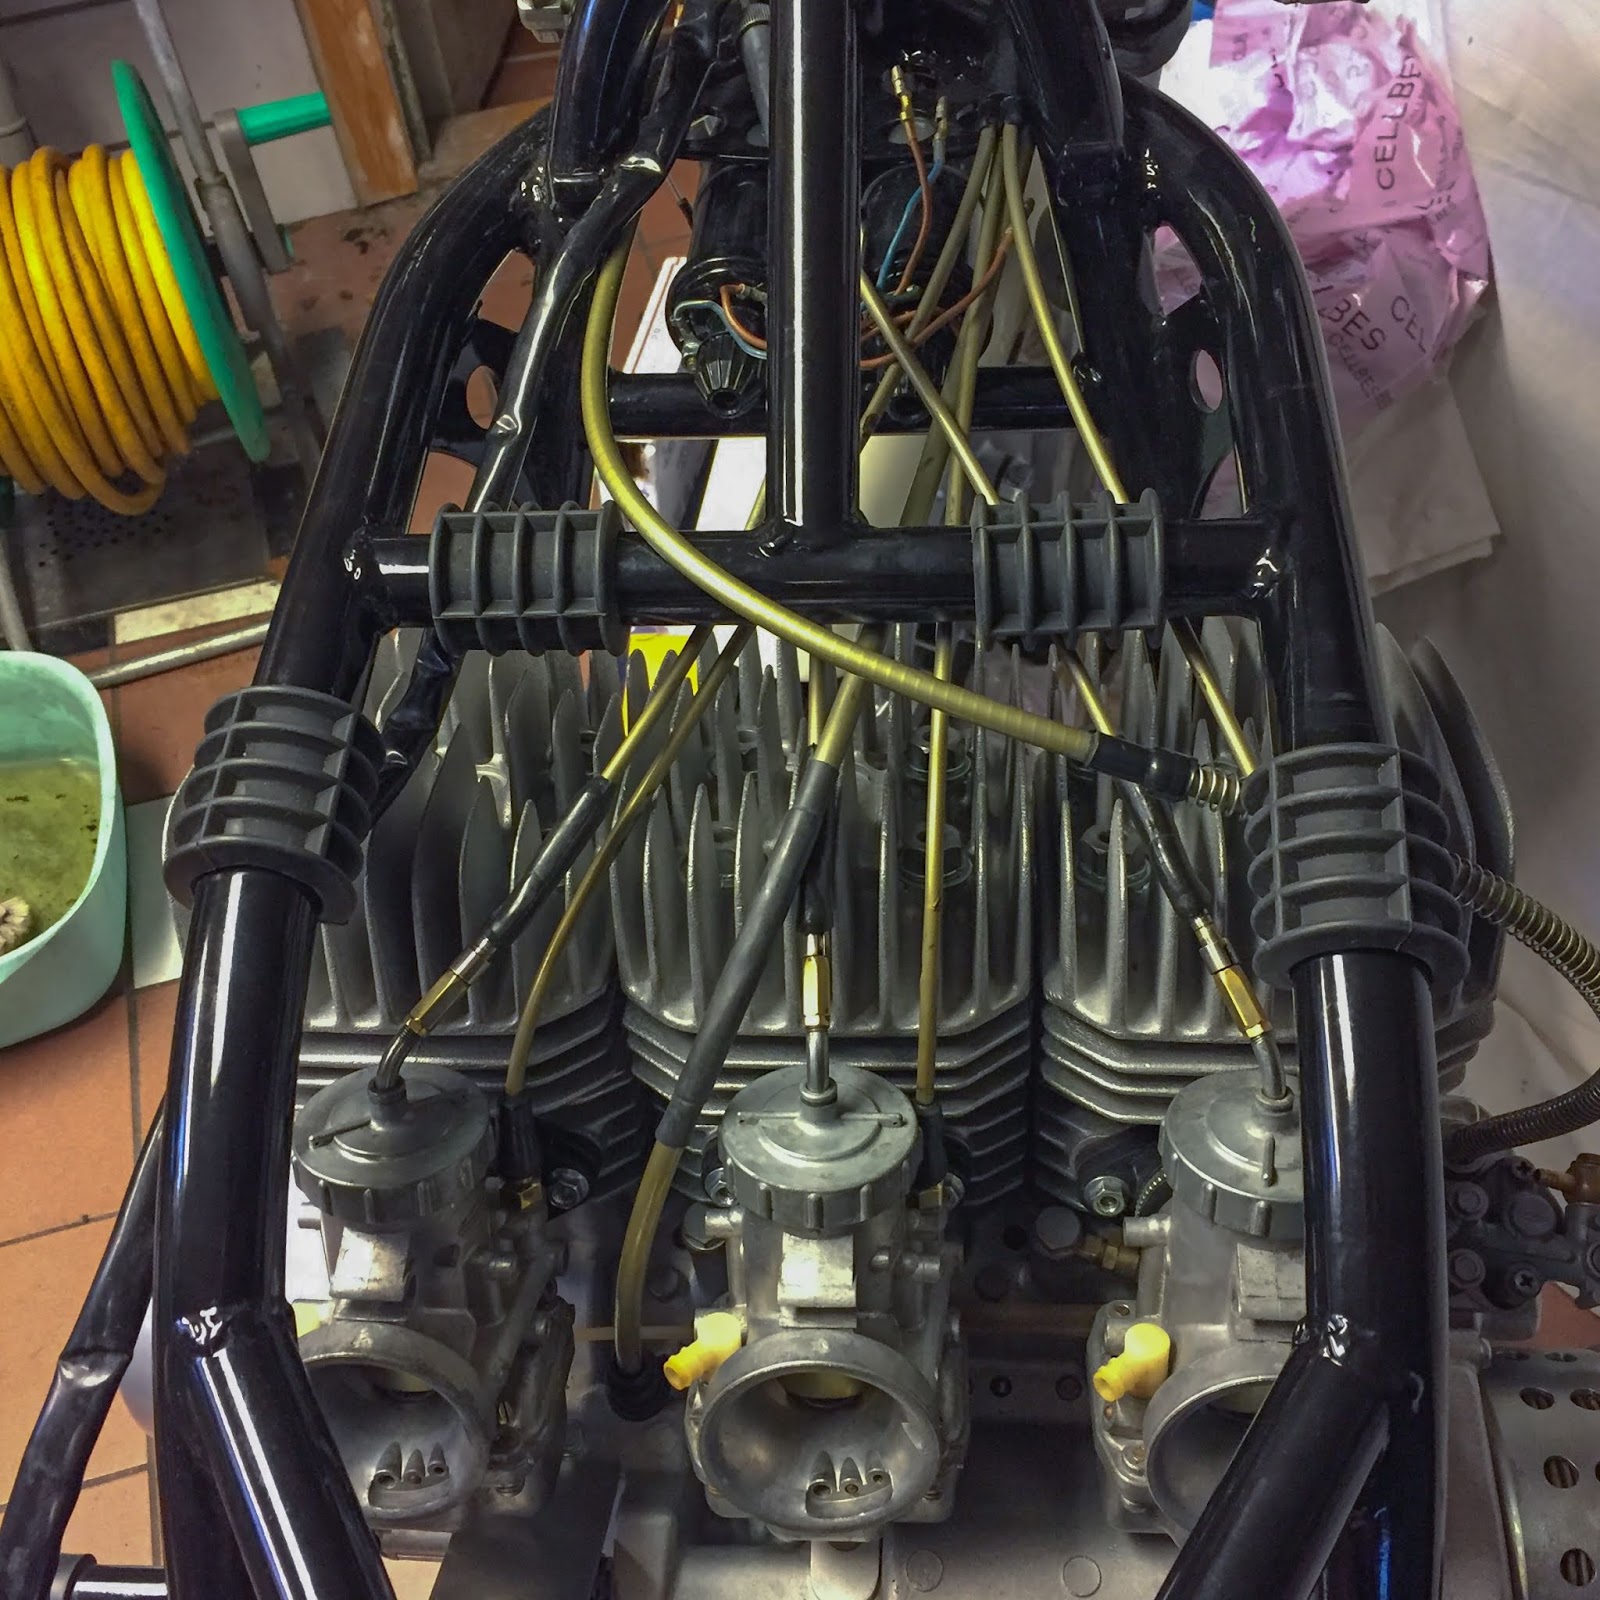
Slightly extra points right here with the routing of the cable meeting. I attempted a couple of totally different routings and ended up transferring the tacho cable above the body pipe for spacing of the throttle and choke cables.
I´m undecided it´ll keep there for good, however for now it provides me extra space for the opposite cables. I checked the thickness of the cable versus the rubber blocks and it’s OK. The blocks are thicker than the cable so it won’t be pinched by the tank.
When the routing had been determined (for the primary time, there may be two or three extra instances, in a while…) I double checked the place of the jet needles.
third place, the center one, is an effective start line for later changes.
That small circlip retains the needle in place in relation to the throttle slide and determines how a lot gasoline is sucked up by the needle jet valve at half throttle opening. Intricate however ingenious!

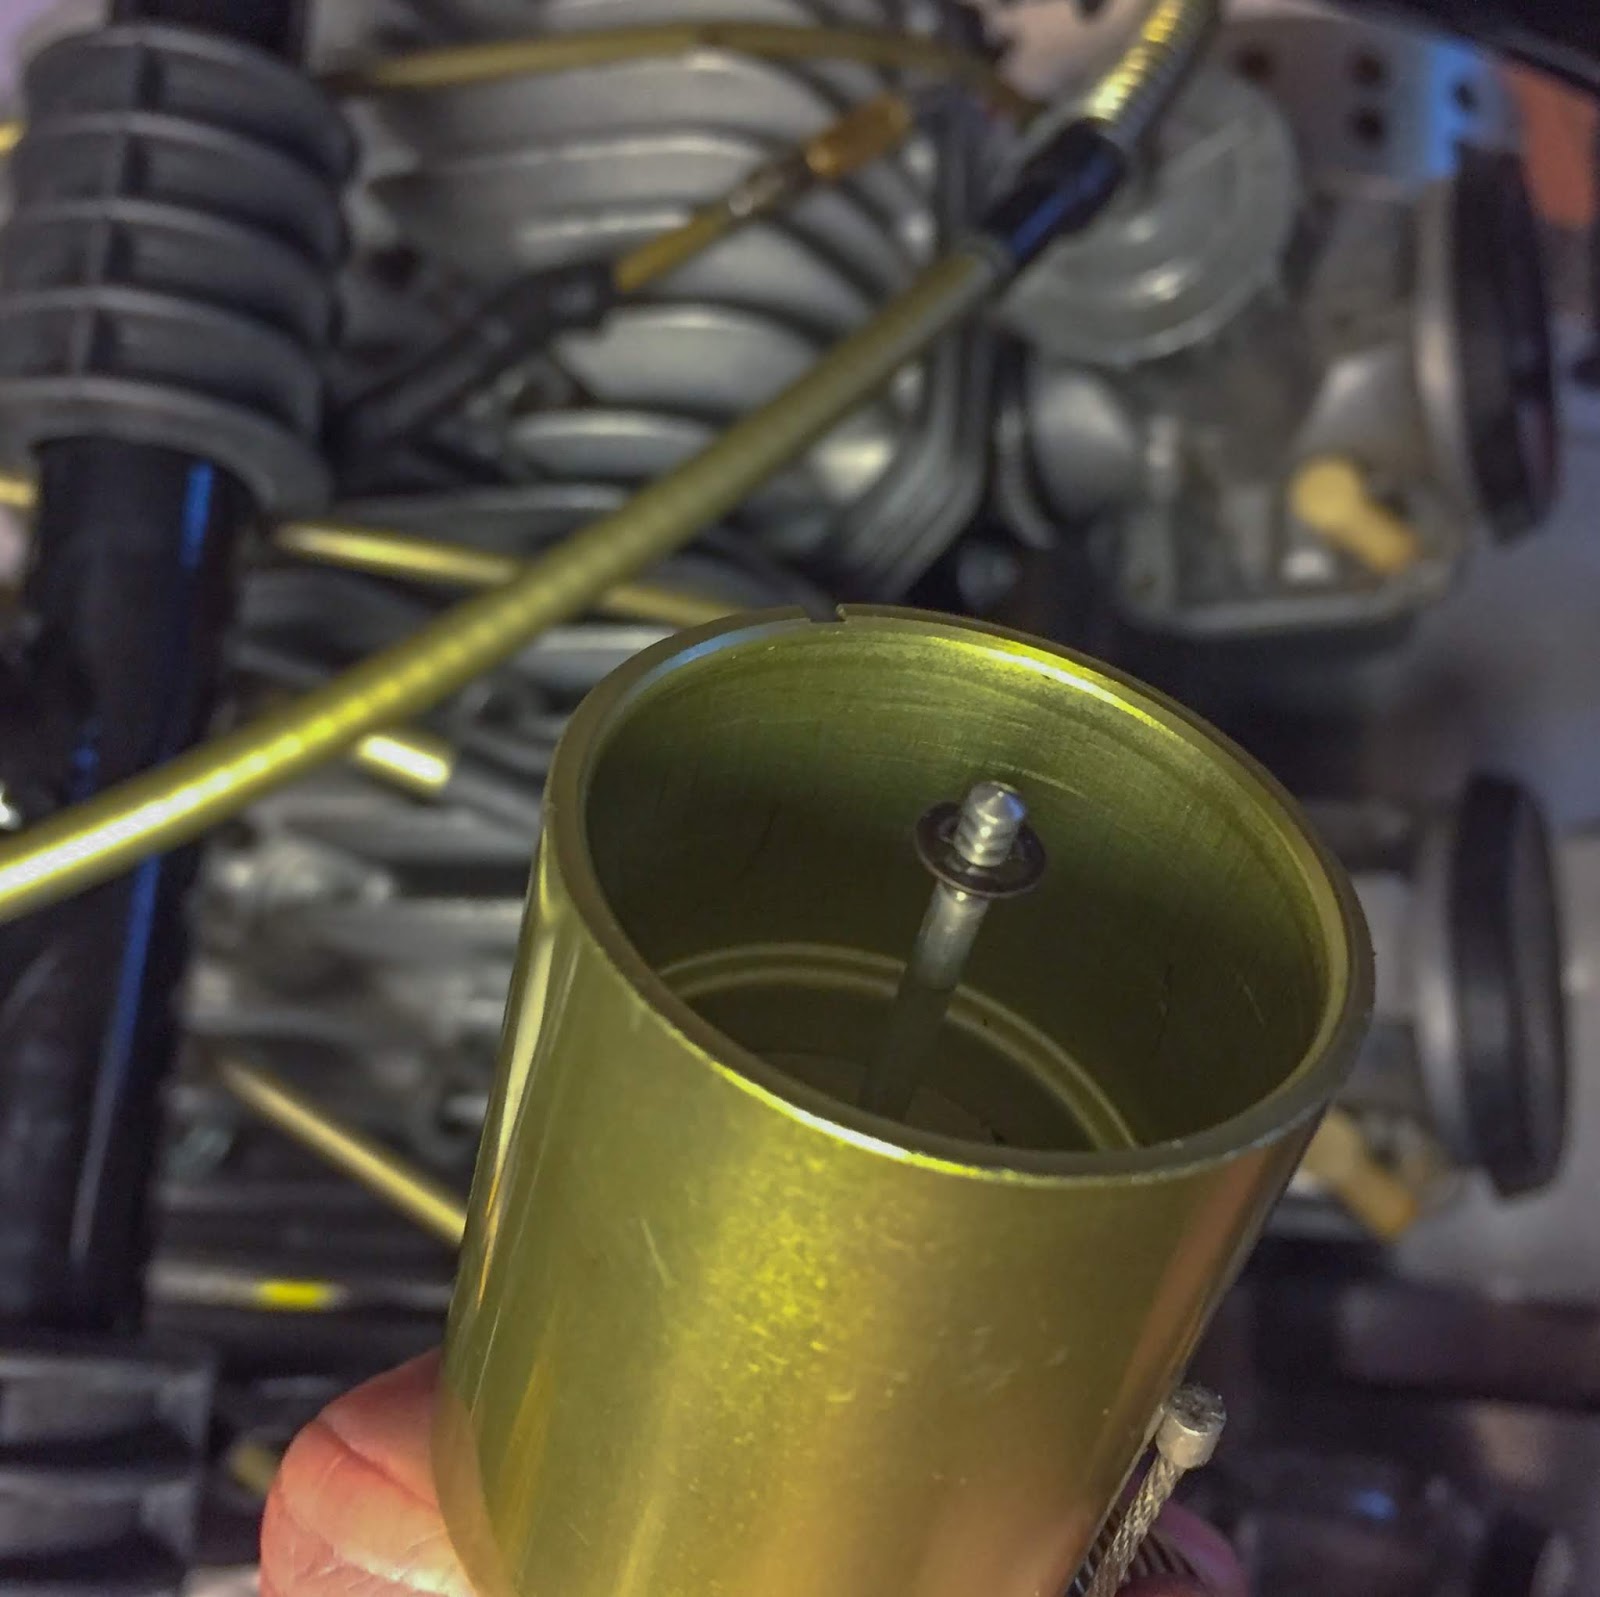
Right here´s one other sensible answer. This small, surprisingly formed, washer locks the throttle cable in place contained in the throttle slide. You’ll be able to see the way it blocks the way in which out for the cable
The outlet in the course of the washer lets the jet needle protrude upwards. The little circlip within the final image is situated under the washer and thus holds the needle in place and at he right top. Sensible.
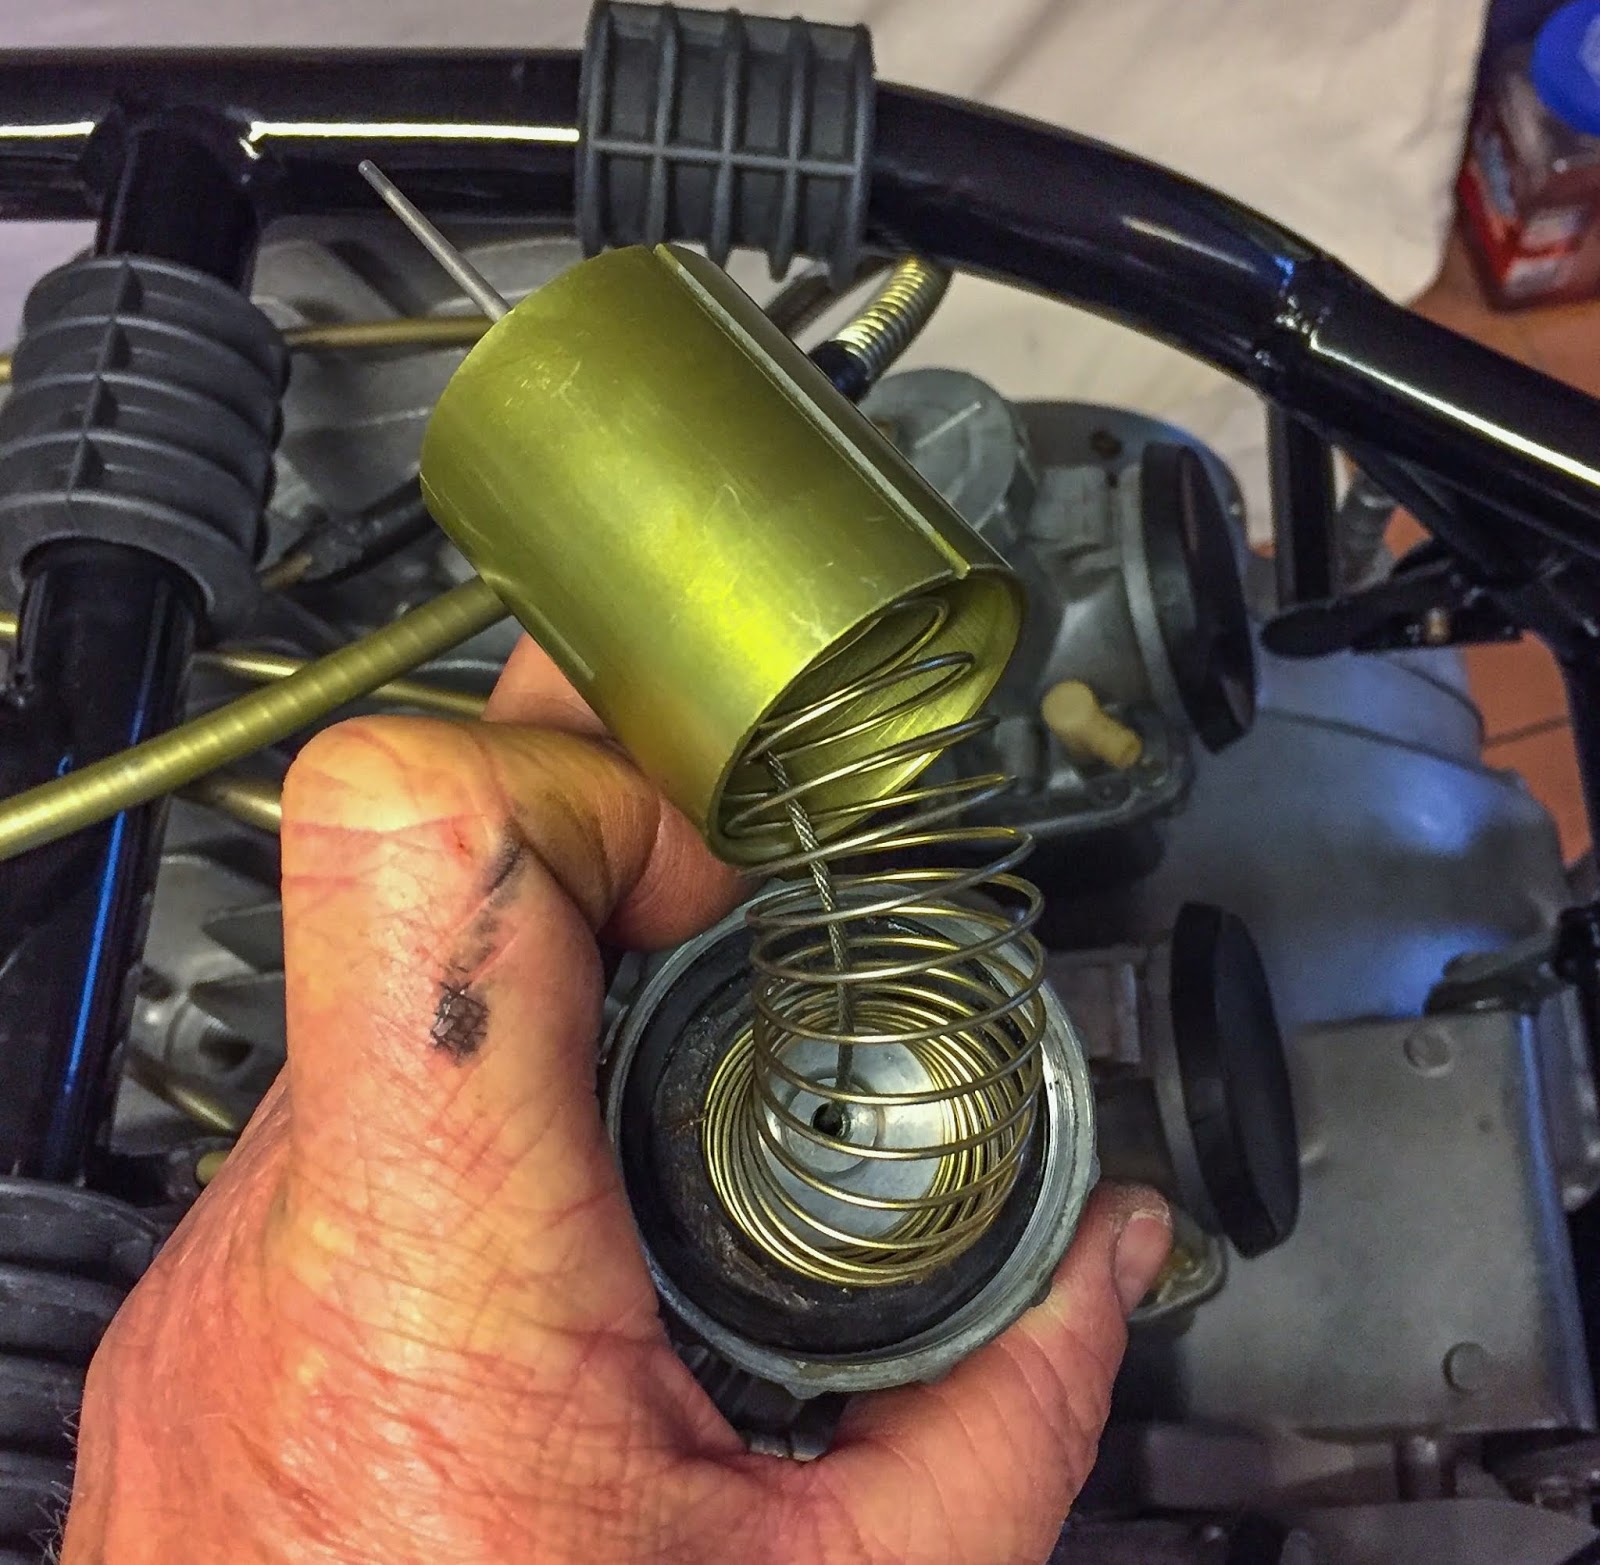
The final half earlier than placing the slide again into the carb is getting every part on to the throttle cable within the right sequence.
First the carb physique lid, then the carb physique lid rubber gasket, the throttle spring and at last the slide assy with the needle in place. Difficult however enjoyable!

Now that the throttle cable was routed by the body and related to the throttle slides down on the carbs it was time to get the throttle grip prepared and greased.
First a verify within the elements guide that I’ve all of the elements wanted. No lock washers under the pan head screws. Attention-grabbing, however that´s the way in which its gonna be…

Ball bearing grease, or regular common grease, works wonderful. Take what you could have useful. The throttle tube slides over the deal with bar floor and a light-weight coat of grease makes the motion smoother and higher. We wish it to really feel like new, proper?

These elements have been straightforward to put in. Loads of slack on the cable finish. Right here on the left the throttle cable has been mounted within the decrease a part of the throttle grip housing.

The throttle grip tube in place, greased and lubricated.
On avenue bikes this could be a ache, however right here the deal with bars aren´t that broad so the throttle cable is lengthy sufficient to permit the grip assy to be slid on to the deal with bar with out eradicating the cable once more.
As I´ve mentioned earlier than, I normally do every part not less than twice!
The following step was easy sufficient. Put the highest a part of the housing in place and tighten the screws. Verify for cable clearance across the steering neck and likewise that the brake lever can transfer freely all the way in which in in the direction of the throttle grip housing.
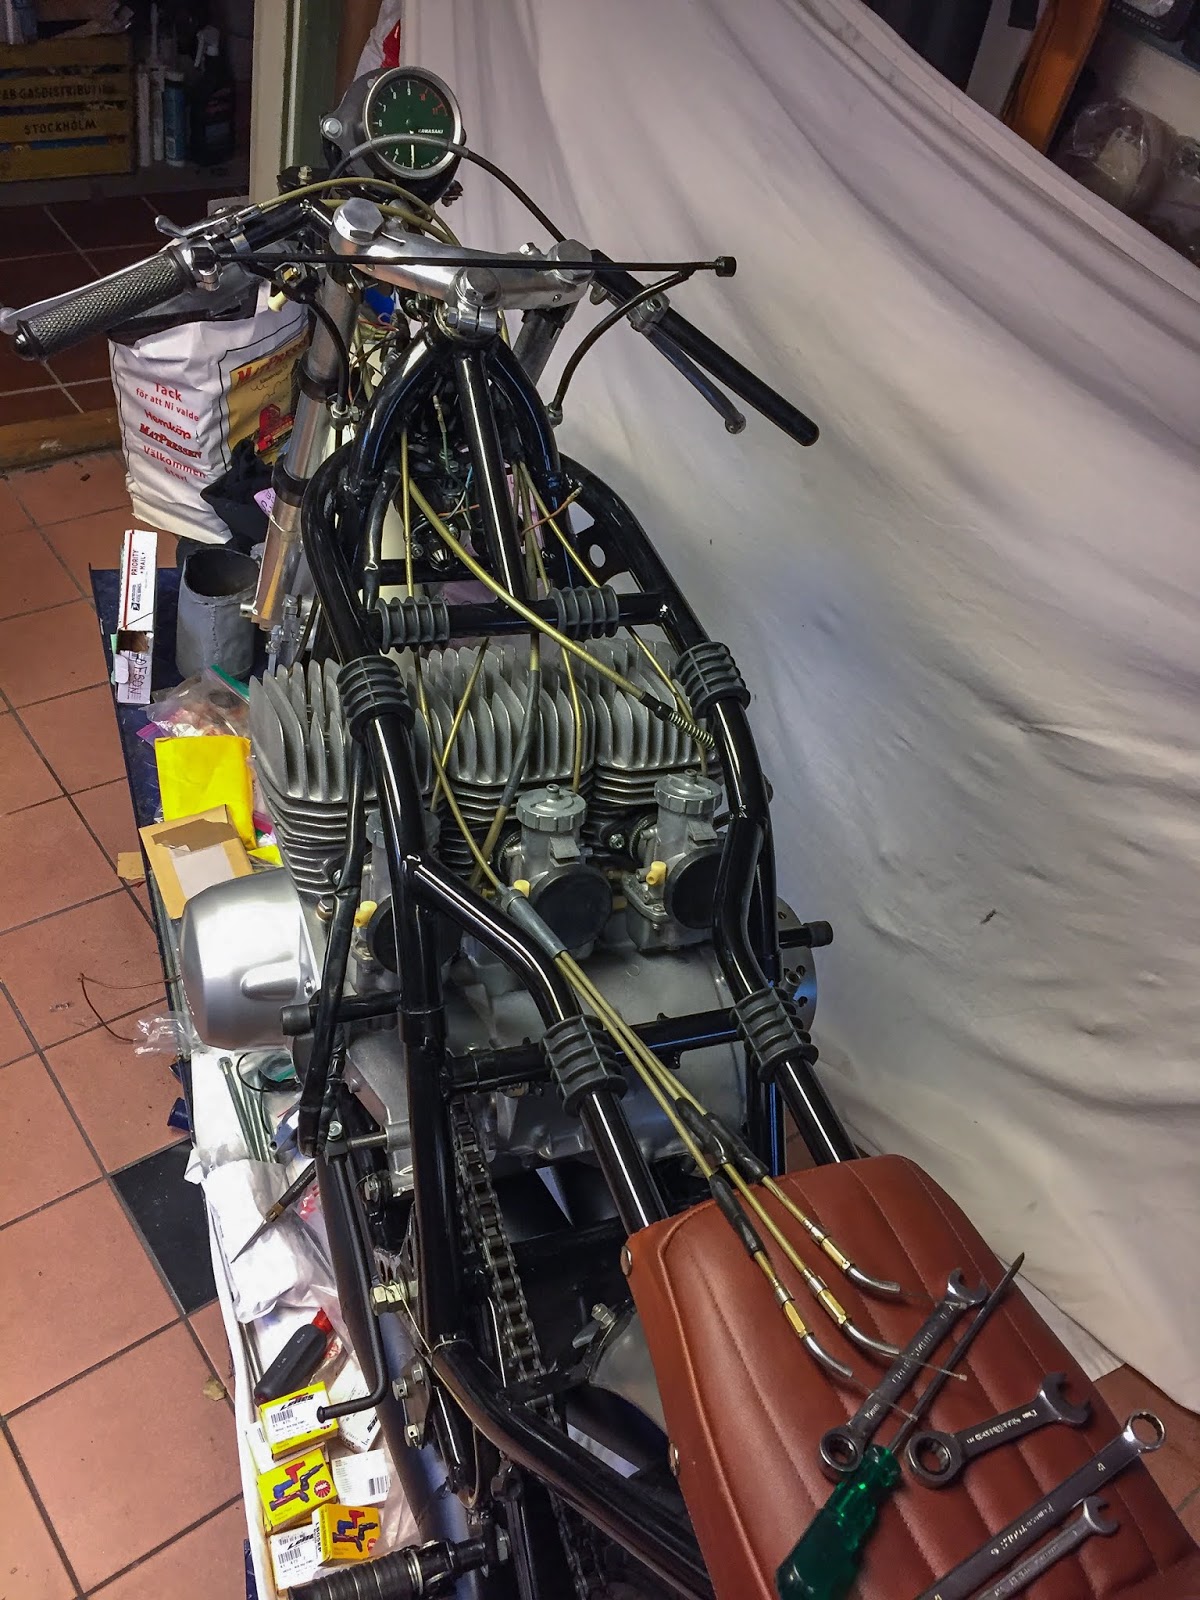
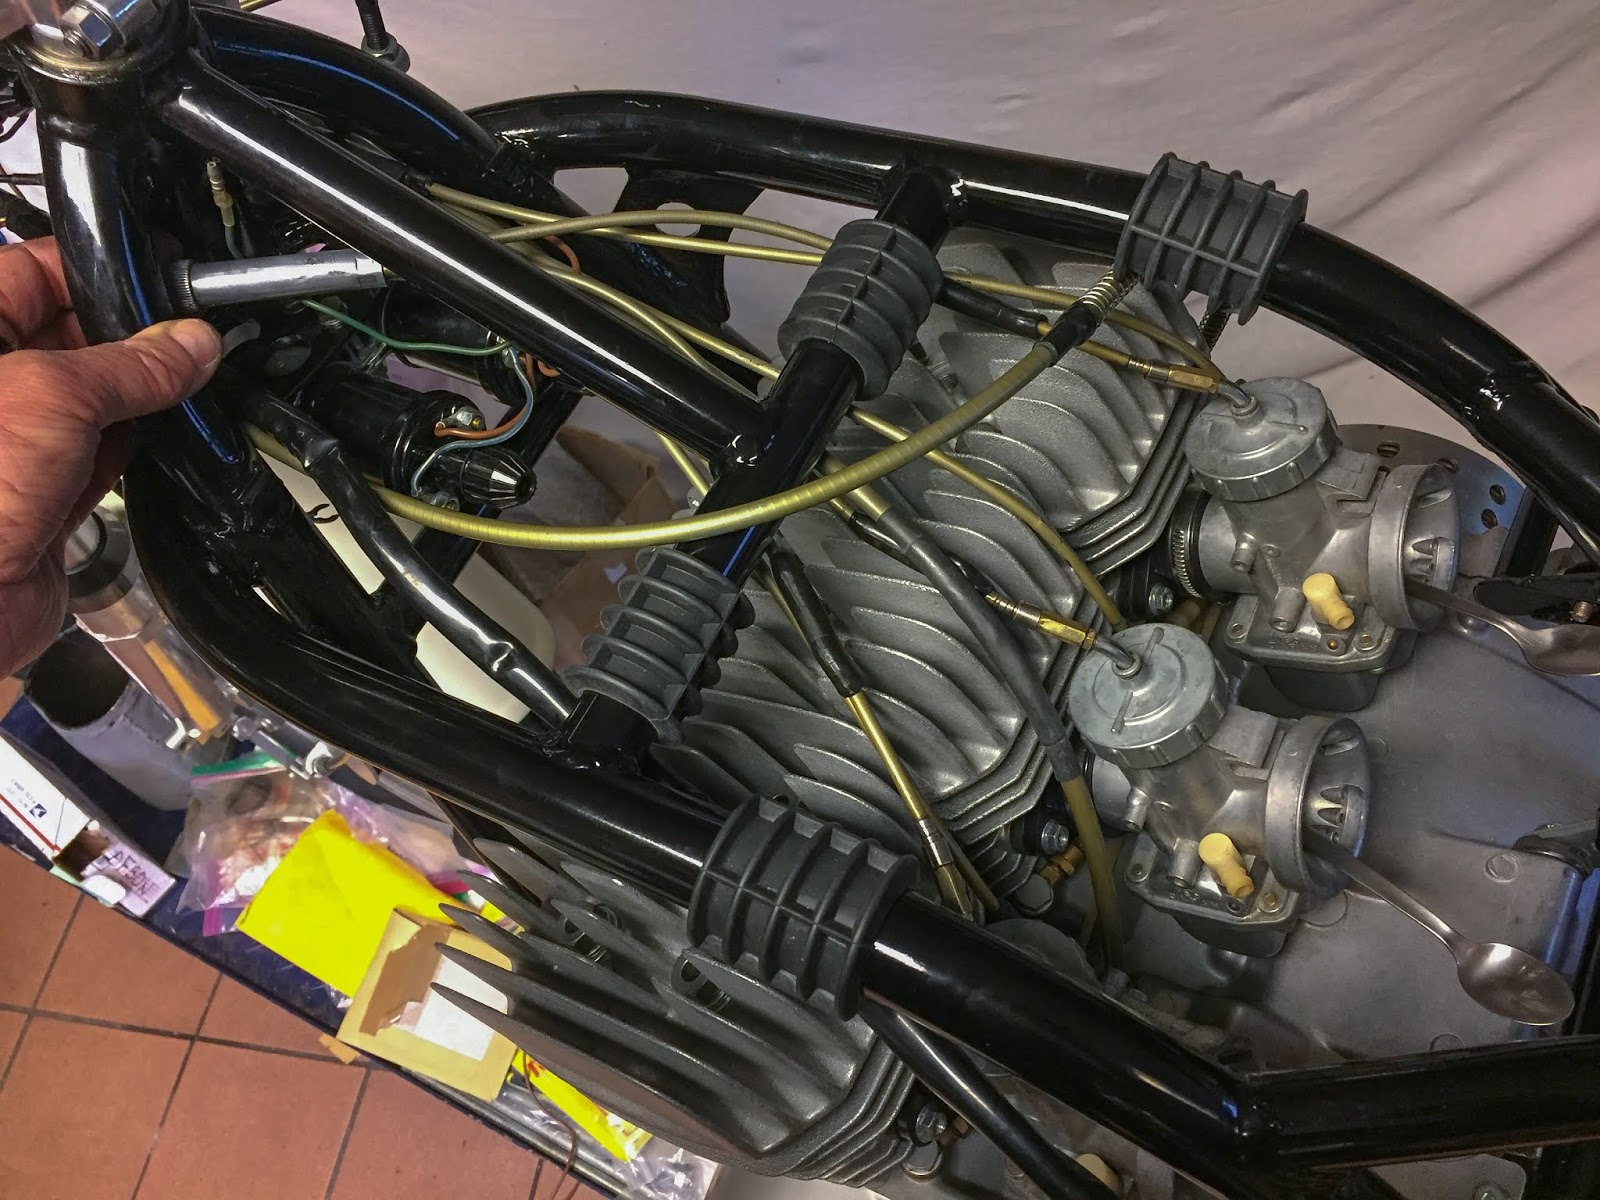
All cables put in. The routing of the tacho cable above the body tube may be modified in a while, I’ve not determined but. We´ll see when the tank arrives.

On the left right here I used to be checking the cable routing when turning the deal with bar full proper and left.
I may need to lock the cables in a greater method than simply letting them sit unfastened and slide right here and there.
The video under reveals my easy approach utilizing spoons to sync the carburetors. The left carb within the video (the best on the bike) appears to be reacting first once I pull the throttle grip. On this case it’s good to make sure that all of the cables are appropriately seated and on the backside of every adjuster…
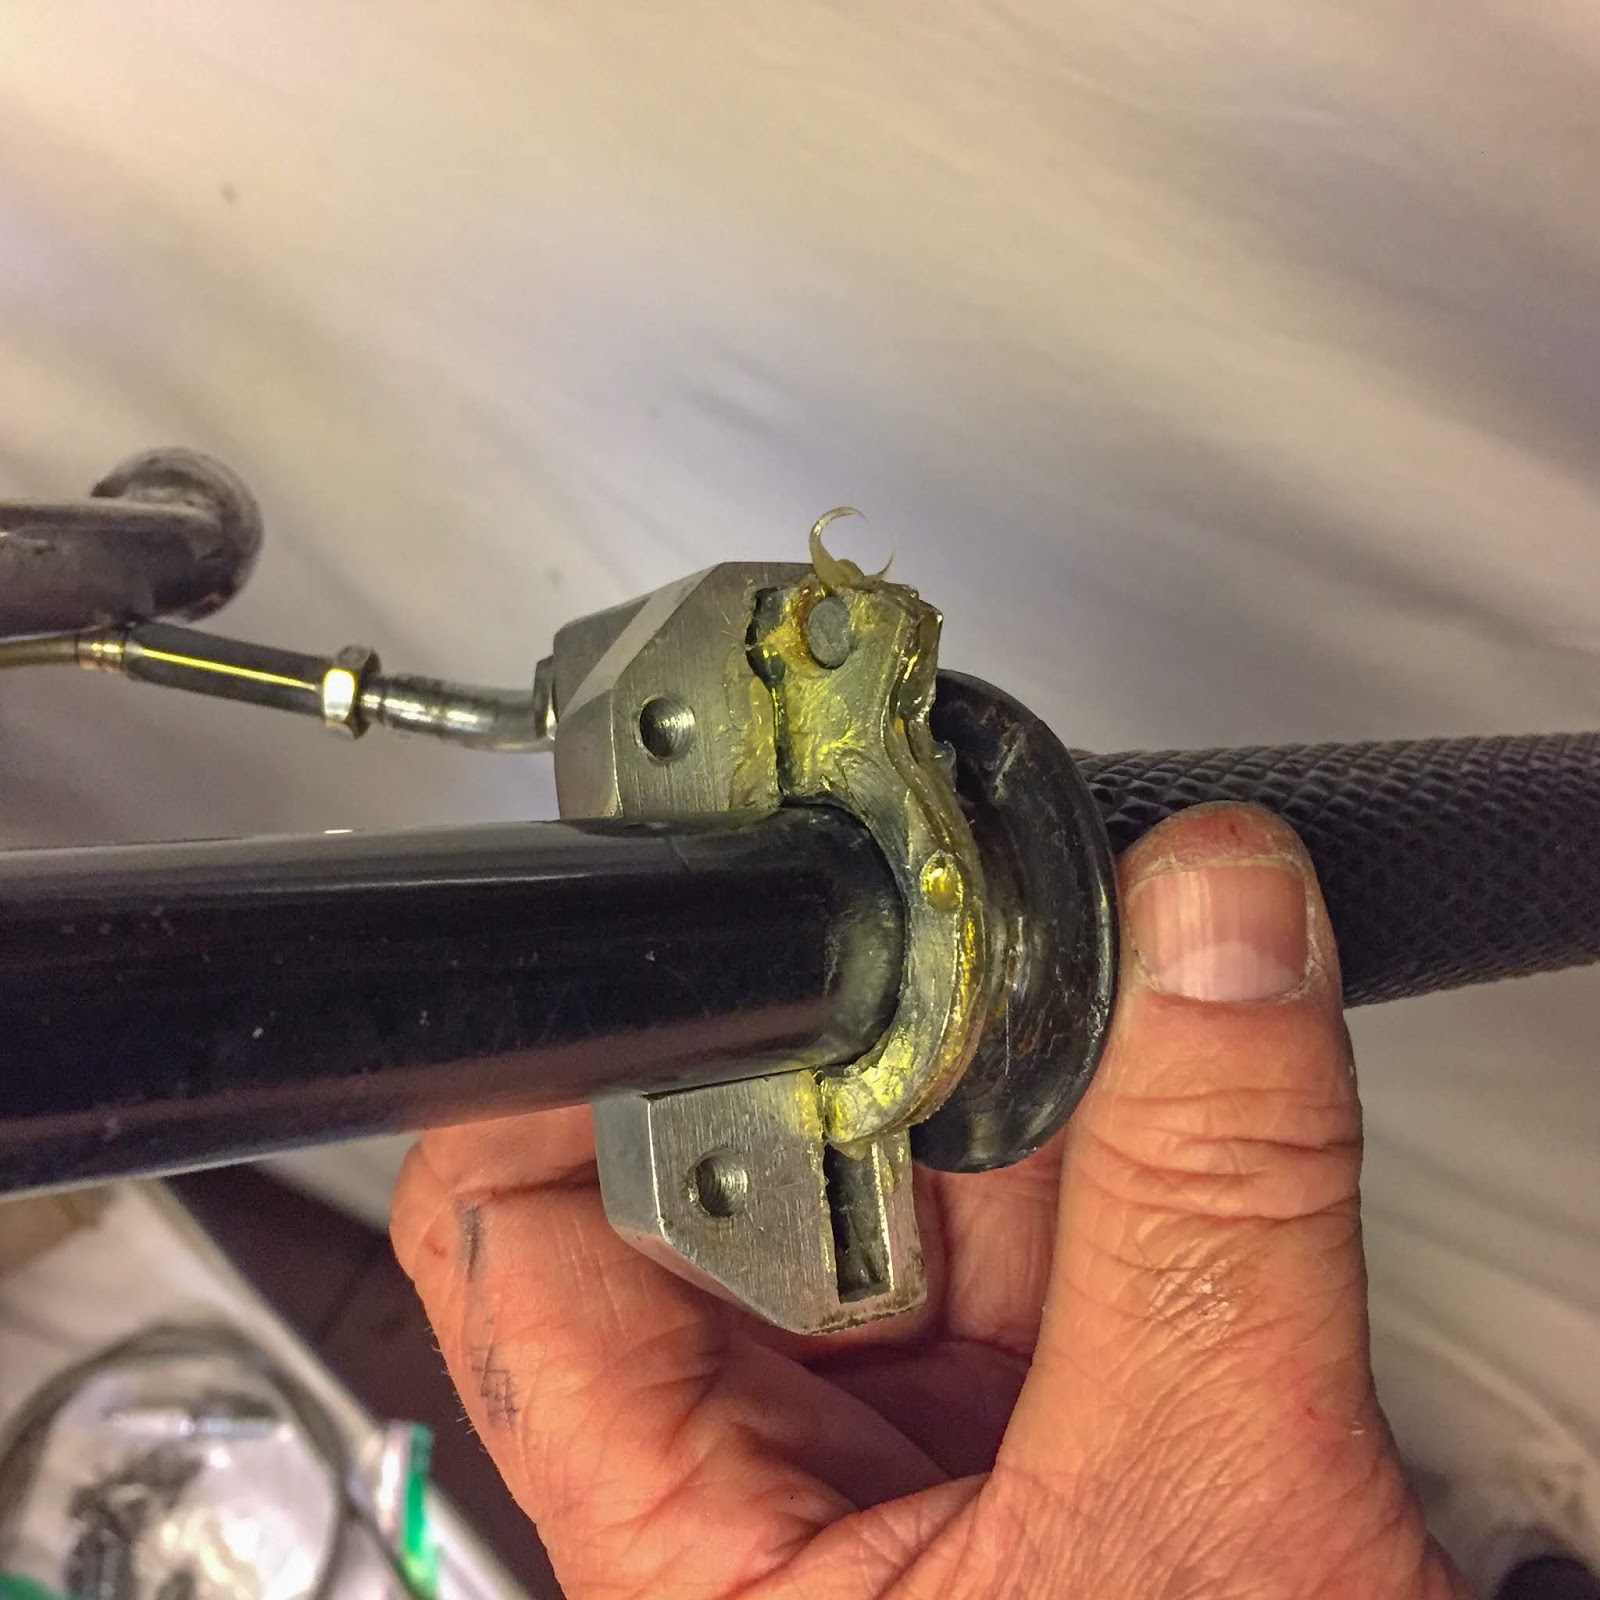
Right here´s the issue clearly seen…
An excessive amount of slack within the cables could make the sheath hook outdoors the adjusters in an undesirable method. Come to consider it, that’s the reason these small black rubber covers are there. They hold the cable in place contained in the adjuster. Mine are a bit cracked and damaged so both I’ll attempt to discover new ones or I´ll simply need to safe-tie them,
If I pushed the splitter housing of the throttle cable a bit backwards I compelled the cables in to the adjusters and the synchronizing is completely totally different. That is the way in which they’re supposed to suit so that is the place I began adjusting the cables. A big clamp held the splitter housing in place whereas I adjusted the carbs.
That positive appears quite a bit higher, doesn´t it? The trick with the spoons works nice and I take advantage of it on a regular basis when engaged on avenue triples for the preliminary, static, sync of carbs. Afterward when the engine is operating it’s a lot simpler to make use of a vacuum instrument for wonderful tuning however, the factor is, most frequently I don´t have to vary issues in any respect from this fundamental adjustment.
One other distinction on the race bike is the dearth of an idle adjuster on the carbs… The road bikes all have some sort of idle adjustment chance, both by a screw that lifts the throttle slides from the underside of the carb our bodies or a screw that lifts them from above, situated within the carb lids, simply beside the throttle cable adjusters. The H2:s have a screw on every carb physique subsequent to the gasoline inlet and the H1:s use the adjusters from above. the perform is kind of the identical, simply alternative ways to go about it.
It appears very apparent that idling is just not a very powerful factor right here. When you get this beast began the rider is on the bike and might hold the engine operating by merely protecting the slides lifted sufficient by the throttle grip. OR, you may modify the slack of the cable brief sufficient on the widespread adjuster up on the deal with bar.
The brief video above reveals the motion of the carbs to date. I consider this synchronization will probably be adequate for the primary begin of the engine.
I´m planning for a tour across the small Island I stay on, right here in Stockholm, after that first begin up… We´ll see how the neighbours will react when “Esso´s” previous bike rumbles by the streets. That will probably be one thing to recollect! Not too distant in time, both…

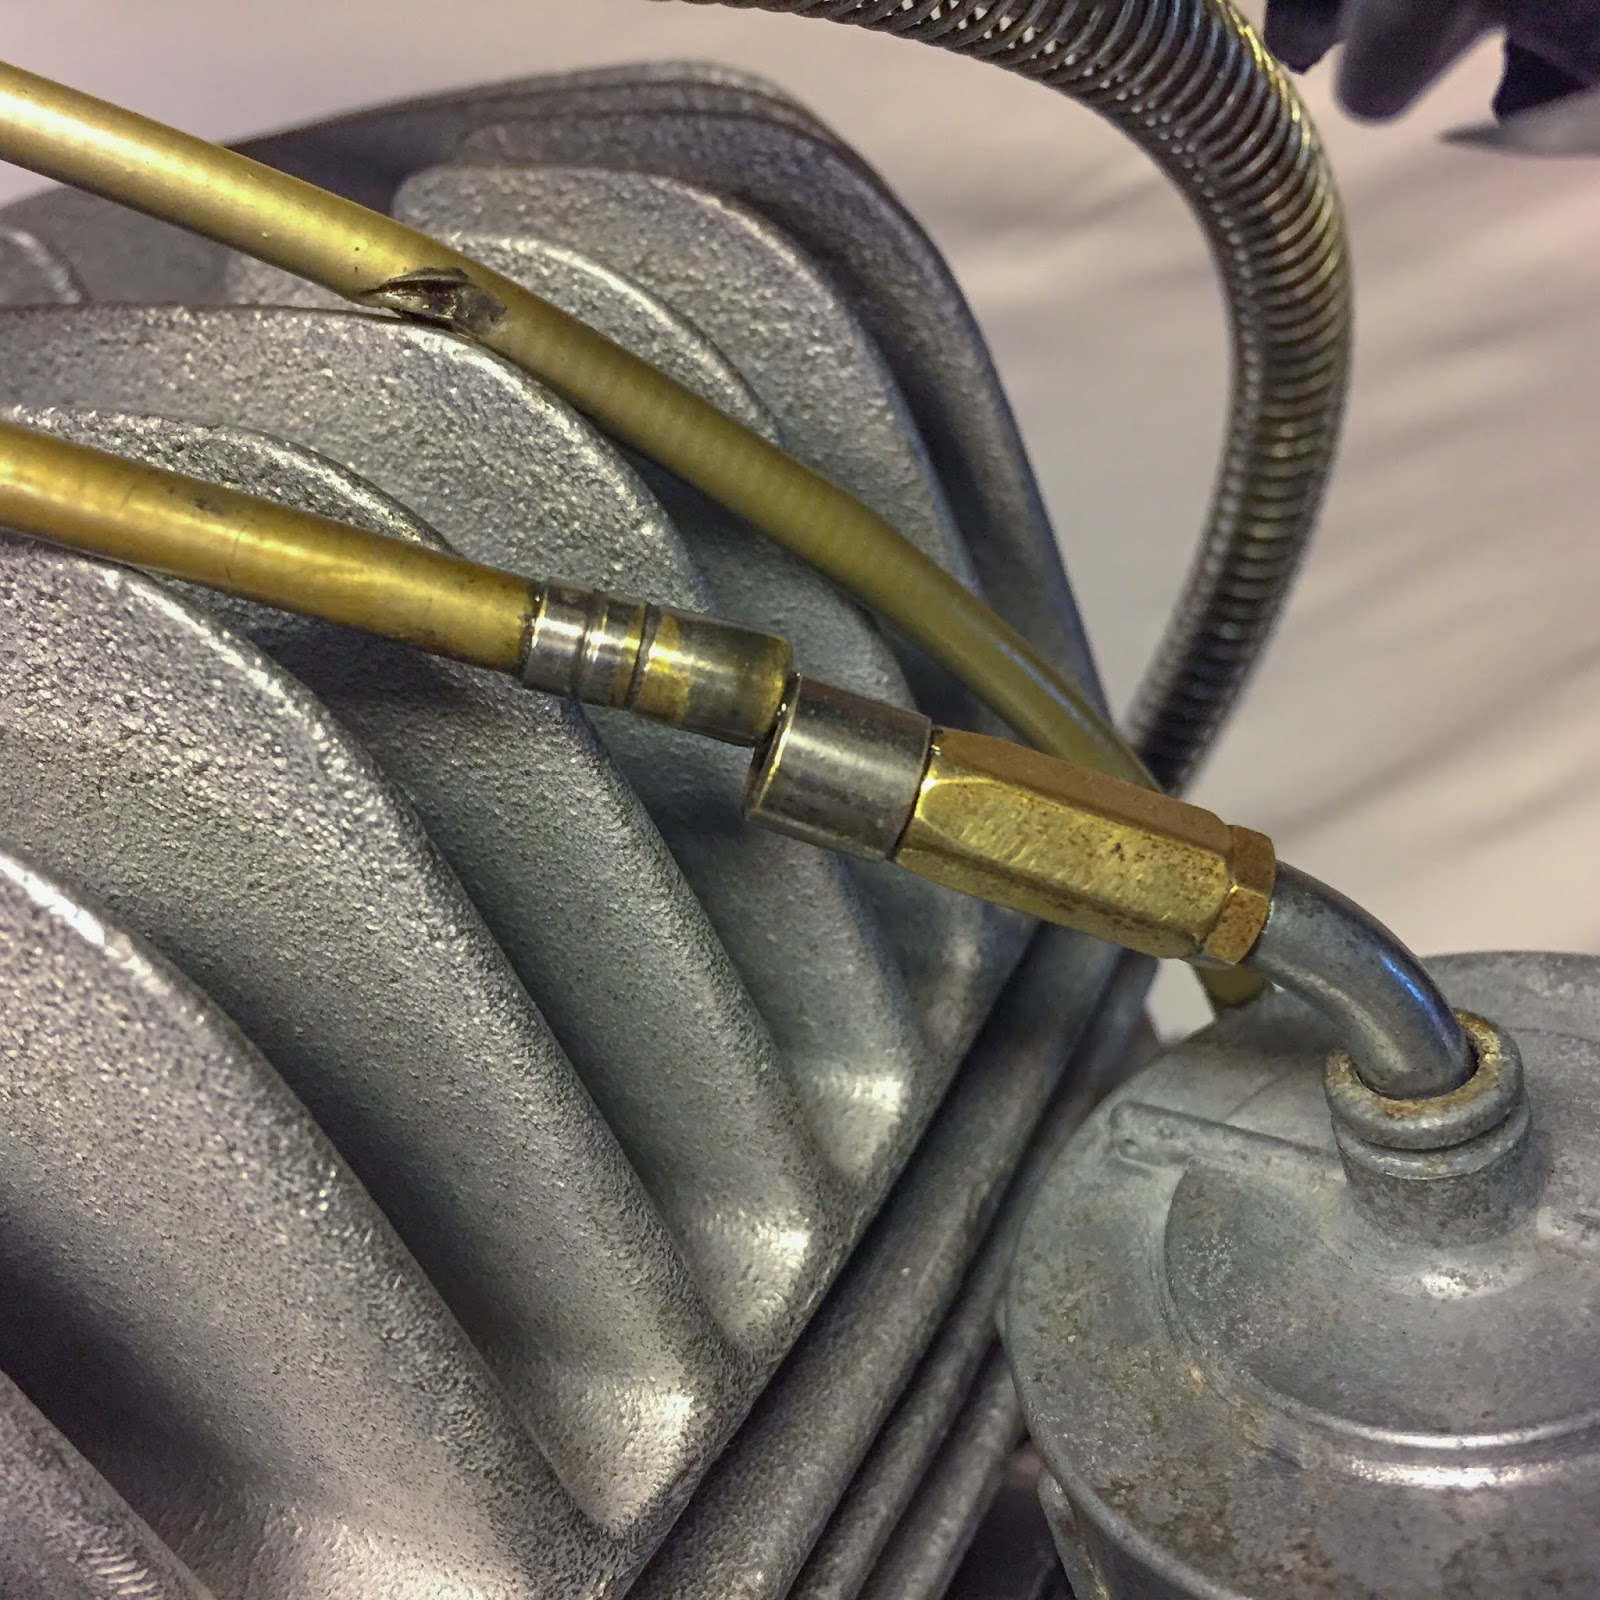
On the best here’s a image of the air consumption of the center carb. No air filter. You too can see the small black rubber protectors that can return on the throttle cable adjusters in a while. As I mentioned, mine should not superb so I´ll try to discover new ones.

And there it was! The final of the exhaust retaining springs… I discovered it searching for electrical elements for the subsequent challenge on the bike.
The Electrical system.
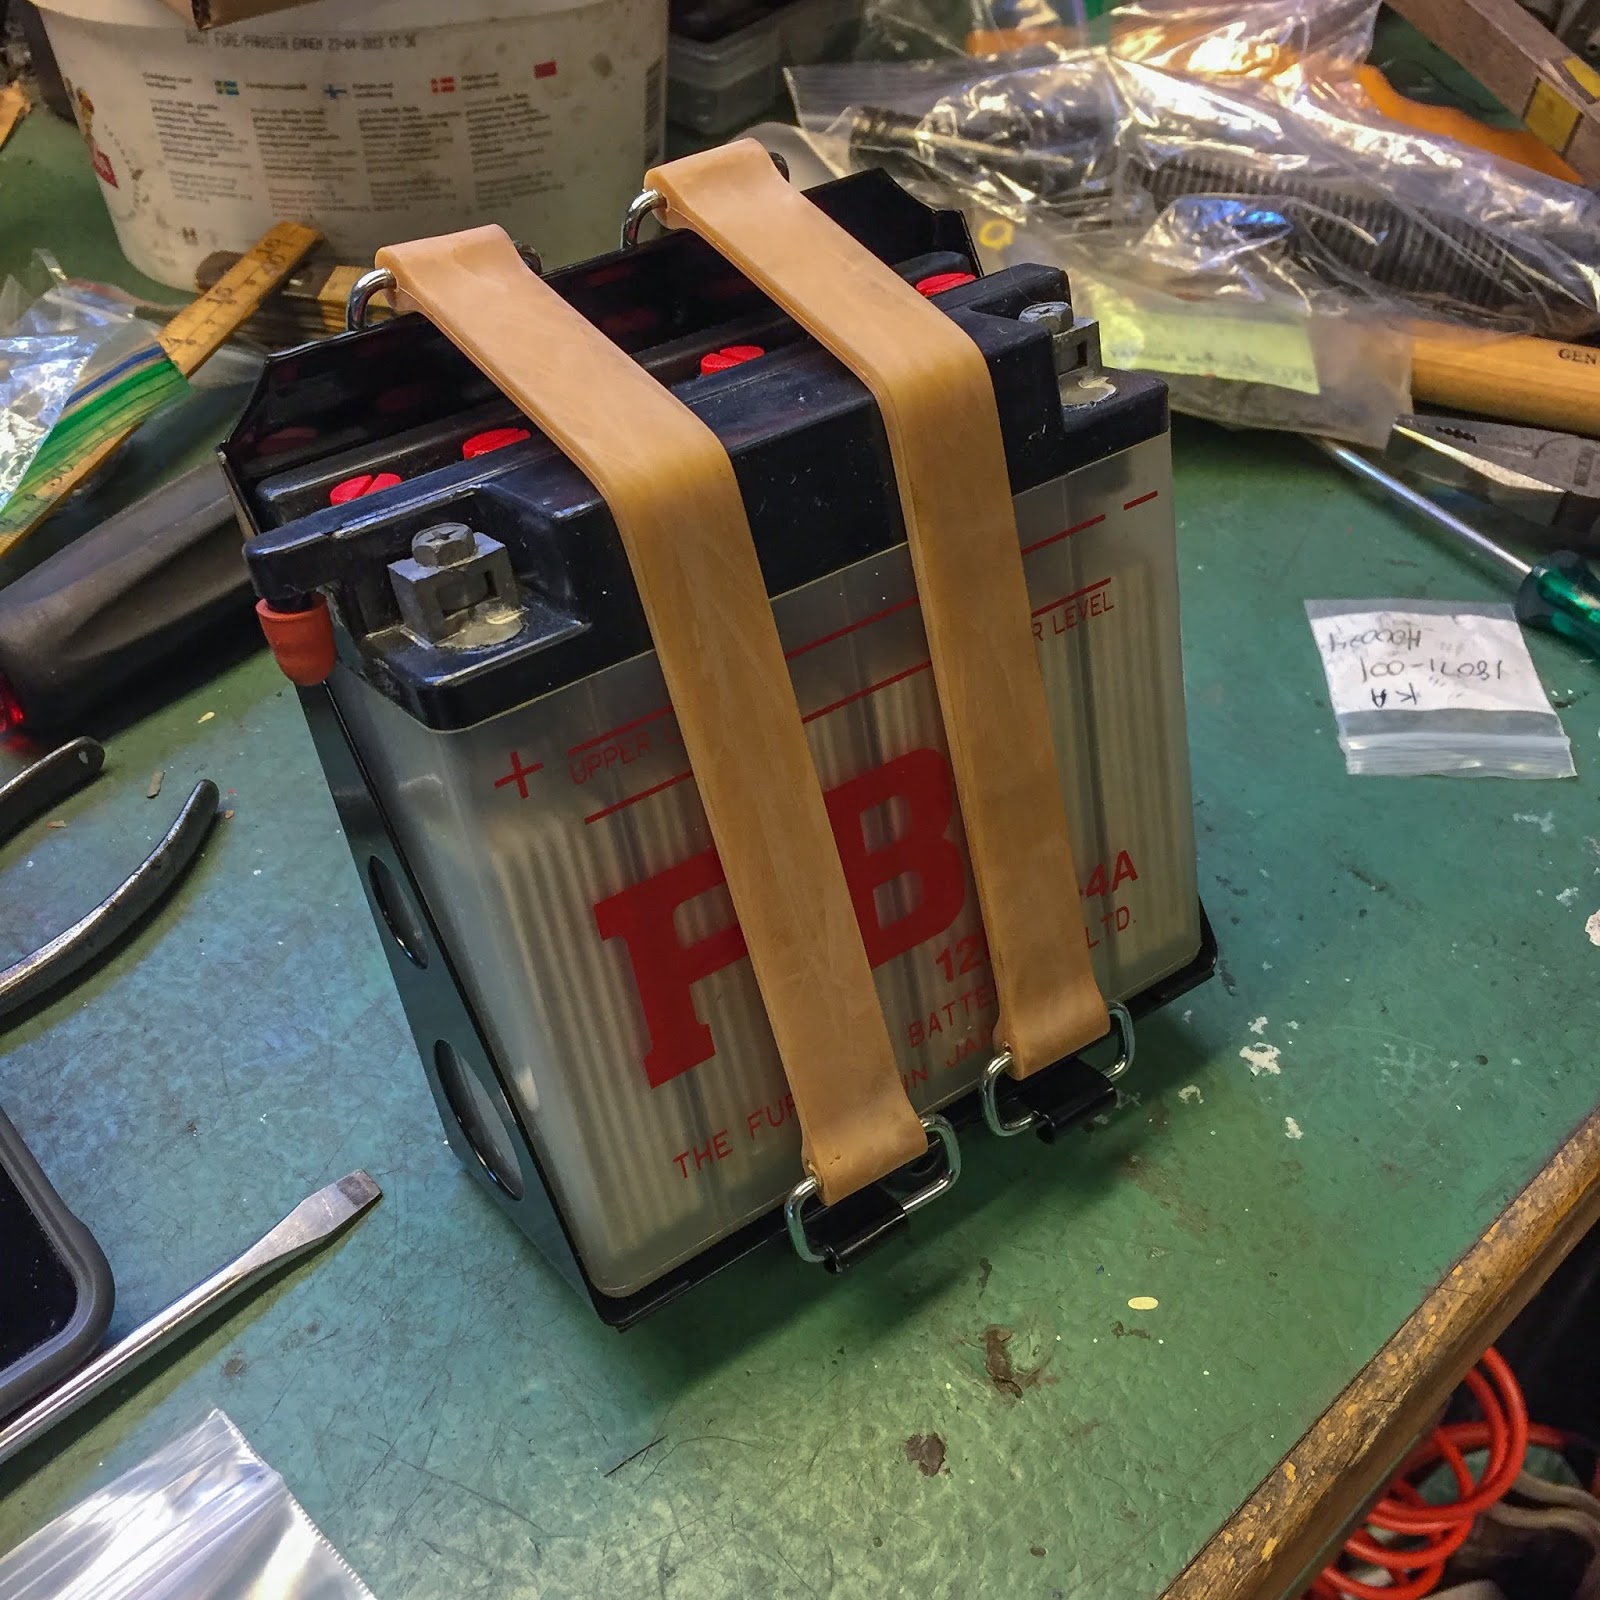
I had a lot of battery trays made a few years in the past, bear in mind? Now it was time to get one in every of them out and making ready it for the constructing of {the electrical} system. I had a few previous, dry charged, batteries in inventory and one in every of them was put in to service as a mock-up right here.
If I bear in mind appropriately the commonest kind of H2 batteries look this manner with the vent home on the left facet along with the optimistic terminal and the adverse one on the best. That is what I would favor in a while once I´m going to purchase a brand new battery for the bike.
The seek for {the electrical} elements additionally revealed a few rubber elements I had missed/forgot about.
On the left right here is the gear change rubber in place on the gear lever.
Matches like a appeal!

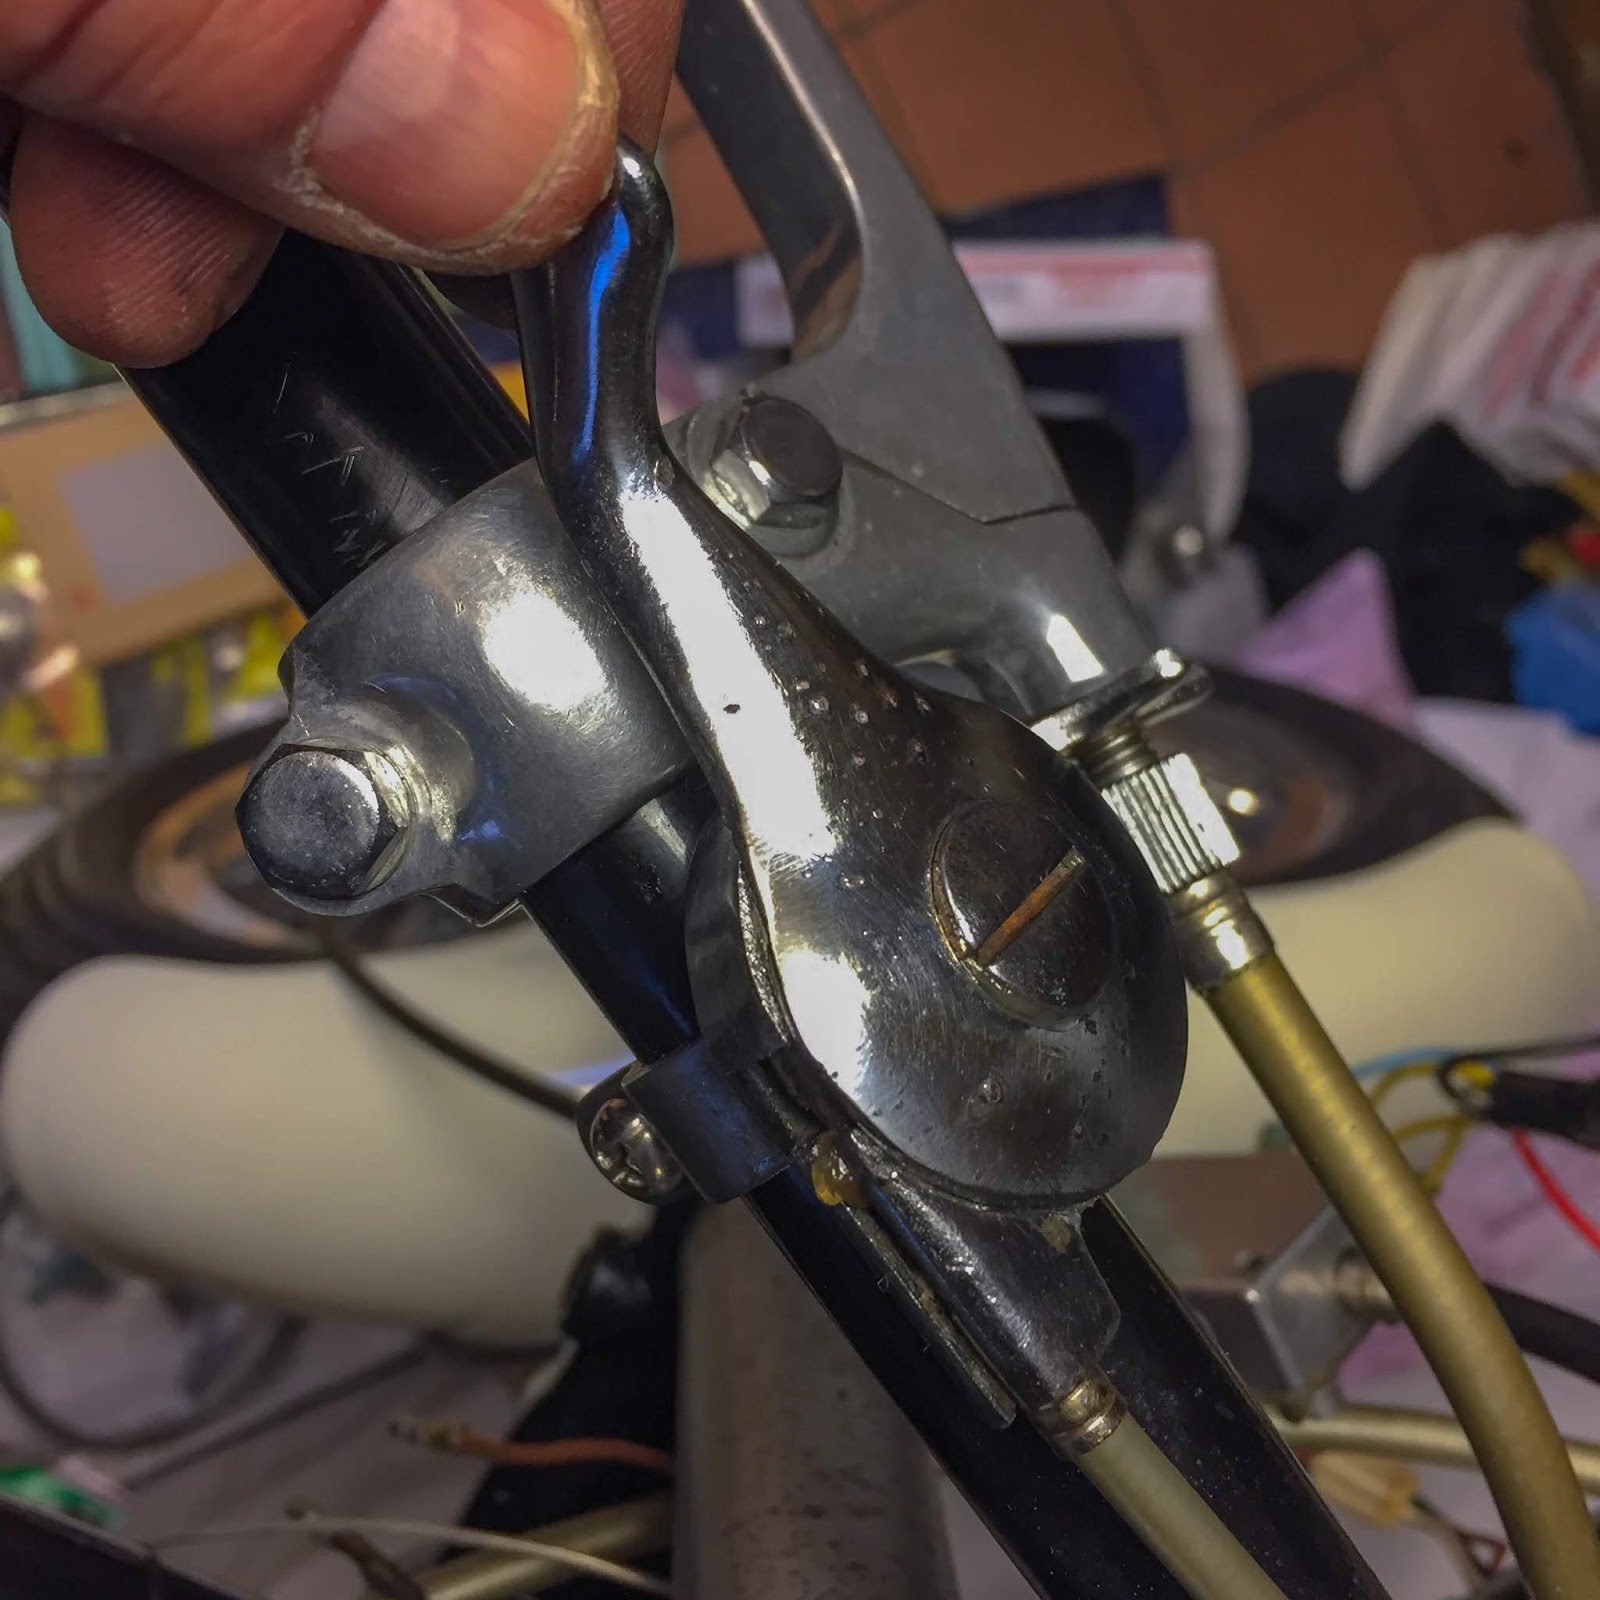
And right here is the brake lever rubber grip, full with the 6x12mm pan head screw that holds it in place. It’s coming collectively now…
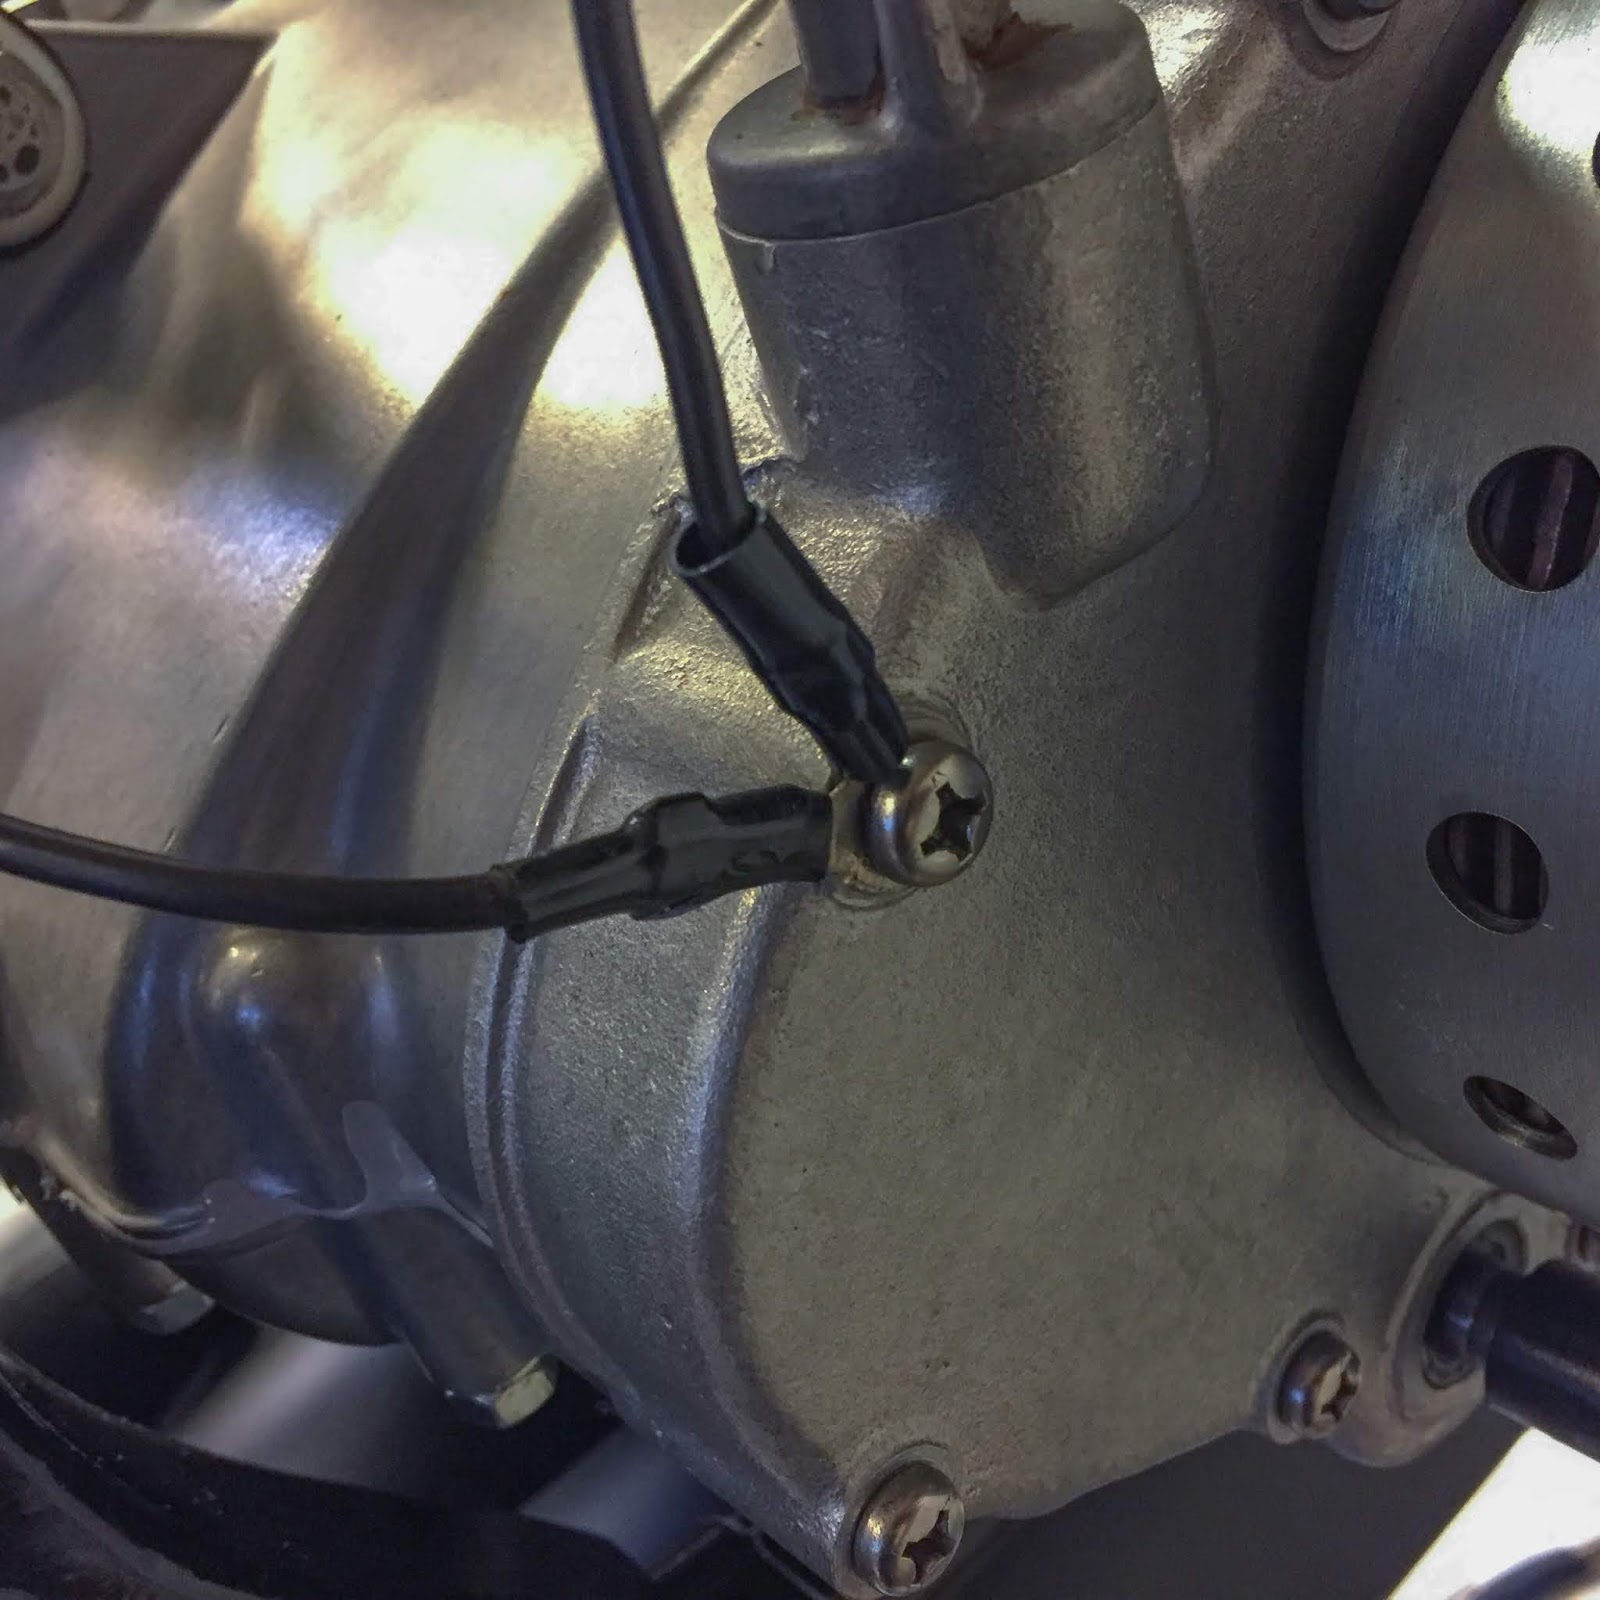
I discovered two superb wanting floor wires in one of many packing containers and figured I might use them as a begin on the wiring.
I´ve seen in quite a few footage from the racing pits that the engine additionally was grounded to the body and battery terminal. Good floor is an important a part of any electrical wiring. I made it straightforward for myself and routed one from the engine to the battery terminal and one from the engine to the body, on the muffler bracket to be actual. That´ll do for starters..
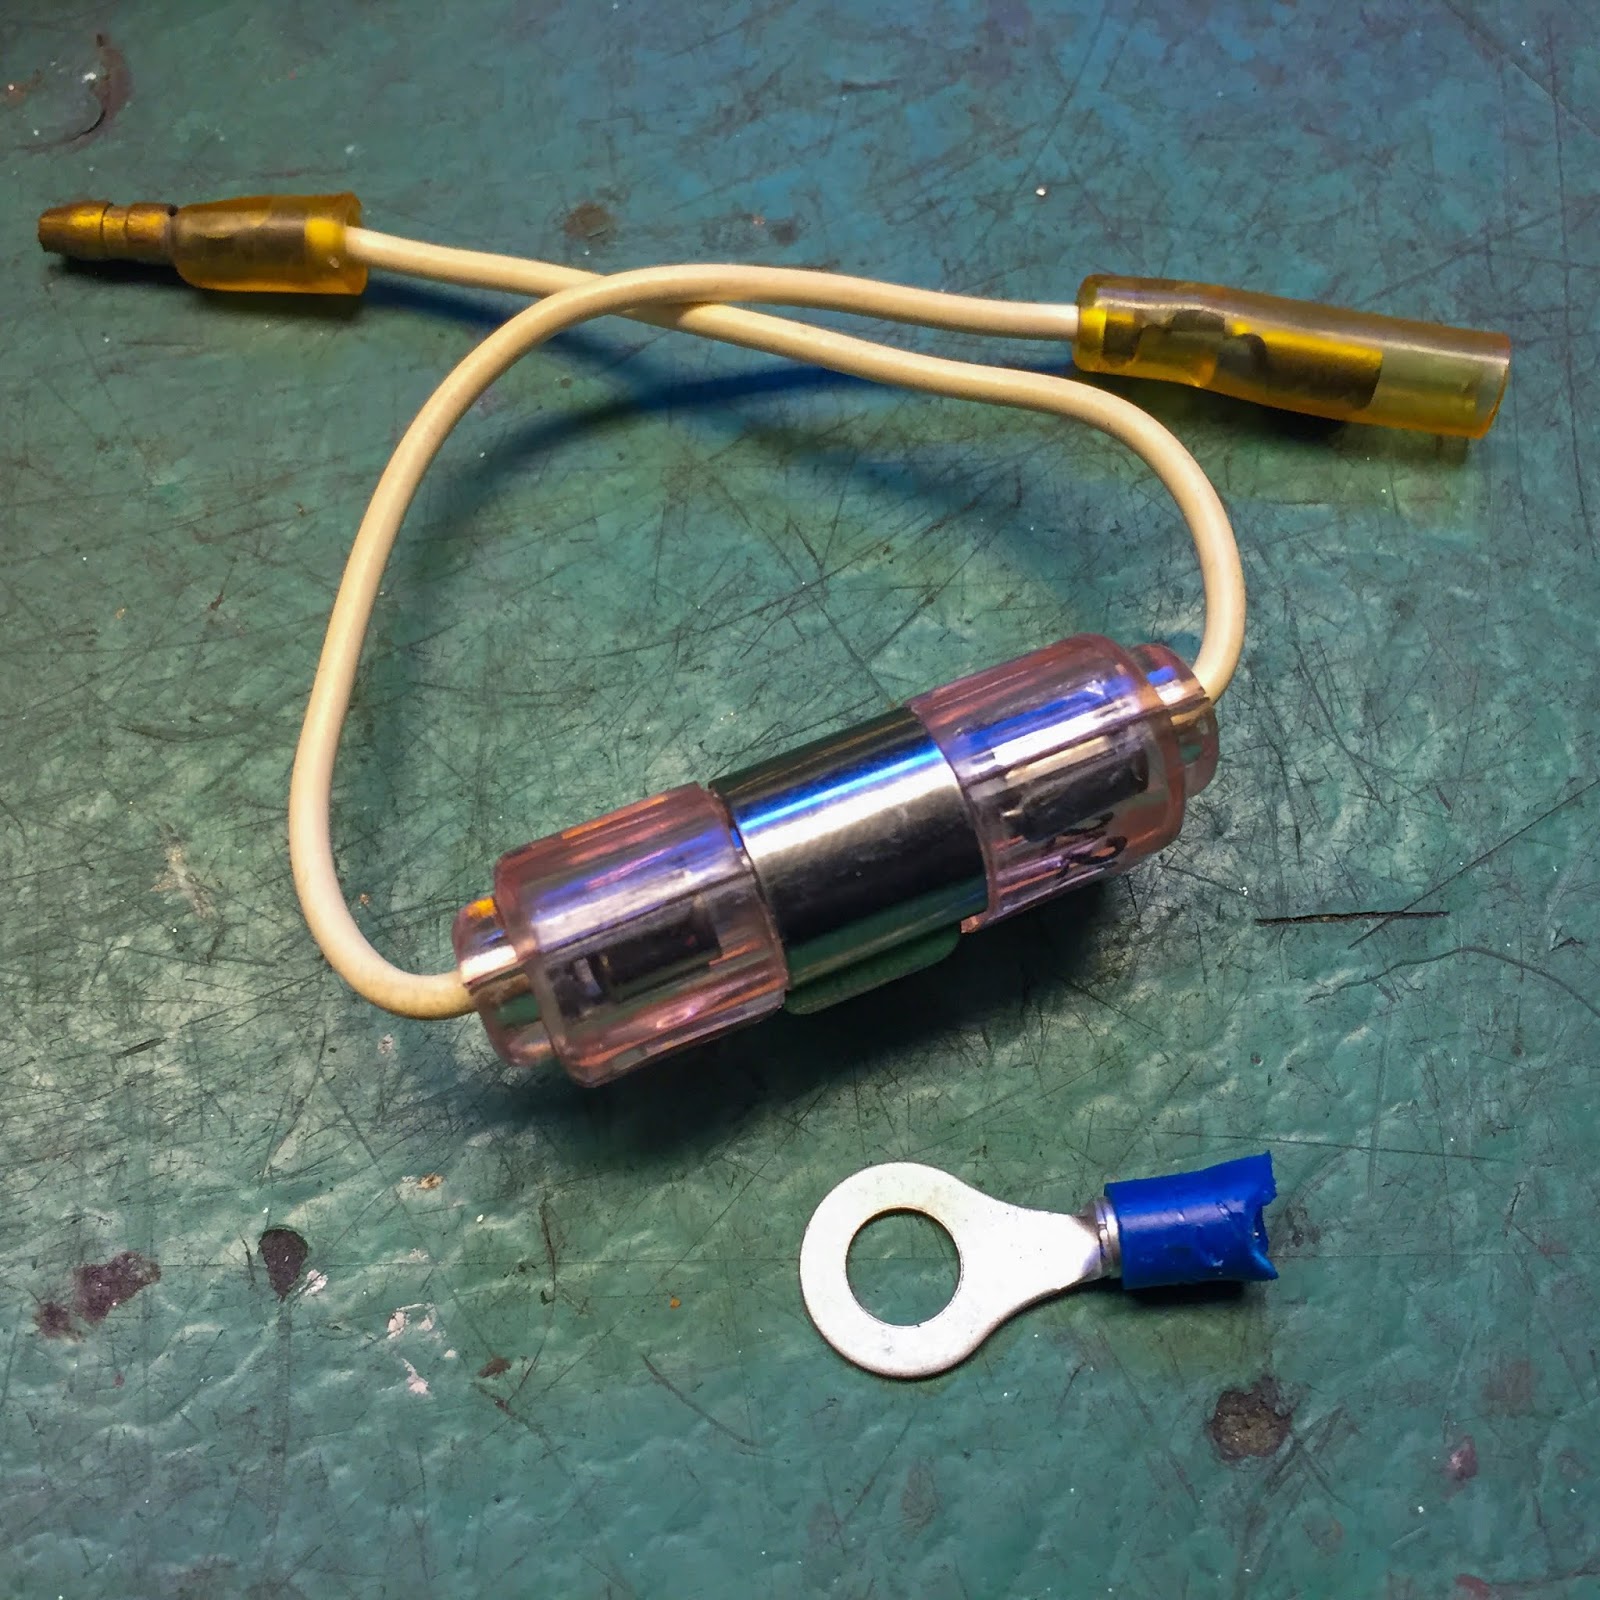
There´s just one, small fuse within the electrical wiring on the bike and it sits proper on the battery plus terminal. this can be a NOS unit from eBay. The precise right half quantity. Price its weight in gold…
I didn´t like placing one other connector between the fuse and the battery terminal so I reduce off the connector on the longest piece of cable going out from the fuse field.

An affordable aftermarket connector was stripped of its ugly, blue insulation, and fitted to the wire with a bit of shrink tubing behind it.
For those who use the right software, there´s no have to solder these connectors. They clamp extraordinarily laborious when used appropriately.
It will look precisely like an unique connector once I´m achieved with it.
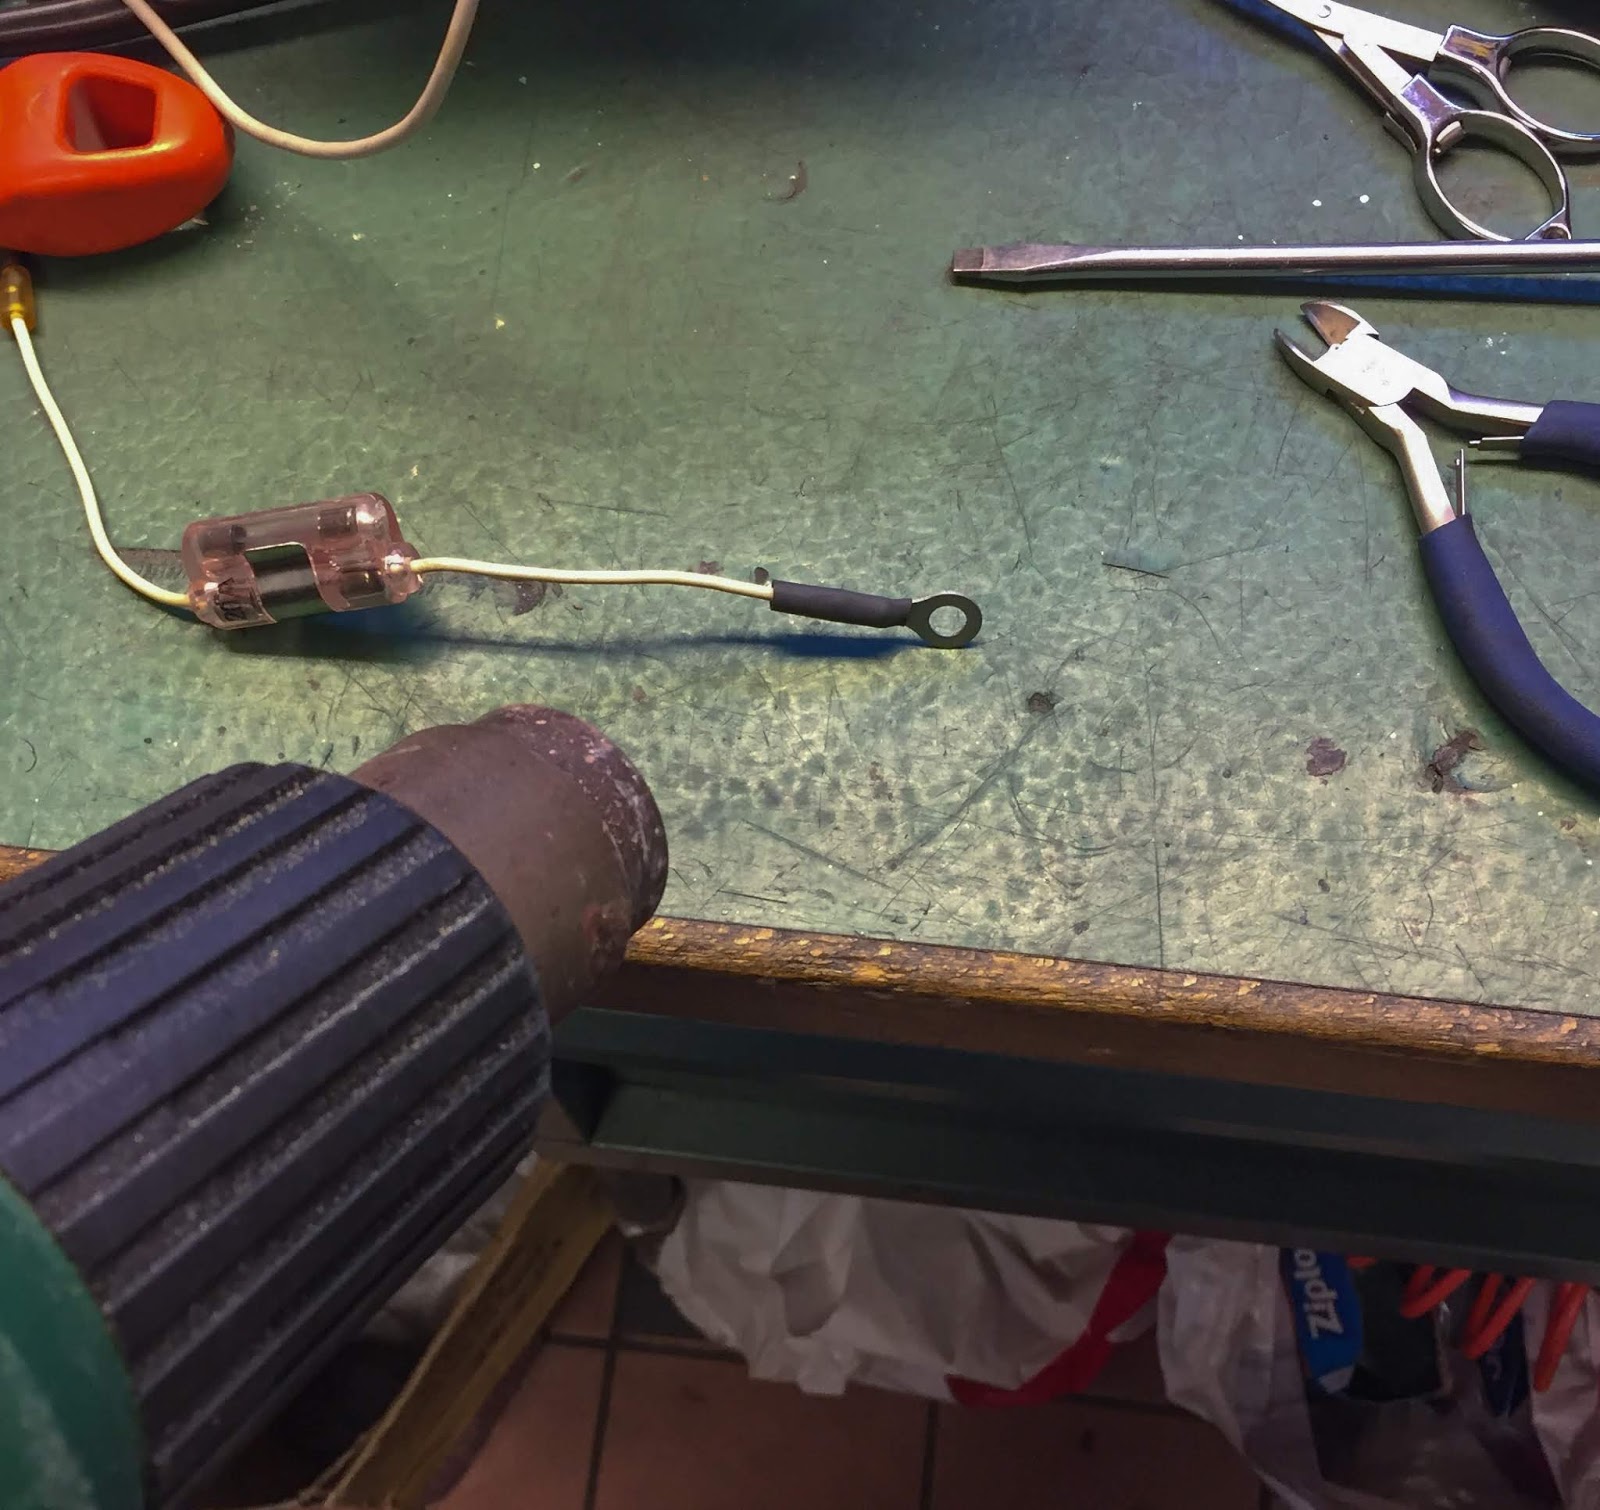
The ultimate contact was made by the warmth gun. The warmth shrinks the tubing and makes a climate resistant, good wanting insulation of the connector. Prefer it was constructed that method within the first place!
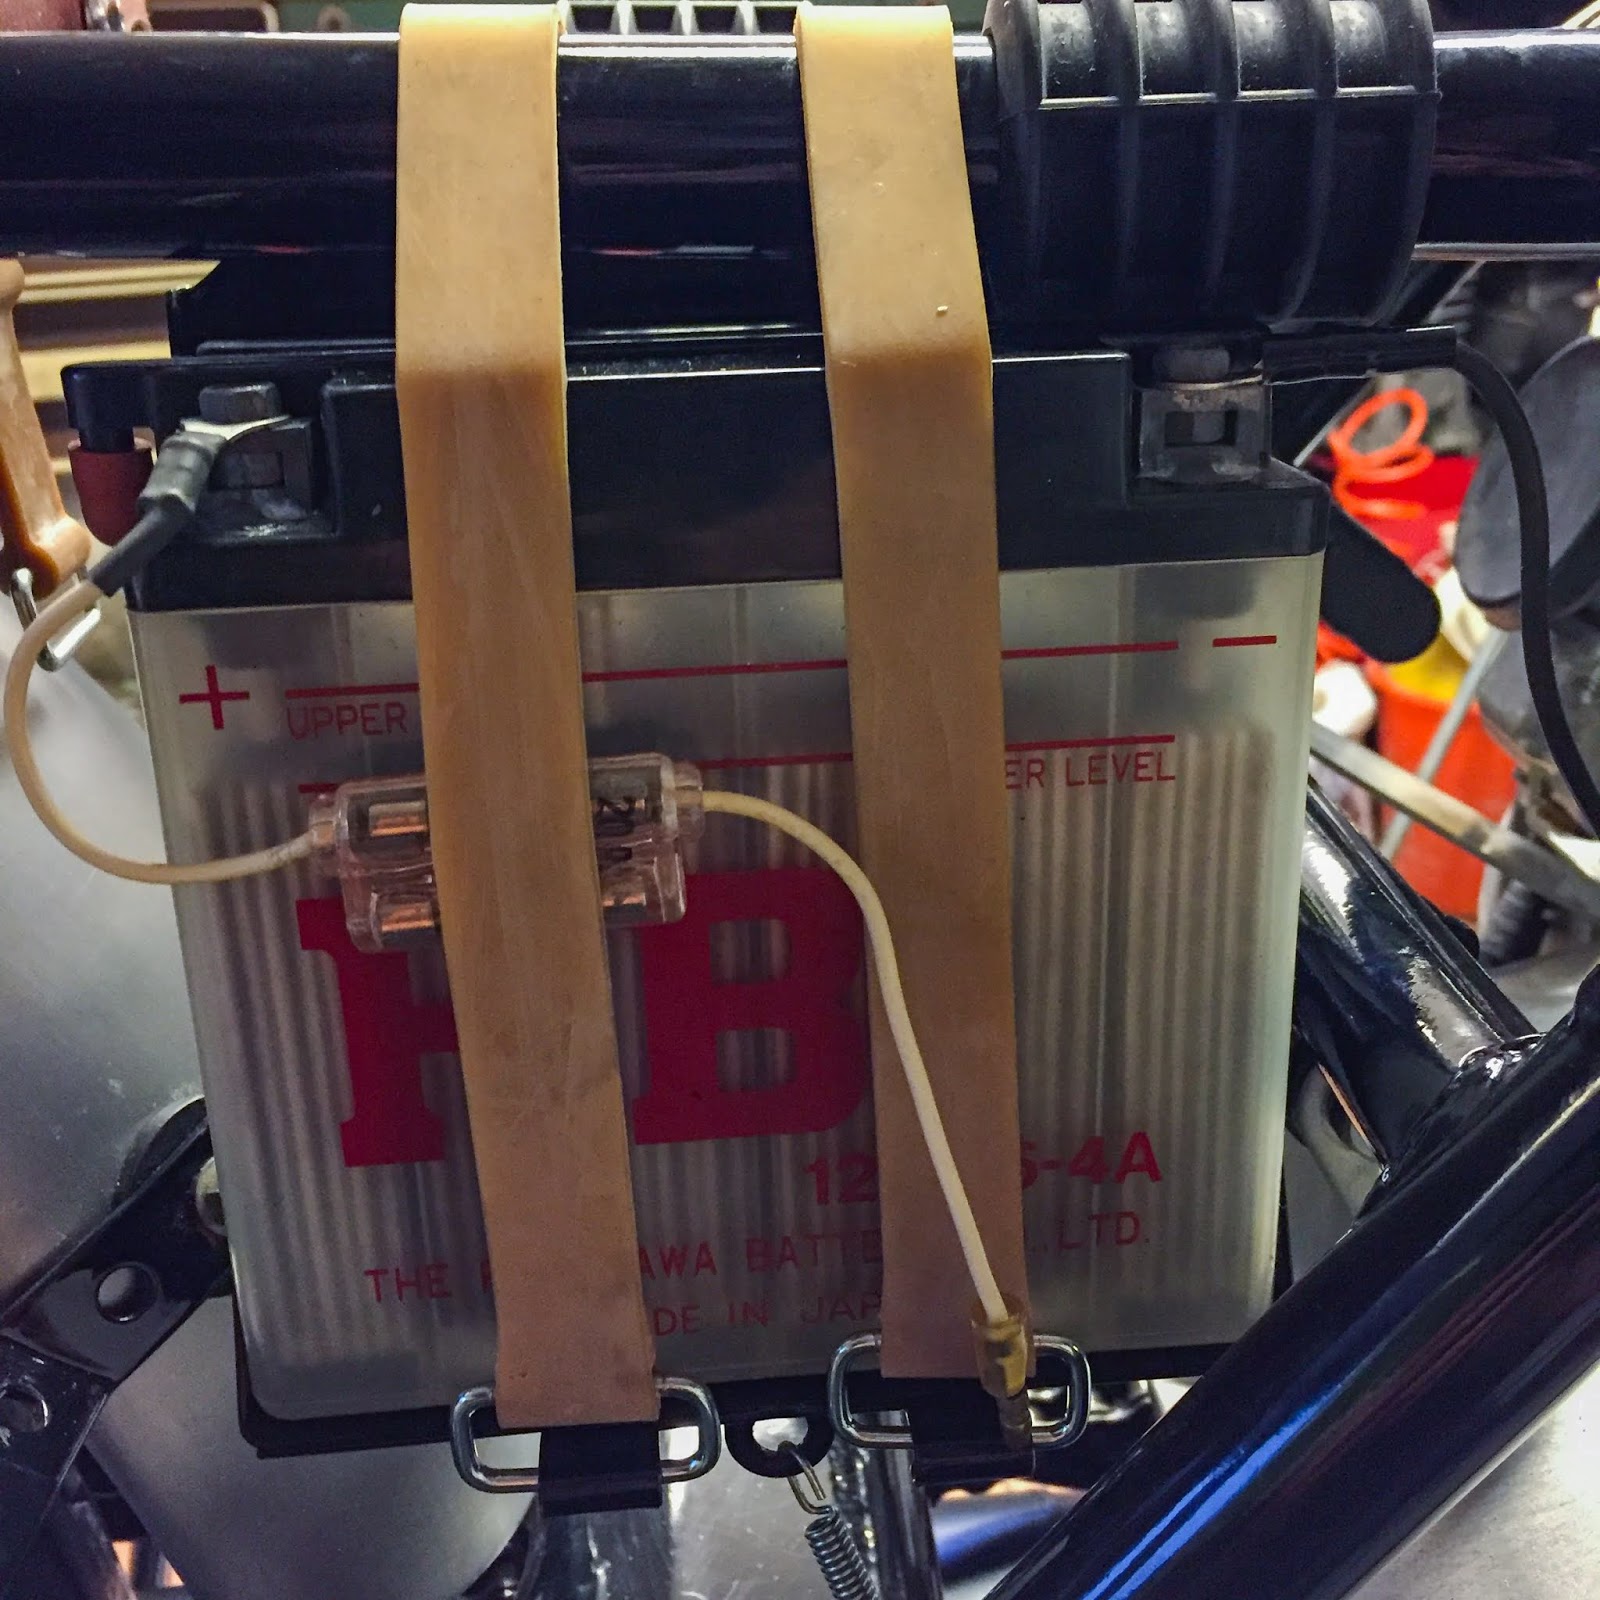
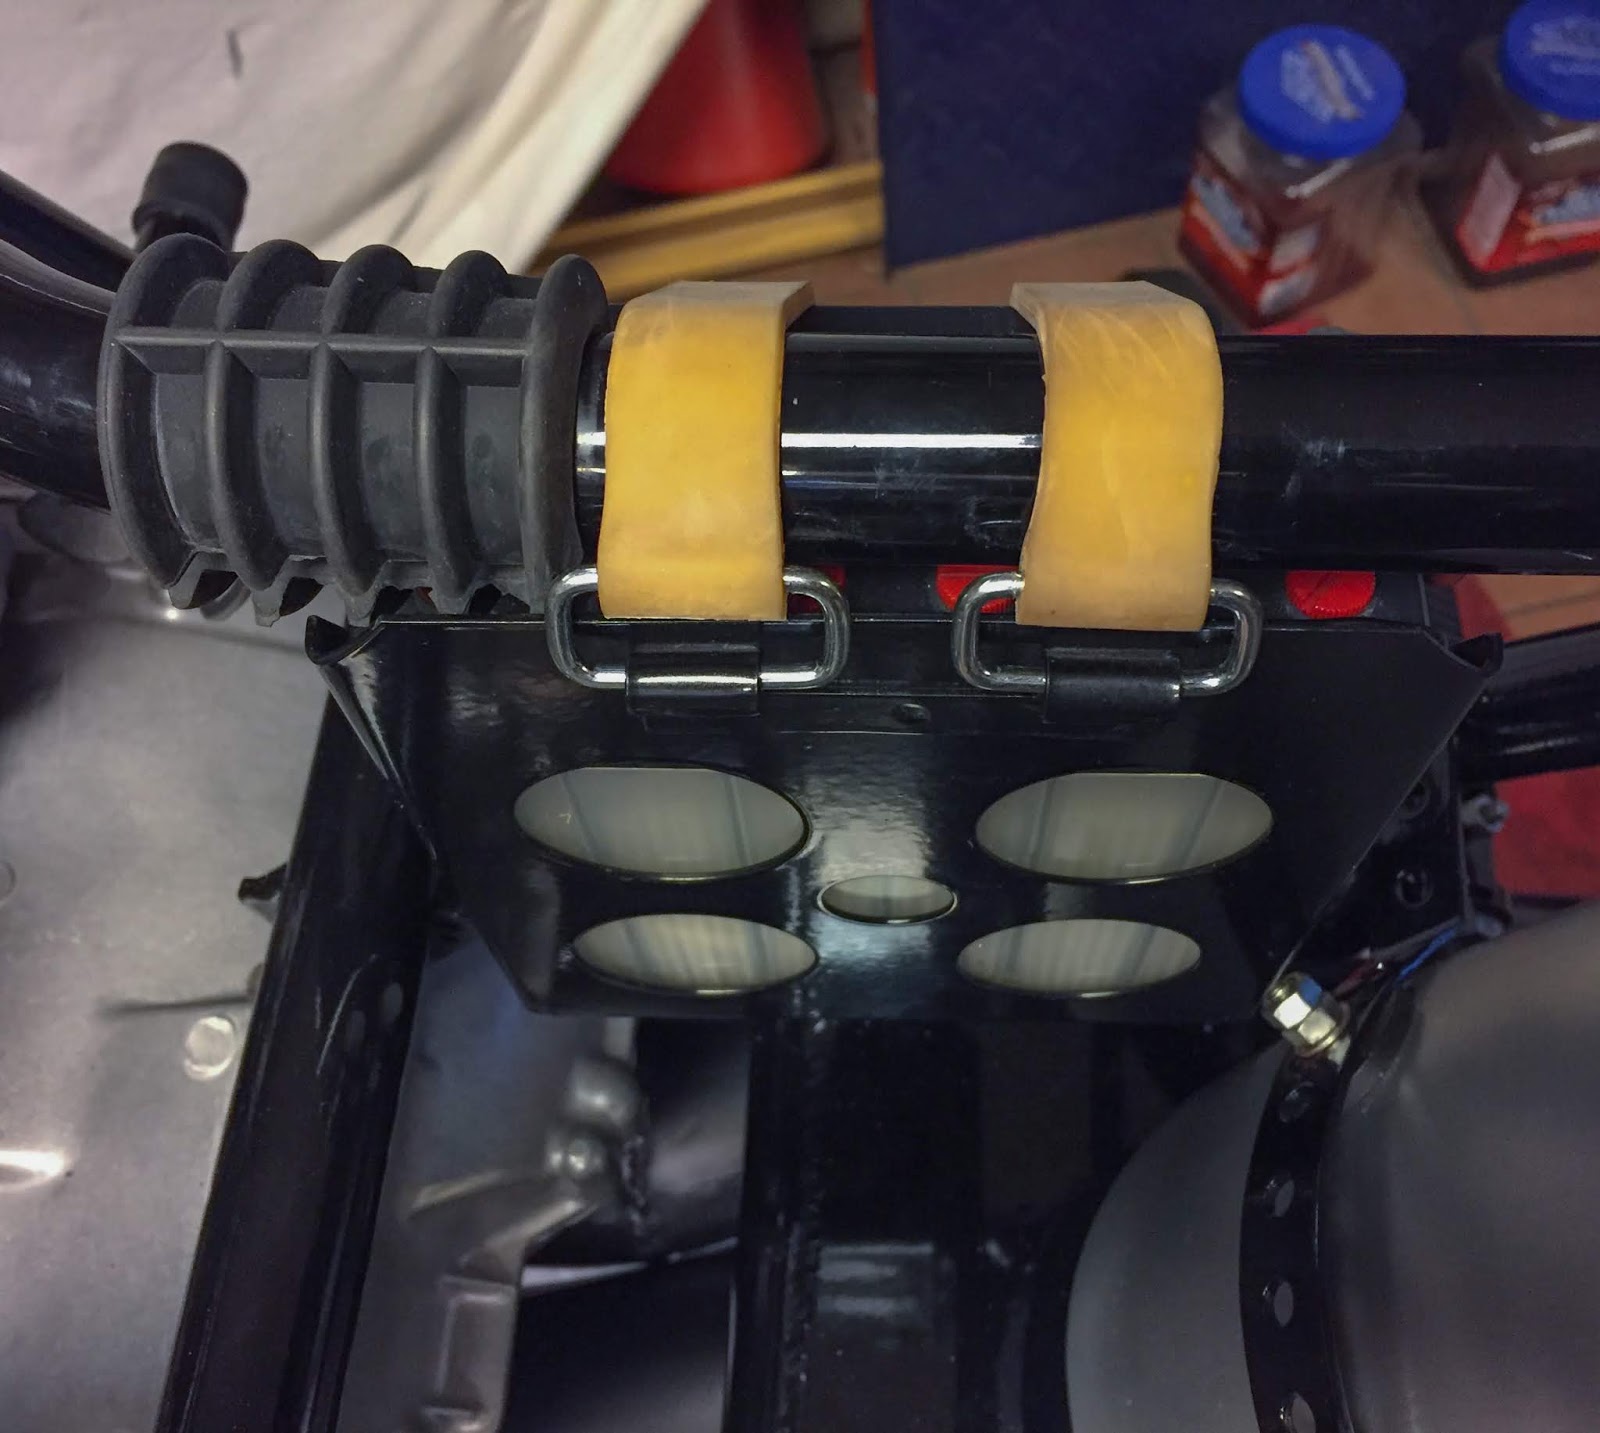
That is the primary trial fitment of the battery to the body. Keep in mind I had none of those elements and thus NO thought what it might seem like or how it might connect to the body. Easy sufficient. The battery tray hangs within the rubber bands that go over the body tube! For those who look intently beneath the battery you may see a small spring there…
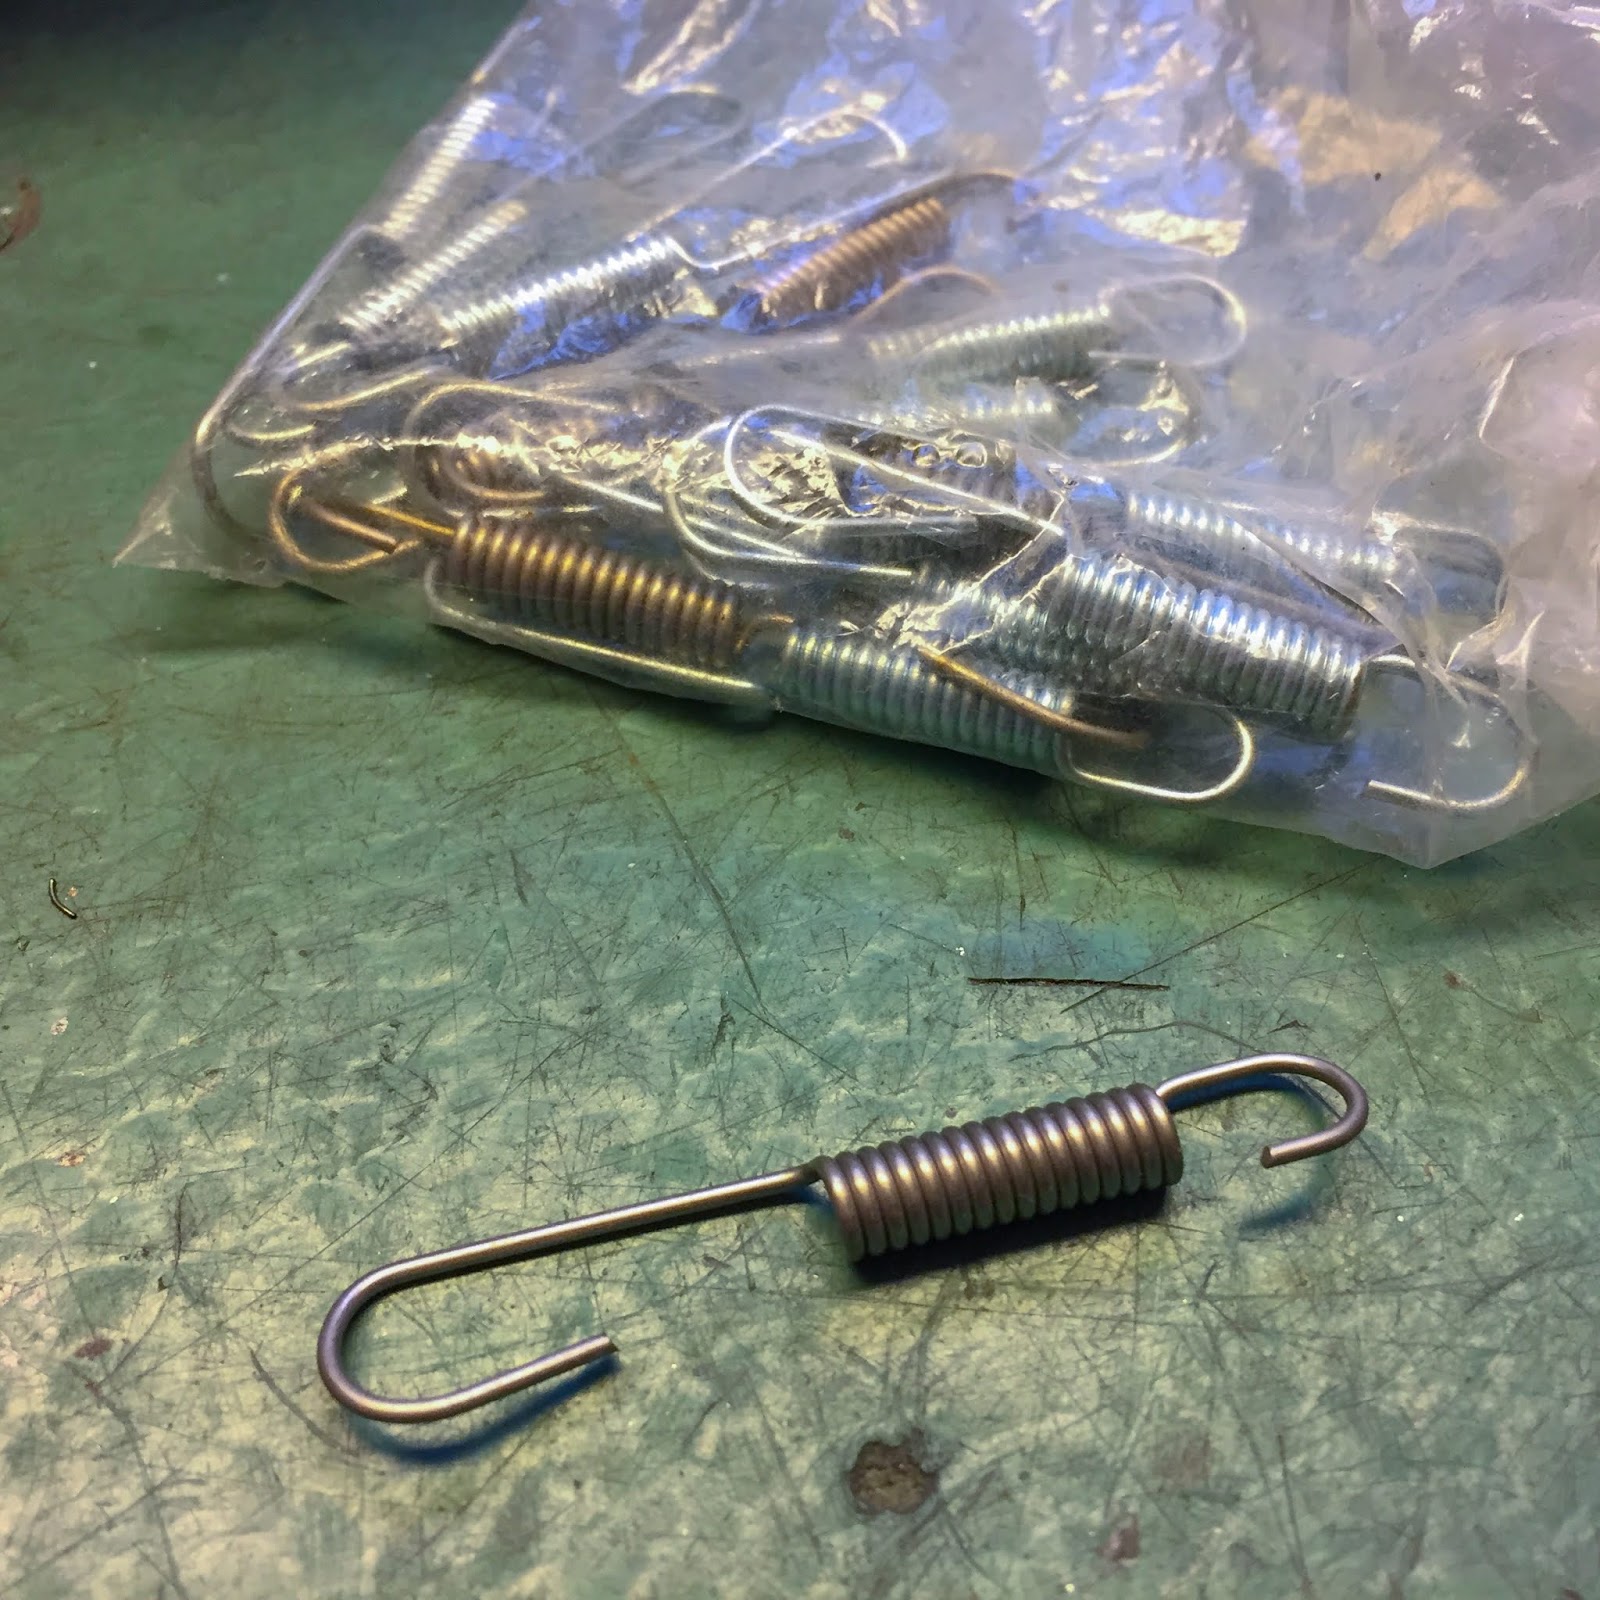
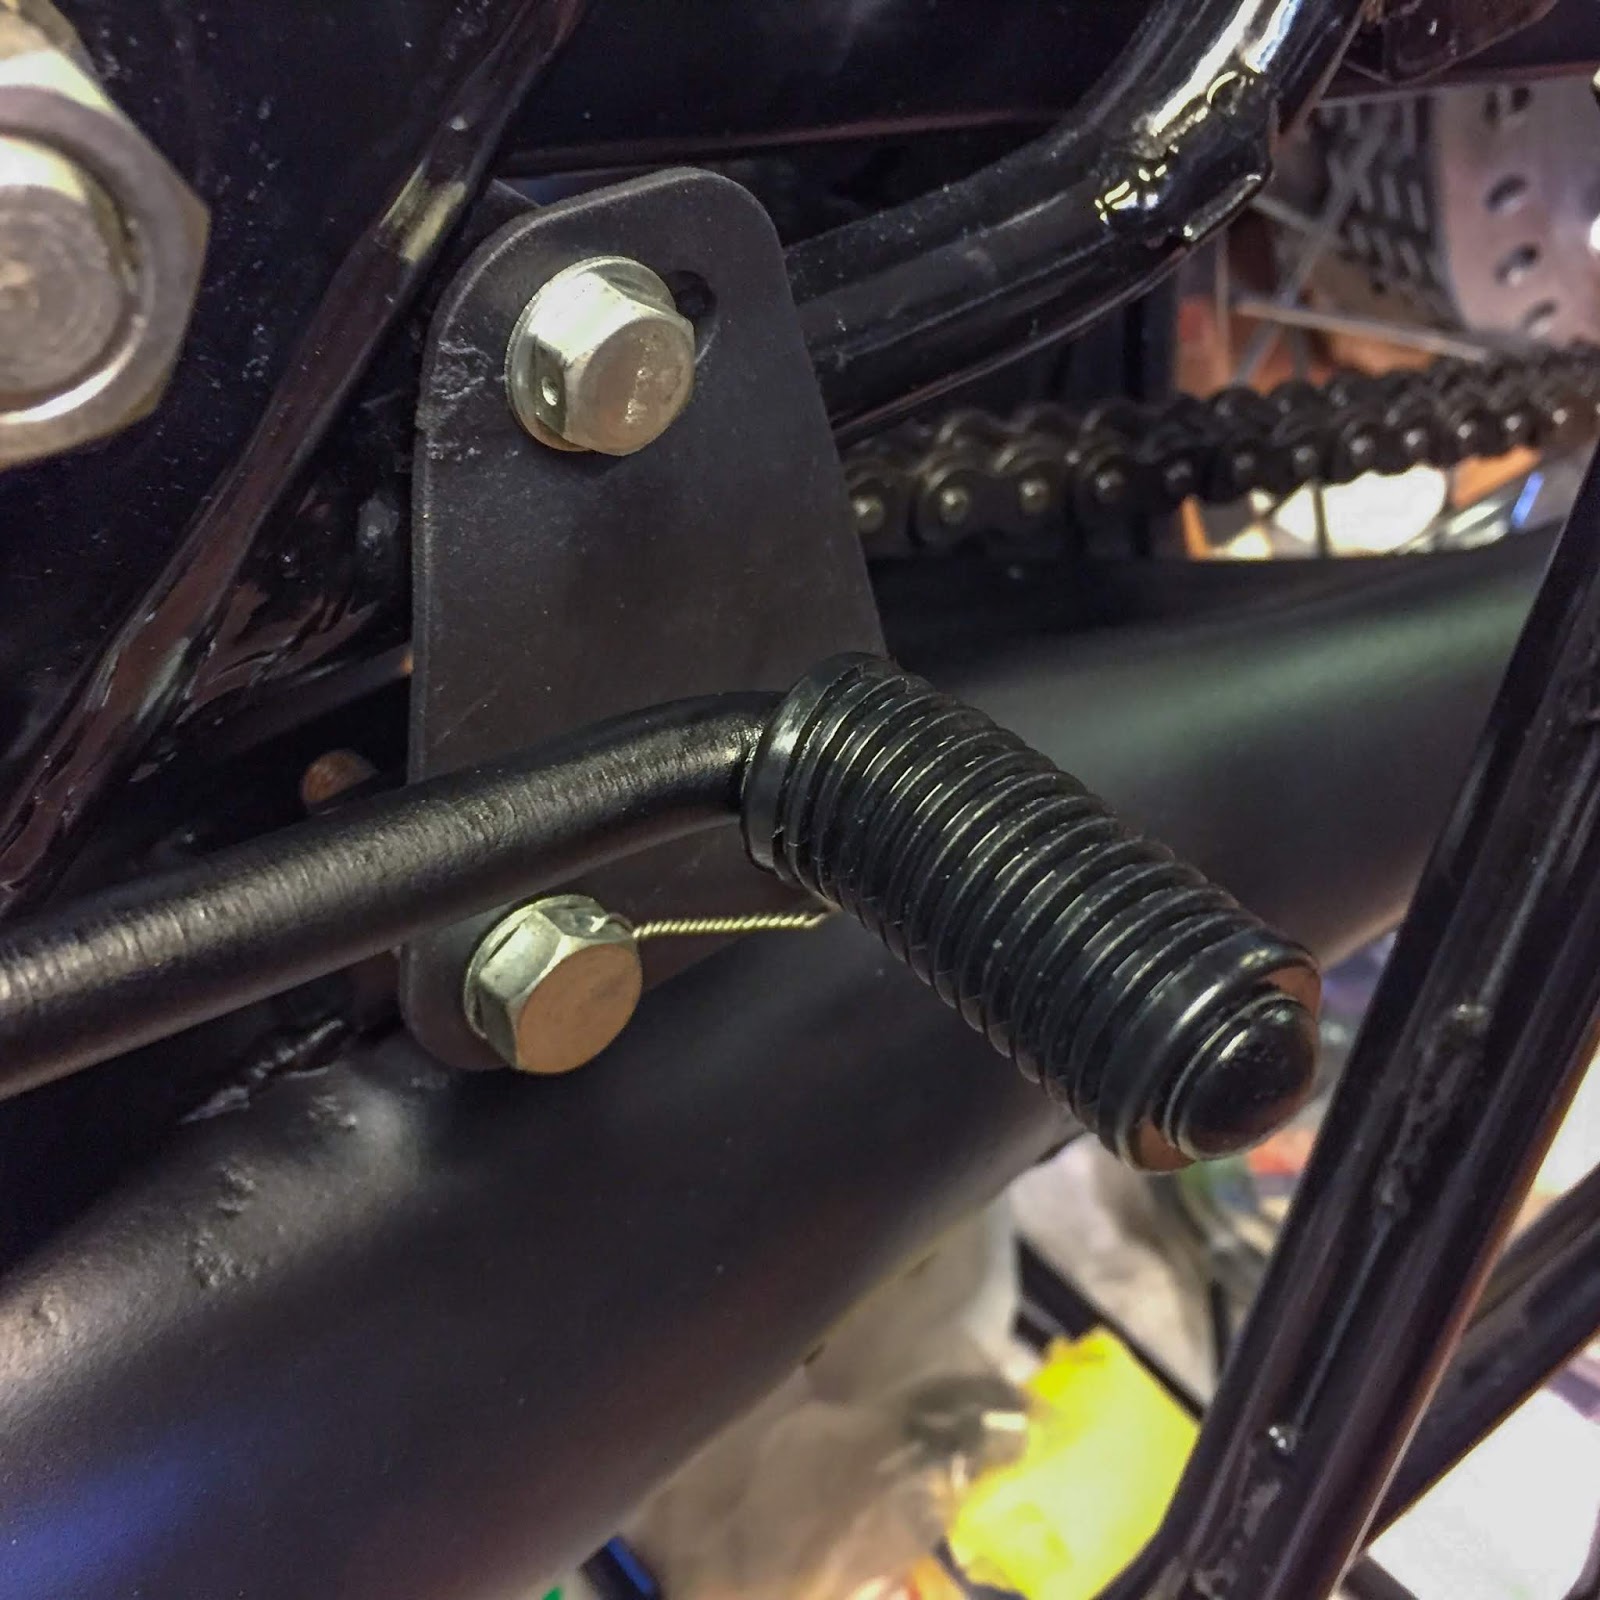
Within the elements ebook that half quantity is identical because the springs that holds the exhaust pipes to the cylinders. Now, I solely had six of them… However I discovered my stash of rear brake mild change springs, H2.
Would I have the ability to use one in every of these?

The good factor with these spring are the size of the decrease par of the spring. That half may very well be prolonged and made to suit this goal completely.
On the best here’s what it appears like from the opposite facet, by the body. That works for me! It’s even a Kawasaki half. Couldn´t be higher. Afterward I´ll simply clamp it higher to the battery tray. The lengthy a part of the spring is simply good for holding it to the body at that enormous gap. One other small victory.
The highest view of the battery tray hanging on the body tubes. It´s fairly clear they didn´t know the way to clear up this drawback with the battery after they designed {the electrical} system.
Possibly they’d plans for the CDI ignition launched on the H1R-A the approaching yr however modified their minds ending up with a battery that wanted mounting to the bike. Who is aware of?
The H1R-A 1971 doesn´t have any battery….
One other one in every of my main considerations achieved! I actually like that battery tray and all of the elements round it. Turned out nice.

My subsequent session within the storage will probably be wiring and ignition. On the left right here is a good start line for that work.
The battery field with the rubber bands holding it to the body, the NOS fuse field with a pleasant, commonplace bullet connector for beginning the wiring and that floor wire connecting the battery to the body and the engine. I´m happy to date.

On the best right here you may see the 2 floor wires from the body to the engine and additional on to the battery.
You too can see how tight the match is for the battery tray within the body. Not a lot clearance between the rear fender locking nuts and the body tube on the best. Tight, however not touching!
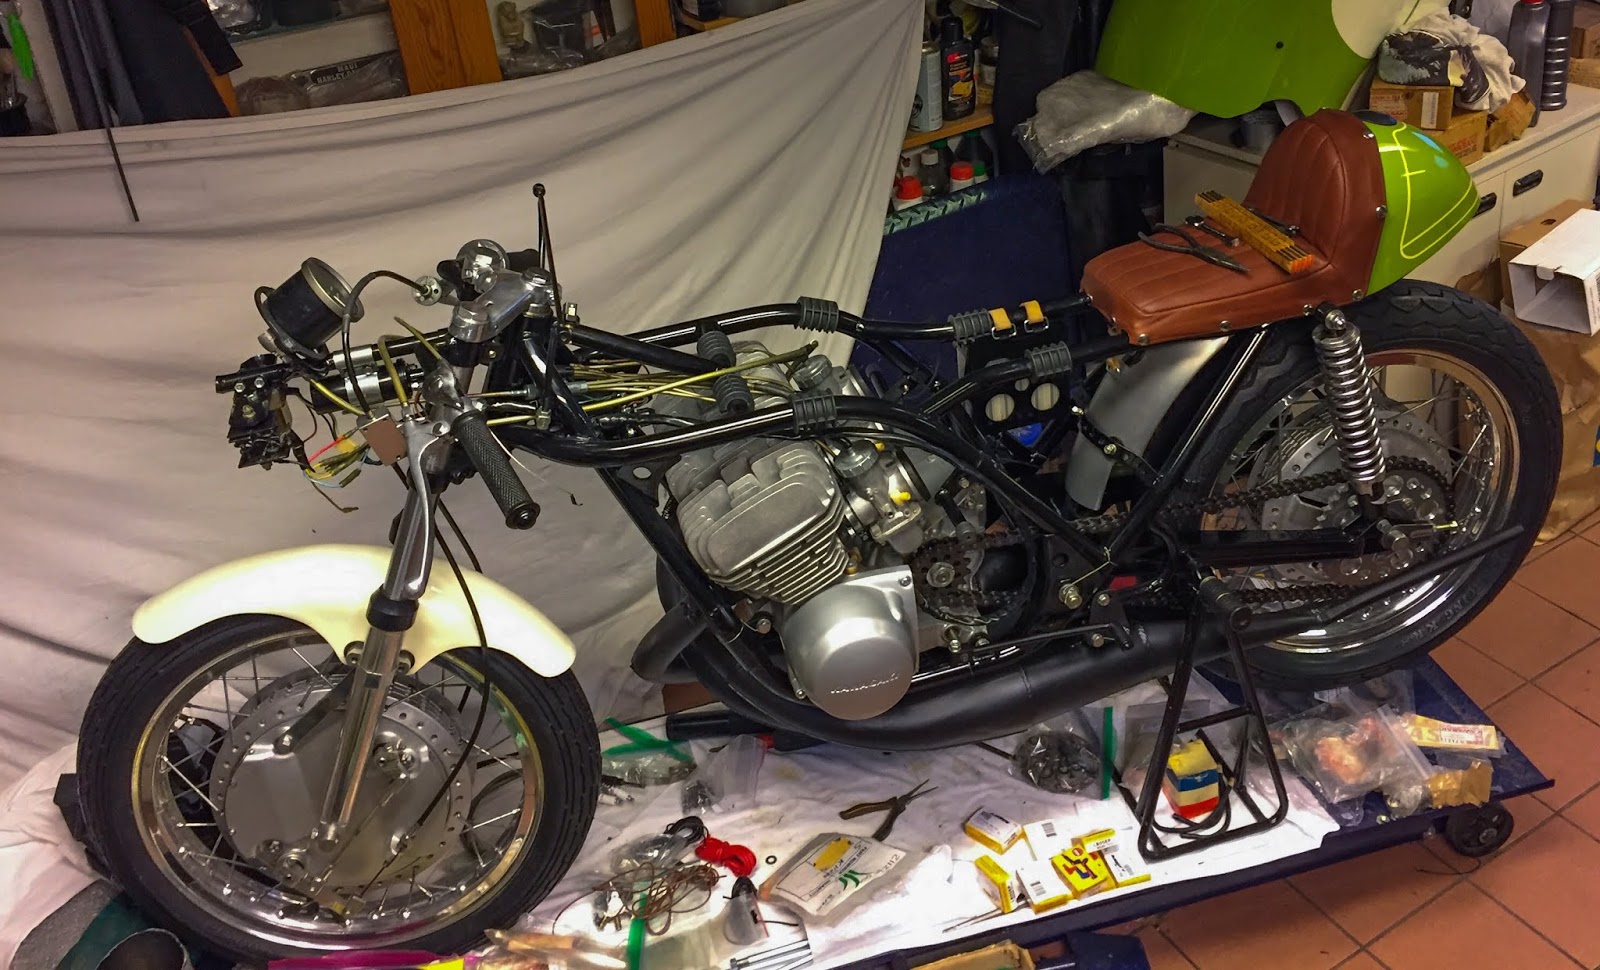
The final image on this publish. the standing of the bike proper now.
Carbs and throttle cable in place and synchronized, choke cable mounted and adjusted, the battery hanging answer found out and {the electrical} system and wiring began. A few days extra within the storage and I´ll be prepared to regulate timing, ignition and checking for these valuable sparks…
I want to determine the way to flip the engine quick sufficient for these checks with out proudly owning a pit starter. That´s an issue I want to handle as properly. Does anybody on the market have a superb tip on who makes and sells them? I´ll want one quickly!
Thanks for studying and see you all quickly!
/Per
[ad_2]